If your Astro A50 headset has no sound, but you don’t know how to troubleshoot the issue yourself, don’t worry. Here we’ll walk you through 4 simple fixes and provide you with a step-by-step guide.
Try these fixes
We’ve put together 4 simple fixes for you when your Astro A50 has no sound. You may not need to try them all; just walk your way down until you find the one that works.
- Troubleshoot the connection
- Set your Astro A50 as the default
- Update the sound card driver
- Disable Audio Enhancement
Fix 1: Troubleshoot the connection
The first thing you need to try is to make sure the headset’s volume wheel is set to a reasonable value.
Then, you need to check if the Base Station and your headset are synced together.
- Ensure the Mode Switch on the Base Station is set to the right device (PC or PS4).
- Place A50 headset on the Base Station, and make sure it’s seated correctly.
- Once synced together, you will see the LED lights on the front of the Base Station will starting Blinking.
- Make sure the optical cable is fully plugged into the “MICRO USB” and the other end of the cable is plugged firmly into the USB port of your PC.

- Ensure that the game voice balance on the right ear cup of the headset is somewhere in the middle.
When the connections are fine, but the Astro A50 no sound issue persists, you can try the next fix below.
Fix 2: Set your Astro A50 as the default
Next, you need to check if your headset is properly configured on Windows.
1. Check Volume mixer settings
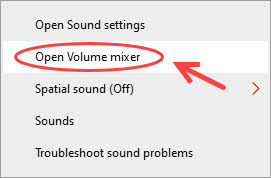
- Right-click the volume icon at the bottom right corner, and click Open Volume mixer.
- Make sure all the entries set at an appropriate level. In my case, I set headphones and my applications to 100.
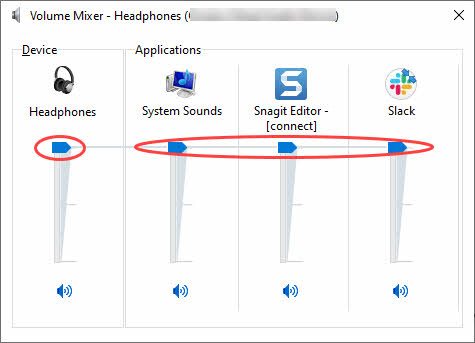
- Now test and see if there is any sound from your Astro A50.
2. Make sure your Astro A50 is set as default
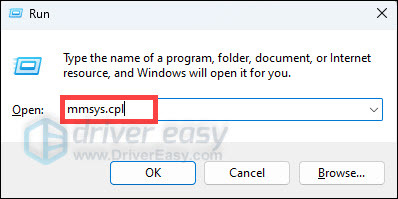
- On your keyboard, press the Windows logo + R keys simultaneously to open the Run box.
- Type mmsys.cpl and hit Enter.
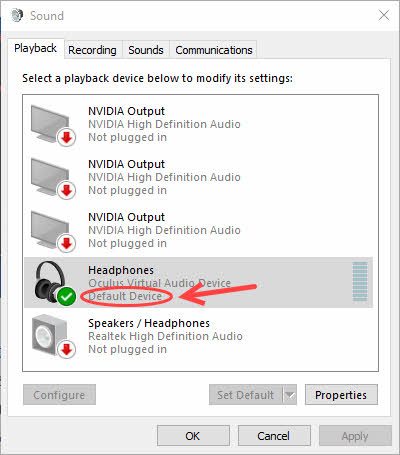
- Go to the Playback tab and make sure your Astro A50 is the default output device and shows strong signals.
- Test the audio.
If the problem remains, you can move on to the next method.
Fix 3: Update the sound card driver
This problem may occur if you are using the wrong audio driver or it’s out of date. So you should update your sound card driver to see if it fixes your problem.
There are two ways you can get the right drivers for your sound card: manually or automatically.
Option 1: Update your sound card driver manually
You can update your sound drivers manually by going to the manufacturer’s website for your sound card and searching for the most recent correct sound driver. Be sure to choose only drivers that are compatible with your variant of Windows 10.
Option 2: Update your sound card driver automatically (Recommended)
If you don’t have the time, patience, or computer skills to update your audio drivers manually, you can, instead, do it automatically with Driver Easy.
Driver Easy will automatically recognize your system and find the correct drivers for your sound card, and your variant of Windows, and it will download and install them correctly:
- Download and install Driver Easy.
- Run Driver Easy and click the Scan Now button. Driver Easy will then scan your computer and detect any problem drivers.

- Click Update All to automatically download and install the correct version of all the drivers that are missing or out of date on your system.
(This requires the Pro version which comes with full support and a 30-day money-back guarantee. You’ll be prompted to upgrade when you click Update All. If you’re not ready to buy the Pro version, Driver Easy offers a 7-day free trial which includes access to all the Pro features such as high-speed download and one-click install. You won’t be charged anything until your 7-day trial has ended.)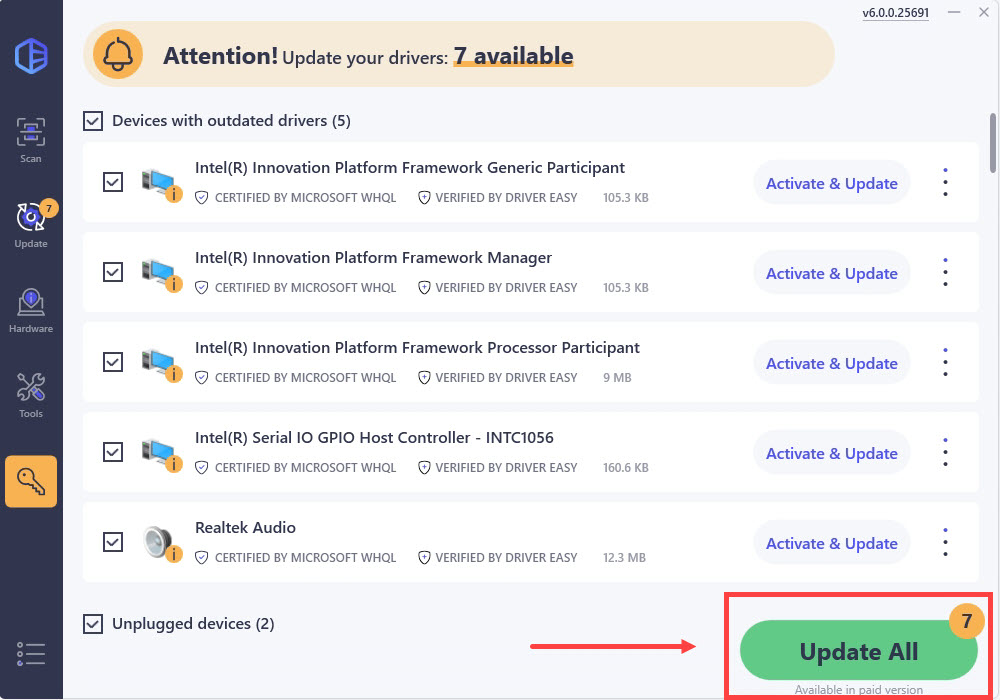
- Restart your computer for the changes to take effect.
Fix 4: Disable Audio Enhancement
Most of the time, Audio Enhancement makes your system sound perfect, but things can go wrong sometimes. To fix your Astro A50 no sound issue, you can follow these steps:
- On your keyboard, press the Windows logo key and R at the same time. Type in mmsys.cpl and press Enter.
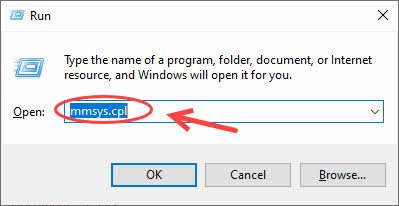
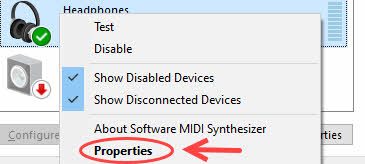
- Right-click your default playback device and click Properties.
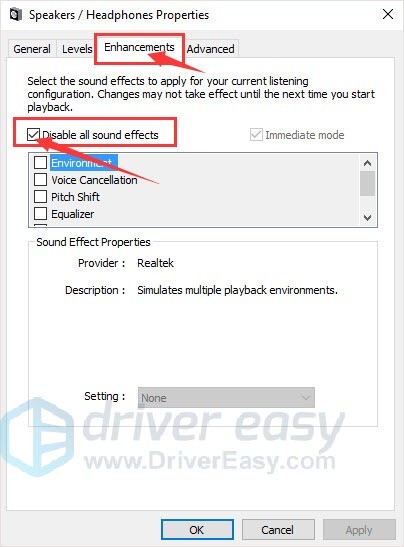
- Go to the Enhancement tab. Select the box for Disable all enhancements, and click Apply > OK to save.
- Test the audio.
If the sound problem only happens in a certain application or game, please make sure the audio is configured correctly.
But your Astro 50 no sound issue persists whatsoever, you can try connecting your headset to another computer and see if it’s working properly. If it does, then you should contact Astro Support for further troubleshooting steps or have your headset replaced.


