USB is a much faster way to go if you want to install Windows 7 from scratch. In this post, we will show you step-by-step guidance on how to create and use the bootable USB flash drive to install Windows 7 from the very beginning.
Before we begin
Step 1: Create or Download an ISO
Step 2: Create an Installation USB Drive
Step 3: Install Windows 7 via USB
Before we begin
Note: Please make sure that your USB flash drive has at least 8 GB of free storage and that there is no important data in it since all the data will be erased later.
We are now getting your USB flash drive ready by erasing the entire contents of the drive.
1) Insert your USB flash drive into your computer.
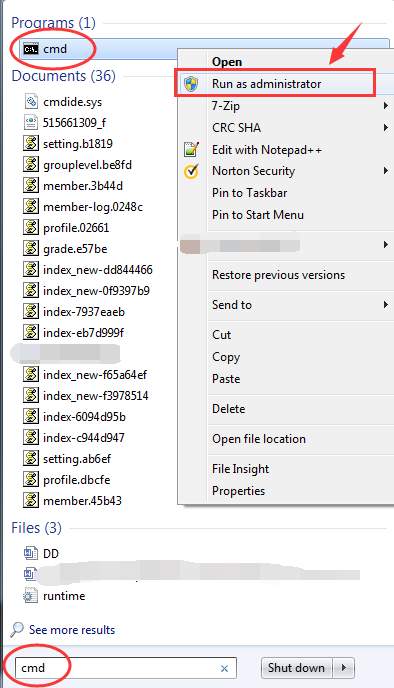
2) Press the Start button on your keyboard, and type cmd in the search box. Right-click cmd and click Run as administrator.
 3) Type the following commands into the cmd window and press the Enter key on your keyboard after each command:
a) diskpart
 b) list disk
 You can see which disk is your USB drive listed. Yours could be listed as Disk 0, Disk 1, or Disk 2. In our screenshots, the USB drive is listed as Disk 1.
c) select disk 1
Note: If your USB flash drive is listed as Disk 0, Disk 2 or some other number, you should change the 1 here accordingly.
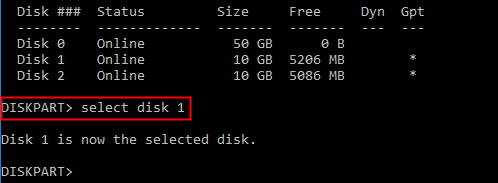 You will see the notification saying that “Disk X is now the selected disk“.
d) clean
 You will see a successful response saying “DiskPart succeeded in cleaning the disk.”
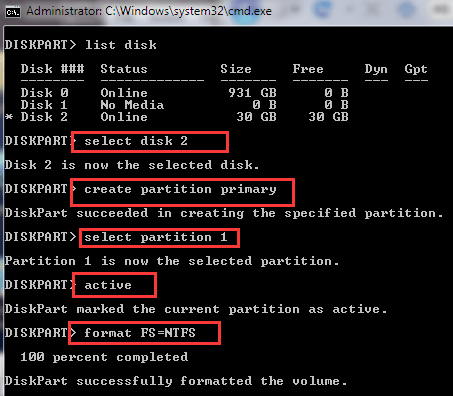
e) When the drive is cleaned, we need to format the USB flash drive. Type in the following commands, and hit Enter after you type each of the commands:
select disk 2 (or what number your USB drive has)
create partition primary
select partition 1
active
format FS=NTFS
 Step 1: Create or Download an ISO
Download the Windows 7 SP1 ISO from Microsoft’s website. You need to provide your product key (in the form of xxxxx-xxxxx-xxxxx-xxxxx-xxxxx) to download the file.
The instructions on the site are pretty easy and straightforward to follow.
Step 2: Create your Installation USB Drive
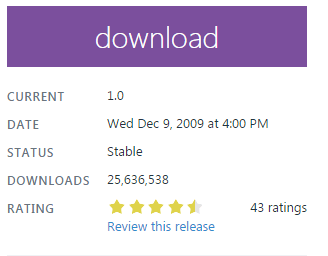
1) Download Windows USB/DVD Download Tool. Even though it’s stated to be appropriate for Windows 7 and XP, it’s OK for you to create Windows 8, and Windows 10 setup files with it.
 2) Double-click the setup file to install the Windows USB/DVD Download Tool. Then double-click it to run.
3) Click Browse to locate the Windows 7 ISO file that you have downloaded and click Next to continue.
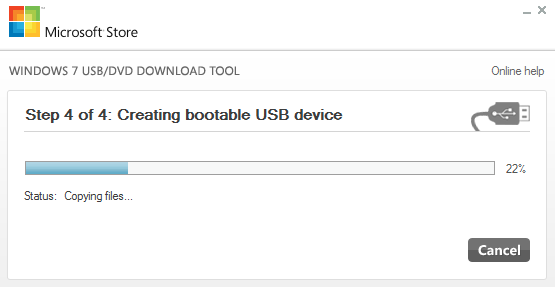 7) Exit the download tool when the process finishes.
Step 3: Install Windows 7 via USB
Now you can start your PC from USB or you can change the boot order so it will boot from the USB first to run the installation of Windows 7.
Related post:
How to burn Windows 10 ISO to USB?
How to install Windows 10 from USB?
 3) Type the following commands into the cmd window and press the Enter key on your keyboard after each command:
a) diskpart
 b) list disk
 You can see which disk is your USB drive listed. Yours could be listed as Disk 0, Disk 1, or Disk 2. In our screenshots, the USB drive is listed as Disk 1.
c) select disk 1
Note: If your USB flash drive is listed as Disk 0, Disk 2 or some other number, you should change the 1 here accordingly.
 You will see the notification saying that “Disk X is now the selected disk“.
d) clean
 You will see a successful response saying “DiskPart succeeded in cleaning the disk.”
e) When the drive is cleaned, we need to format the USB flash drive. Type in the following commands, and hit Enter after you type each of the commands:
select disk 2 (or what number your USB drive has)
create partition primary
select partition 1
active
format FS=NTFS
 Step 1: Create or Download an ISO
Download the Windows 7 SP1 ISO from Microsoft’s website. You need to provide your product key (in the form of xxxxx-xxxxx-xxxxx-xxxxx-xxxxx) to download the file.
The instructions on the site are pretty easy and straightforward to follow.
Step 2: Create your Installation USB Drive
1) Download Windows USB/DVD Download Tool. Even though it’s stated to be appropriate for Windows 7 and XP, it’s OK for you to create Windows 8, and Windows 10 setup files with it.
 2) Double-click the setup file to install the Windows USB/DVD Download Tool. Then double-click it to run.
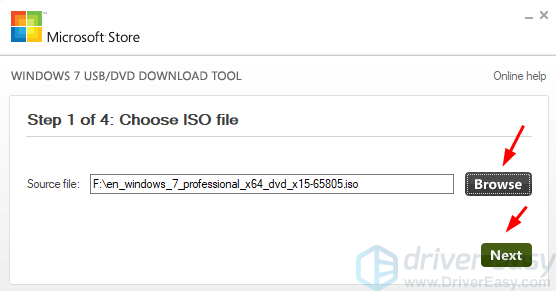
3) Click Browse to locate the Windows 7 ISO file that you have downloaded and click Next to continue.
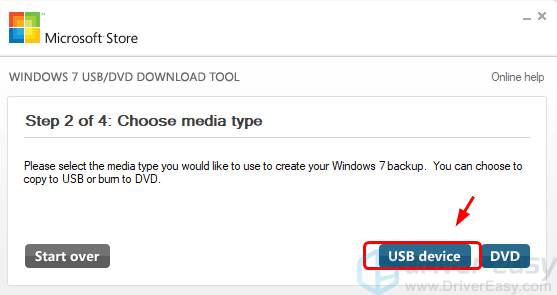
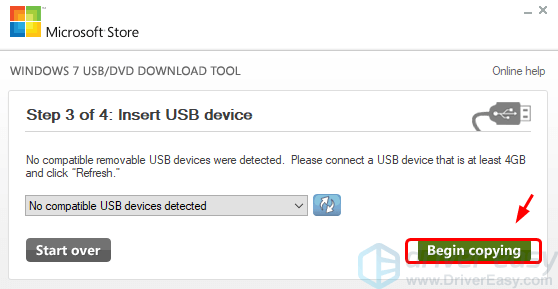
 7) Exit the download tool when the process finishes.
Step 3: Install Windows 7 via USB
Now you can start your PC from USB or you can change the boot order so it will boot from the USB first to run the installation of Windows 7.
Related post:
How to burn Windows 10 ISO to USB?
How to install Windows 10 from USB?
110
110 people found this helpful
5 Comments
Most Voted


