


Urgh, the very annoying and scary blue screen of death that no one ever wants to see, and this time, the stop code is Critical Process Died. But don’t worry: where there’s a glitch, there’s a fix. In this post, we’ll look at the potential causes and offer solutions to help you fix the Critical Process Died blue screen of death error to get you back to the smooth sailing of your Windows 11 experience.
Try these fixes for the Critical Process Died blue screen of death error on Windows 11
You don’t have to try all the following fixes: simply work your way down the list until you find the one that does the trick to fix the Critical Process Died blue screen of death error on Windows 11 for you.
- If your Windows 11 won’t boot…
- Unmake recent changes
- Update your device drivers
- Run a memory test
- Run system file and disk checks
- Run some hardware checks
- Check the minidump file crash logs
- Reinstall or reset Windows
If your Windows 11 won’t boot…
Before we move any further, let’s first make sure that your Windows 11 computer can boot. If not, please try the following to go to the Windows Recovery Environment:
- Start your computer and wait for the Windows logo or the manufacturer’s logo to appear.
- As soon as the Windows logo appears, press and hold the power button until the computer shuts down.
- Turn your computer on again and repeat step 2.
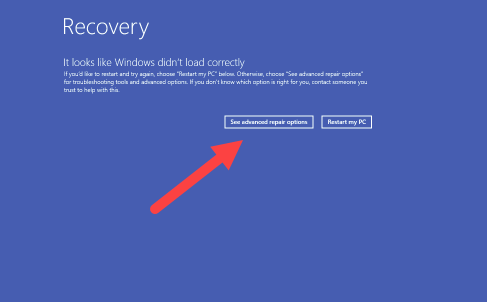
- Turn your computer on a third time. Then Windows should display the Recovery screen. Select See advanced repair options.
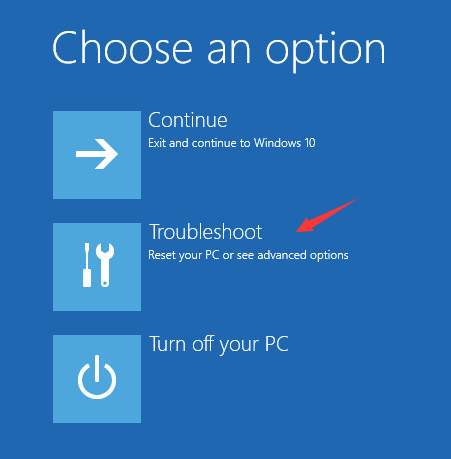
- Click Troubleshoot.
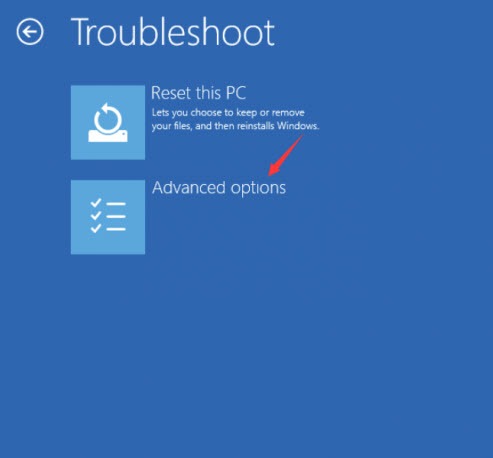
- Click Advanced options.
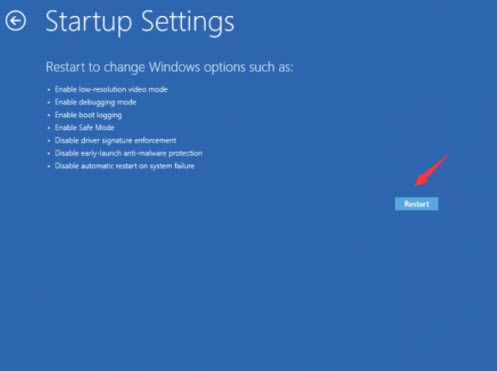
- Click Startup Settings.
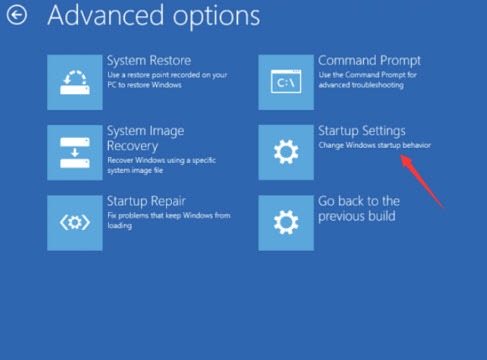
- Click Restart.
When you’re able to boot into Windows 11, move along to the fixes below to get the Critical Process Died blue screen Windows 11 error solved.
1. Unmake recent changes
The stop code Critical Process Died doesn’t contain much useful information, but if this error only happened very recently, and you can recall that you’ve made some changes with your computer, like a new hardware component, a new software program installed, or even a manualy Windows and device driver update, please unmake them, as they could be the culprit.
If the Critical Process Died blue screen of death error happens after a new hardware component, instead of removing the device, you can also check with the hardware manufactuere to see if there are pathces available.
If this doesn’t apply to you, please move on to the next fix below.
2. Update your device drivers
Outdated or incorrect device drivers could also be the culprit to your Critical Process Died blue screen of death error on Windows 11 problem, especially if you can see a yellow exclamation mark in your Device Manager like this:
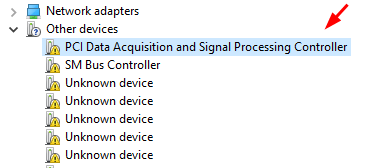
If this is what you see, you should update your drivers to see if it helps.
If you don’t have the time, patience or skills to update the driver manually, you can do it automatically with Driver Easy. Driver Easy will automatically recognize your system and find the correct drivers for it. You don’t need to know exactly what system your computer is running, you don’t need to be troubled by the wrong driver you would be downloading, and you don’t need to worry about making a mistake when installing. Driver Easy handles it all.
You can update your drivers automatically with either the 7 days free trial or the Pro version of Driver Easy. It takes just 2 clicks, and you get full support and a 30-day money-back guarantee with the Pro version:
- Download and install Driver Easy.
- Run Driver Easy and click the Scan Now button. Driver Easy will then scan your computer and detect any problem drivers.

- Click the Activate & Update button next to the flagged device to automatically download and install the correct version of this driver.
Or click Update All to automatically download and install the correct version of all the drivers that are missing or out of date on your system (You’ll need the Pro version for this – when you select Update All, you’ll get a prompt to upgrade. If you’re not prepared to purchase the Pro version yet, Driver Easy provides a 7-day trial at no cost, granting access to all Pro features like fast downloads and easy installation. No charges will occur until after your 7-day trial period ends.)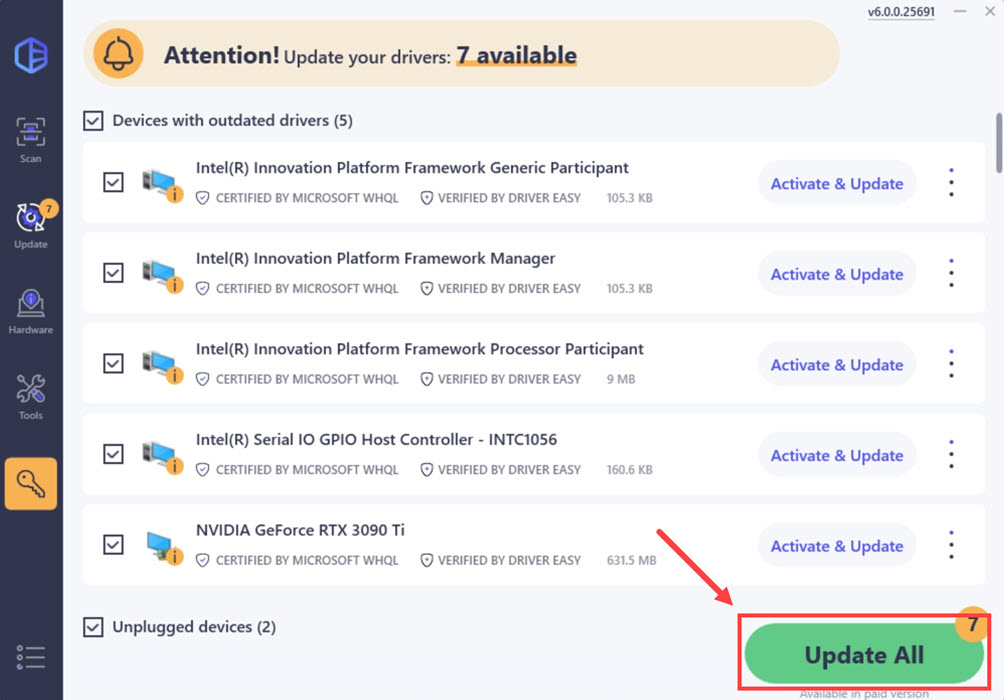
- After updating, restart your computer to take effect.
If updating your device drivers doesn’t help to fix the Critical Process Died blue screen of death error on Windows 11, please move on to the next fix below.
3. Run a memory test
According to Microsoft, the Critical Process Died blue screen of death error could relate to faulty RAM. To see if this is your case, you can do a RAM stick and module check. To do so:
- Turn off your computer and unplug it from the wall socket.
- Open your computer case and locate the RAM modules. (If you need help with this, check your computer’s manufacture website for your product manul and you should find details there on how to open your computer case.)
- Remove all but one RAM stick.
- Power on your computer and run the Windows Memory Diagnostic in this way:
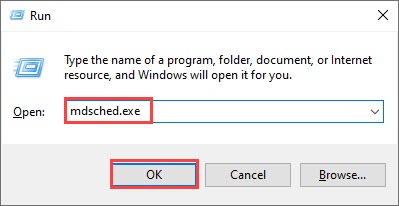
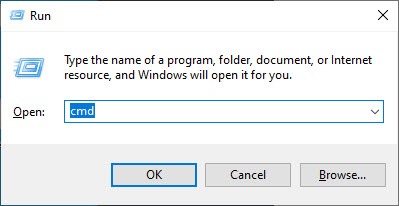
- Press the Windows logo key and R on your keyboard to invoke the Run box.
- Type mdsched.exe, then click OK.
- Click Restart now and check for problems (recommended).
IMPORTANT: Make sure to save all your work before restarting.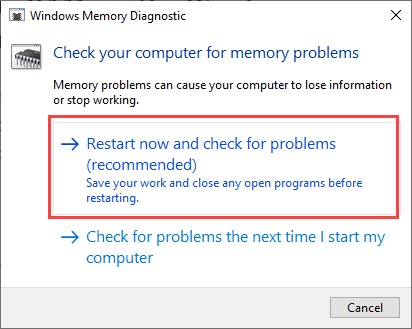
- Windows will run diagnosis automatically, which can take a few minutes. When it’s finished, your PC will reboot.
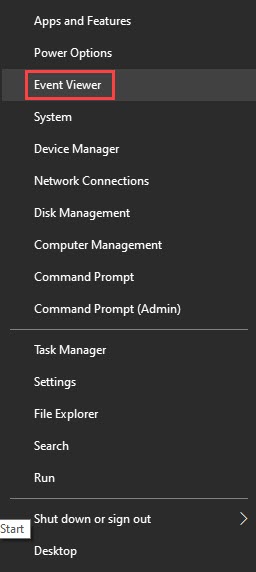
- The results will be shown on your desktop. If you don’t see any notification, right-click the Start menu then click Event Viewer.
- Click Windows Logs >> System >> Find.
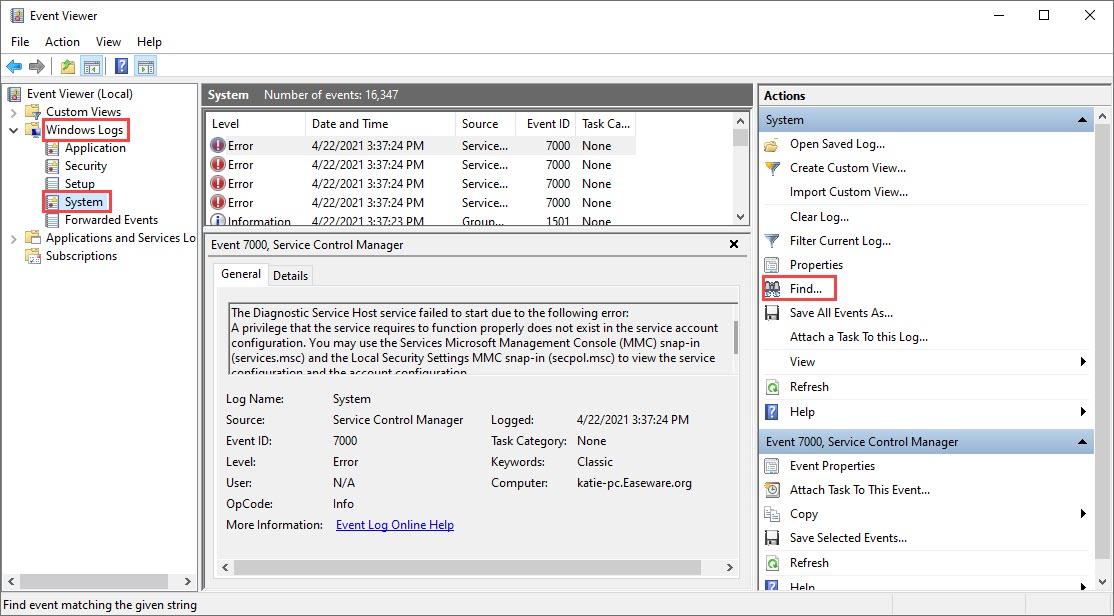
- Type memory diagnostic, then click Find Next.

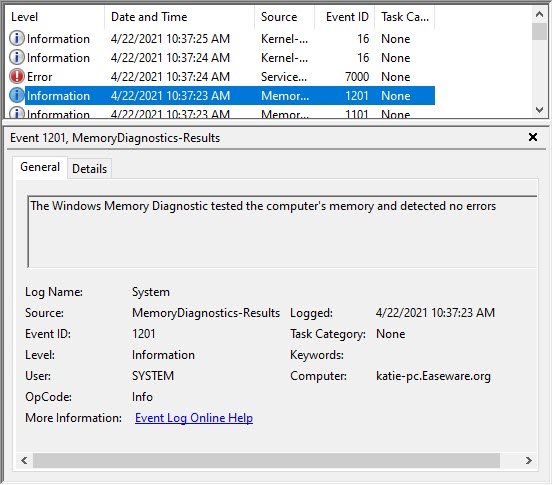
- If you see “no errors”, your RAM is functioning well and is not the culprit to the Critical Process Died blue screen of death error. Then please move on to the next method below.
- If the test results show errors, replace the faulty module.
- If no errors are detected, repeat the above process with the second RAM stick until you have them all tested.
- If Windows Memory Diagnostic comes up with problems with one of the RAM sticks, you should get it replaced.
If all RAM sticks are working well with the Windows Memory Diagnostic test, your RAM sticks should be all good. In that case, please move on to the next fix for the Critical Process Died blue screen of death error.
4. Run system file and disk checks
Corrupted system files may cause Critical Process Died blue screen of death error too on Windows 11, but luckily, there are two built-in tools that can help to identify and repair such bad system files. The whole process could take some time, and we suggest you don’t run any other programs when doing the test. To run these tools:
1) On your keyboard, press the Windows logo key and R at the same time. Type cmd and press Ctrl+Shift+Enter at the same time to run Command Prompt as administrator.
Click Yes when prompted for permission to make changes to your device.
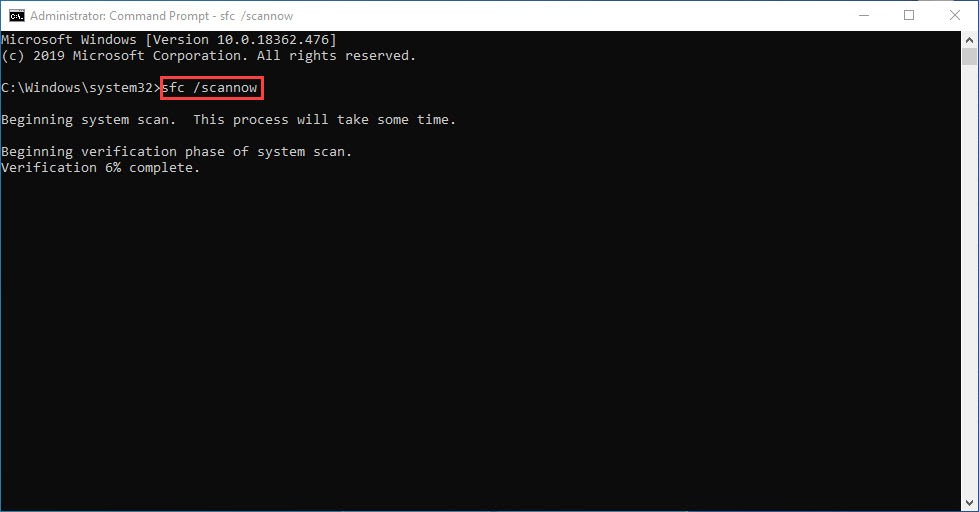
2) In the Command Prompt window, copy and paste the following command and hit Enter.
sfc /scannow
3) System File Checker will then scan all system files and repair any corrupted or missing ones it detected. This may take 3-5 minutes.
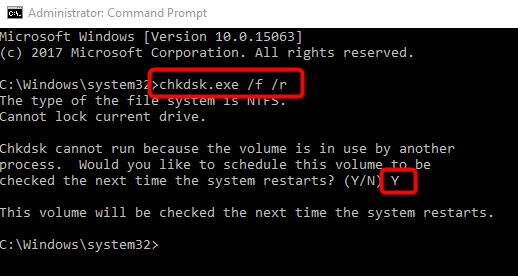
4) The command prompt will once again display. Type in the following command:
chkdsk.exe /f /r
5) Hit Enter on your keyboard, then type Y to confirm that you’d like to perform the disk check the next time you restart your computer.
If the Critical Process Died error on Windows 11 still remains after the above tests, please move on to the next method below.
5. Run some hardware checks
Some forum users mentioned that some hardware checks help to fix the Critical Process Died error on Windows 11 for them. To see if they do wonders for you, here are what you can try:
- To rule out any potential intermittent problems, esure that all your hardware connections and cables are properly checked.
- Ensure that your computer is not overheating by cleaning the inside of your comptuer with compressed air. You may need to reapply the CPU thermal paste if it runs hot. If you need more help with the overheating issue, please refer to: How to Know Your CPU Overheating and How to Fix It and How to Apply Thermal Paste and How It Works.
- Check your computer manufacturer to see if they have a hardware disgnostics tool. For instance, HP has HP PC Hardware Diagnostics, and Asus has MyASUS System Diagnosis. If you’re not sure, reach out to your computer vendor about it.
If you’ve done the above and can be sure that the Critical Process Died blue screen on Windows 11 problem is not caused by hardware devices, please move on to the next method.
6. Check the minidump file crash logs
If you have crash logs enabled on you computer, you should be able to find the logs when the computer crashes with the Critical Process Died blue screen of death error. With the logs, you might be able to find the culprit service, program, device or driver that cause the error in the very first place.
To see how you can enable the log record and how to use the logs, please refer to method 4 in this post we have: View Crash Logs with Minidump Files
You should then find some error codes and/or error messages in your minidump files that might help to locate the culprit to the Critical Process Died blue screen of death error on your computer. The codes or messages you see might be unique in your case, so we don’t have more general fixes here to suggest. But if you do find such codes or error messages, you can always search them on our knowledge base here: https://www.drivereasy.com/knowledge/ for further troubleshooting tips.
Or, the Pro version of Driver Easy comes with full tech support, so you ca also ask our support team for further assistance.
7. Reinstall or reset Windows
If you’ve tried all the above methods but still can’t solve your Critical Process Died error on Windows 11, as the last resort, you can consider a Windows reinstallation or a reset.
If you need more help, here’s a post from Microsoft with detailed instructions on how to do it: Give your PC a Fresh Start
Hope one of the methods above helps to fix the Critical Process Died blue screen of death on Windows 11 for you. If you have any other suggestions, please feel free to share with us.