 Lock screen, first saw in Windows 8, is originally only designed for touchscreens. But Windows 10 keeps this feature, even though it seems rather useless, considering that not as many Windows 10 PCs are with touchscreens as Windows 8.
In this post, we will be introducing the easiest way to disable the lock screen on your Windows 10 PC.
Before we begin, we need to state clear that there are actually two kinds of lock screens on Windows 10: when you turn on your computer, you will see the first lock screen. When you unlock your computer from sleep or lock, you will see the second lock screen.
And we are to turn off the second lock screen here. When this is done, you don’t need to manually unlock your PC when waking from sleep.
1) First, go to your This PC. Then follow the path: C > Windows > SystemApps.
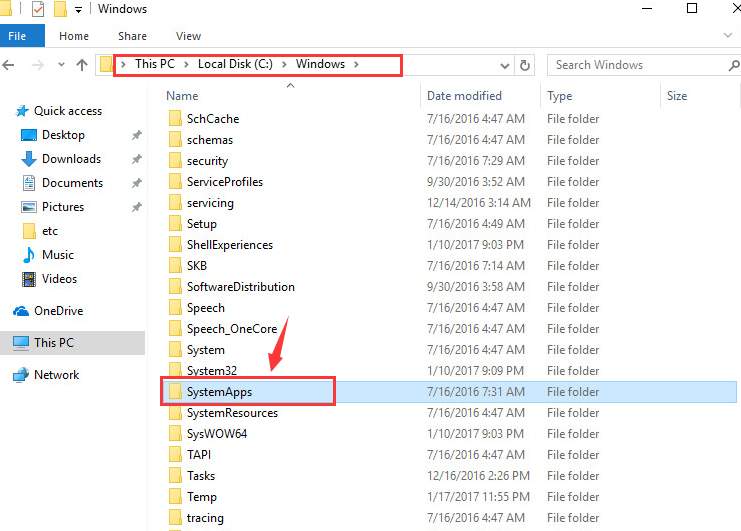 2) Then go into SystemApps folder, locate Microsoft.LockApp_cw5n1h2txyewy folder. Right click this folder and choose Rename.
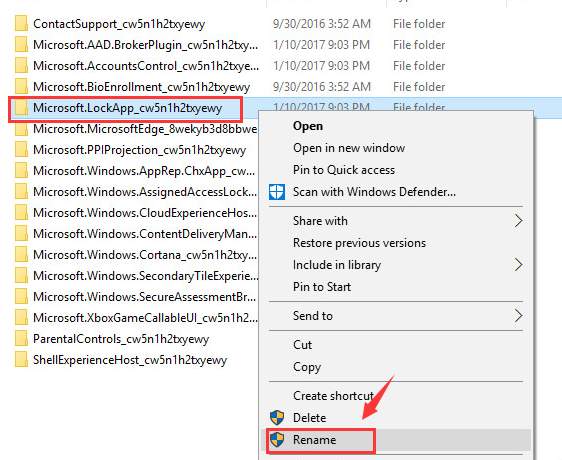 3) We are not changing the name here, just adding .bak to the end of it and then hit Enter.
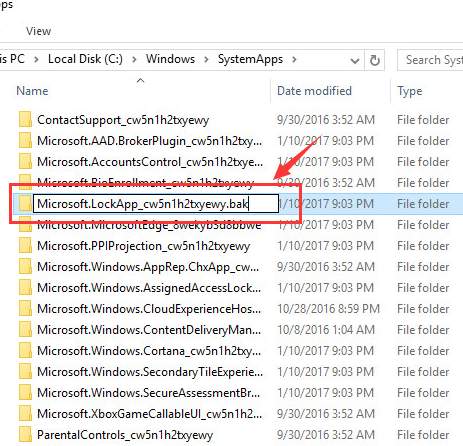 If you want to get your lock screen back, just delete the .bak from the name of this folder.
If you have a desktop PC and do not want to type in password every time you wake your PC from sleep mode, here is an alternative for you. Please note that the following instructions shut off your lock screen as well as the log-in screen, meaning that you don’t need to type in password to use your computer. So, please choose this method at your own peril.
1) Press Windows key and R at the same time, then type in netplwiz. Make sure you have made no typo and then hit Enter.
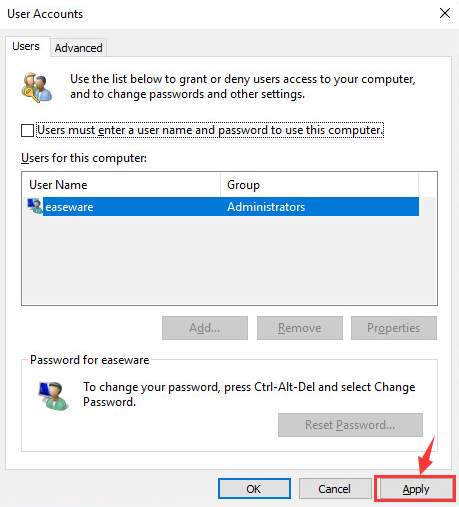
 2) First, choose the account in the User for this computer field; second, un-tick the box for Users must enter a users name and password to use this computer.
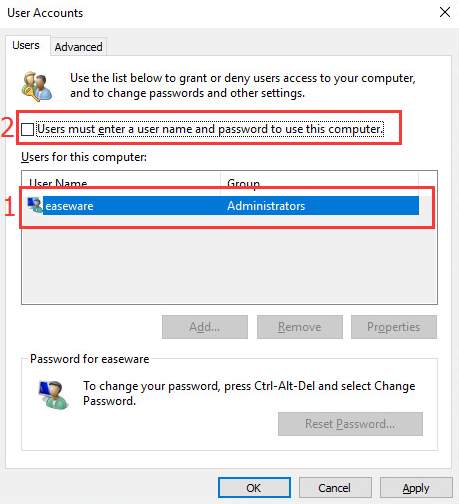 3) Click Apply.
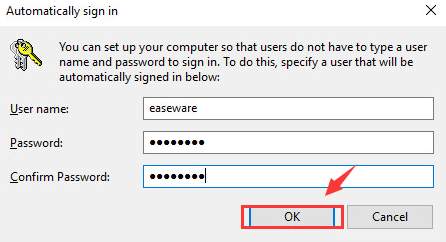
 4) Type in your password in both of the password fields. Then click OK to continue.
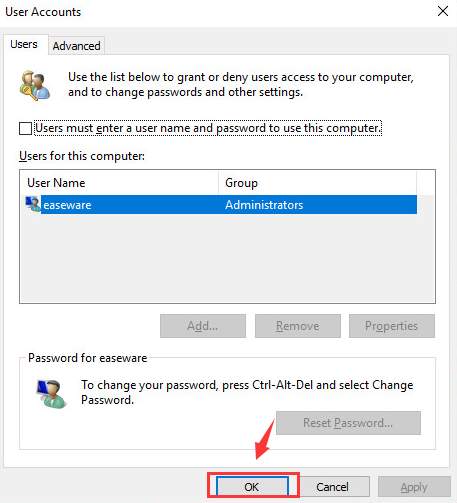
 5) Now click OK.
 6) You can try to restart your computer now to see if the lock screen is off already.
2
2 people found this helpful
1 Comment
Most Voted


