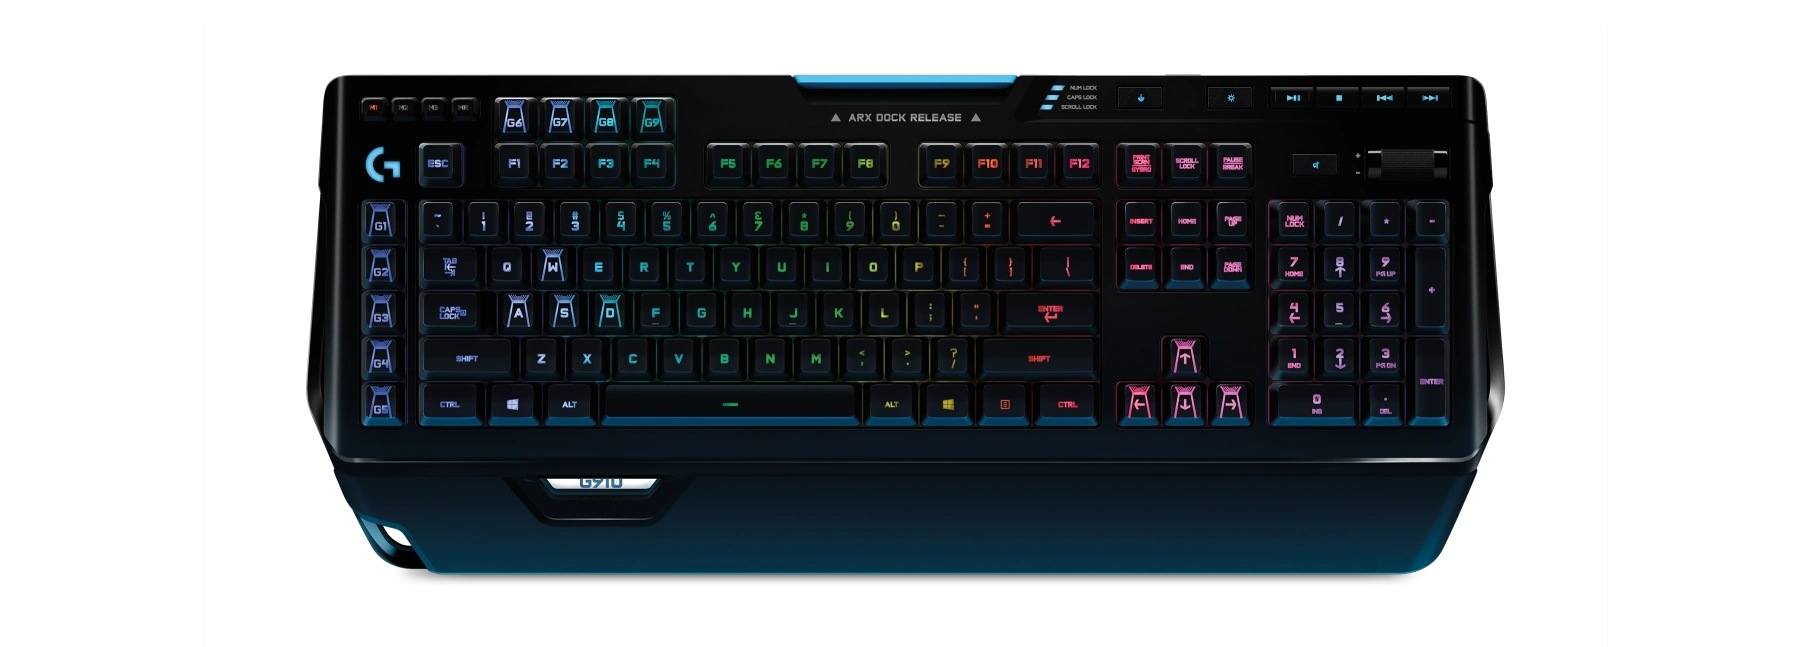
Logitech G910 not working? You may need to download the software for further configuration, or install the correct driver to get it work.
1: Install the Logitech G HUB software
2: Update your keyboard drivers
1: Install the Logitech G HUB software
Logitech G HUB is a software platform to help users set up a keyboard of the brand. If the software is not automatically installed when you first connect the keyboard to your computer, then your keyboard may not work or would only have limited functions. Follow the steps below to find and install it from the official website:
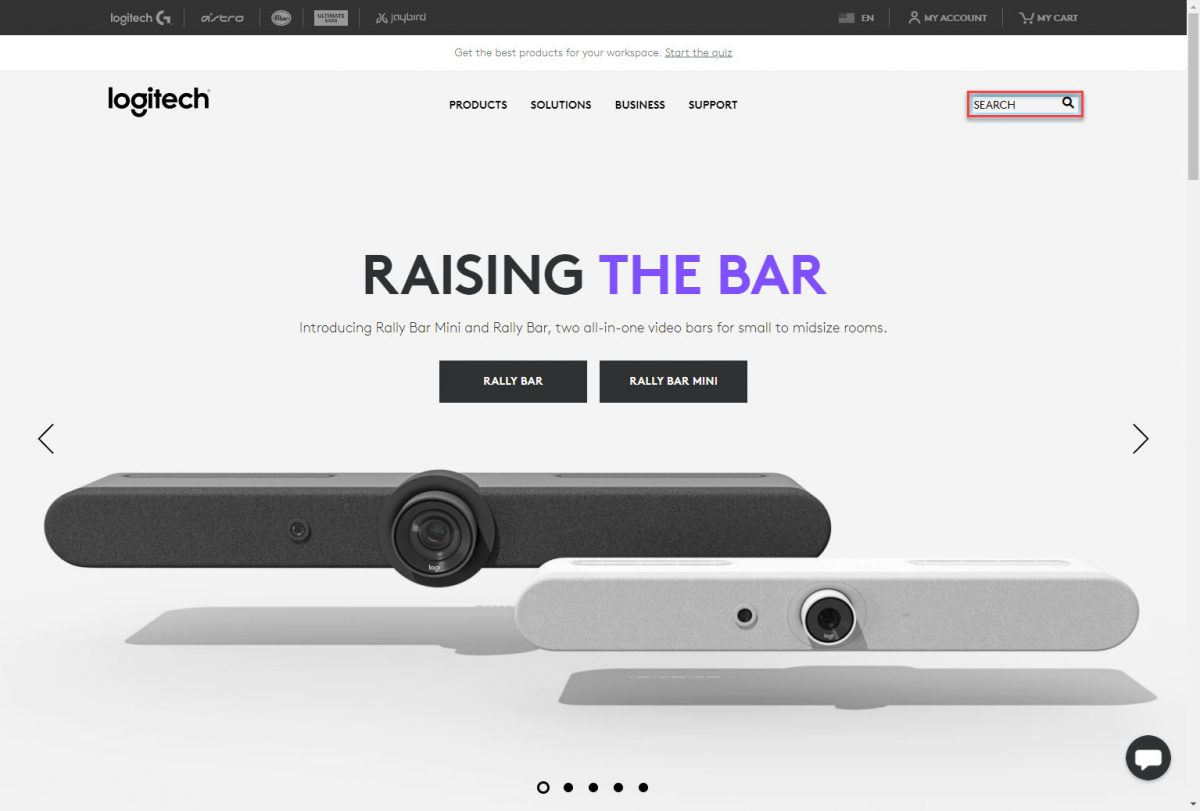
01 Visit the Logitech official website.
02 Type G910 in the search bar on the top right corner of the webpage.
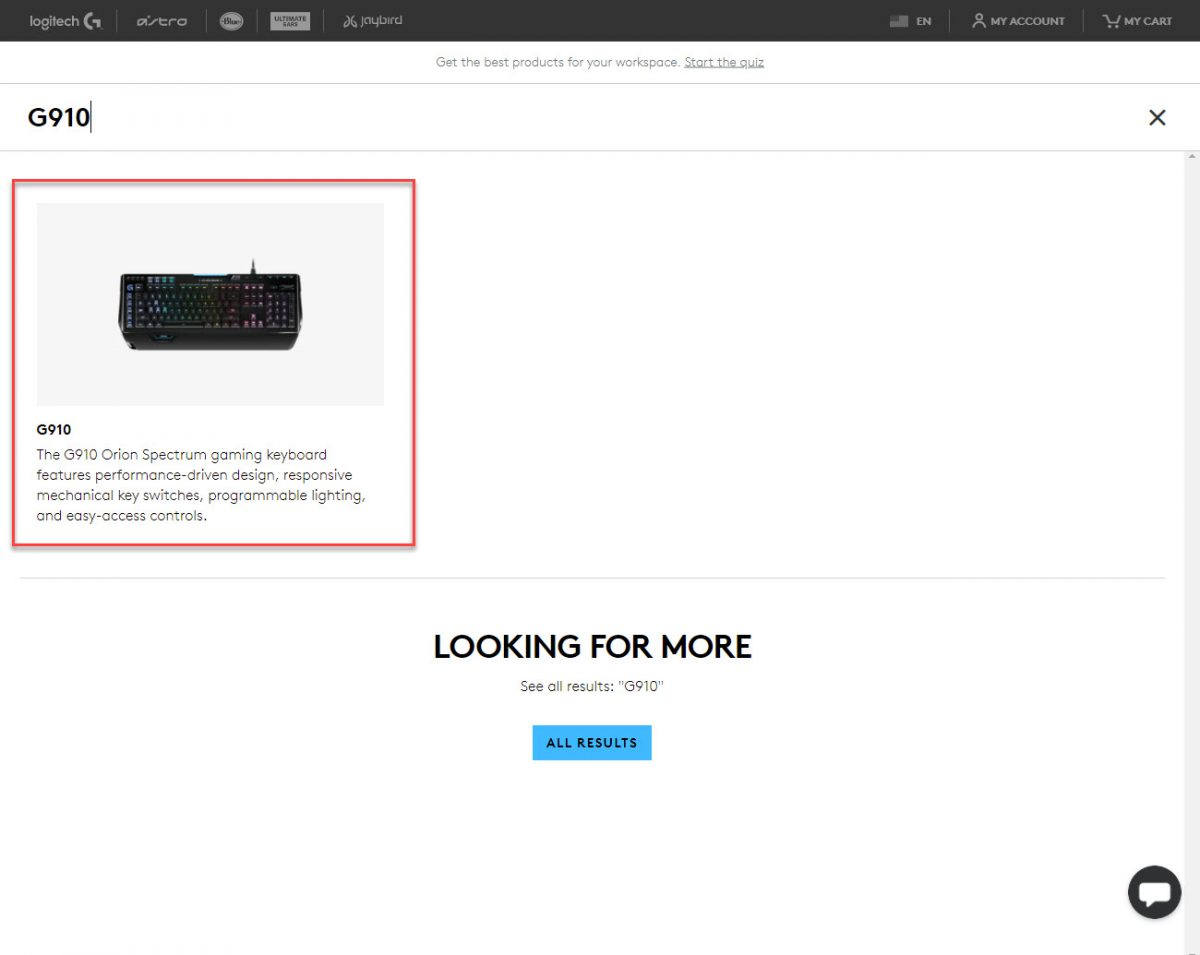
03 Click the G910 image.
04 Click Support.

05 Click Downloads.

06 Click Download Now.

07 Open the Downloads folder and you will find the installer. If you’re using a Chrome browser, click Show in folder.

08 Double click the installer file, and you would be prompted to restart your computer before installation. Click Reboot Now.

09 The installer will reopen once the computer restarts. If not, you can open the installer manually. Click INSTALL.

Now your keyboard should be ready to use! Full keyboard functionality and customization would also be available with the Logitech software, give it a try!
2: Update your keyboard drivers
Logitech G910 keyboard not working is usually a result of an outdated or faulty driver. You would need to check your keyboard driver is up-to-date and functioning properly..
There are two ways you can get the right drivers for your keyboard: automatically or manually.
Option 1: Automatically (Recommended!)
If you don’t have the time, patience, or computer skills to update your keyboard drivers manually, you can do it automatically with Driver Easy.
Driver Easy will automatically recognize your system and find the correct drivers for your exact keyboard, and your Windows version, and it will download and install them correctly.
You can update your drivers automatically with either the FREE or the Pro version of Driver Easy. But with the Pro version, it takes just 2 clicks (and you get full support and 30-day money-back guarantee).
01 Download and install Driver Easy.
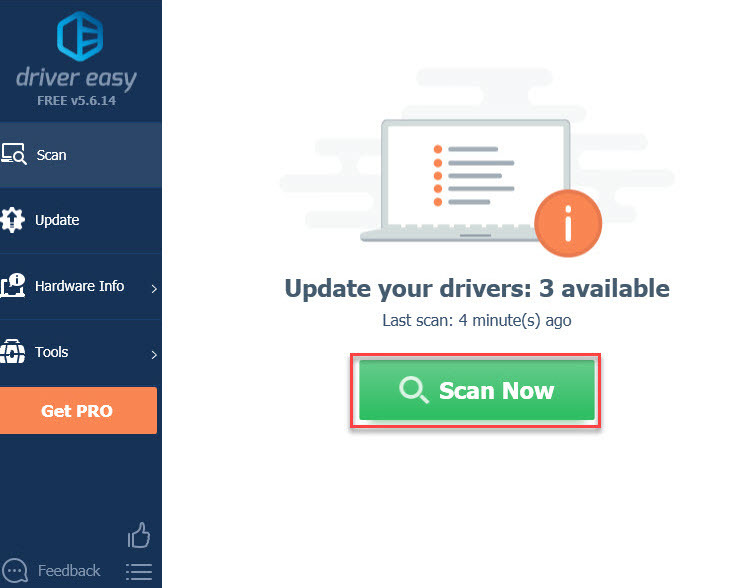
02 Run Driver Easy and click the Scan Now button. Driver Easy will then scan your computer and detect any problem drivers.
03 Click the Update button next to a flagged keyboard driver to automatically download the correct version of this driver (you can do this with the FREE version). Manual installation, however, is required. Please refer to Option 2 below to see how to install the driver.
Or
Click Update All to automatically download and install the correct version of all the drivers that are missing or out of date on your system (this requires the Pro version – you’ll be prompted to upgrade when you click Update All).
Check your keyboard to see if it works.
Option 2: via Device Manager
Device Manager is a Windows tool that allows you to check and alter hardware settings as well as driver statuses. You may need some computer skills for the following steps:
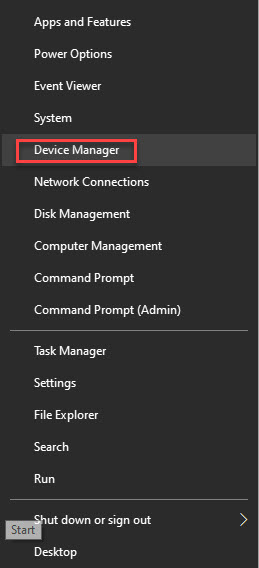
01 Right-click the Start button in the bottom-left corner of your screen.
![]()
02 Select Device Manager.
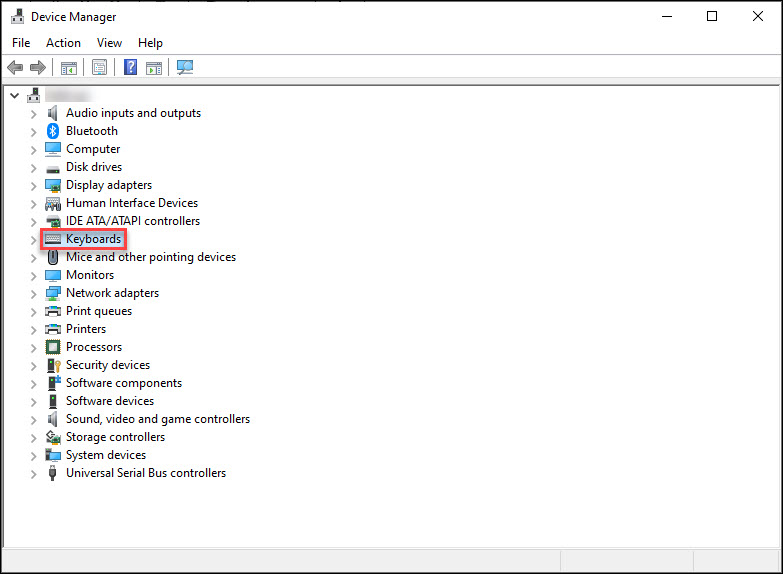
03 Select Keyboards.
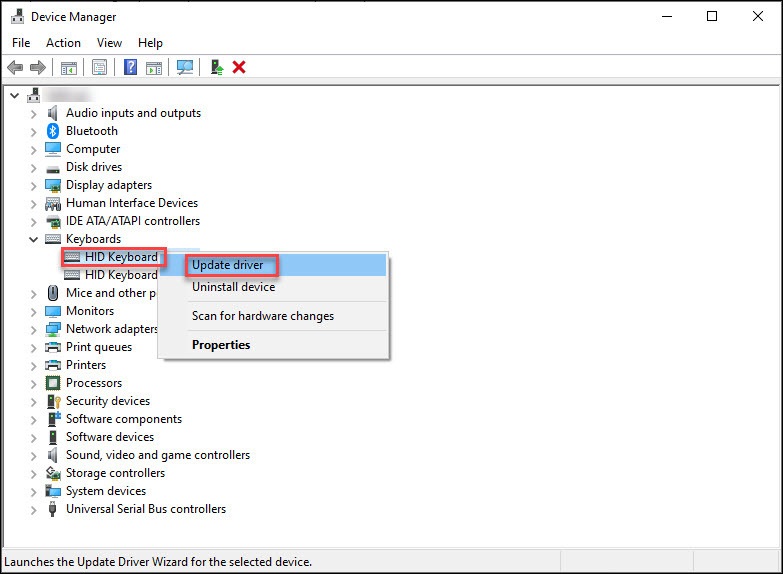
04 Right-click HID Keyboard Device and select Update driver.
05 Click Search automatically for drivers. Make sure your computer has an internet connection. Windows would automatically scan and install available drivers.
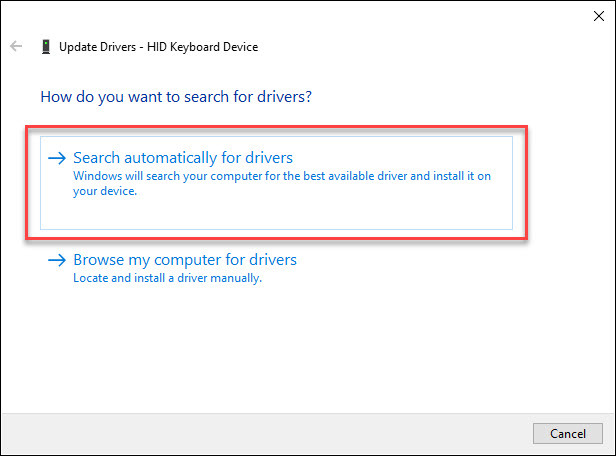
06 If the automatic scan doesn’t work, then click Browse my computer for drivers instead.
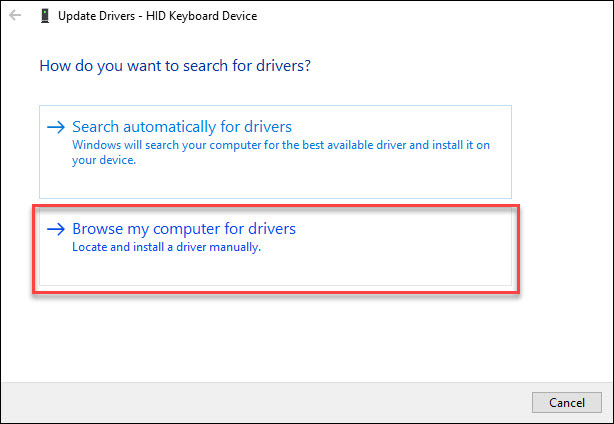
07 Select Let me pick from a list of available drivers on my computer.
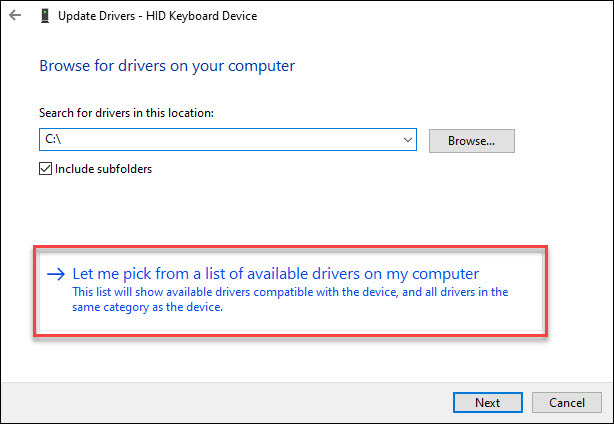
08 Click Have Disk.
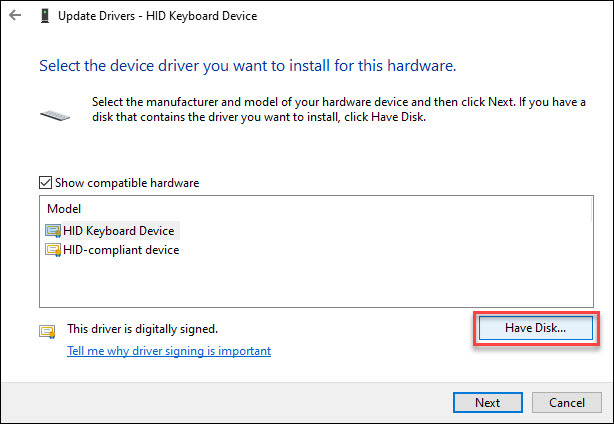
09 Click Browse. Look for the driver you downloaded in the previous steps. Select it and click Open.
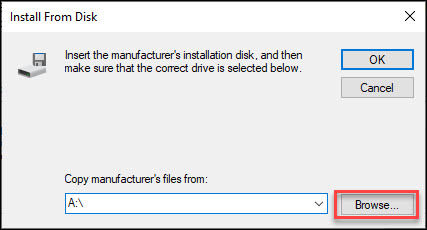
10 Click OK to start the installation.
Now check your keyboard to see if it works.
Hopefully these methods help! Please feel free to leave a comment if you have any further questions.


