If you’re looking for the ways to edit YouTube videos, you’ve come to the right place. In this article, we’ll show you how to edit YouTube videos even if the videos have been uploaded to YouTube website.
We’ve put together two ways for you to edit the YouTube videos. You can choose either of the ways to edit your YouTube videos.
Way 1: Edit your YouTube videos with YouTube video editor
Way 2: Edit your YouTube videos with third-party video editor
Way 1: Edit your YouTube videos with YouTube video editor
YouTube has the official video editor, which allows you to edit YouTube videos even after you uploaded your video to YouTube. You can use YouTube video editor to trim the video, to blur faces in the video, to add music to the video, etc.
Before you use YouTube video editor, you need to upload the video to YouTube first. You can upload the video in Private mode if you think your video is not ready to be published.

Then follow steps below to access Video Manager, where you can edit the YouTube video.
1) Click the account icon in the upper right corner then click YouTube Studio (beta).

2) Click Creator Studio Classic in the left pane. When prompted to do the survey, click Skip.

3) Click VIDEO MANAGER -> Videos.

After you access Video Manager, you can select the video which you want to edit and use the built-in features in Video Manager to edit the video according to your needs.
Following are the common features that you may need to use:
Trim the video
If the video is too long for you, you can choose to trim the video. You can select the beginning and the end of video according to your needs. For more information about how to trim the video, you can visit Trim your videos.

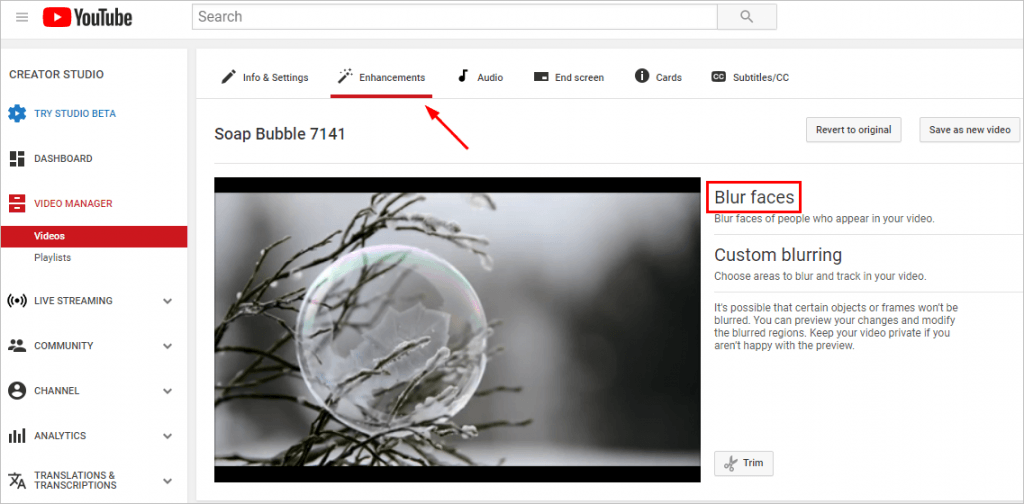
Blur faces or areas
You can use YouTube video editor to blur some faces which you don’t want to appear in the video. You can blur some areas in the video if you want. For more information about how to blur faces or areas, you can visit Blur your videos.

Add audio
Audio is necessary for a video. If your video doesn’t have audio yet, you can add audio to the video. YouTube video editor allows you to add audio to the video or replace the original audio with the new audio. For more information about how to add audio to YouTube video, you can visit Swap the audio track on your video.

Add end screen
If you want to promote another video in the video, You can add it as an end screen to the video. Note your video has to be at least 25 seconds long to have an end screen. For more information about how to use the End Screen feature, you can visit Add end screens to videos.

Add cards
If you want to show other information or do some polls in the video, you can add them as cards to your video. To learn how to add card to your video, you can visit Add cards to videos.

Add subtitle
Adding subtitle to your video is very easy. To learn how add subtitle to YouTube video, you can visit Add your own subtitles & closed captions.

Above are the basic features which are commonly used in editing YouTube videos. If you don’t find the feature you need from YouTube video editor, you can use a third-party video editor to edit your YouTube videos.
Way 2: Edit your YouTube videos with third-party video editor
The YouTube built-in video editor is good but the features are limited. If the YouTube built-in video editors don’t satisfy your requirements, you can use a third-party video editor to edit your YouTube video.
If you’re not sure what video editor you can trust, we recommend you use Movavi Video Editor.
Movavi Video Editor is a viable alternative – it’s a powerful yet easy-to use editing app that’s an effective replacement for the YouTube video editor. You can use it to combine or cut clips, add music, filters, text, and transitions to create one-of-a-kind videos. Download Movavi Video Editor for Windows or Mac. Then you can follow this simple guide to edit YouTube videos .

Hopefully you find the tips here help you edit YouTube videos. If you have any questions, ideas or suggestions, feel free to leave a comment below.


