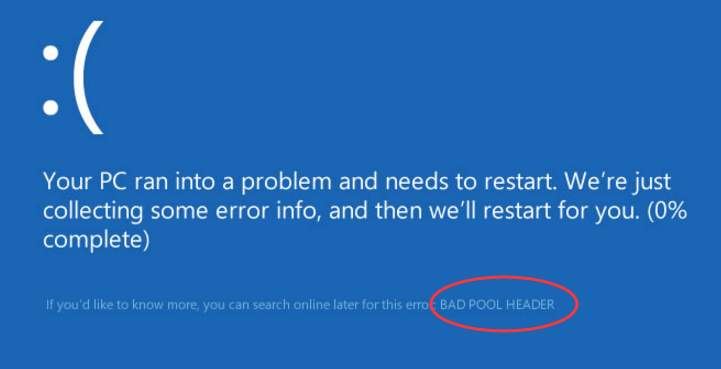
The BAD_POOL_HEADER blue screen error means there’s a problem with the way your computer is allocating memory. If you get this error, don’t worry. Most Windows 10 users are able to resolve it with one of the following solutions.
6 fixes for the Bad Pool Header blue screen error in Windows 10
You may not have to try all of these solutions; just work from the top down until you find the one that works.
1. Disconnect external devices
The error can be caused by a piece of external hardware. If you have some external devices connected to the PC, disconnect all of them except the mouse and the keyboard and then boot up.
If you don’t get the error again, plug your devices back into the PC, one at a time, and restart after each one. If you get the error again after plugging in a device, then you know that device or its driver is causing the error. Then try updating the driver for that device
2. Repair system files
IMPORTANT: You need to be logged into Windows on the problem computer to try this fix. If you can’t log into Windows, restart it in Safe Mode, then:
Run sfc /scannow command
System File Checker (SFC) is a built-in Windows tool that scans and repairs corrupted system files. If there are corrupted system files in your computer, your system will be crashing without doubt. So you should run SFC to fix the problem. To do so:
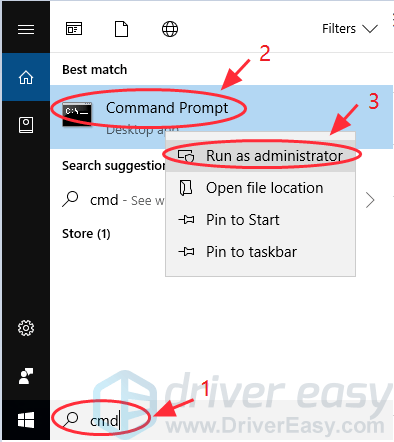
1) Type cmd in the search box on your desktop. Right-click Command Prompt to select Run as administrator, and then click Yes to verify UAC.
2) Once you see the command prompt, type sfc /scannow and press Enter.
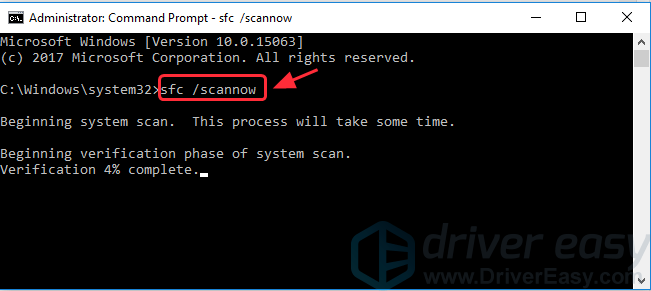
3) Windows will now verify the system files, and automatically fix any issues.
4) Once verification is complete, exit the Command Prompt and restart your PC to test your issue.
3. Update all drivers
IMPORTANT: You need to be logged into Windows on the problem computer to try this fix. If you can’t log into Windows, restart it in Safe Mode, then try.
Your BAD POOL HEADER problem probably is caused by faulty drivers. You should verify that all your devices have the right driver, and update those that don’t. If you’re not comfortable playing around with drivers manually, you can do it automatically with Driver Easy.
Driver Easy will automatically recognize your system and find the correct drivers for it. You don’t need to know exactly what system your computer is running, you don’t need to be troubled by the wrong driver you would be downloading, and you don’t need to worry about making a mistake when installing. Driver Easy handles it all.
You can update your drivers automatically with either the 7 days free trial or the Pro version of Driver Easy. It takes just 2 clicks, and you get full support and a 30-day money-back guarantee with the Pro version:
- Download and install Driver Easy.
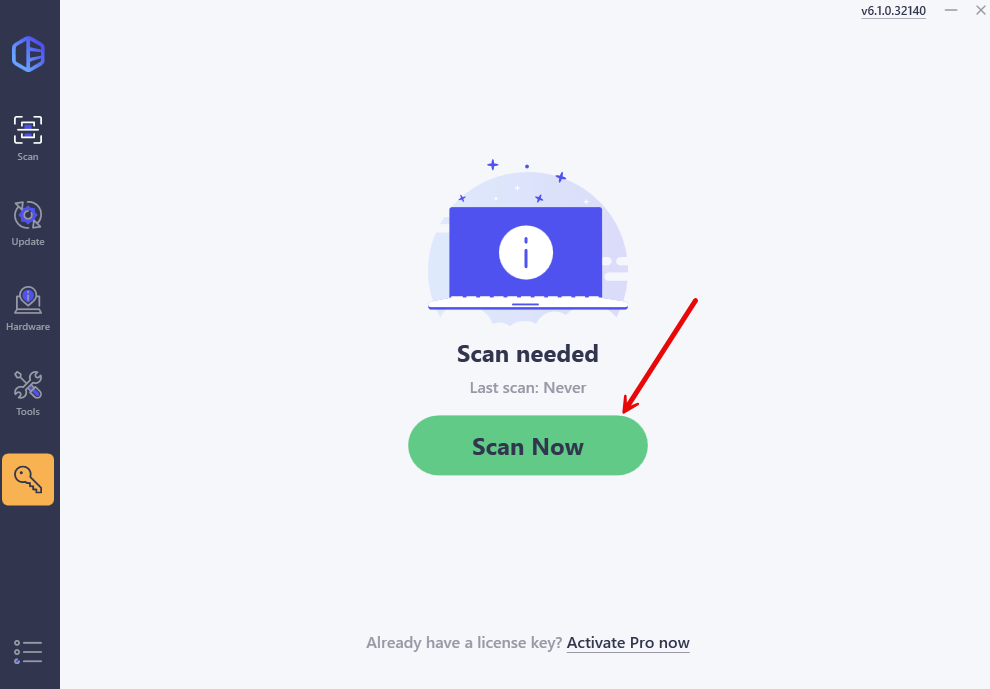
- Run Driver Easy and click the Scan Now button. Driver Easy will then scan your computer and detect any problem drivers.
- Click the Activate & Update button next to the flagged device to automatically download and install the correct version of this driver.
Or click Update All to automatically download and install the correct version of all the drivers that are missing or out of date on your system (You’ll need the Pro version for this – when you select Update All, you’ll get a prompt to upgrade. If you’re not prepared to purchase the Pro version yet, Driver Easy provides a 7-day trial at no cost, granting access to all Pro features like fast downloads and easy installation. No charges will occur until after your 7-day trial period ends.)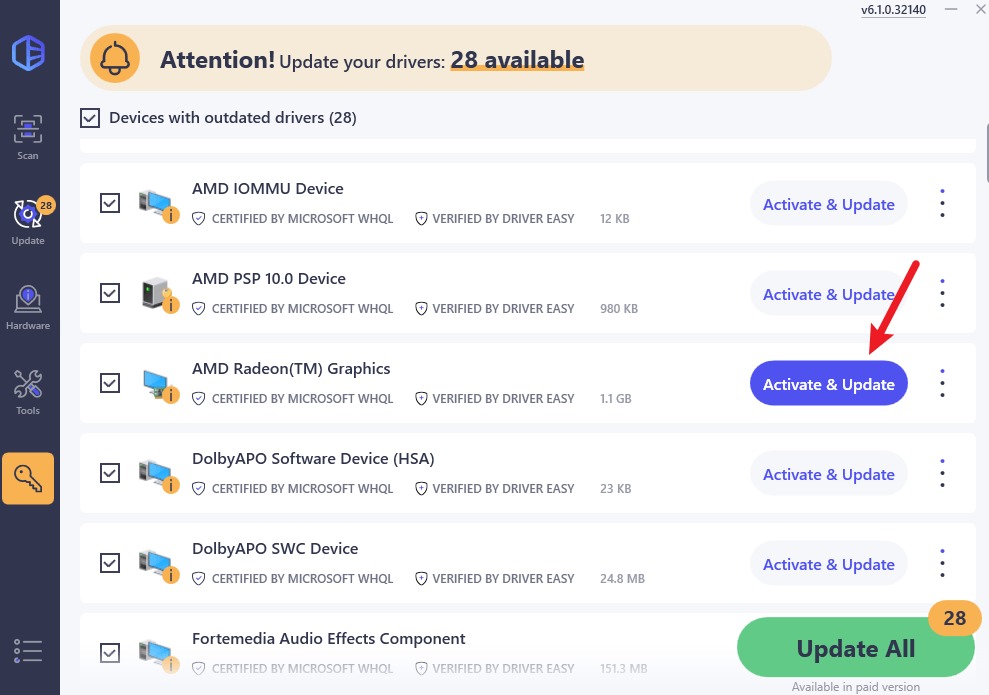
- Restart your computer for the change to take effect.
4. Temporarily disable third-party antivirus applications
IMPORTANT: You need to be logged into Windows on the problem computer to try this fix. If you can’t log into Windows, restart it in Safe Mode, then try.
This error is sometimes caused by interference from antivirus software. To see if that’s the problem for you, temporarily disable your antivirus and check if the problem persists. (Consult your antivirus documentation for instructions on disabling it.)
If this resolves the problem, contact the vendor of your antivirus software and ask them for advice, or install a different antivirus solution.
IMPORTANT: Be extra careful about what sites you visit, what emails you open and what files you download when your antivirus is disabled.
5. Disable fast startup
IMPORTANT: You need to be logged into Windows on the problem computer to try this fix. If you can’t log into Windows, restart it in Safe Mode, then try.
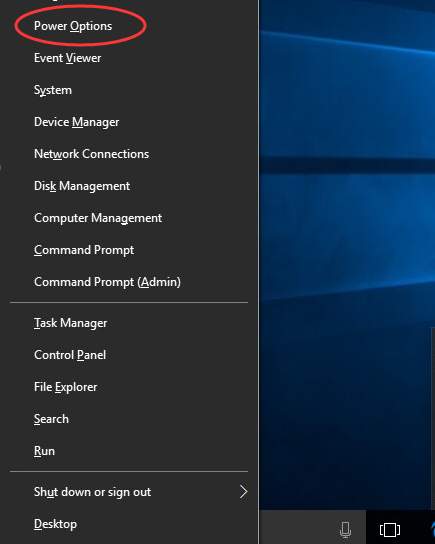
1) On your keyboard, press the Windows logo key and R at the same time, then click Power Options.
2) Click Choose what the power button does:

3) Click Change settings that are currently unavailable:

4) Uncheck Turn on fast startup (recommended), then click Save changes:

5) Reboot your PC and see if the error persists.
6. Check for faulty RAM
IMPORTANT: You need to be logged into Windows on the problem computer to try this fix. If you can’t log into Windows, restart it in Safe Mode, then try.
This error can also be caused by faulty RAM. First, check if your RAM is covered in dust. If it is, take it out and clean it, then replace it and see if the error persists. If it does, you may need new RAM. If you’re not comfortable identifying the correct RAM and replacing it, contact your local computer repair shop for assistance.


