


If you’ve recently tried to launch a game that requires DirectX 12 and were greeted with the frustrating error message:
DirectX 12 is not supported on your system. Try running without the -dx12 or -d3d12 command line argument.
you’re not alone. Many gamers face this issue when their system’s hardware or drivers aren’t fully compatible with DirectX 12, or if certain settings aren’t properly configured.
In this article, we’ve gathered six useful methods to help you fix the DirectX 12 not supported on your system error. Just work your way through the list until you find the one that works for you.
How to fix DirectX 12 is not supported on your system in Windows
Fix 1: Check GPU compatibility
The first step in resolving the “DirectX 12 is not supported on your system” error is to ensure that your GPU supports DirectX 12. Older graphics cards, such as those from the GTX 700 series or earlier, may not support the necessary DX12 features, even if your system shows that DX12 is installed.
Here’s how to check your GPU’s compatibility:
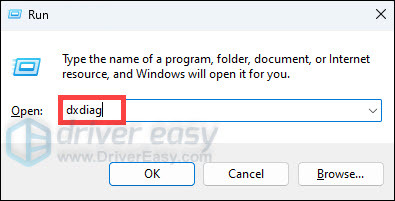
- On your keyboard, press the Windows key + R, type dxdiag, and hit Enter.
- In the DirectX Diagnostic Tool, click the Display tab and check out Feature_Levels. If it lists 12_0 or higher, your GPU supports DirectX 12.
If it only shows 11_1 or lower, your GPU is not fully compatible with DX12, and you may need to upgrade to a newer model that supports it.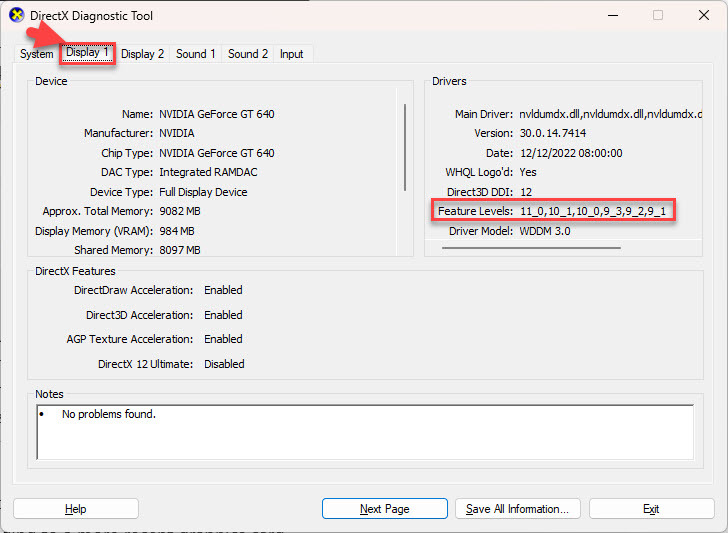
If your GPU doesn’t support DirectX 12, unfortunately, you won’t be able to run games that require DX12 without upgrading to a more recent graphics card. If your GPU is DX12 compatible but your computer is still giving you the error, just move on to Fix 2, below.
Fix 2: Update your GPU driver
GPU drivers are essential for ensuring that your graphics card communicates properly with your system and supports the necessary features of DirectX 12. If your drivers are outdated or incompatible, it could prevent DirectX 12 from functioning altogether, triggering the DirectX 12 is not supported on your system error.
Here’s how to update your GPU driver:
1. Update your GPU driver manually
For NVIDIA Graphics Cards:
- Visit the official NVIDIA Driver Downloads page.
- Select your GPU model and download the latest driver version.
- Follow the on-screen prompts to install the driver and restart your system.
For AMD Graphics Cards:
- Go to AMD Driver and Support page.
- Select your GPU model and download the latest driver version.
- Install the driver and restart your PC.
2. Update your GPU automatically (Recommended)
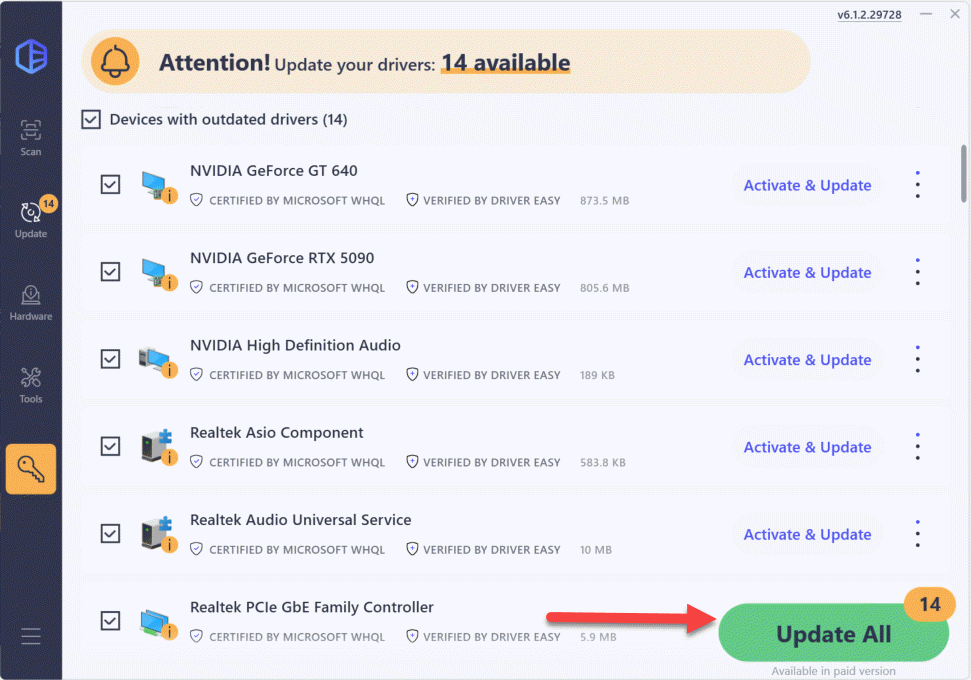
If you don’t have the time or confidence to manually update your GPU drivers, you can do it automatically with Driver Easy. This is especially helpful if you’re unsure which driver version is the latest or have trouble finding the right one.
Driver Easy scans your system, identifies outdated or missing drivers, and allows you to update them with a single click. You don’t need to worry about downloading the wrong drivers or making installation mistakes. Driver Easy takes care of it all.
- Download and install Driver Easy.
- Run Driver Easy and click the Scan Now button. Driver Easy will then scan your computer and detect any problem drivers.

- Click Update All to automatically download and install the correct version of all the drivers that are missing or out of date on your system (this requires the Pro version – you’ll be prompted to upgrade when you click Update All).
- Restart your computer for the changes to take effect.
- Check to see if you can launch the game without error. If yes, then congrats and enjoy your game! If the DX 12 error still persists, please head over to Fix 3, below.
Fix 3: Modify launch options
The DX 12 not supported launching error may suggest your game is trying to launch with DirectX 12, but your system isn’t fully compatible. In this case, you can switch to a more compatible rendering API such as DirectX 11 or Vulkan to bypass the issue and potentially get the game up and running.
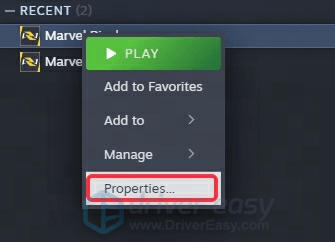
For Steam:
- Open Steam and go to LIBRARY.
- Right-click on the game you’re having trouble with and select Properties…
- In the General tab, click the Launch Options box and add one of the following commands:
-d3d11 (for DirectX 11)
-vulkan (for Vulkan API)
You can enter one or both options, but make sure to separate them with a space (e.g., -d3d11 -vulkan).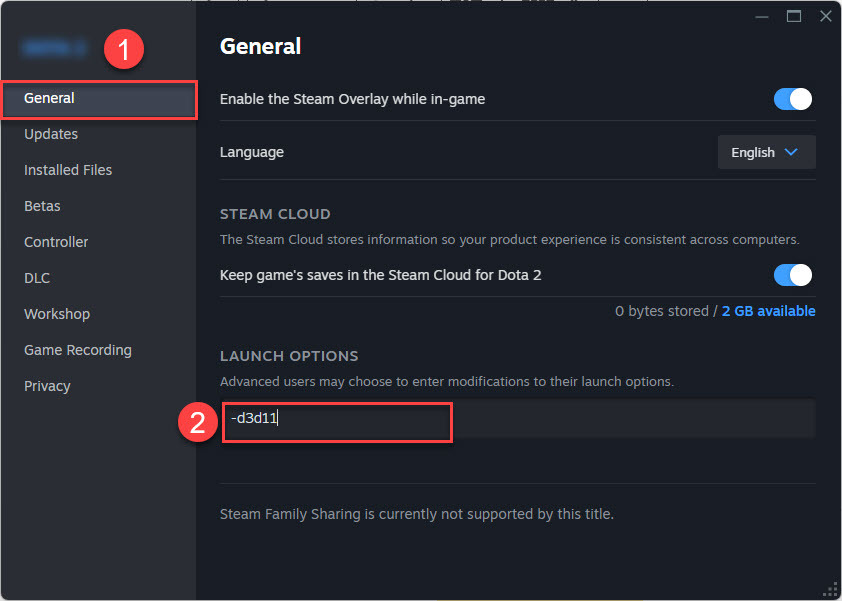
- Close the window and try launching the game to see if the issue is resolved. If yes, then great. But if it still won’t launch, please skip to Fix 4.
For Epic Games:
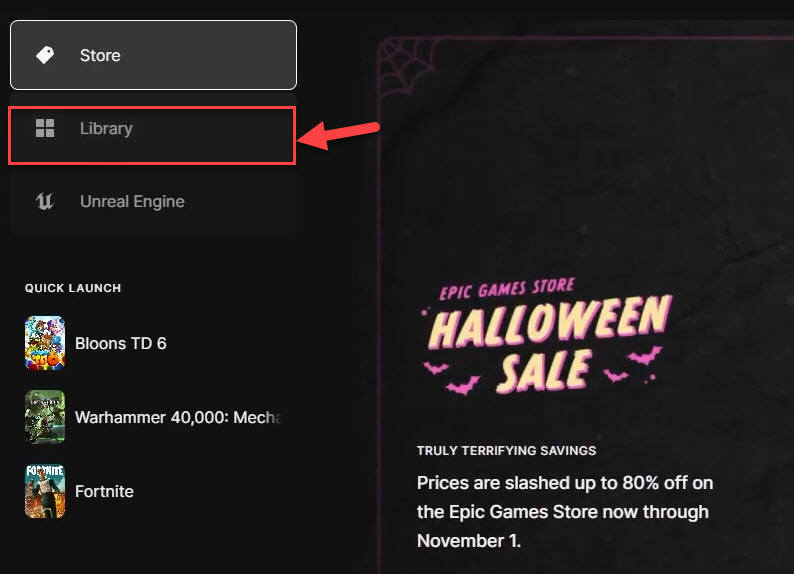
- Open the Epic Games Launcher and navigate to Library.
- Choose the game where you encounter the error and click on the three dots > Manage.
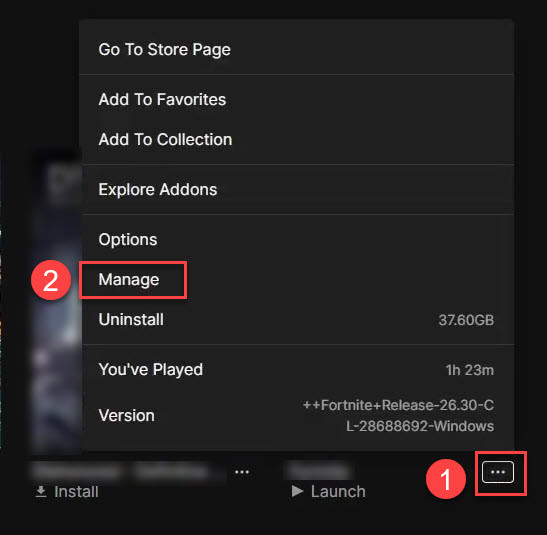
- Under the Launch Options section, make sure the toggle is On. Then add one of the following commands:
-d3d11 (for DirectX 11)
-vulkan (for Vulkan API)
You can enter either or both options, but make sure to separate them with a space (e.g., -d3d11 -vulkan).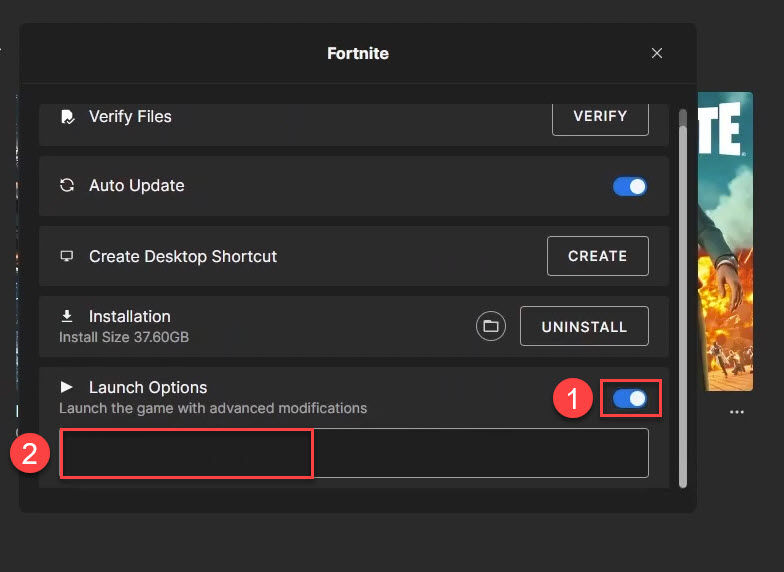
- Close the window and try launching the game to see if the issue is resolved. If yes, then great. But if the error still occurs, please move on to Fix 4.
Fix 4: Verify game integrity
Corrupted or missing game files may also cause the DirectX 12 is not supported error. To ensure that all your game files are intact, you can use your game platform’s built-in tool to verify the integrity of the game files.
Here’s how to verify the game files on Steam and Epic Games:
For Steam:
- Open Steam and go to Library.
- Right-click on the game and select Properties.
- Under the Local Files tab, click Verify Integrity of Game Files.
- Steam will check for missing or corrupted files and replace them.
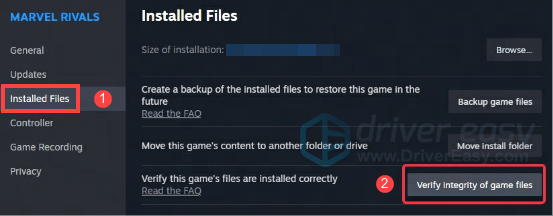
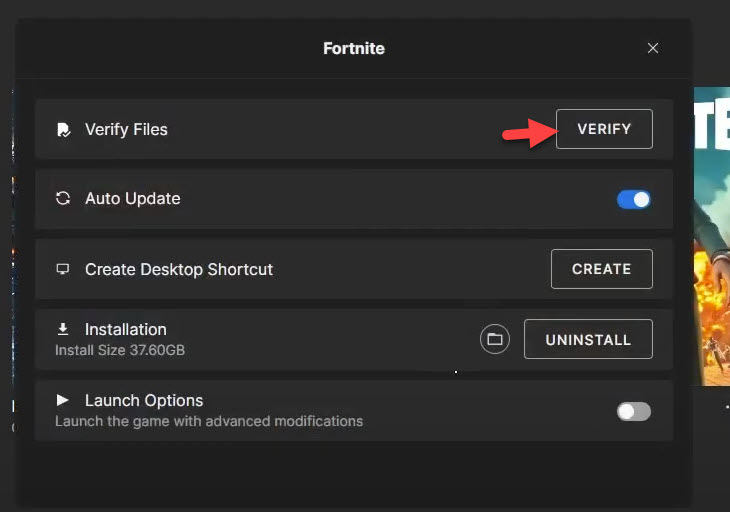
For Epic Games:
- Open the Epic Games Launcher and go to your Library.
- Click the three dots next to your game and select Manage.
- Scroll down and click VERIFY.
Once the process is complete, launch the game again to check if the issue is fixed. If it still persists, don’t worry. Here are two more fixes to try.
Fix 5: Install Windows Updates
Outdated versions of Windows may lack critical updates, such as patches or system optimizations, that are necessary to fully support DirectX 12. These updates often include bug fixes, security patches, and performance improvements that can directly impact compatibility with newer technologies like DirectX 12.
Here is how to check for and install the latest Windows updates:
- On your keyboard, press the Windows logo key and I at the same time to open the Settings window.
- Click Windows Update > Check for updates.
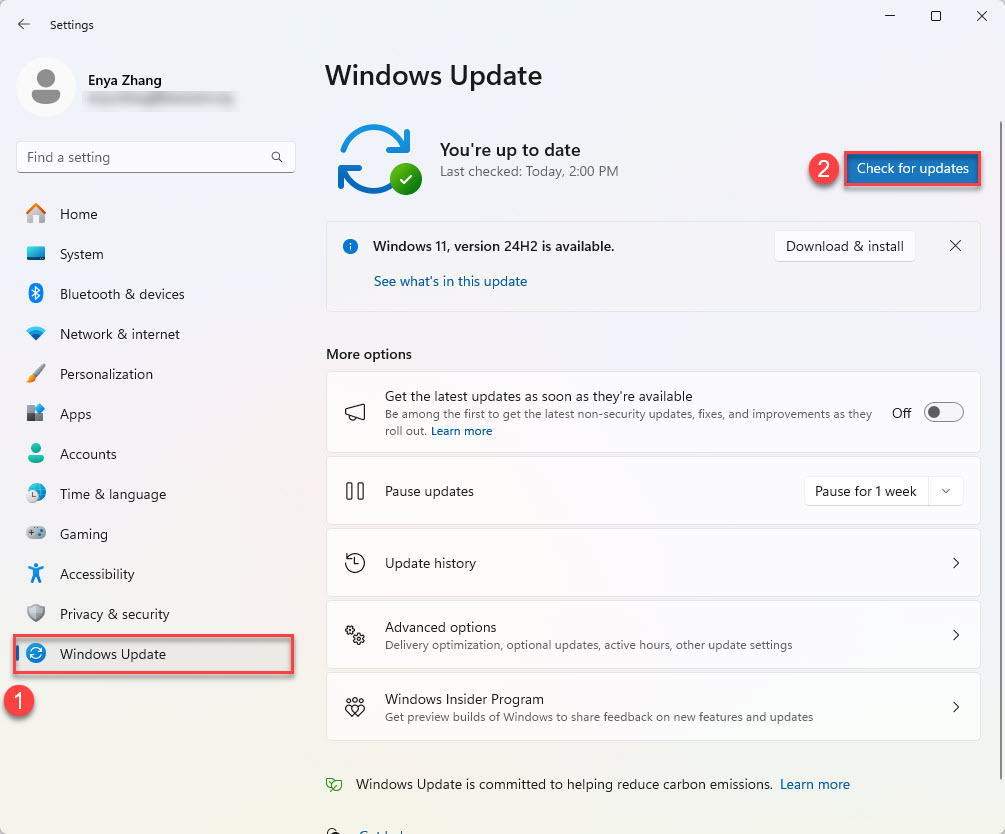
- Wait a short while as Windows searches for available updates. If updates are available, click to download and install them. If no updates are found, please skip to Fix 6.
- Once installed, restart your PC to apply the changes.
- Check to see if the game can be launched! If it’s still no joy, please try Fix 6, below.
Fix 6: Reinstall DirectX
If you’ve tried modifying the launch options and the error persists, it might be a good idea to reinstall DirectX. Sometimes, missing or corrupted DirectX components can cause compatibility issues that prevent games from launching with DirectX 12.
Here’s how to reinstall DirectX:
- Go to the official DirectX End-User Runtime Web Installer.
- Download and run the installer.
- Follow the on-screen instructions to complete the installation.
- Restart your PC for the changes to take effect.
After reinstalling DirectX, try launching the game again to see if the DirectX 12 is not supported on your system error is resolved.
That’s it – 6 fixes that have helped players solve the DirectX 12 is not supported on your system error. Hopefully, they have helped.
If, after trying all of these fixes, the issue persists, it could be a more complex underlying problem at play. In such cases, it may be helpful to wait for an official patch from the game developers or reach out to their support team for further assistance. They may be able to address bugs or compatibility issues that are specific to your game or system configuration.