We’ve seen many reports on the audio problems in Halo Infinite these days. Many players found themselves tricked by sneaky kills because the footstep audio from behind is barely audible. Some also reported that game audio is missing when using headsets. With the launch of Halo Infinite Campaign, players also experience audio glitches or lose all the audio all of a sudden.
While some audio issues in Halo Infinite are bugs and need to be addressed by the developers, others may be fixed by configuring some settings on your PC. If you’re also experiencing audio problems while playing Halo Infinite, here are some working fixes you can try!
Try these fixes…
You don’t have to try them all, just work your way down the list until you find the one that does the trick!
1: Set Dynamic Range to Compressed mode
3: Configure Windows sound settings
Fix 1: Set Dynamic Range to Compressed mode
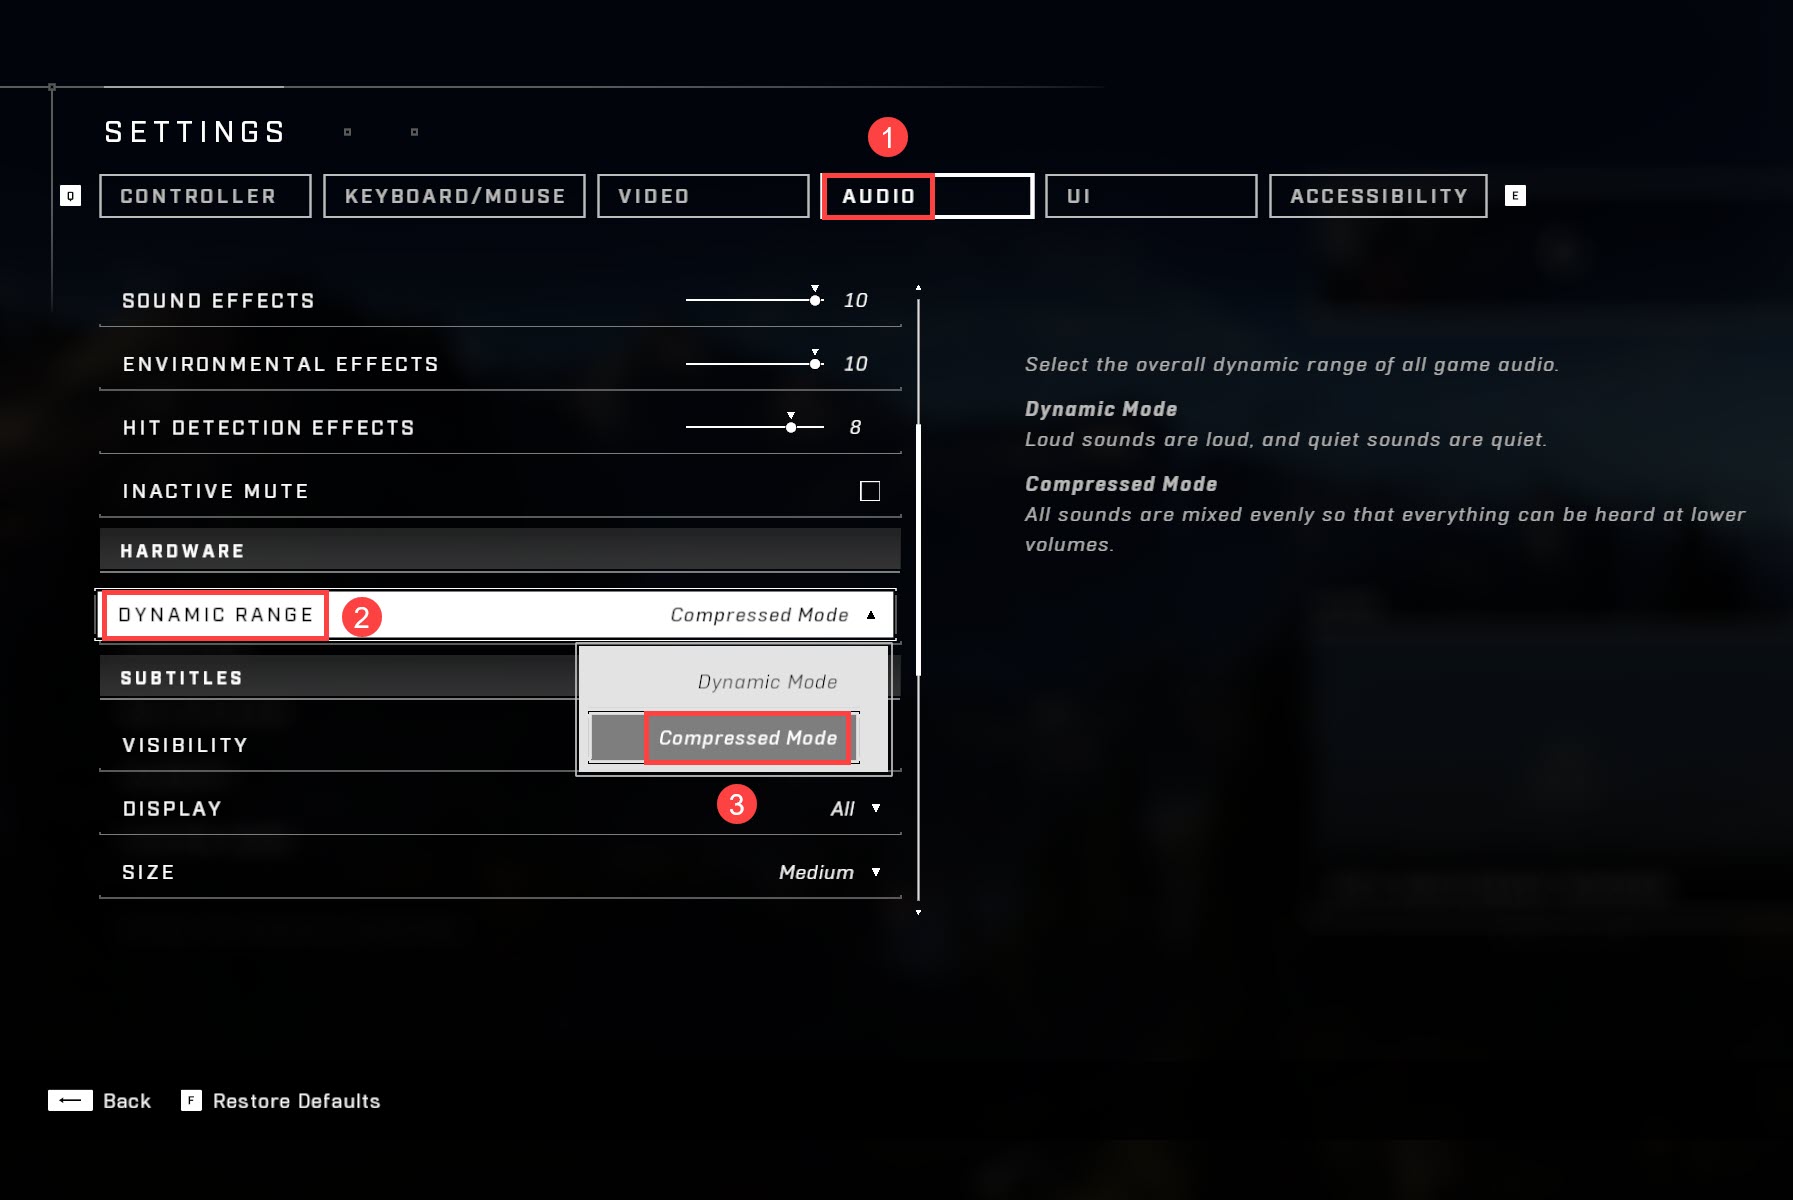
If you find it hard to hear the game audio sometimes, for example, little spatial sound feedback when enemies approach or when you’re firing a gun, you can try this quick fix first. By changing the game audio setting, dynamic range, to compressed mode, the game audio will be adjusted to play at the same level of volume. Here’s how:
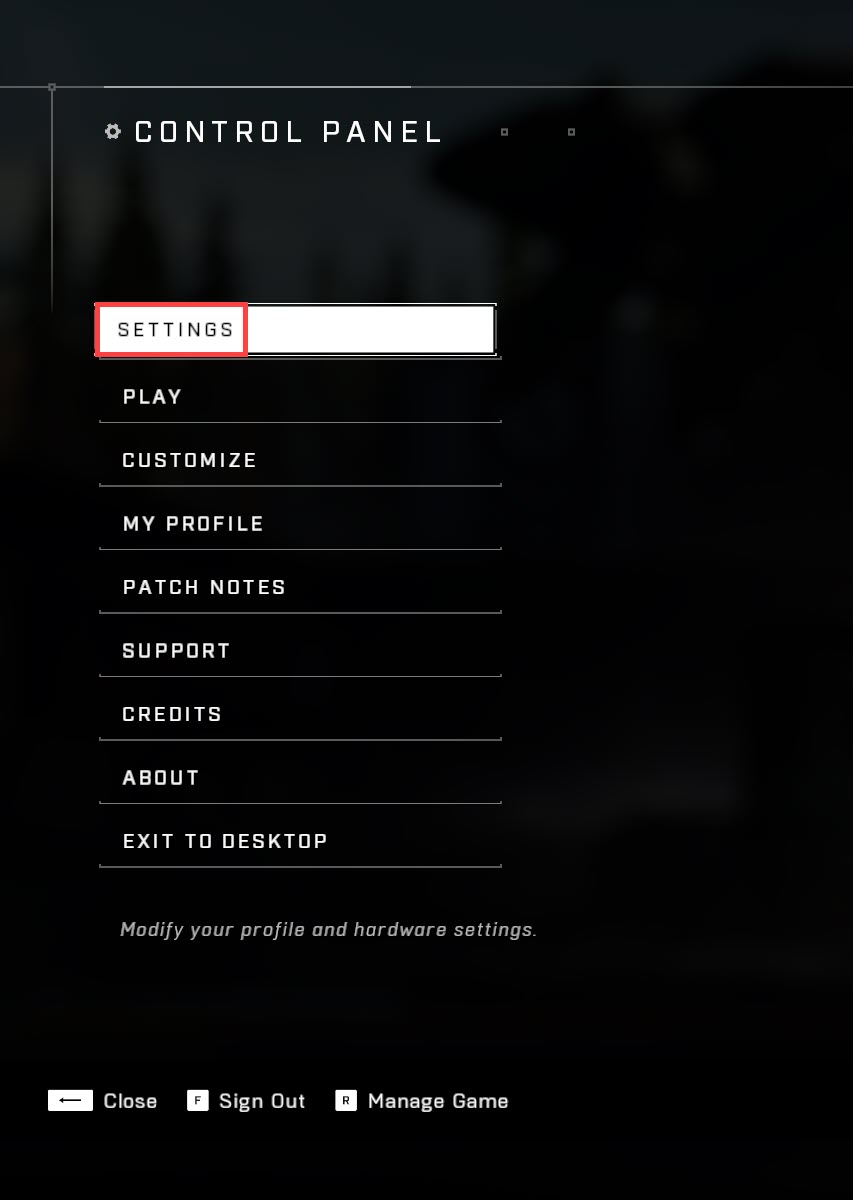
- Launch Halo Infinite. Press F1 to open the control panel and click Settings.
- Go to the Audio tab, and set the Dynamic Range setting to Compressed mode.
- Play a game to test the issue.
If this fix doesn’t solve your problem, try the next fix.
Fix 2: Update your device drivers
Random sound issues could indicate a driver issue. Particularly, many players using Logitech headsets reported audio missing or stuttering. If you’re also experiencing similar issues or can’t identify what’s causing your audio problem, you may want to update your audio driver and your Bluetooth adapter driver.
There are two ways you can get the right drivers for your audio device and/or Bluetooth adapter: manually or automatically.
Manual driver update – You can update both your audio driver and Bluetooth driver via Device Manager. If you’re using a wireless headset, you can also search on the supplier’s website for your exact device. Be sure to choose only drivers that are compatible with your Windows version.
Automatic driver update – If you don’t have the time, patience, or computer skills to update your drivers manually, you can, instead, do it automatically with Driver Easy. Driver Easy will automatically recognize your system and find the correct drivers for your devices and your Windows version, and it will download and install the drivers correctly:
1) Download and install Driver Easy.
2) Run Driver Easy and click the Scan Now button. Driver Easy will then scan your computer and detect any problem drivers.
3) Click the Update button next to the flagged drivers to automatically download their correct version, then you can manually install them (you can do this with the FREE version).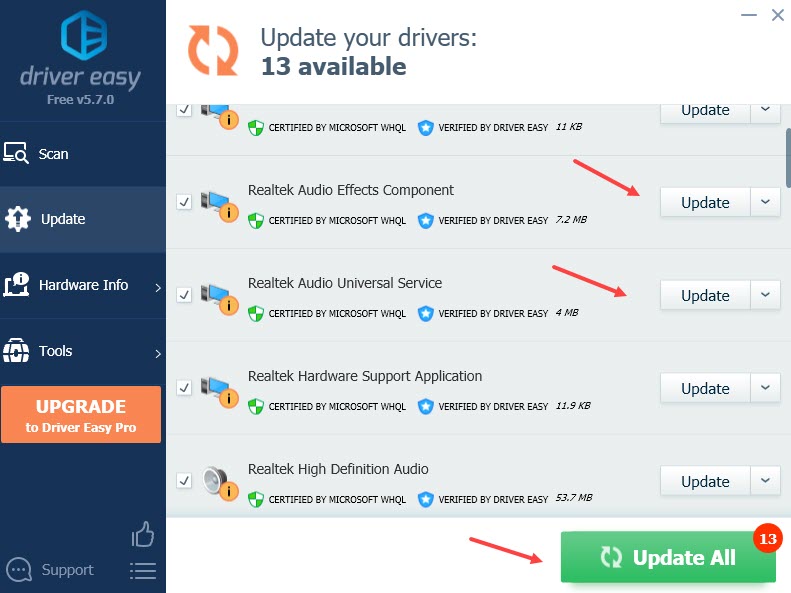
Or click Update All to automatically download and install the correct version of all the drivers that are missing or out of date on your system. (This requires the Pro version which comes with full support and a 30-day money-back guarantee. You’ll be prompted to upgrade when you click Update All.)
Restart your PC for the new drivers to take effect. If the audio problem persists, try the next fix.
Fix 3: Configure Windows sound settings
Last but not least, you can try to adjust the sound settings on your PC to see if it helps. While we’re waiting for the developers to recognize and work on the bugs, these workarounds may improve the in-game audio quality.
Configure the output device settings
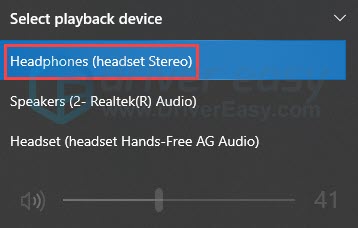
If you’re using a wireless headset, you’ll need to make sure the audio is set to Stereo, and disconnect other audio output devices (if you have any.)
- Click the speaker icon on your taskbar, then click the output device. (Here my headphone is set as the output device already.)
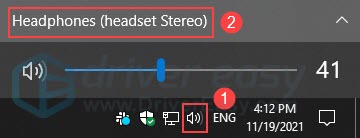
- Make sure you select the Stereo audio. Hands-Free audio allows you to use your device as both the output and input device, but your audio quality will be very low.
Turn on loudness equalization
Loudness equalization is a Windows built-in sound feature and will balance the loud and quiet audios. It’s similar to the compressed mode audio setting that we mentioned above, but at a system level. The quiet audio will be easier to hear and the high-pitched audio will no longer sound too loud and unbearable.
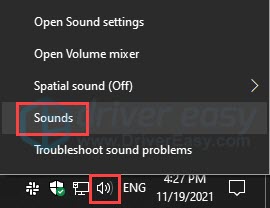
- Right-click the little speaker icon on your taskbar, and click Sounds.
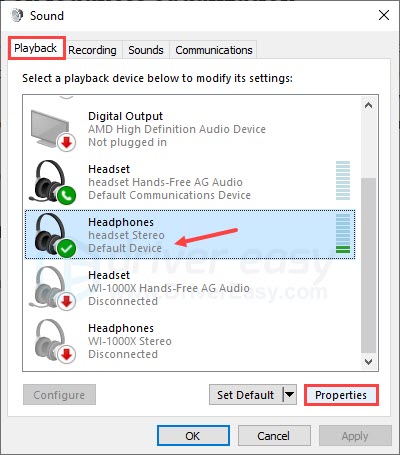
- Go to the Playback tab, select your output device, and click Properties.
- Switch to the Enhancements tab. Tick the checkbox of Loudness Equalization, then click Apply and OK.
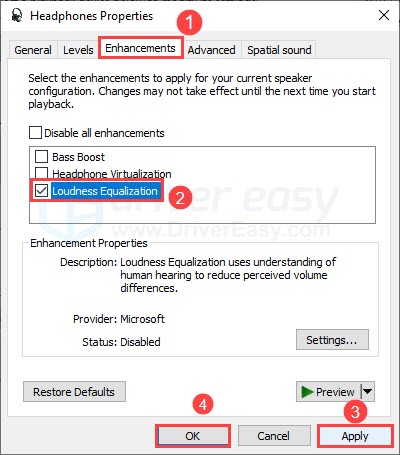
If this doesn’t work for you or you wish to revert the change, simply repeat the steps above and uncheck the Loudness Equalization setting.
Turn on spatial sound
Enabling the spatial sound on your PC may give you some luck, and it only takes a few clicks.
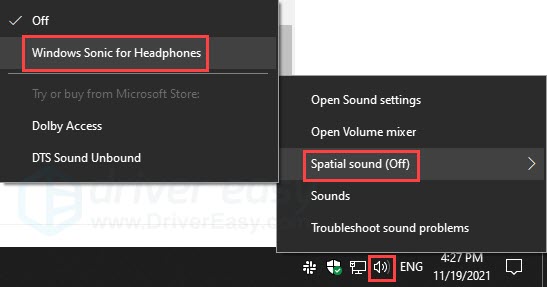
- Right-click the speaker icon on your taskbar, move your cursor to Spatial sound, and click Windows Sonic for Headphones. You may see different options here based on your output device.
Disable the communication option
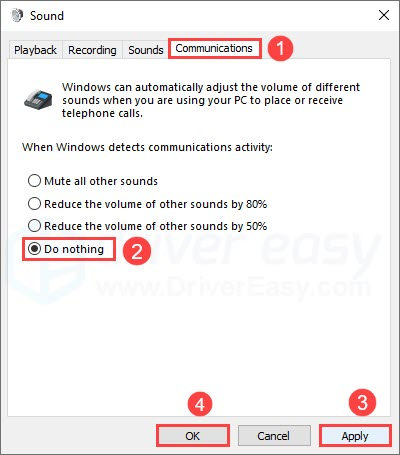
When Windows detects you’re voice-chatting or video-calling on your PC, it may reduce the volume of other sounds. You can adjust this setting in the sound control panel:
- On your taskbar, right-click the speaker icon and click Sounds.

- Go to the Communications tab, select Do nothing, then click Apply and OK.
Hopefully this article helps! Please feel free to drop a comment down below if you have any questions or suggestions.


