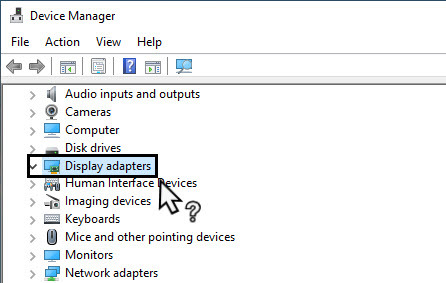
If you don’t see the NVIDIA graphics card listed under Device Manager, you can tell the graphics card is incorrectly detected by Windows. The common error that you would encounter is failure to install the NVIDIA Graphics driver. The problem can be caused by many reasons. Here you will learn the top methods to fix the problem. With these instructions, your problem should be resolved.
Try these methods
- Show Hidden Devices and Reinstall Graphics Driver Manually
- Update the NVIDIA Graphics Driver
- Restore BIOS to Default
- Update BIOS
Method 1: Show Hidden Devices and Reinstall Graphics Driver Manually
This method is especially useful for fixing the problem caused by leftover drivers after replacing a video card. Follow these steps:
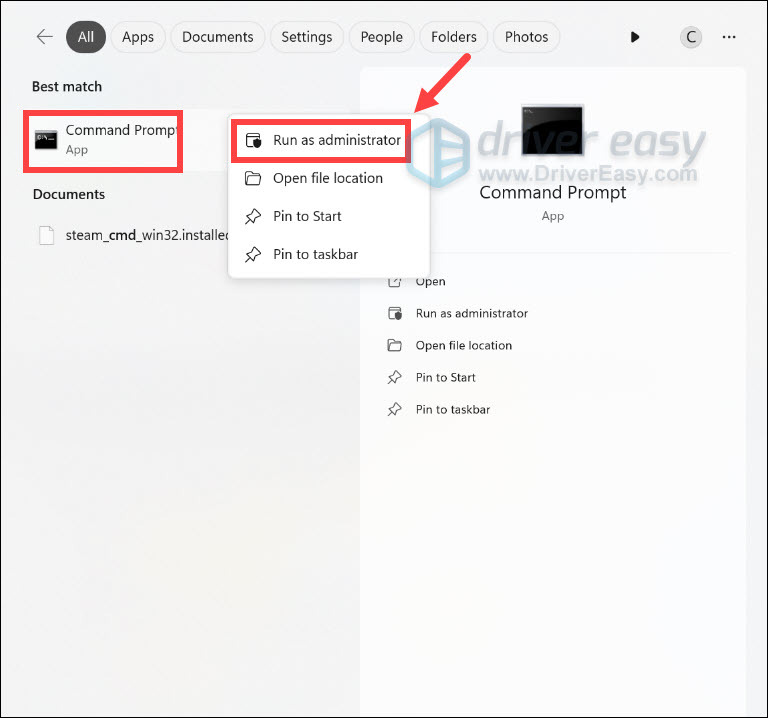
1. Open Command Prompt as administrator. All you have to do is press the Windows logo key to open the Start menu. Then type cmd. Right-click the Command Prompt from the list of results and select Run as administrator.
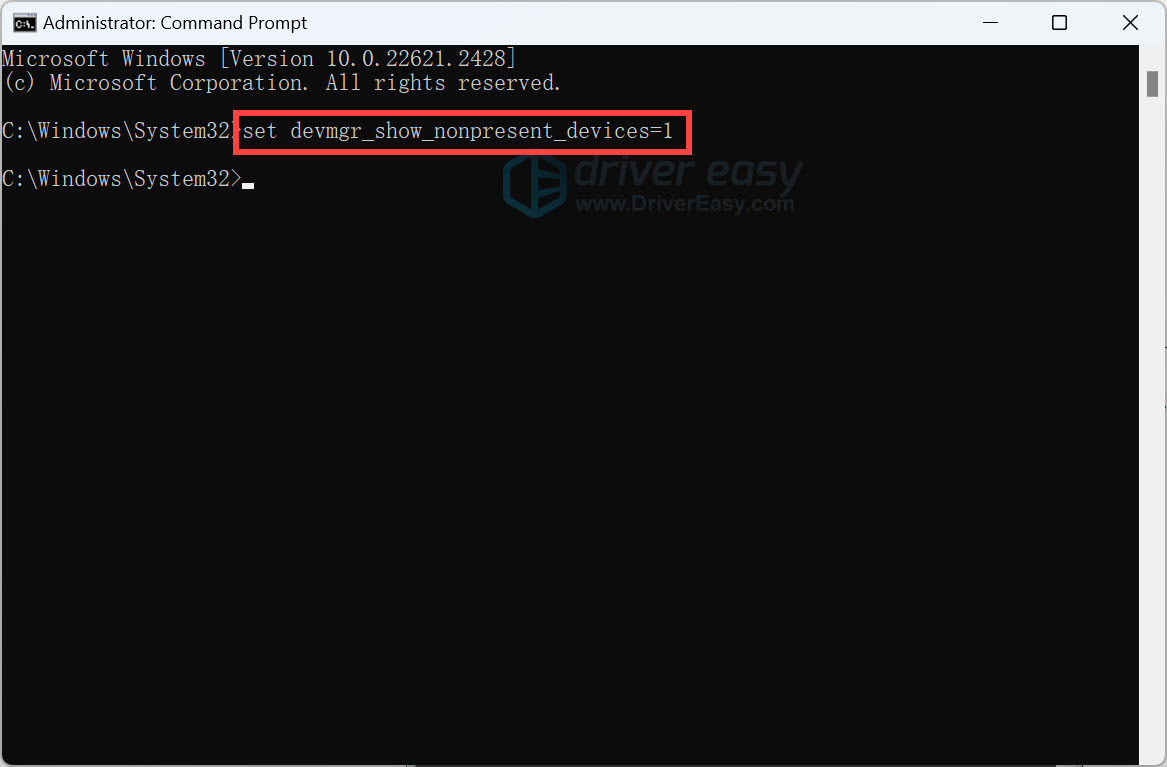
2. In the Command Prompt, type set devmgr_show_nonpresent_devices=1, and then press Enter.
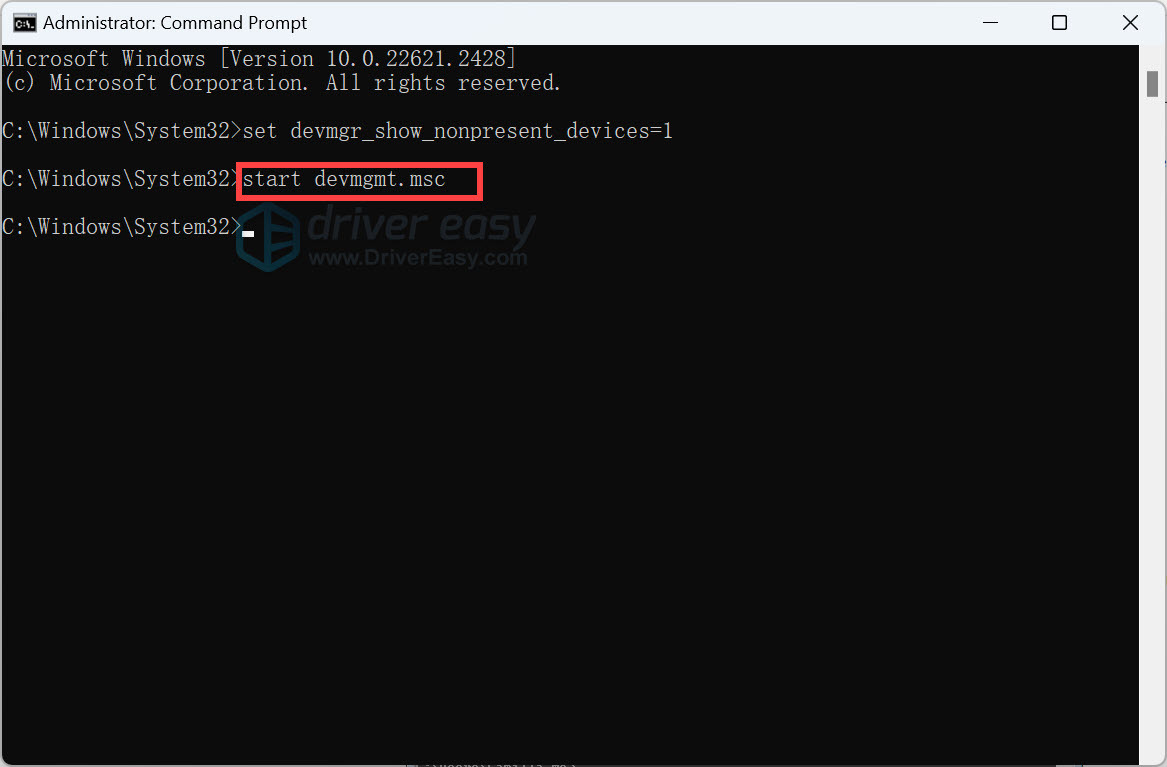
3. At the same Command Prompt, type start devmgmt.msc, and then press Enter. This is to open the Device Manager window.
4. Once the Device Manager window opens, click the View menu and select Show hidden devices from the drop-down menu. After that, Any devices that are not connected to the computer will be shown, including the NVIDIA Graphics card.
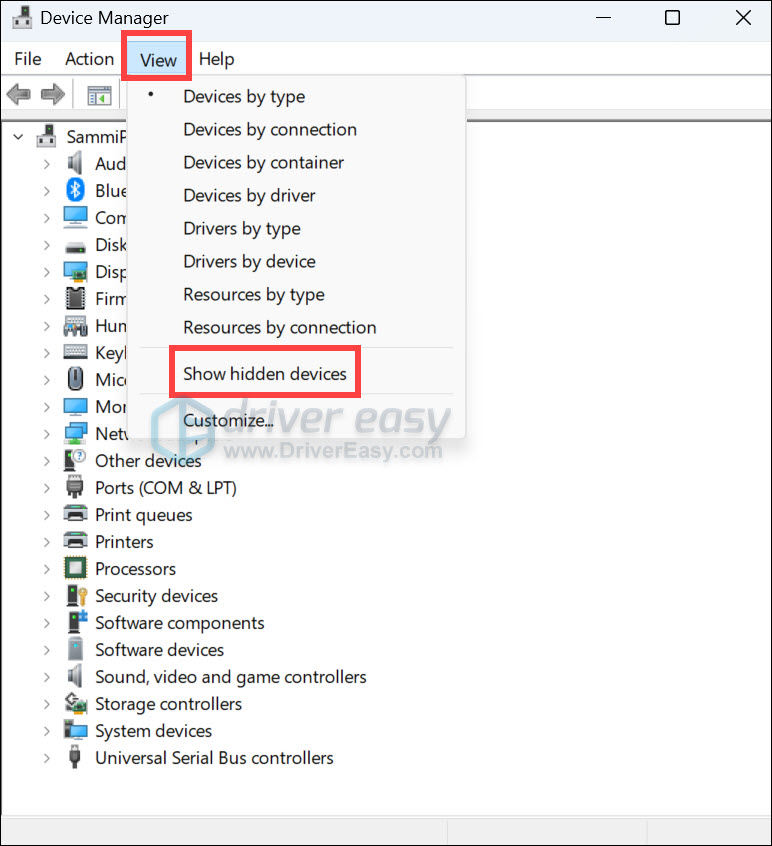
5. Uninstall each instance of the NVIDIA card and unknown device (The unknown device will be listed under the category Other devices. ).
To uninstall the device, right-click on the device name and select Uninstall from the context menu. The following screenshot is for your reference.
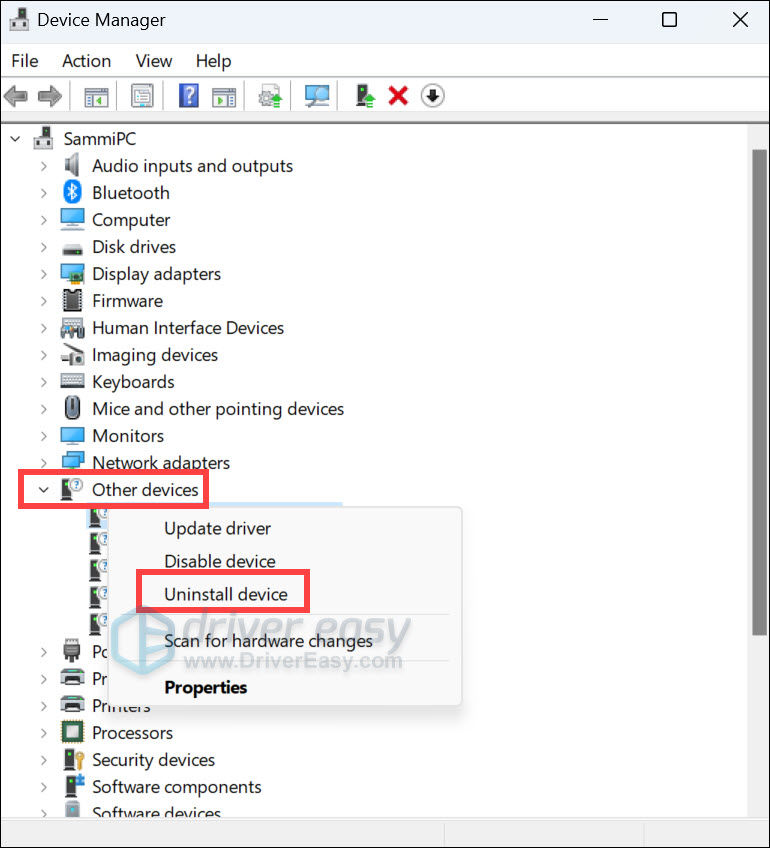
Note: NVIDIA graphics card may not be shown as its own device name. It could be an unknown device, video controller, etc. If you are not sure how to identify it, just uninstall the device that has a yellow mark on it.
6. After uninstalling, restart your computer then Windows will reinstall the driver automatically.
Method 2: Update the NVIDIA Graphics Driver
If Method 1 doesn’t resolve the problem, it’s suggested that you update the driver to the latest version.
You can go to NVIDIA’s official website to download the latest driver for your Graphics card. But if you don’t have time, patience, or computer skills to update drivers manually, you can do it automatically with Driver Easy.
Driver Easy will automatically recognize your system and find the correct drivers for it. You don’t need to know exactly what system your computer is running, you don’t need to risk downloading and installing the wrong driver, and you don’t need to worry about making a mistake when installing.
Here’s a step-by-step guide to automatically updating your NVIDIA driver with Driver Easy:
1) Download and install Driver Easy.
2) Run Driver Easy and click Scan Now. Driver Easy will then scan your computer and detect any problem drivers.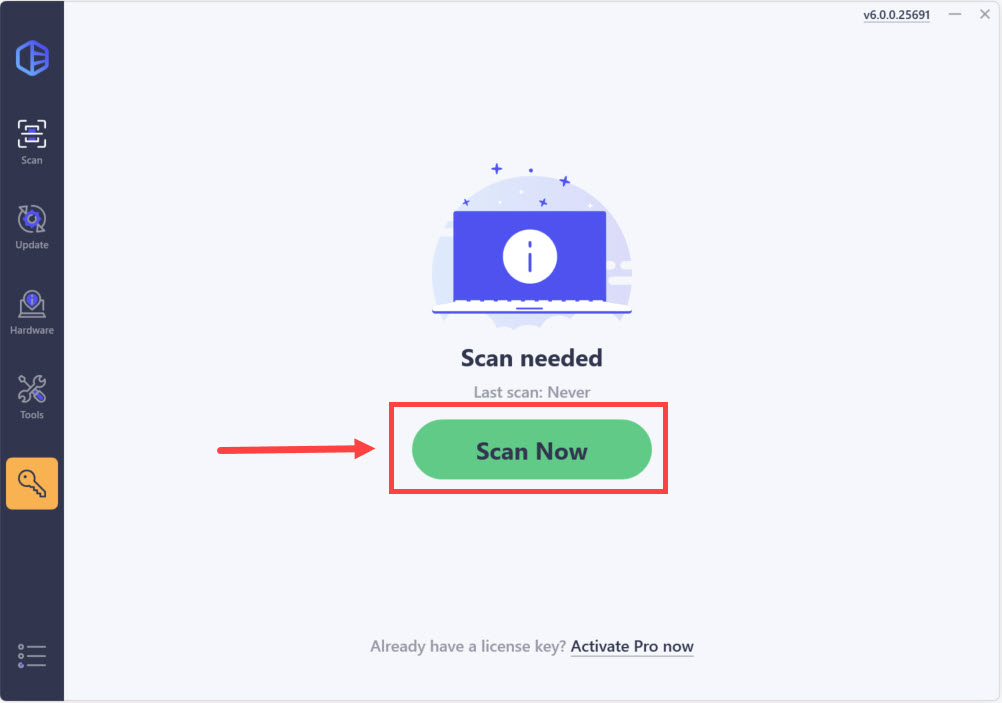
3) Click the Activate & Update button next to a flagged NVIDIA graphics driver to automatically download and install the correct version of this driver.
Or click Update All to automatically download and install the correct version of all the drivers that are missing or out of date on your system.
(Note: This will prompt an upgrade to the Pro version. Driver Easy offers a 7-day trial period with access to premium features like high-speed downloads and one-click installations. You won’t be charged until the trial ends.)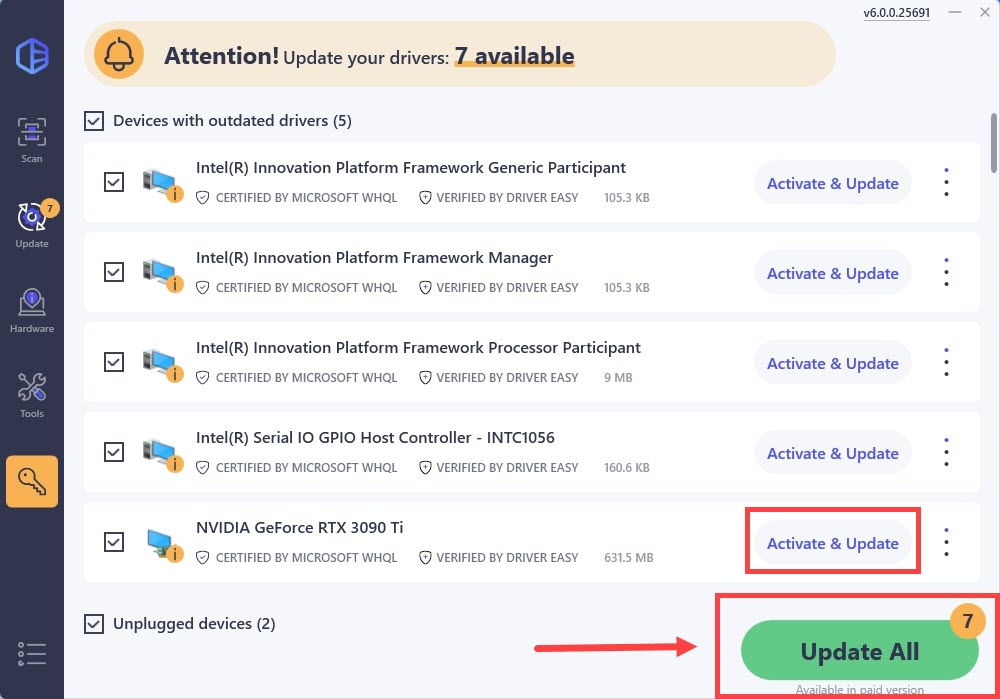
Method 3: Restore BIOS to Default
If you are an advanced computer user, you may already know how to enter BIOS and restore it to default. If not, contact your PC manufacturer or technician who you could ask for assistance to help with this, as modifying BIOS settings incorrectly can cause serious problems.
Method 4: Update BIOS
You can go to the motherboard manufacturer’s website or the PC manufacturer’s website to check for and download the latest BIOS version that you can update. Contact your PC manufacturer or technician whom you could ask for assistance to help with this, as updating BIOS incorrectly can cause serious problems.


