Recently, many users have been reporting that VRChat just keeps crashing all the time. What a bummer! But don’t worry, for it’s not hard to fix it at all. Try these quick fixes below to bring your VRChat back to life again.
Try these fixes
- Reset your avatars to fix VRChat crashing
- Verify your game files
- Update your GPU drivers
- Allow VRChat through the firewall
- Delete VRChat files
- Create a VRChat account
- Turn off SteamVR Beta
- Use VPN
Fix 1: Reset your avatar to fix VRChat crashing
If you can still access the game, you can press Ctrl + (the slash under Backspace) to reset your avatar to default. In most cases, the VRChat crashing issue can be simply caused by avatar issues.
Alternatively, you can go to VRChat’s official website. Log in and go to the AVATARS tab and select the Reset to Default Avatar option.
Fix 2: Verify your game files
If VRChat keeps crashing while other games run perfectly, the culprit could be corrupt game files. Try verifying your VRchat game files in Steam:
- Go to Library.
- Right-click VRChat and select Properties.
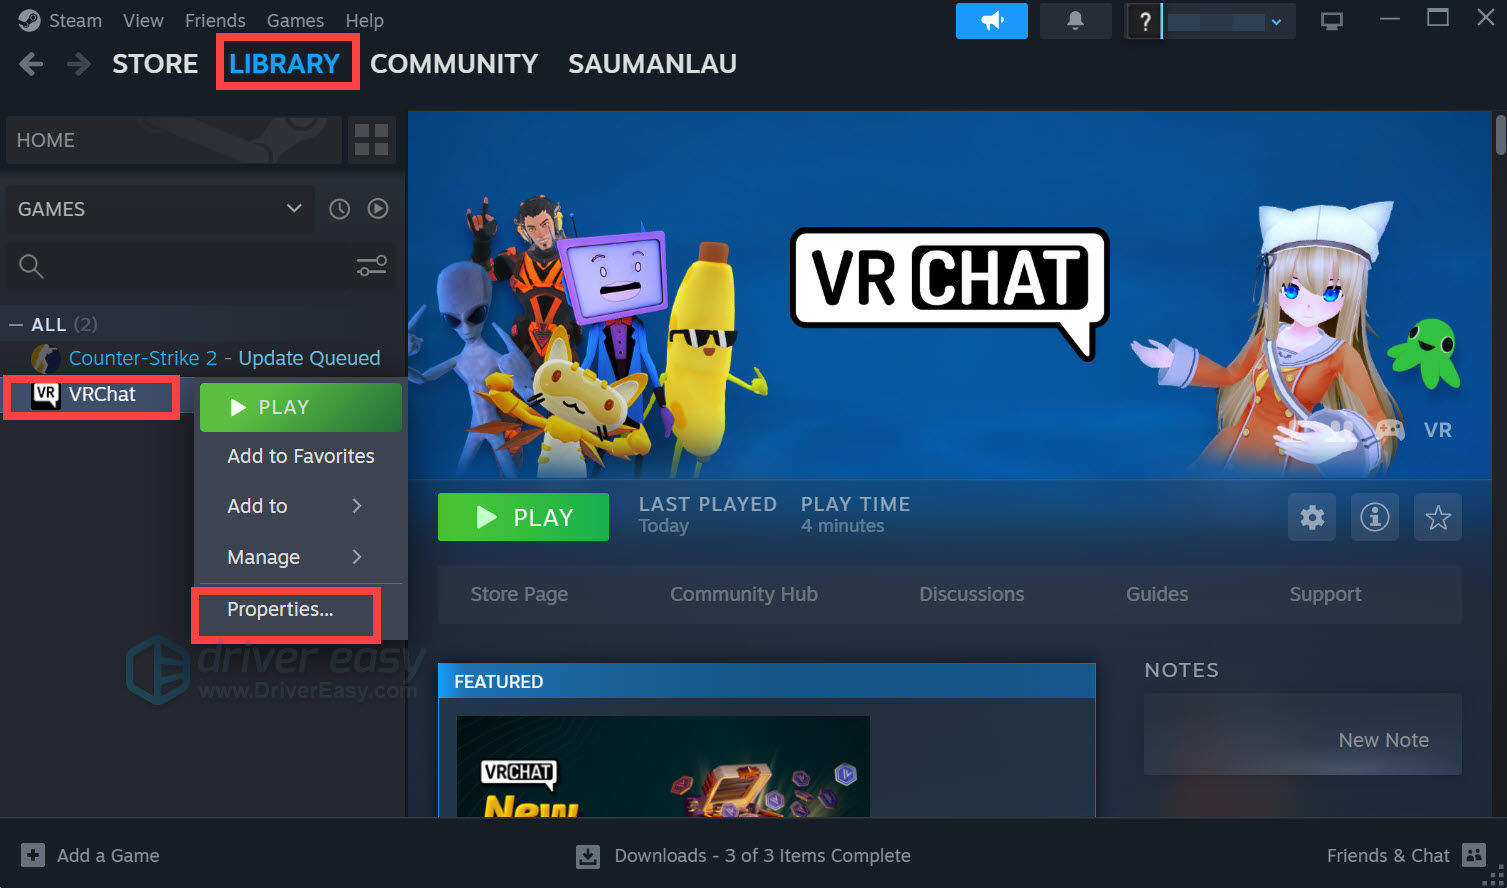
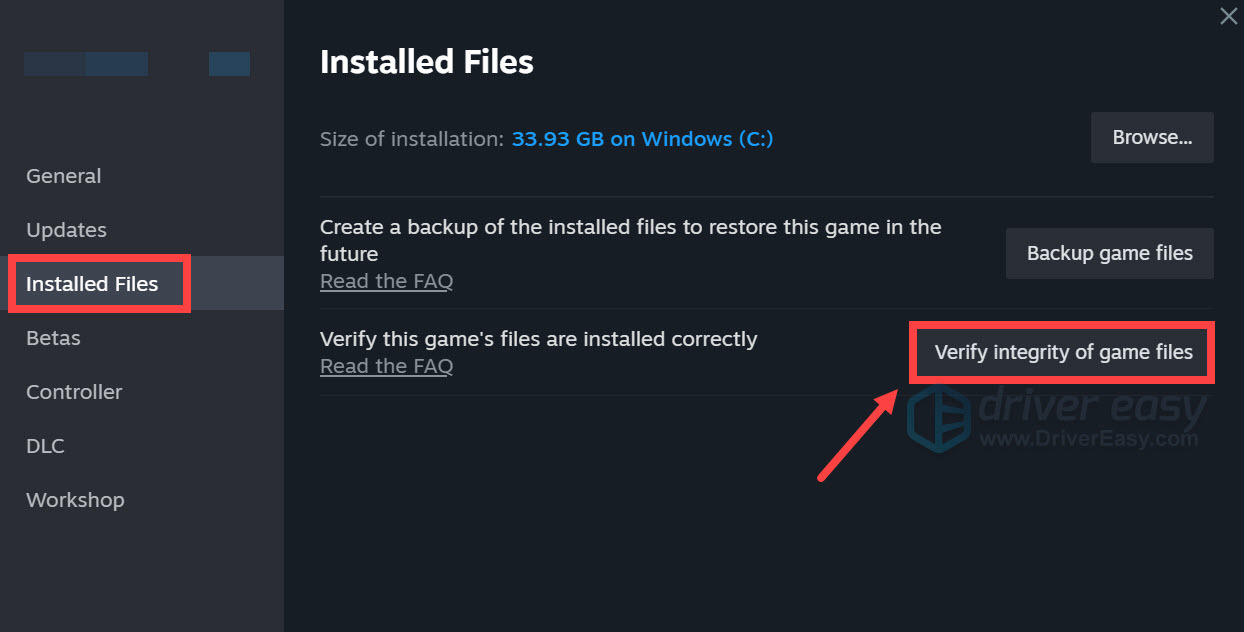
- Select the Installed Files tab and click Verify integrity of game files.
Fix 3: Update your GPU drivers
For game players, the GPU driver plays a significant role in improving your game performance and ensuring a wonderful gaming experience. If the graphics card driver is outdated or corrupt, you will bump into various game issues such as the game crashing or not launching, and in your particular case – VRChat crashing.
There are two ways for you to update your drivers:
Option 1 – Manually – You’ll need some computer skills and patience to update your drivers this way because you need to find exactly the right driver online, download it, and install it step by step.
OR
Option 2 – Automatically (Recommended) – This is the quickest and easiest option. It’s all done with just a couple of mouse clicks – easy even if you’re a computer newbie.
Option 1: Update your graphics driver manually
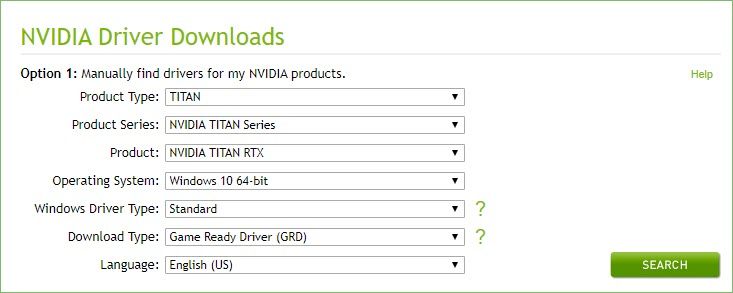
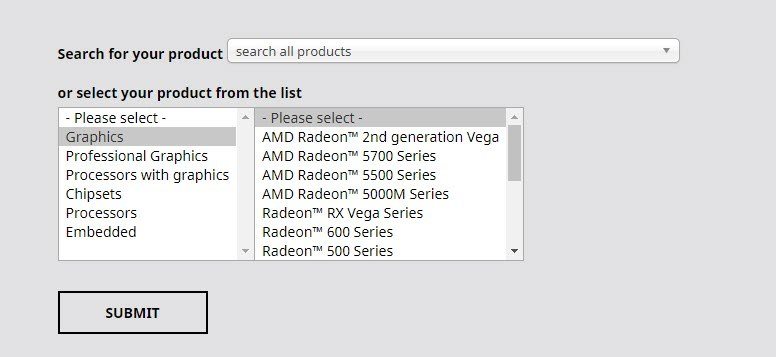
Graphics card manufacturers like NVIDIA and AMD keep releasing new drivers to fix bugs and improve performance, so you can always get the latest driver on their official website.
Once you’ve downloaded the correct drivers for your system, double-click the downloaded file and follow the on-screen instructions to install the driver. After that, don’t forget to restart your computer for the changes to take effect.
Option 2: Update your graphics driver automatically
If you don’t have the time, patience, or computer skills to update the graphics driver manually, you can do it automatically with Driver Easy.
Driver Easy will automatically recognize your system and find the correct drivers for it. You don’t need to know exactly what system your computer is running, you don’t need to risk downloading and installing the wrong driver, and you don’t need to worry about making a mistake when installing.
You can update your drivers automatically with either the 7 days free trial or the Pro version of Driver Easy. It takes just 2 clicks, and you get full support and a 30-day money-back guarantee with the Pro version:
- Download and install Driver Easy.
- Run Driver Easy and click the Scan Now button. Driver Easy will then scan your computer and detect any problem drivers.

- Click the Activate & Update button next to the flagged device to automatically download and install the correct version of this driver.
Or click Update All to automatically download and install the correct version of all the drivers that are missing or out of date on your system (You’ll need the Pro version for this – when you select Update All, you’ll get a prompt to upgrade. If you’re not prepared to purchase the Pro version yet, Driver Easy provides a 7-day trial at no cost, granting access to all Pro features like fast downloads and easy installation. No charges will occur until after your 7-day trial period ends.)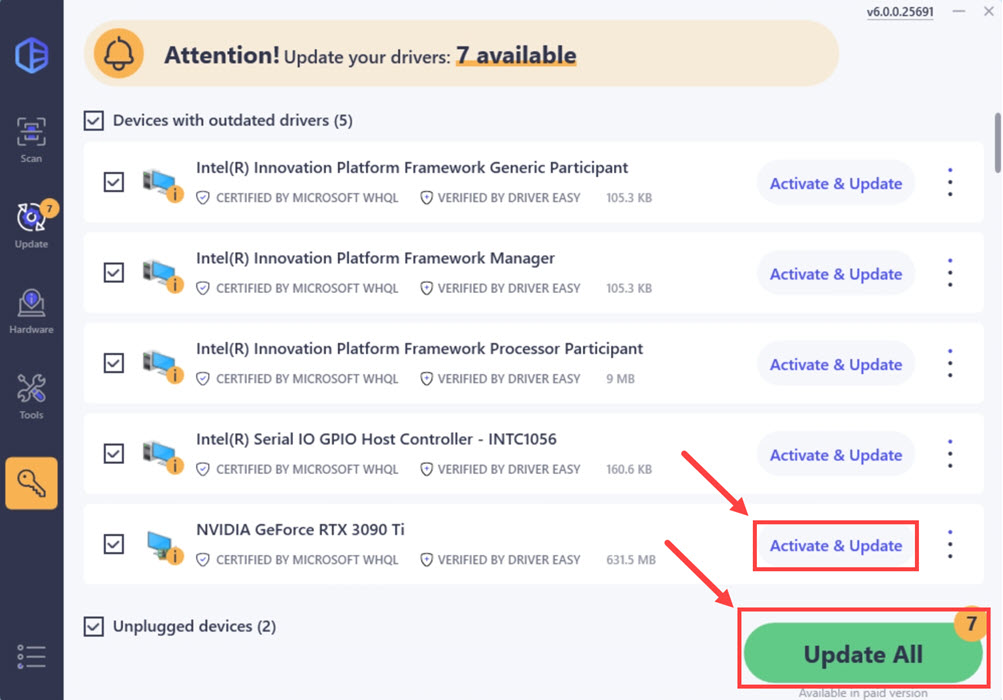
- After updating, restart your computer to take effect.
Fix 4: Allow VRChat through firewalls
VRChat crashing issue can also be caused by firewall blocking, so you need to allow your VRChat through Windows Firewall and any installed third-party antivirus applications.
Step 1: Add your VRChat through the firewall
- On your keyboard, press the Windows key and the R key simultaneously to open the Run box.
- Type control firewall.cpl and hit Enter.

- From the left navigation pane, click Allow an app or feature through Windows Defender Firewall.

- Scroll down and check if VRChat is on the list.
- If not, click the Change settings button.

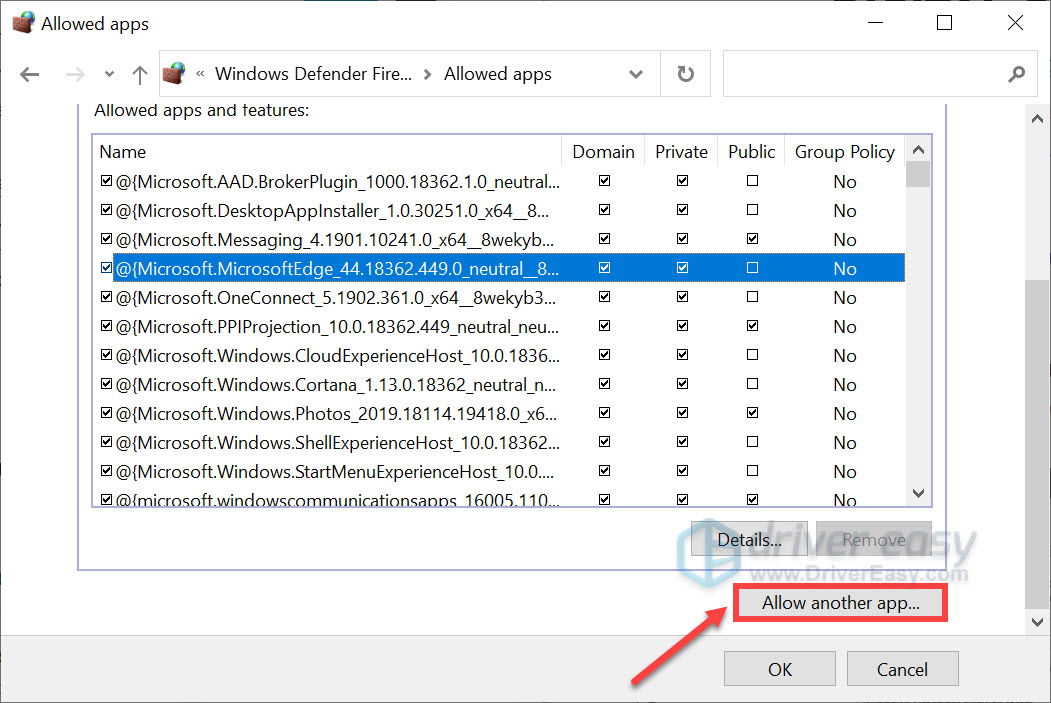
- Click Allow another app….
- Click Browse… and go to the installation folder for VRChat.
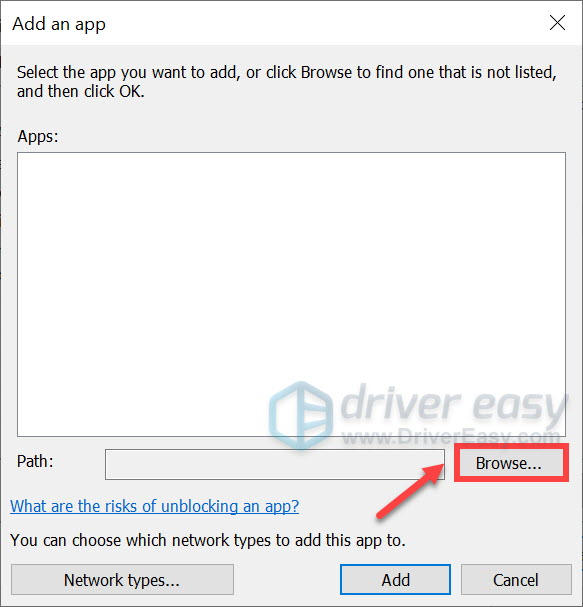
If you don’t know what the installation folder is for your VRChat, simply right-click on its shortcut and select Open file location. - Find VRChat.exe and follow the on-screen instructions to make sure VRChat is added to the list and tick Domain, and Public. Once you’re done, click OK.
Step 2: Add VRChat as an exception in the Antivirus application
If you’ve ever installed an antivirus program, you should follow the links below to exclude your VRChat in your antivirus app.
Fix 5: Delete VRChat files
VRChat official has provided an automatic method for users who are experiencing VRChat crashing or VRChat not launching issues. All you need is to run Command Prompt as administrator and run a few commands:
- On your Windows search bar, type cmd. Right-click Command Prompt from the results and select Run as administrator.
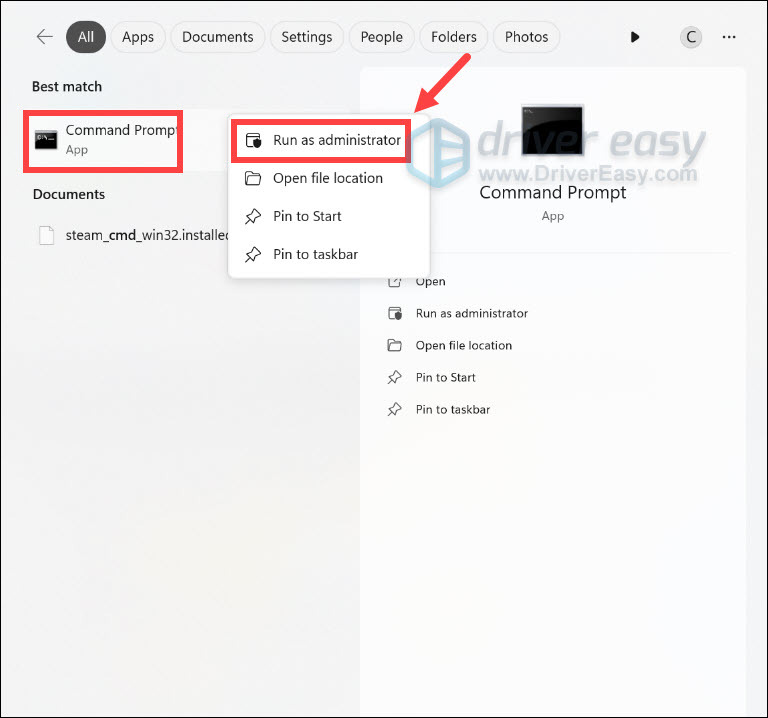
You’ll be prompted for permission. Click Yes to open the Command Prompt. - Copy this command with Ctrl + C, and paste it into the cmd window by right-clicking in the window.
rmdir /S /Q %AppData%..LocalLowVRChatvrchatCookies && rmdir /S /Q %AppData%..LocalLowVRChatvrchatHTTPCache && rmdir /S /Q %AppData%..LocalLowVRChatvrchatUnity && rmdir /S /Q %AppData%..LocalLowVRChatvrchatVRCHTTPCache && rmdir /S /Q %TEMP%VRChat && REG DELETE HKCUSoftwareVRChatvrchat /va - Press Enter to run this command.
- When prompted for permission to delete all keys under the VRChat key, press Y and hit Enter.
- If this command gives you error messages such as not finding the exact file path, you can run the following command in cmd to clear the VRChat cache:
rmdir /S /Q %USERPROFILE%AppDataLocalLowVRChatvrchat && rmdir /S /Q %TEMP%VRChat && REG DELETE HKCUSoftwareVRChatvrchat /va
After clearing the cache, you can check if the VRChat crashing still persists.
You can also check its support article to learn how to do it manually if the command doesn’t work for you.
Fix 6: Create a VRChat account
If the methods above failed to help, then you can try creating a new VRChat account then link your Steam/Oculus account with your VRChat account on VRChat official website.
To merge your Steam account with your VRChat account:
- Log into VRChat with your Steam/Oculus account.
- Open your quick menu, then select Settings.
- Click Upgrade Account near the bottom of that menu, then follow the instructions on the screen to merge your accounts.
Fix 7: Turn off SteamVR Beta
SteamVR is the ultimate tool for experiencing VR content on the hardware of your choice. However, many users reported that SteamVR Beta has caused their VRChat to crash.
You can either turn off SteamVR Beta or roll it back to a more stable version.
Fix 8: Use VPN
Sadly, for many users, the only solution is using a VPN. This is mainly because your ISP has filtered or throttled your internet connection for VRChat, thus causing your VRChat to crash randomly.
If all of these fixes fail, the last resort is using a VPN to connect to VRChat. We suggest Nord VPN as it’s the most powerful and secure VPN at a reasonable price, and you can get Nord VPN coupons to save up to 83% of your money.


