One of the most frustrating issues faced by Warzone fans is related to game textures, such as textures flickering on and off, textures and curves of objects taking forever to render, etc.
If your game is also unplayable due to texture glitches, don’t panic. Here’re some fixes you can try.
Fixes to try:
You don’t have to try them all. Just work your way through the list until you find the one that does the trick for you.
- Update your graphics driver
- Repair corrupt game files
- Change your graphics settings
- Delete game cache files
- Switch to your dedicated GPU
- Stop overclocking your GPU
Fix 1: Update your graphics driver
The graphics processing unit (GPU), or your graphics card, has the most impact on your gameplay experience. And your graphics driver is essential for getting top performance from your GPU. If you’re using an outdated graphics driver, it could result in rendering glitches. So try updating your graphics driver and then running the game again.
You can update your graphics driver manually by going to the manufacturer’s website for your graphics product, (such as AMD, Intel or Nvidia,) and searching for the most recent correct driver. Be sure to choose only driver that is compatible with your Windows version.
If you’re not comfortable playing with device drivers, we recommend using Driver Easy. Driver Easy will automatically recognize your system and find the correct driver for you.
You don’t need to know exactly what system your computer is running, you don’t need to risk downloading and installing the wrong driver, and you don’t need to worry about making a mistake when installing.
- Download and install Driver Easy.
- Run Driver Easy and click the Scan Now button. Driver Easy will then scan your computer and detect any problem drivers.

- Click the Update button next to the graphics driver to automatically download the correct version of that driver, then you can manually install it.
Or click Update All to automatically download and install the correct version of all the drivers that are missing or out of date on your system. (This requires the Pro version which comes with full support and a 30-day money back guarantee. You’ll be prompted to upgrade when you click Update All.)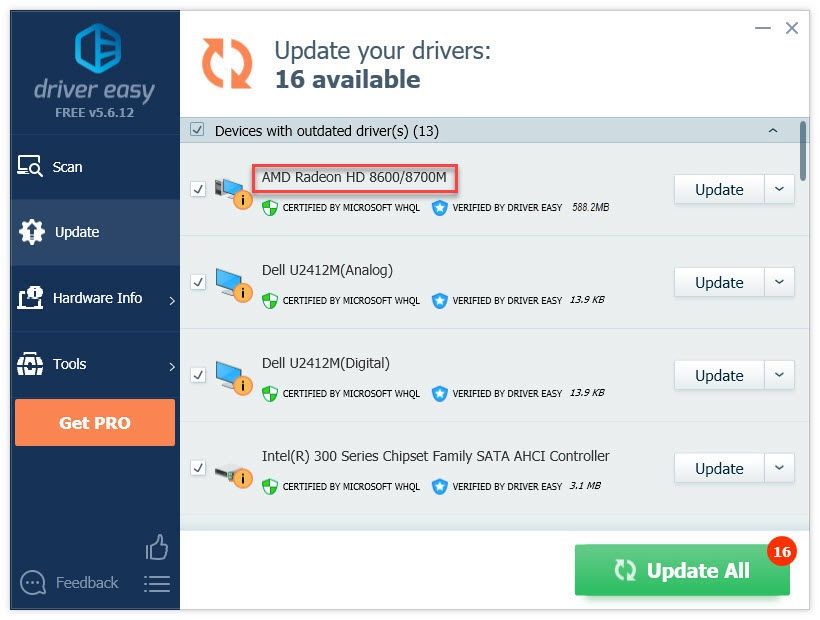
Relaunch Warzone to test your issue. If the texture fails to load as intended, try the next fix below.
Fix 2: Repair corrupt game files
Game issues could happen when certain game files get corrupt somehow. To see if that’s the core issue, you can use the Scan and Repair tool in Battle.net.
- Launch Battle.net and open the game page.
- Click the Gear button then select Scan and Repair.
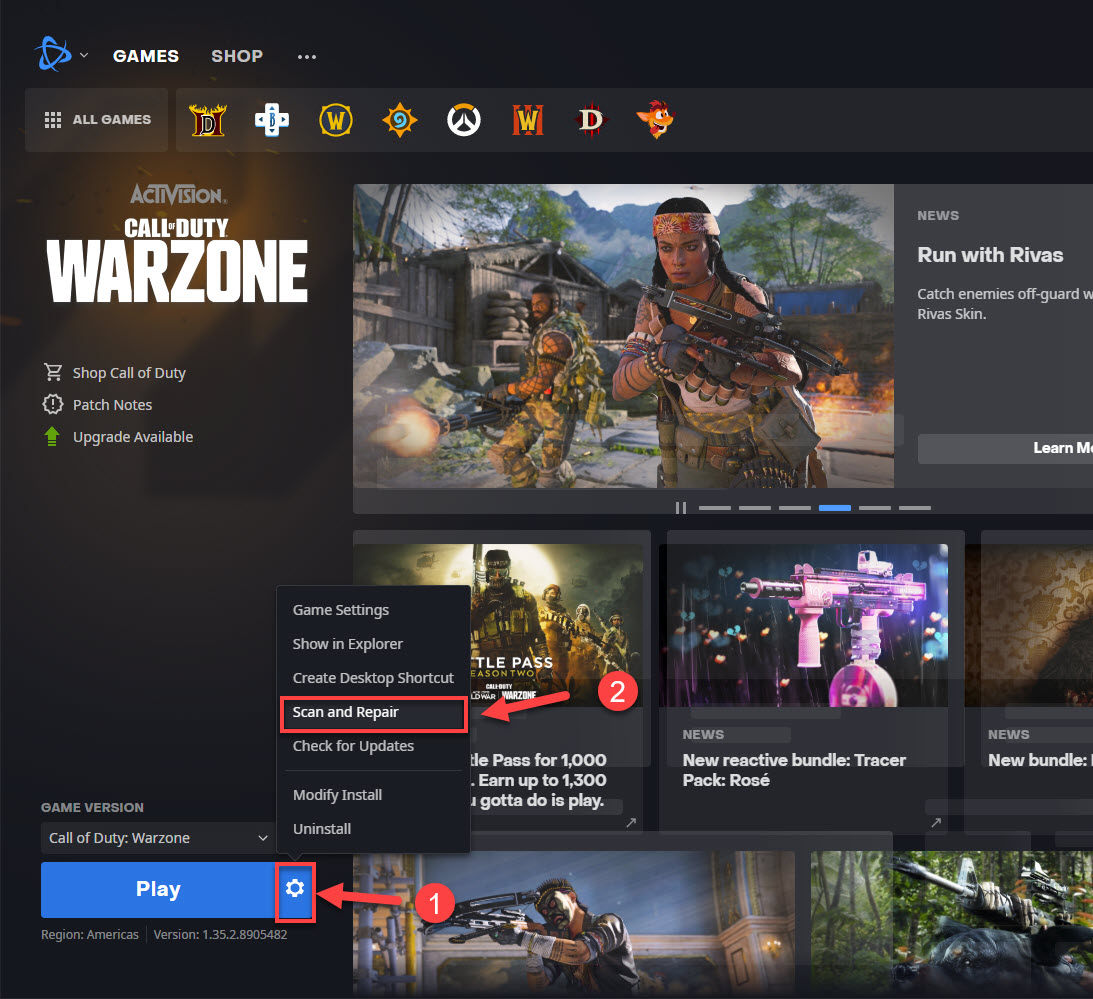
- Wait for the process to be complete and launch your game to test the issue.
If the texture is still not loading correctly, try Fix 3 below.
Fix 3: Change your graphics settings
In some cases, Warzone texture problems can be easily resolved by making a few adjustments in your in-game settings.
- Launch the game.
- Go to Settings > Graphics > Shadow & Lighting.
- Turn off the Cache Sun Shadow Maps and Cache Spot Shadow Maps toggle.
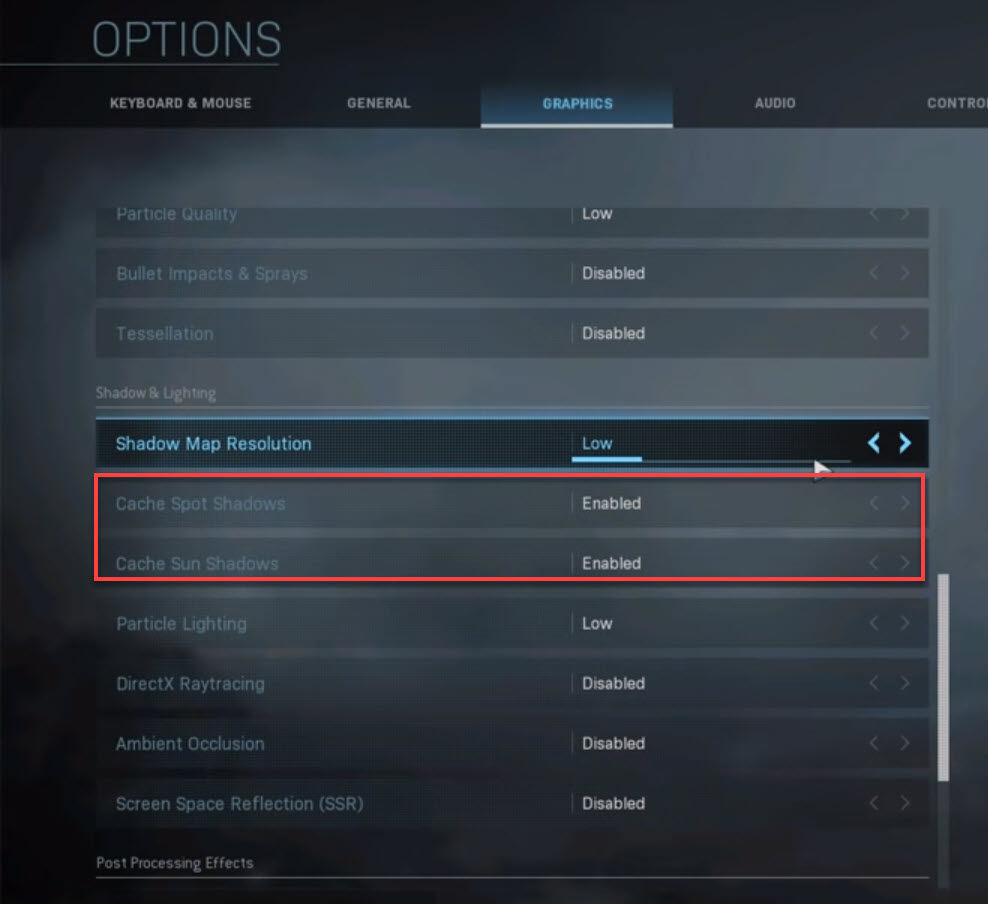
- Save your change and relaunch the game to test the issue.
If adjusting the game settings didn’t resolve your issue, then try the next fox below.
Fix 4: Delete game cache files
Outdated cache files can cause issues with some games. If you’re running into game issues, you can try clearing the game cache files to see if it fixes your problem.
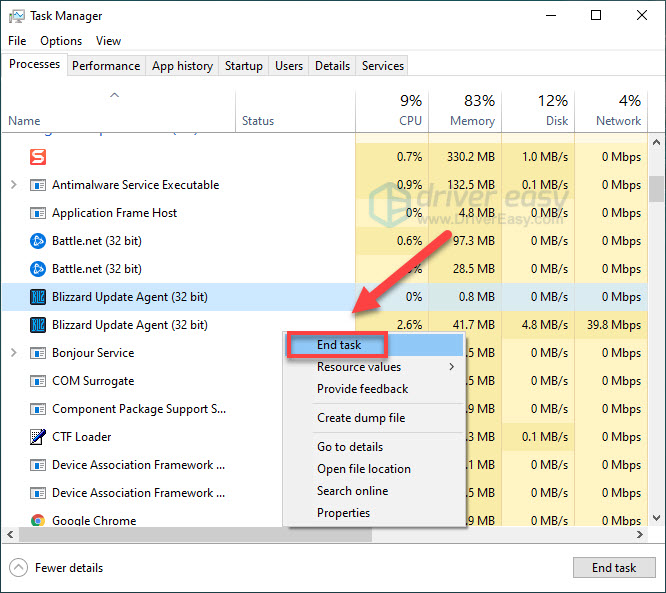
- On your keyboard, press the Ctrl, Shift and Esc keys at the same time to open Task Manager.
- Close the Blizzard Battle.net application, and any Blizzard Battle.net and Blizzard Update Agent processes.
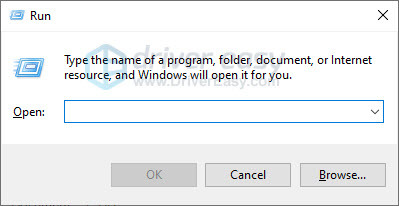
- On your keyboard, press the Windows logo key and R at the same time.
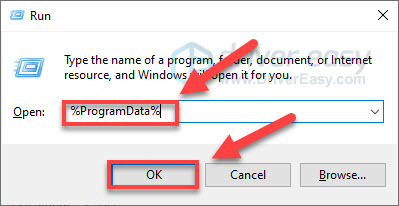
- Copy %ProgramData% and paste it into the text box, then click OK.
- Delete the Battle.net and Blizzard Entertainment folder. (This will not affect your game data.)
- Relaunch Battle.net and Warzone to test your issue.
If the texture issue persists, move on and try the next solution.
Fix 5: Switch to your dedicated GPU
Gameplay is a demanding task that requires a strong GPU. If you have more than one GPU, an integrated and a dedicated one, it could be that the game is running with the wrong GPU.
In this case, you can switch your GPU to the dedicated one to see if it fixes your issue. Here’s how to switch to the dedicated Nvidia GPU and AMD GPU.
Switch to the dedicated Nvidia GPU
- Right-click an empty space on your desktop and select Nvidia Control Panel.
- Navigate to 3D Settings > Manage 3D Settings.
- Open the Program Settings tab and choose Warzone from the dropdown menu.
- Select the preferred graphics processor for this program from the second dropdown. (Your Nvidia GPU should show as High performance Nvidia processor.)
- Save your changes.
Your game should now run with the dedicated Nvidia GPU. Launch it to see if the texture error still exists. If it does, check Fix 6.
Switch to the dedicated AMD GPU
- Right-click an empty space on your desktop and select Radeon Settings.
- Navigate to Preferences > Additional Settings > Power > Switchable Graphics Application Settings.
- Select Warzone from the list of applications. (If Warzone is not in the list, click the Add Application button and select the Warzone.exe file from its installation directory. Then, select it.)
- In the Graphics Settings section, assign the High Performance profile to Warzone.
Your game should now run with the dedicated AMD GPU. Launch it to see if the texture problem got fixed. If not, check the next solution below.
Fix 6: Stop overclocking your GPU
An unstable overclock can also cause gaming issues, such as texture not loading properly. If you have overclocked your card, return it to default clocks and see if the problem goes away. If it does, you will have to apply some more voltage to your card if you want to maintain your overclock.
Hopefully, this post helped. Feel free to leave a comment below if you have any questions or suggestions.


