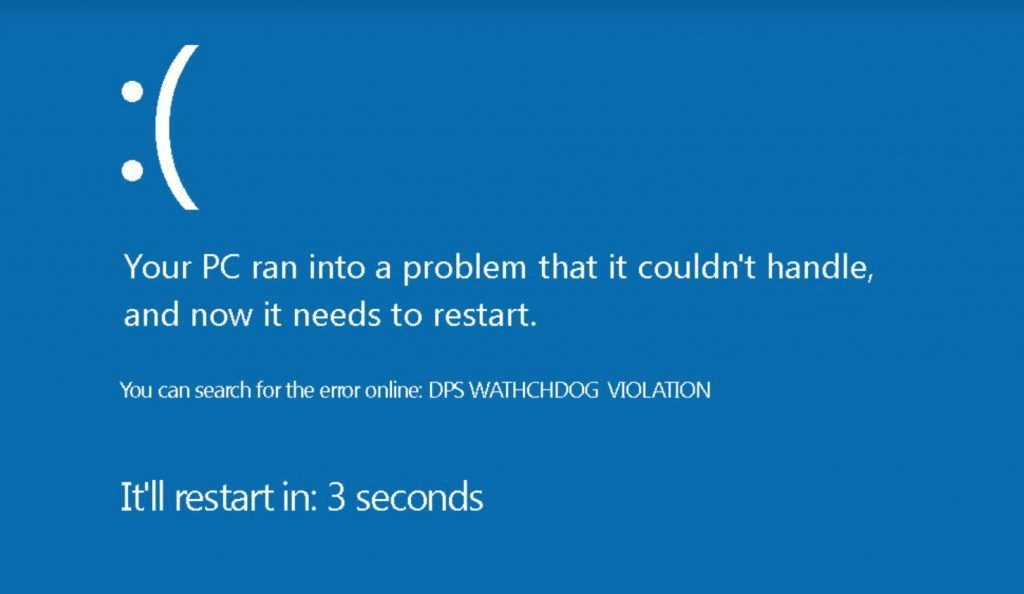
When you are web-surfing, you may meet the 0x00000133 blue screen error. The 0x00000133 is also called DPC_WATCHDOG_VIOLATION bug check. In most of the cases, the error is caused by hardware problems and driver issues.
It’s a common error but no need for you to worry about, this error should be easy to fix. Read on to find how.
Back to normal system
The first thing to do when you meet the 0x00000133 error is to restart your computer and back to the normal Windows system.
How: Usually the system will restart automatically. But if your computer freezes, you can hold your Power button for about 5 seconds to restart it.
If you can’t reboot your computer into normal mode in this way, you can click here to know how to boot into safe mode. After that, restart your computer to see if the system has returned to normal.
6 fixes for 0x00000133 blue screen error:
- Change SATA AHCI controller driver
- Update your driver
- Rollback your driver
- Repair system files
- Repair hard disk errors
- Restore your system
- Reset or reinstall Windows
Method 1: Change SATA AHCI controller driver
Change your Family SATA AHCI Controller into Standard SATA AHCI Controller can help you solve this problem.
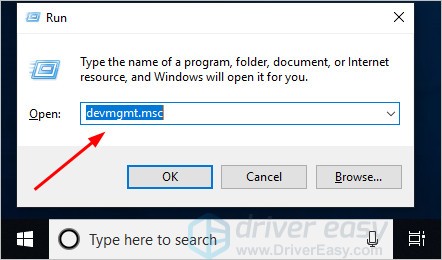
1) On your keyboard, press the Windows logo key and R at the same time, then type “devmgmt.msc” and press Enter.
2) Expand IDE ATA/ATAPI Controllers. Right-click SATA AHCI controller and click Update driver.

3) Click Browse my computer for driver software.

4) Click Let me pick from a list of device drivers on my computer.

5) Click Standard SATA AHCI Controller, then click Next. Then follow the on-screen instructions to finish the process.

6) Restart your computer and then check whether the blue screen will appear or not.
Method 2: Update your driver
One reason for the 0x00000133 error is outdated drivers for your hardware devices. You should verify that your devices have the right and latest drivers, and update those that don’t.
E.g. Check the network drivers (found under the Network Adapters) in Device Manager if you face issues while surfing the internet.
There are two ways you can get the right drivers: manually or automatically.
Manual driver update – You can update your driver manually by going to the manufacturer’s website, and searching for the most recent correct driver. Be sure to choose only drivers that are compatible with your Windows version.
Automatic driver update – If you don’t have the time, patience or computer skills to update your driver manually, you can do it automatically with Driver Easy. Driver Easy will automatically recognize your system and find the correct driver for your device, and your Windows version, and it will download and install it correctly:
1) Download and install Driver Easy.
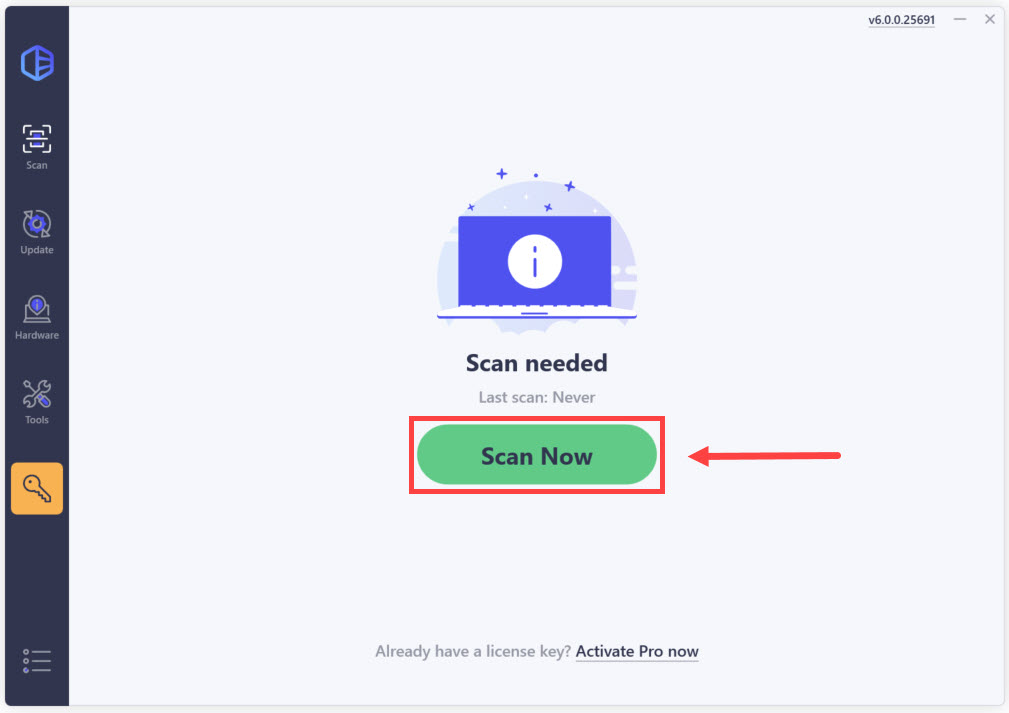
2) Run Driver Easy and click the Scan Now button. Driver Easy will then scan your computer and detect any problem drivers.
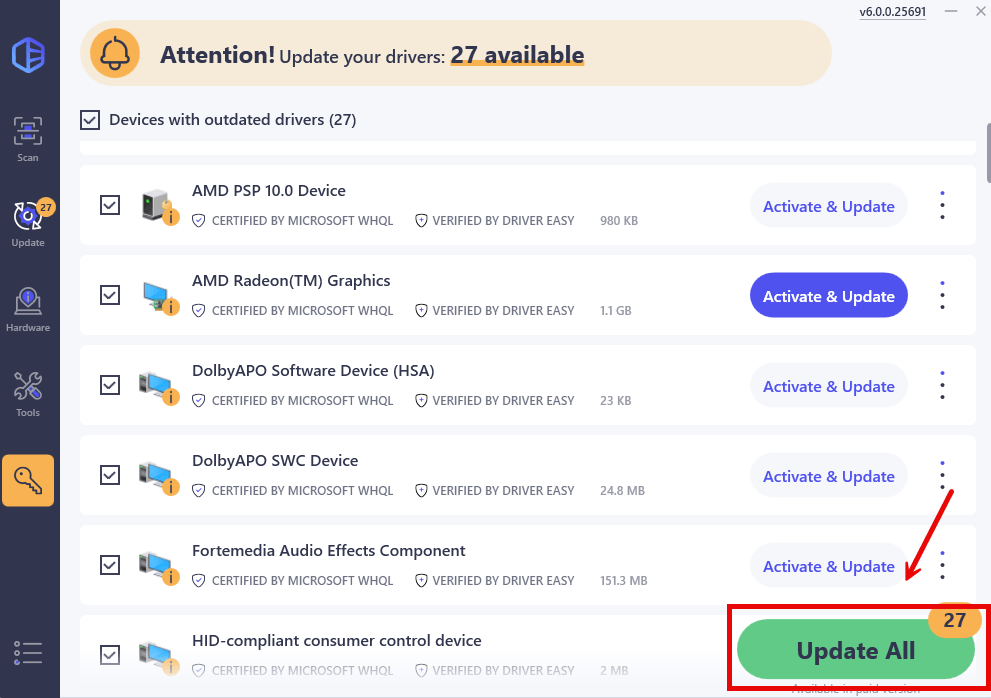
3) Click the Activate & Update button next to the flagged device to automatically download and install the correct version of this driver.
Or click Update All to automatically download and install the correct version of all the drivers that are missing or out of date on your system (You’ll need the Pro version for this – when you select Update All, you’ll get a prompt to upgrade. If you’re not prepared to purchase the Pro version yet, Driver Easy provides a 7-day trial at no cost, granting access to all Pro features like fast downloads and easy installation. No charges will occur until after your 7-day trial period ends.)
4) Restart your computer and check the blue screen problem is fixed or not.
Method 3: Rollback your driver
When you meet the blue screen error, you check your drivers and find they’ve already updated to the latest version. In this case, you have to make sure they are compatible with your system. It’s because sometimes the latest version of device driver doesn’t work properly on your system and start interfering with the computer’s normal start-up process.
So, roll back your driver to the previous version to solve the issue.
In the steps below, we use the graphics driver as an example to demonstrate. You can follow the steps to roll back the driver you think needs to be rolled back.
1) On your keyboard, press the Windows logo key and R together to invoke the Run box.
2) Type “devmgmt.msc” and click OK.

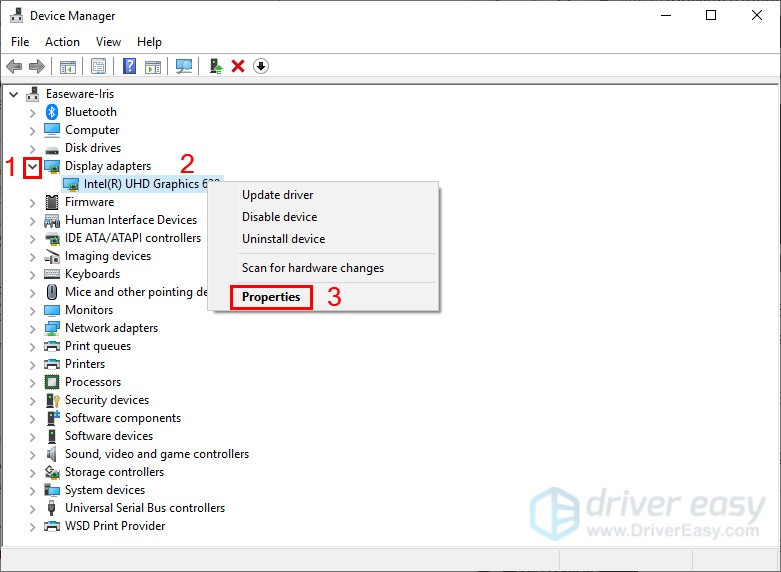
3) In the Device Manager, click the Display adapters, then right-click on your display device software and click Properties.
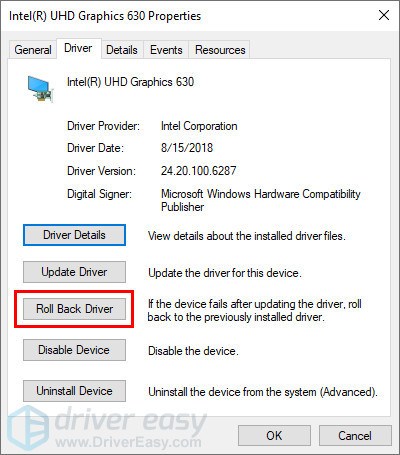
4) Under the Driver tab, click Roll Back Driver, then follow the on-screen instructions to finish the process.
5) Restart your computer, and see if the blue screen error is fixed or not.
Method 4: Repair system files
The Blue Screen of Death (BSOD) Error 0x00000133 often occurs when Windows encounters critical system file corruption. When the system files become corrupted or damaged, Windows may fail to access crucial information it needs to operate, leading to system crashes and the 0x00000133 error.
Windows provides two powerful built-in tools to repair system files:
- System File Checker (SFC): The System File Checker (SFC) is a Windows utility that scans for and repairs corrupted system files. It works by comparing your current system files against clean backups stored in Windows to identify and fix potential errors.
- Deployment Image Servicing and Management (DISM): For cases where SFC can’t fix the problem, DISM provides a deeper level of system repair by accessing Windows’ installation image to replace corrupted files.
Here’s how to run an SFC scan:
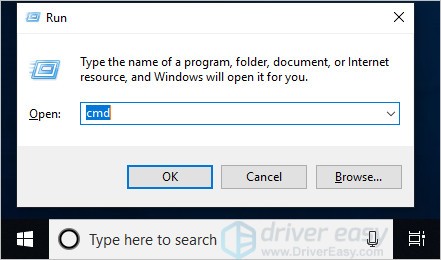
1) On your keyboard, press the Windows logo key and the R key at the same time to invoke the Run box.
2) Type “cmd” and press Shift+Ctrl+Enter together to open Command Prompt in the administrator mode.
3) Type “sfc /scannow” in the window and press Enter. Then wait for the verification is 100% complete.

4) Restart your computer to check the blue screen error is fixed or not.
If the result indicates that there are broken files exist but SFC can’t fix it, you can turn to Deployment Image Servicing and Management (DISM) Tool for deeper examination and repair.
Click here for a tutorial on how to use the DISM Tool.
Method 5: Repair hard disk errors
In some cases, the 0x00000133 blue screen error could be attributed to hard drive corruption.
Check Disk Utility(chkdsk.exe) is a useful tool offered by Windows that can be used to check the hard drive for bad sectors and fix them if possible. Here’s how:
1) On your keyboard, press the Windows logo key and R key at the same time to invoke the Run box.
2) Type “cmd” and press Shift+Ctrl+Enter together to open Command Prompt in the administrator mode.

3) Type the following command line and press the Enter key on your keyboard.
Note: The letter “x” means the disk drive that you want to scan and repair for. If you want to scan and repair C disk, replace “x” with “c”.
chkdsk x: /f

4) After the scanning and repairing process is done, restart your PC and check to see if the blue screen error is resolved.
Method 6: Restore your system
If you can’t figure out which software or driver cause this blue screen error and your computer was fine a few days ago, you can restore your system back to a previous restore point.
This will roll back all the device drivers and software updates to the condition when you created the restore point.
Click here to learn how to backup files.
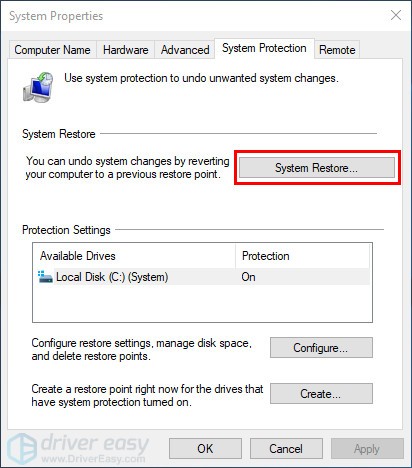
1) On your keyboard, press the Windows logo key + Pause together, then click System protection.
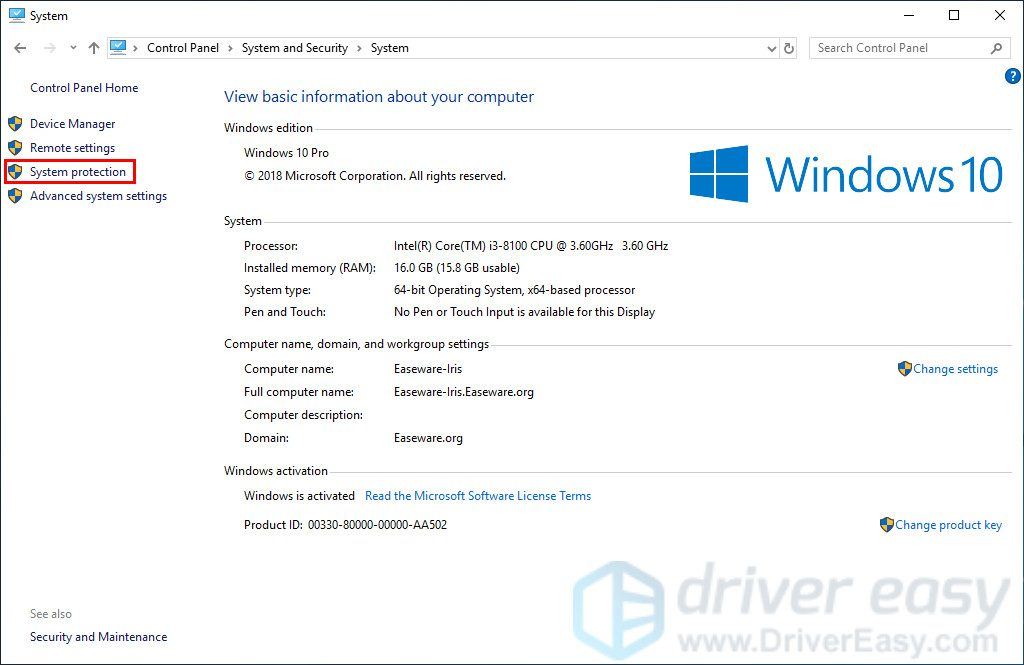
2) Click System Restore.
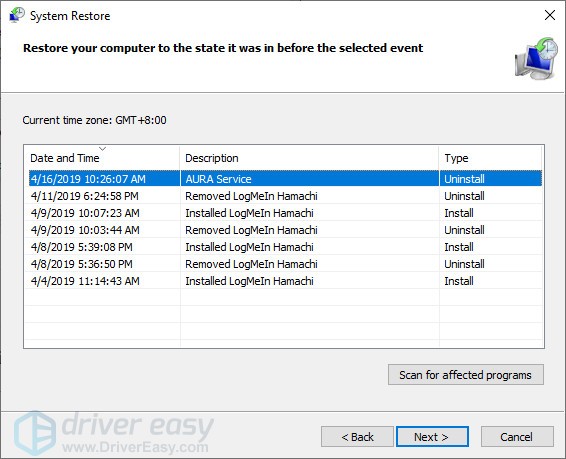
3) Click Next and it will open the below window.
Choose a restore point where the Windows didn’t show any errors. Then follow the on-screen instructions to finish the process.
4) Restart your computer to check the blue screen will appear or not.
Method 7: Reset or reinstall Windows
If all else fails, you may have to reset Windows, or perform a complete reinstallation. These are powerful but time-consuming solutions that should be treated as last resorts. Here’s how to proceed with each option:
How to reset Windows
- On your keyboard, press the Windows logo key and I at the same time to open Windows Settings.
- Click System > Recovery.
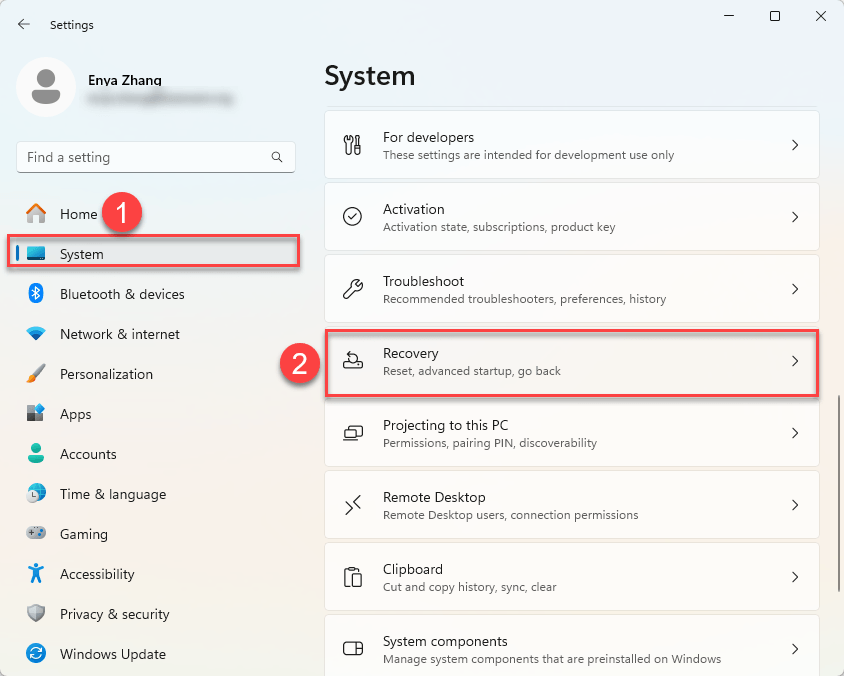
- Click the Reset PC button for Reset this PC.

- Choose either:
- “Keep my files” (preserves your personal files but removes apps and settings)
- “Remove everything” (completely cleans your PC and starts fresh)
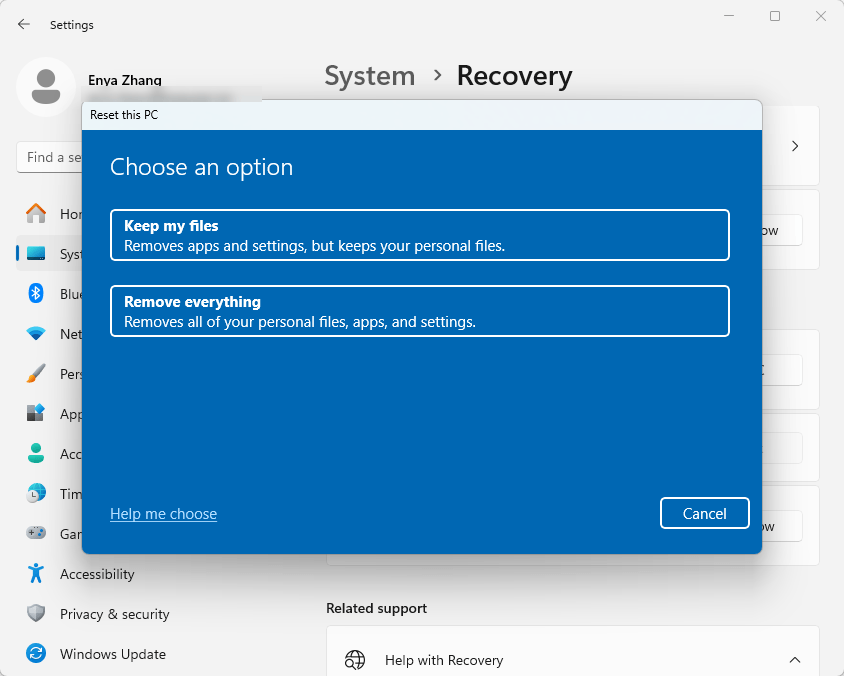
- Follow the on-screen instructions to complete the reset process.
How to reinstall Windows:
For steps on how to reinstall Windows, please refer to this guide.
We hope you find these techniques useful. You’re welcome to leave comments and questions below.


