Audio playing through the speakers while your headphones are plugged in? This is so annoying and you’re not alone! Many users are reporting it.
But the good news is that you can fix it. Try the fixes below.
5 simple fixes to try:
You may not have to try them all; just work your way down the list until you find the one that works for you.
First thing first…
Before you take any troubleshooting steps, restart your computer first if you haven’t yet. A reboot will clear your RAM and give your system a clean slate and fresh start. It’s often the fix for even the most frustrating issues.
Fix 1: Check for loose connections
Unplug and reconnect the headphones to your computer. Make sure that the headset plug is securely connected, then try playing an audio file to test your issue.
If the sound still comes out from speakers instead of headphones, go ahead and try the fix below.
Fix 2: Set your headphones as default audio device
This issue might happen when you have the speakers set as the default audio device. To fix it, you’ll need to set your default output device manually. Follow the instructions below:
1) Right-click the Volume Control icon on the taskbar and select Sounds.

2) Click the Playback tab.

3) Make sure the Headphones are set as the default device. If not, right-click Headphones and Set as default device.

4) Click the OK button.

Play the audio to test your issue. If the sound is still coming from the speaker, try the fix below.
Fix 3: Update your audio/headphone driver
Most audio issues are driver-related, so make sure your drivers are fully updated. If your headphones have a 3.5mm jack that connects to your motherboard, make sure you have the right audio driver to keep your headphone working correctly. If you’re using USB or wireless headphones (which require a driver to function correctly), you’ll need to make sure that you have that particular driver for your device.
You can download the driver for your sound card or headphones manually from the manufacturers’ websites. Just find the driver corresponding with your specific device from the site, then download and install the driver.
If you don’t have the time, patience, or computer skills to update the audio driver manually, you can do it automatically with Driver Easy. Driver Easy will automatically recognize your system and find the correct drivers for it in just one click:
1) Download and install Driver Easy.
2) Run Driver Easy and click the Scan Now button. Driver Easy will then scan your computer and detect any problem drivers.

3) Click the Update button next to the driver to automatically download the correct version of that driver, then you can manually install it (you can do this with the FREE version).
Or click Update All to automatically download and install the correct version of all the drivers that are missing or out of date on your system. (This requires the Pro version which comes with full support and a 30-day money back guarantee. You’ll be prompted to upgrade when you click Update All.)

4) Restart your computer after the update is finished.
If your problem continues to occur, then move on and try the next fix.
Fix 4: Run the Audio Troubleshooter
The audio troubleshooter is a Windows built-in utility that can detect and fix common audio problems automatically. If you run into audio issues, chances are the Audio Troubleshooter can help fix it. Follow the instructions below:
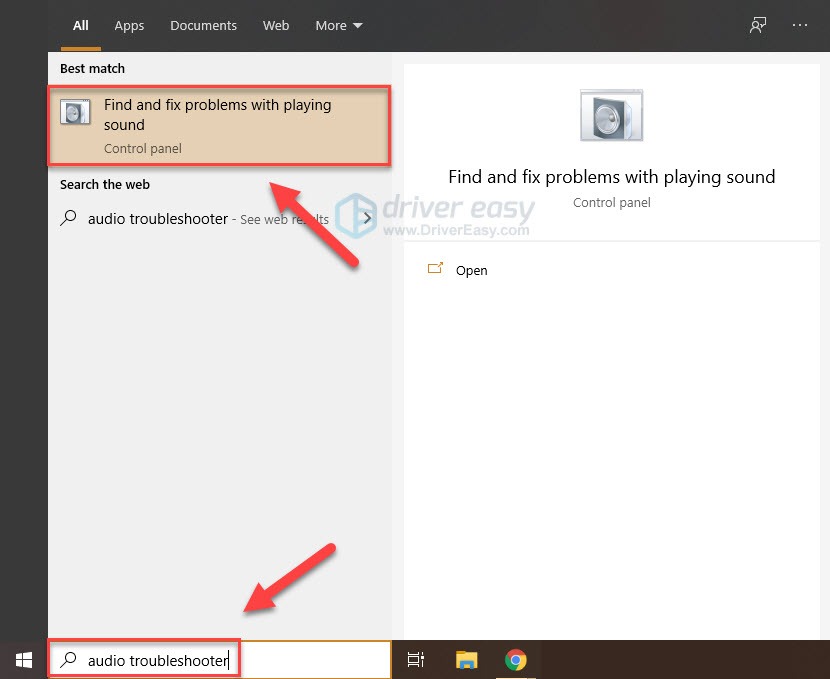
1) On your keyboard, press the Windows logo key and type audio troubleshooter. Then click Find and fix audio playback problems.
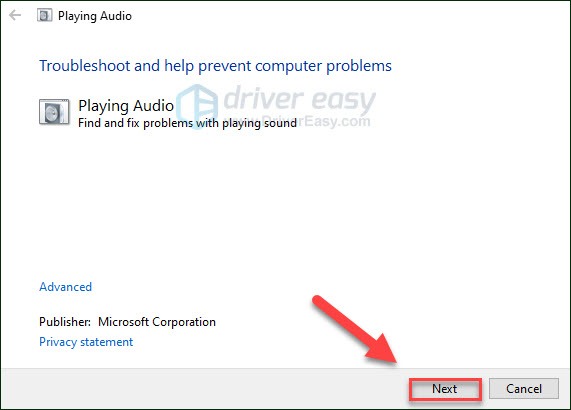
2) Click Next and wait for the scans to complete.
Fix 5: Repair corrupt system files
There are many factors that can cause Windows audio issues, like corrupted or missing Windows system files, registry, and more.
To see if this is the core issue for you, you can run a system scan to detect damaged system components and repair them. System File Checker is a Windows built-in tool that can help you scan for and repair any corruptions of your system files.
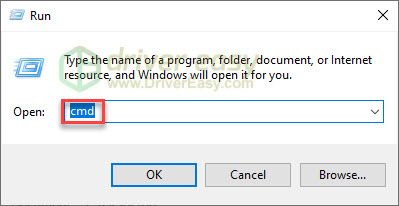
1) On your keyboard, press the Windows logo key and R at the same time.
2) Type cmd, then press the Enter, Shift and Ctrl keys at the same time to run Command Prompt as an administrator.
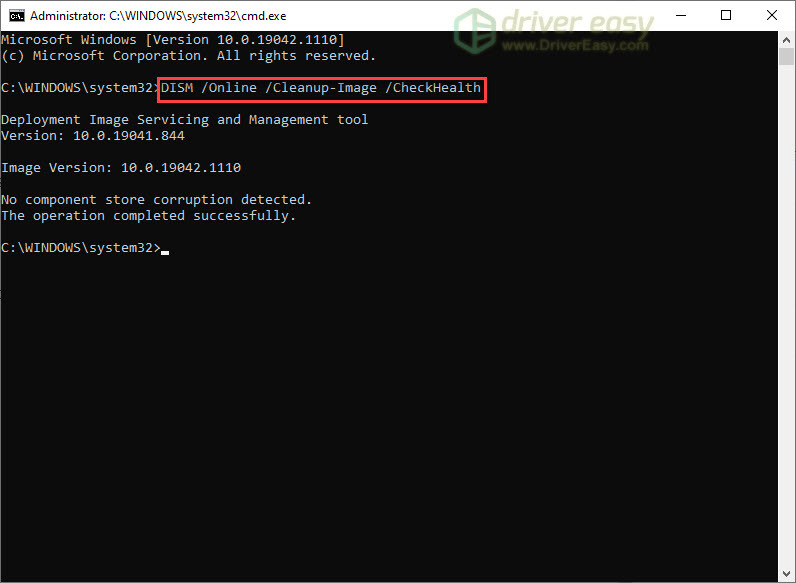
3) Type DISM /Online /Cleanup-Image /Restorehealth and press Enter.
4) At the command prompt, type sfc /scannow, then press Enter.
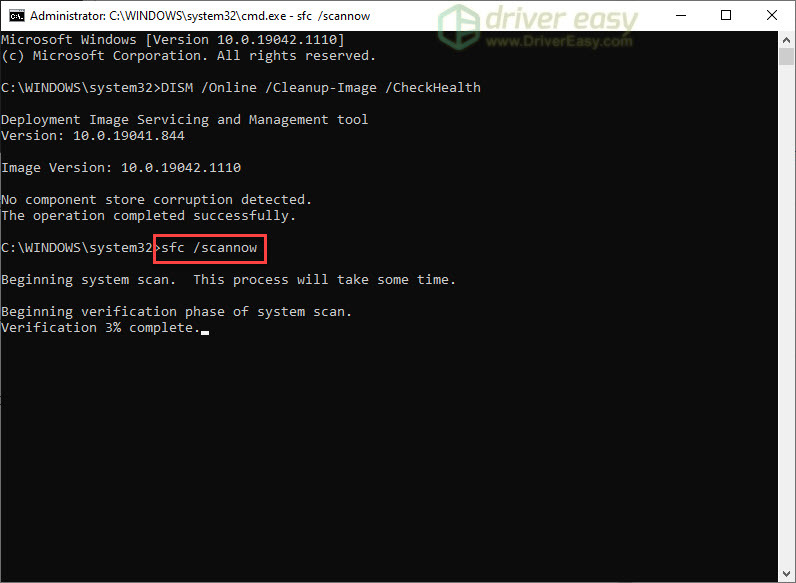
5) Wait for the process to be complete then follow the on-screen instructions to fix your issue.
Hopefully, one of the fixes above helped. If you have any questions or suggestions, please feel free to leave a comment below.


