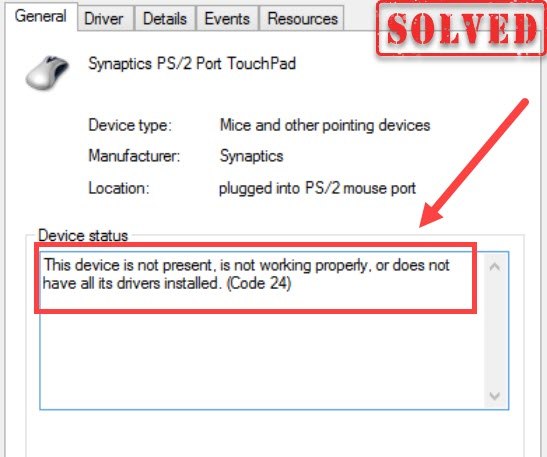
If one of your hardware stops working, and when you open Device Manager an error message pops up: “This device is not present, is not working properly, or does not have all its drivers installed. (Code 24)“, don’t worry as it’s just a common problem, and here’re some working fixes that could help you get rid of this error right away.
Try these fixes
You might not need to try them all; simply work your way down the list until you find the one that solves your problem.
- Restart your computer
- Restart or replug your hardware
- Reinstall or update your device driver
- Install all Windows updates
- Scan and repair your system
Fix 1: Restart your computer
Sometimes you’ll be seeing the Code 24 error when the hardware isn’t properly configured. So before trying anything complicated, you can try restarting your computer and let Windows do the configuration. More often than not, you’ll be surprised how quickly this trick works.
If restarting your computer doesn’t give you any luck, you can take a look at the next fix below.
Fix 2: Restart or replug your hardware
This error could also be hardware-related. It could mean that your hardware isn’t functioning correctly, or isn’t installed properly. You need to make sure there’s nothing wrong with your hardware, and it’s plugged into your PC securely.
If you’re using a device with a power button, try restarting it and see how things go. You can also try to unplug the device, wait a few seconds and plug it back in.
If restarting or replugging your hardware doesn’t help, simply move on to the next fix.
Fix 3: Reinstall or update your device driver
Drivers are an important computer component. They function as a bridge between your hardware and computer. Usually Windows will use or install the generic driver to help set up your hardware, but that’s not always the case.
In some cases, the Code 24 error indicates that you’re using a faulty or outdated device driver. So you’ll have two ways to fix this problem:
Option 1: Reinstall your device driver
You can follow these simple steps to reinstall your device driver:
- On your keyboard, press the Windows logo key and R (the r key) at the same time to invoke the Run box.
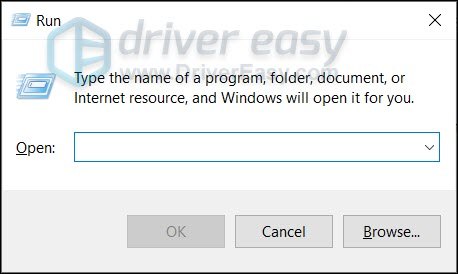
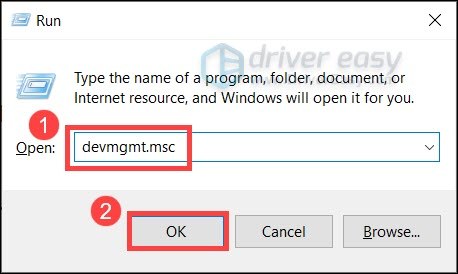
- Type or paste devmgmt.msc. Click OK to open Device Manager.
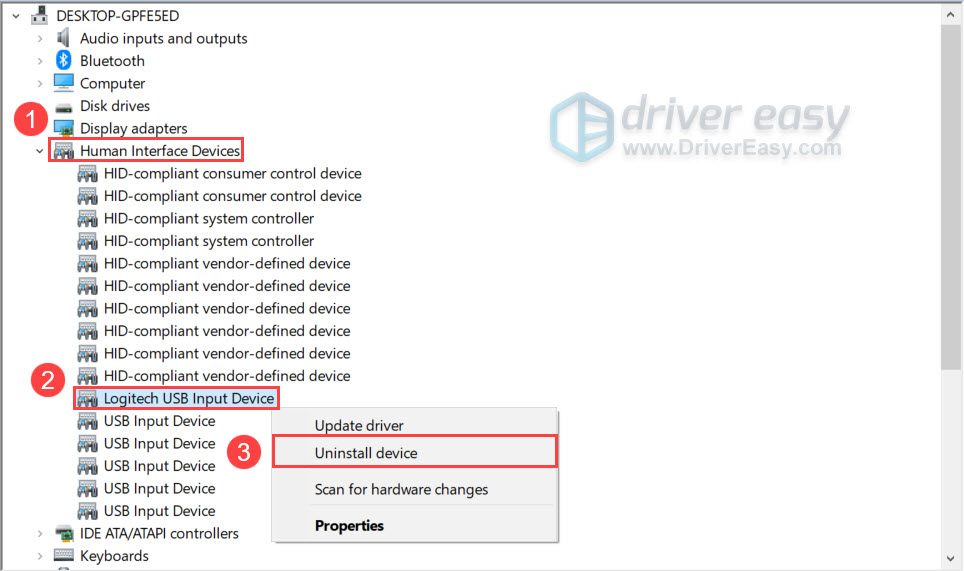
- Click to expand the category your device is in. Right-click the device you need to reinstall driver for, then select Uninstall device. (Here we use the Logitech mouse driver as an example.)
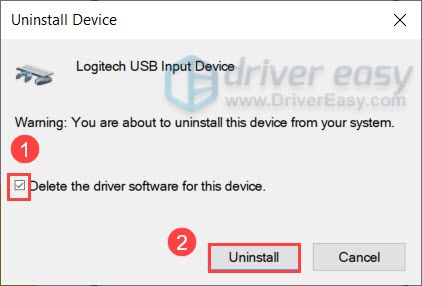
- In the pop-up window, check the box next to Delete the driver software for this device. Click Uninstall.
- Restart your PC.
Once done, you should see that Windows has automatically configure your device with the generic driver.
If the error reappears after reinstalling your driver, you can use another option below to update your device driver.
Option 2: Update your device driver (Recommended)
In most cases, updating the drivers has the same effect as reinstalling them. And you should try it first because it’s often easier and safer.
You can do this manually, if you like, by visiting each manufacturer’s download page, finding the right drivers, etc. But that takes time and computer skills. If you’re not comfortable playing with device drivers, we recommend using Driver Easy. It’s a tool that detects, downloads and installs any driver updates your computer needs.
- Download and install Driver Easy.
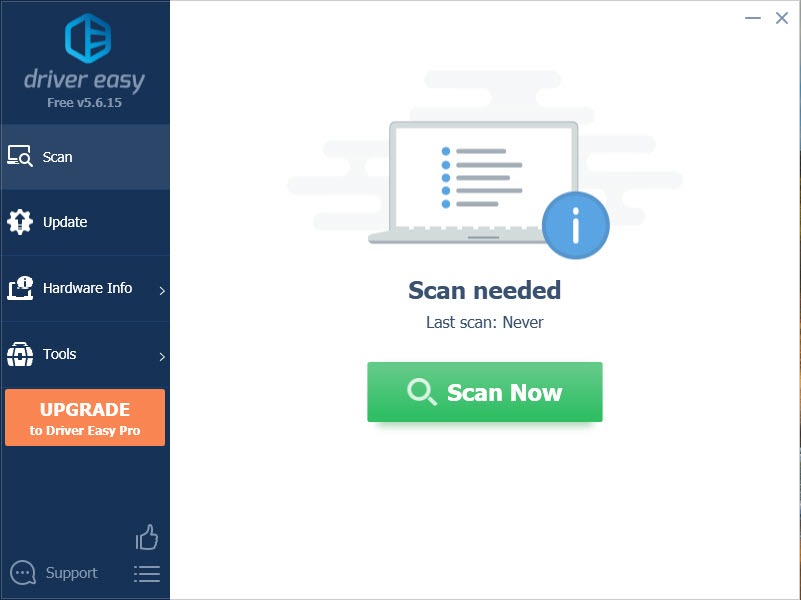
- Run Driver Easy, then click Scan Now. Driver Easy will then scan your computer and detect any problem drivers.
- Click Update All to automatically download and install the correct version of all the drivers that are missing or out of date on your system.
(This requires the Pro version – you’ll be prompted to upgrade when you click Update All. If you don’t want to pay for the Pro version, you can still download and install all the drivers you need with the free version; you just have to download them one at a time, and manually install them, the normal Windows way.)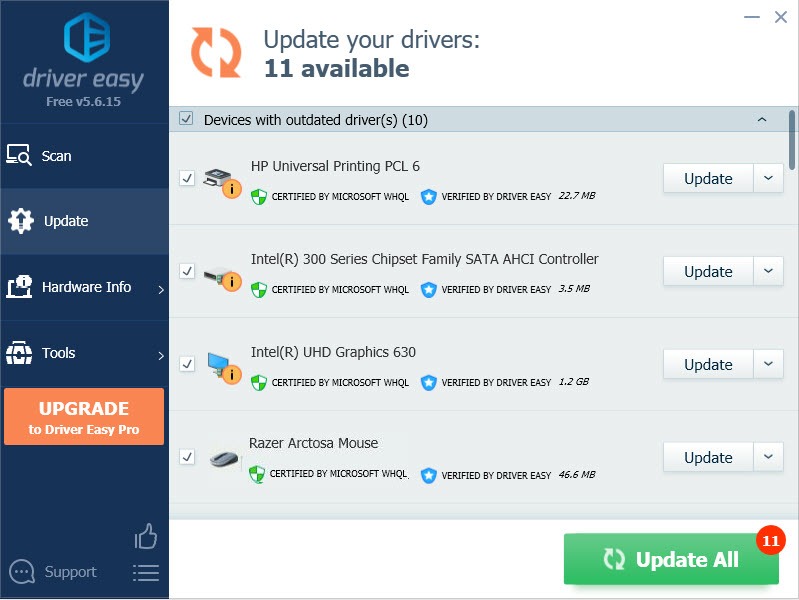
Once you’ve updated your device drivers, restart your computer and check if your hardware is now working.
If this method doesn’t do the trick for you, simply check out the next one below.
Fix 4: Install all Windows updates
Windows updates sometimes include patches that could repair faulty or missing drivers. If you can’t remember when was the last time you installed system updates, do it now as it might save your day.
Here’re the steps of how to install system updates on Windows 10, 8 or 7:
Windows 10
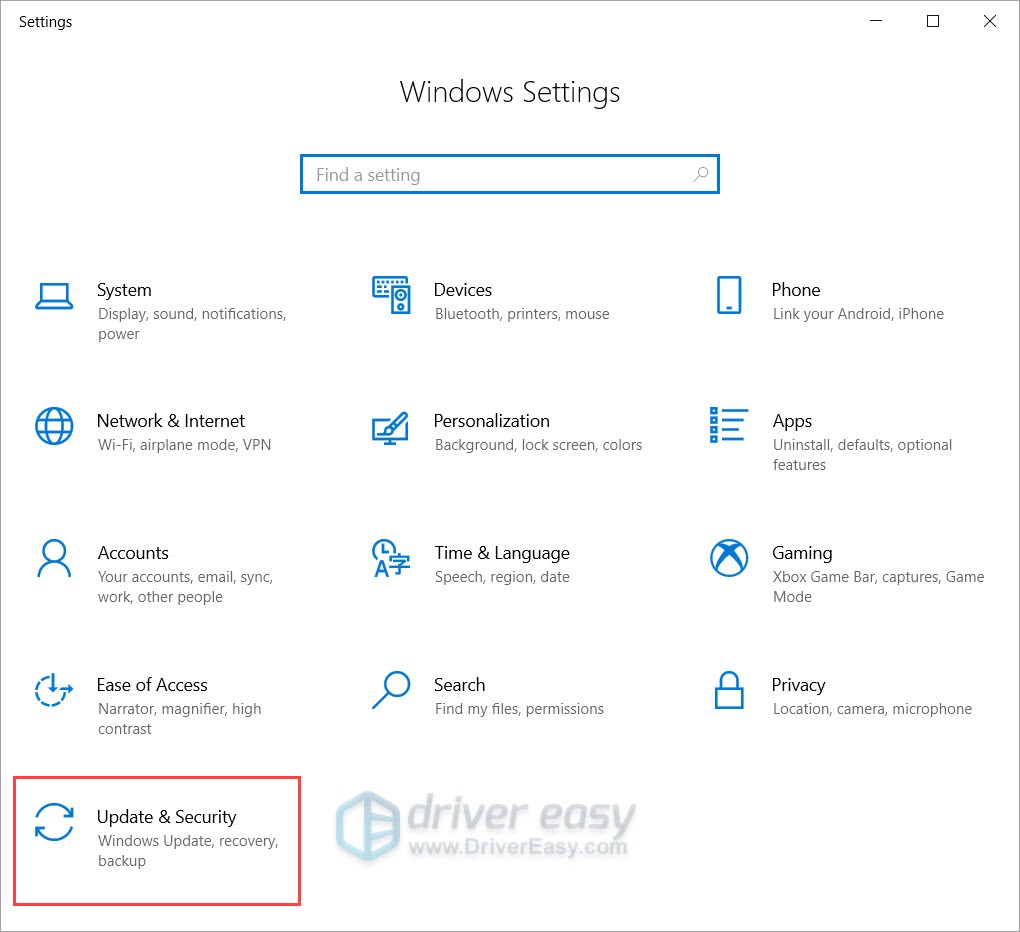
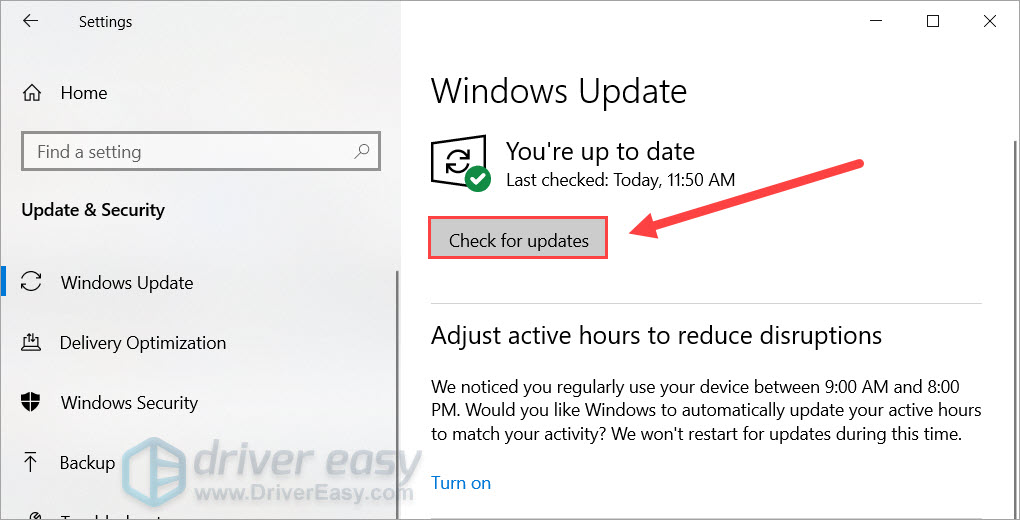
- On your keyboard, press the Windows logo key and I (the i key) at the same time to open the Windows Settings app. Click Update & Security.
- Click Check for updates. It might take up to an hour for Windows to download and install available updates.
Windows 8
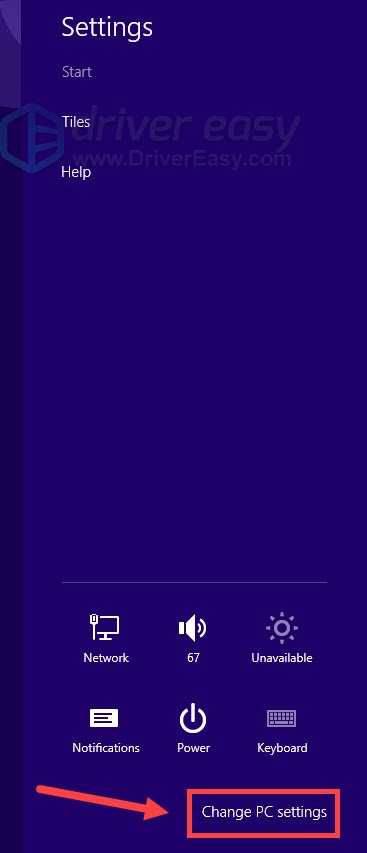
- On your keyboard, press the Windows logo key and I (the i key) at the same time. From the right menu, click Change PC settings.
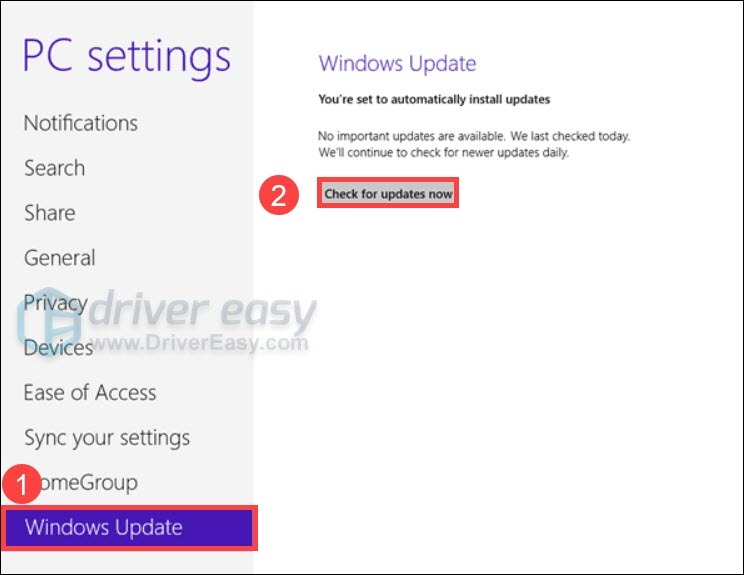
- From the left menu, select Windows Update. Click Check for updates now.
Windows 7
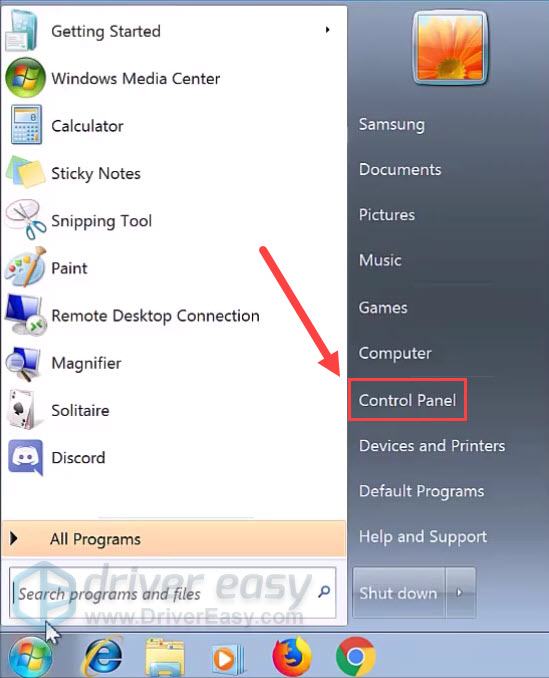
- On your keyboard, press the Windows logo key. Select Control Panel.
- Select System and Security.
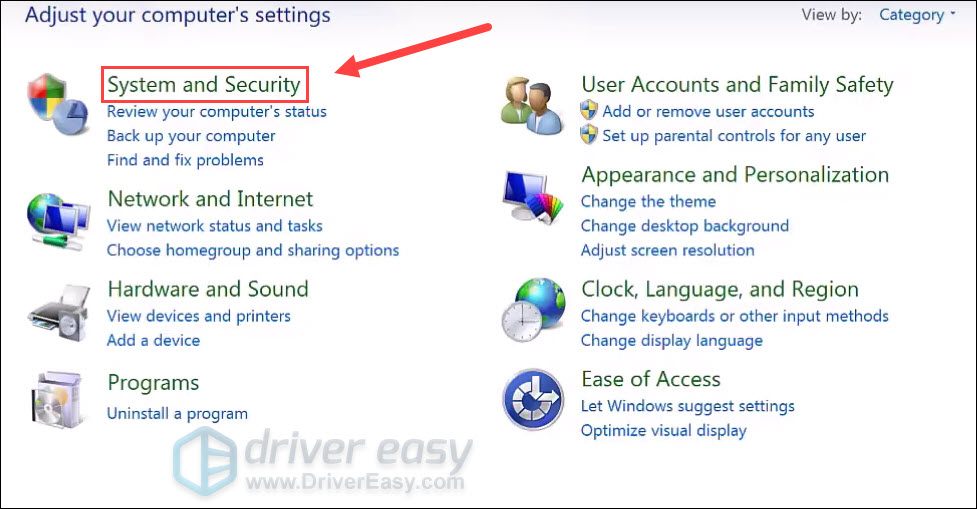
- Click Windows Update.

- Click Install updates. It’ll take a while (up to 1 hour) for Windows to install all the updates.
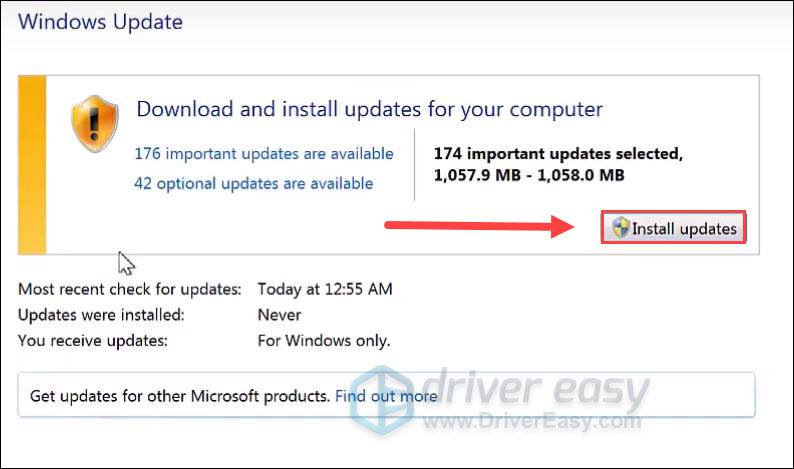
After installing all the system updates, restart your PC and check if the error has gone.
Fix 5: Scan and repair your system
If none of the fixes can help you, it might indicate a more serious issue with your system. Or it could be a faulty hardware. Either way, you can use a built-in system repair tool to find out what went wrong exactly.
Step 1. Scan corrupt files with System File Checker
1) On your keyboard, press the Windows logo key and R at the same time to open the Run box. Type cmd and press Ctrl+Shift+Enter to run Command Prompt as administrator.

Click Yes when prompted for permission to make changes to your device.
2) In the Command Prompt, type the following command and hit Enter.
sfc /scannow
3) System File Check will begin to scan all system files and repair any corrupted or missing ones it detected. This may take 3-5 minutes.
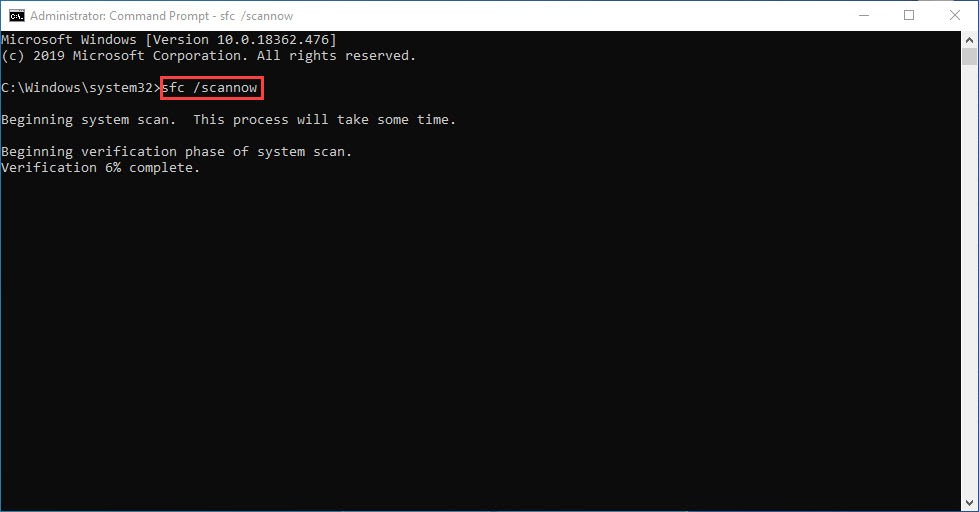
4) You may receive something like the following messages after the verification.
- no errors
- it fixed some errors
- could not fix all errors
- could not fix errors at all
- ……
No matter what message you receive, you can try running dism.exe (Deployment Image Servicing and Management) to further scan the health of your PC.
Step 2. Run dism.exe
1) Run Command Prompt as admin and enter the following commands.
- This command line will scan the health of your PC:
dism.exe /online /cleanup-image /scanhealth
- This command line will restore the health of your PC:
dism.exe /online /cleanup-image /restorehealth
2) After the restore health process finishes, you may get some error messages.
- If restore heath gave you errors, you can always try this command line. This will take up to 2 hours.
dism /online /cleanup-image /startcomponentcleanup
- If you get Error: 0x800F081F with the restore health scan, reboot your PC and run this command line.
Dism.exe /Online /Cleanup-Image /AnalyzeComponentStore
If the System File Check finds any files corrupted, follow the on-screen instructions to repair them, and then restart your computer for the changes to take full effect.
So these are the fixes for your Code 24 error. If you have any ideas or questions, feel free to drop a line and we’ll get back to you.


