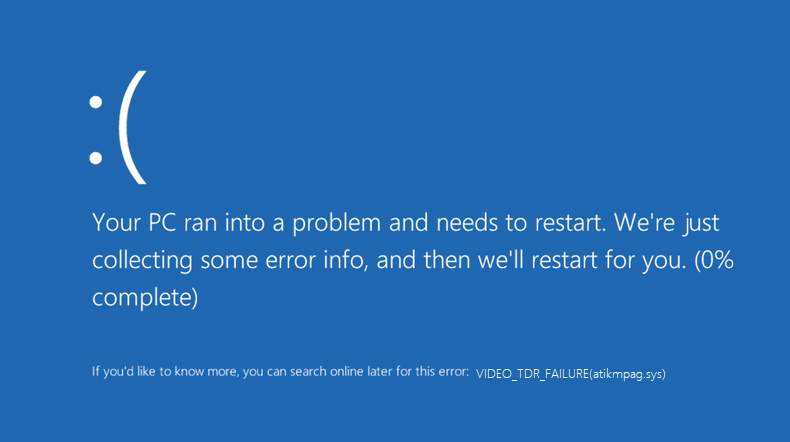
If you’re using an AMD or ATI graphics card, and you’re seeing a VIDEO_TDR_FAILURE blue screen error, you’re not the only one. Many Windows users have reported this frustrating error. And as annoying as a blue screen of death error can be, it’s possible to fix.
We’ve put together 3 fixes you can try. You may not need to try them all; just work your way down until you find the one works for you.
3 fixes for Video_TDR_Failure
- Update display card and chipset drivers
- Re-install drivers in Safe Mode
- Replace atikmpag.sys or atikmdag.sys file
If you’re with NVIDIA or Intel graphics cards, the error codes would be nvlddmkm.sys and igdkmd64.sys.
What is VIDEO_TDR_FAILURE error?
TDR stands for Timeout, Detection, and Recovery components in Windows. It’s supposed to be there to help stop BSODs by resetting the GPU and/or driver when there’s an issue causinga lengthy delay. If this problem happen too many times in a row, a blue screen of death occurs.
1: Update display card and chipset drivers
If your PC fails to reset the display driver and recover from a timeout, a Video_TDR_Failure blue screen will appear. You can update your chipset and display card driver to fix it. Here’s how:
Manual driver update – You can update your chipset and display card drivers manually by going to the device manufactures’ website and searching for the most recent correct drivers. Note that if the Video_ TDR_Failure error happens on your laptop, you should go to the laptop manufacturer for the display card and chipset driver. If you don’t have the time, patience or computer skills to update your drivers manually, you can always do it automatically with Driver Easy.
Automatic driver update – Driver Easy will automatically recognize your system and find the correct drivers for both your chipset and your AMD video card. You don’t need to know exactly what system your computer is running or who all the manufacturers are, you don’t need to risk downloading and installing the wrong driver, and you don’t need to worry about making a mistake when installing. You can update your drivers automatically with either the FREE or the Pro version of Driver Easy. But with the Pro version it takes just 2 clicks (and you get full support and a 30-day money back guarantee):
1) Download and install Driver Easy.
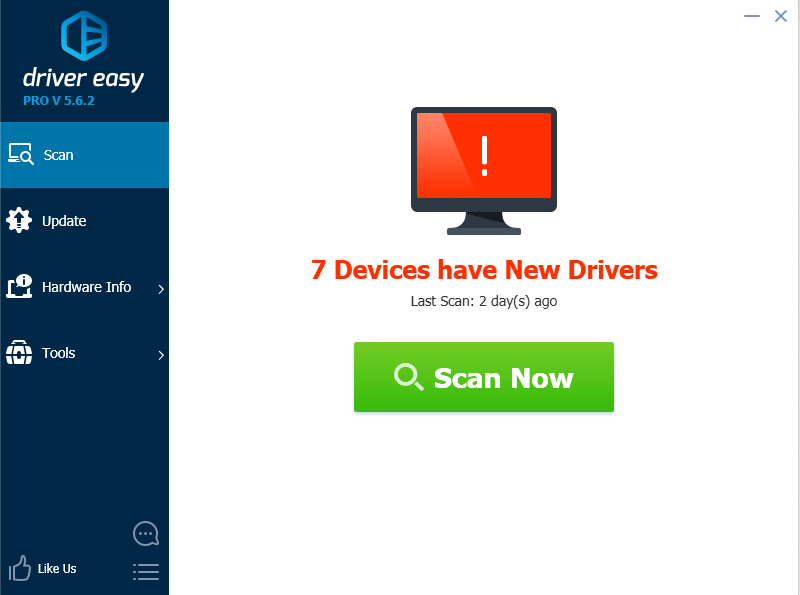
2) Run Driver Easy and click the Scan Now button. Driver Easy will then scan your computer and detect any problem drivers.
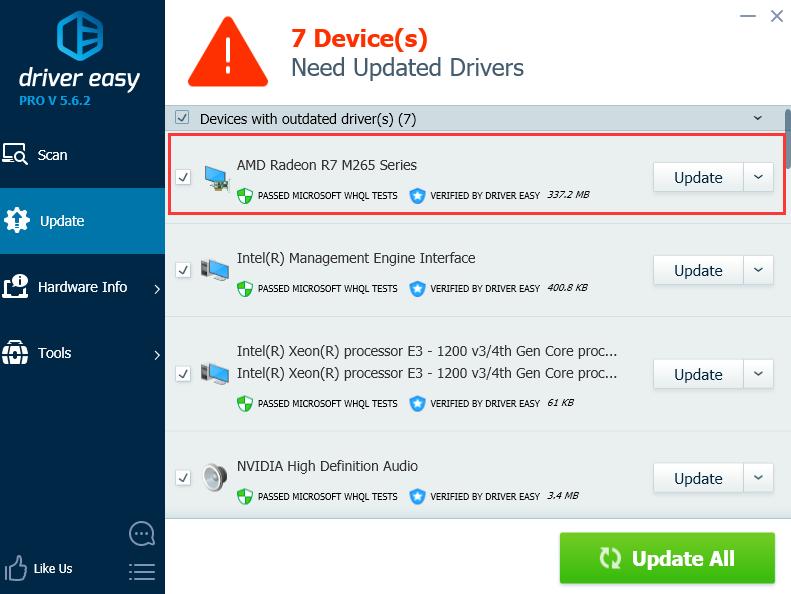
3) Click the Update button next to your flagged AMD video card (or your chipset) to automatically download the correct version of that driver, then you can install it manually(you can do this with the FREE version).
Or click Update All to automatically download and install the correct version of all the drivers that are missing or out of date on your system (this requires the Pro version – you’ll be prompted to upgrade when you click Update All).
2: Re-install drivers in Safe Mode
IMPORTANT: You need to have the latest version of Intel chipset driver and ATI/AMD graphics card driver in your computer. You can download them for free with Driver Easy first.
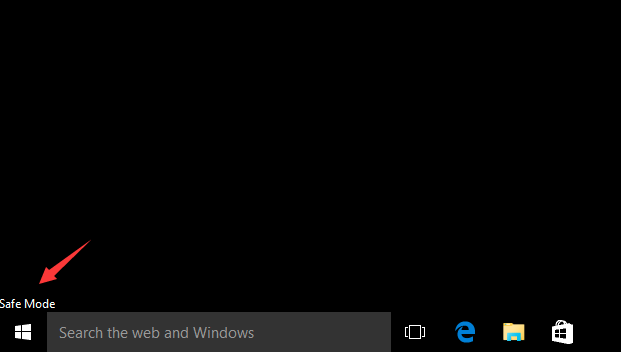
1) Go to Safe Mode in Windows 10.
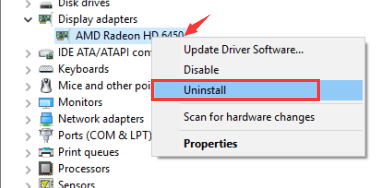
2) Go to Device Manager. Expand Display adapters. Right-click AMD/ATI device and click Uninstall.
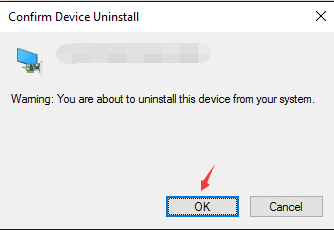
3) Click OK.
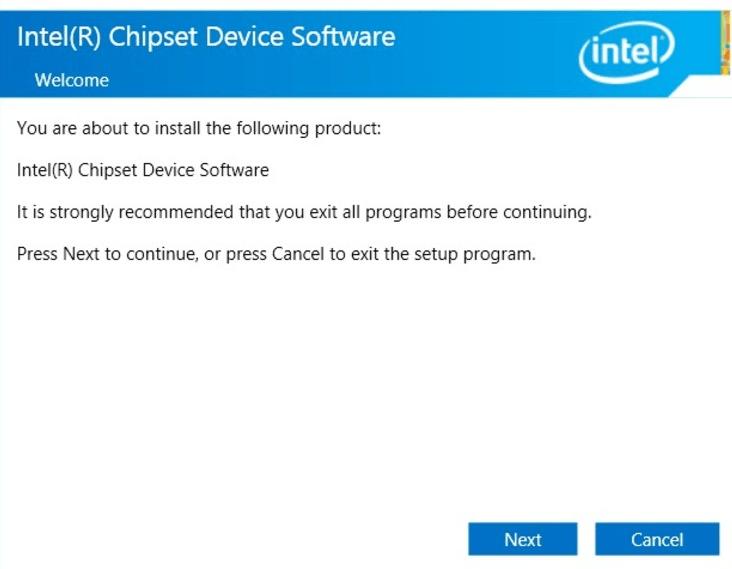
4) Reboot your computer into the normal mode. Then install the latest version of Intel chipset driver for your computer.
5) Reboot your computer again.
6) Try installing the latest version of the ATI/AMD device driver on your computer again.
3: Replace atikmpag.sys or atikmdag.sys file
If you’ve tried the methods above but the problem still occurring, you may need to replace the file in atikmpag.sys or atikmdag.sy (which is listed in your blue screen error).
1) Download the latest version of ATI/AMD graphics card driver first. You can do so with Driver Easy.
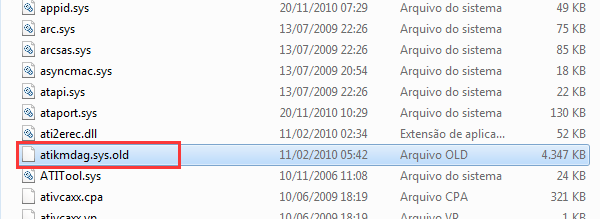
2) Follow the path C:\Windows\System32\drivers and locate the atikmdag.sys (or atikmpag.sys) file. Rename it as atikmdag.sys.old (or atikmpag.sys.old).
It’s important that you change only the one listed in your blue screen error.
3) Go to ATI directory (Usually in C:\ATI) and find the file atikmdag.sy_ or atikmpag.sy_.

Copy the file to your desktop.
If you can’t find it in this folder, try typing the name of the file into the search box in the Start panel.
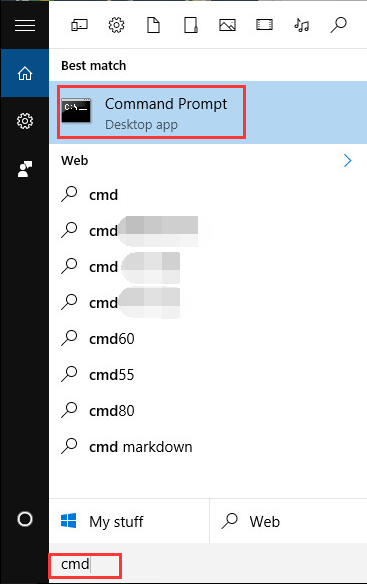
3) On your keyboard, press the Windows logo key. Type cmd and click Command Prompt.
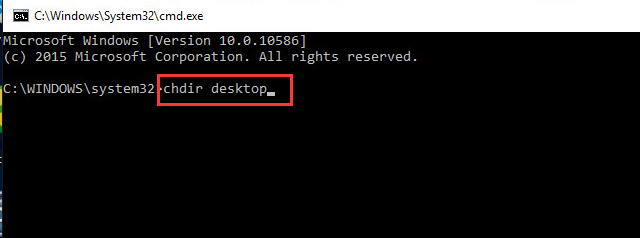
4) Type chdir desktop and press Enter to change the directory to your Desktop.
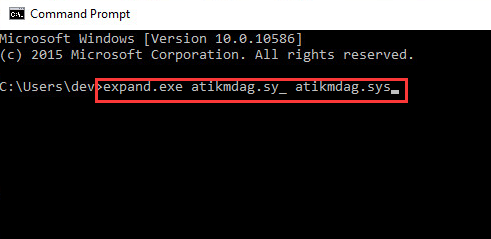
5) Type expand.exe atikmdag.sy_ atikmdag.sys and press Enter.
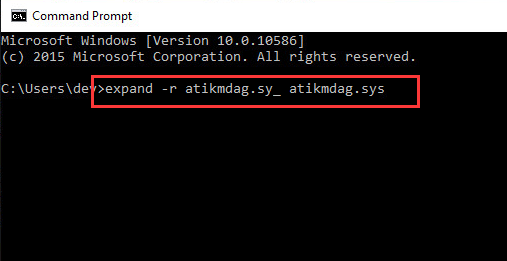
Or, type in expand -r atikmdag.sy_ atikmdag.sys and press Enter.
6) When the expansion is complete, copy the new atikmdag.sys file from your Desktop to C:\Windows\System32\Drivers.
7) Restart your computer and the problem should be resolved.


