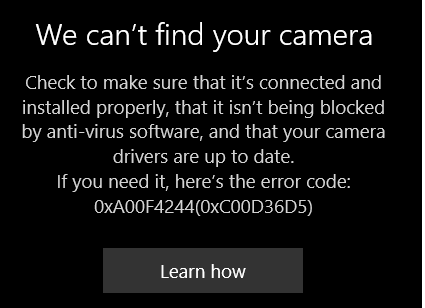
If you can’t turn on your webcam or camera successfully and get an error message saying “We can’t find your camera” in Windows 10, and the error code is 0xA00F4244, the cause might be antivirus software that’s blocking the webcam or camera, or the problematic camera drivers. To resolve the problem, you can try solutions in this post.
Solution 1: Make sure the camera app is turned on
Follow these steps:
Windows 10
1. Press Win+I (Windows key and I key) at the same time to open Settings Window.
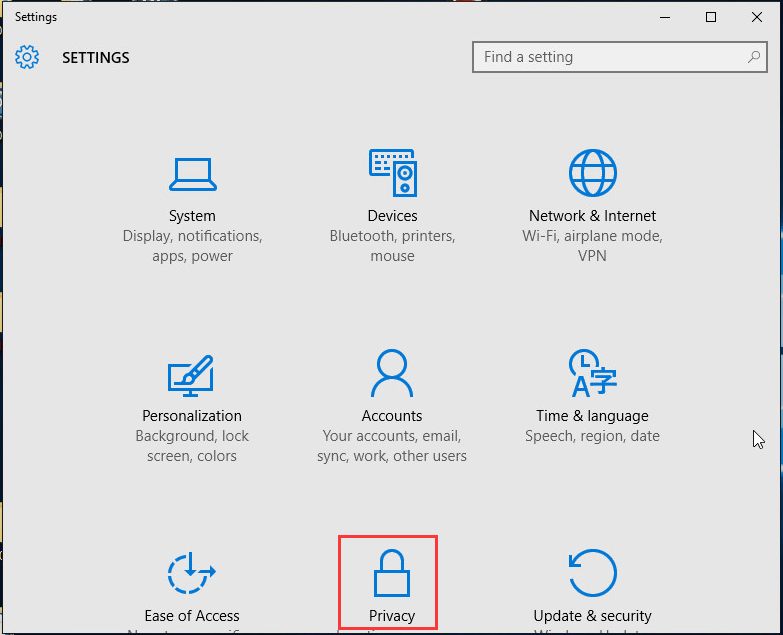
2. Click Privacy.
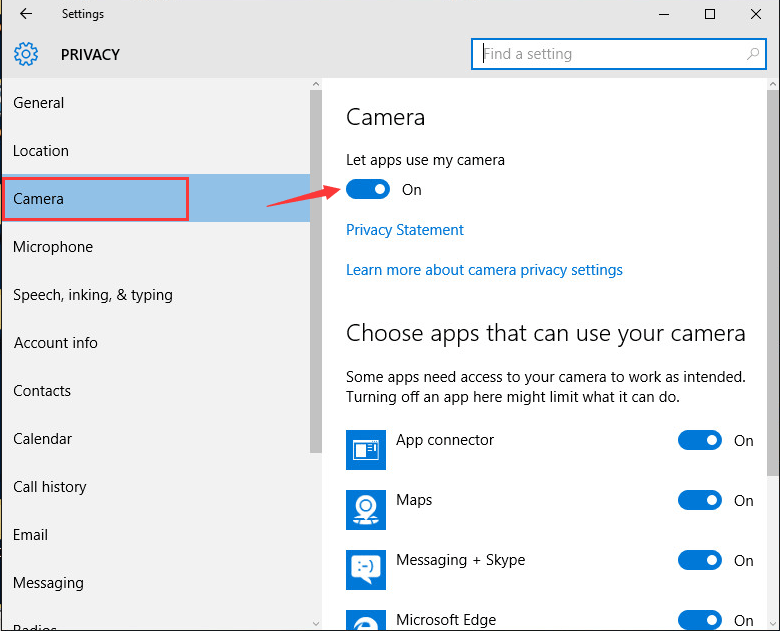
3. Click Camera in the left pane. If it is off, turn it on.
Windows 11
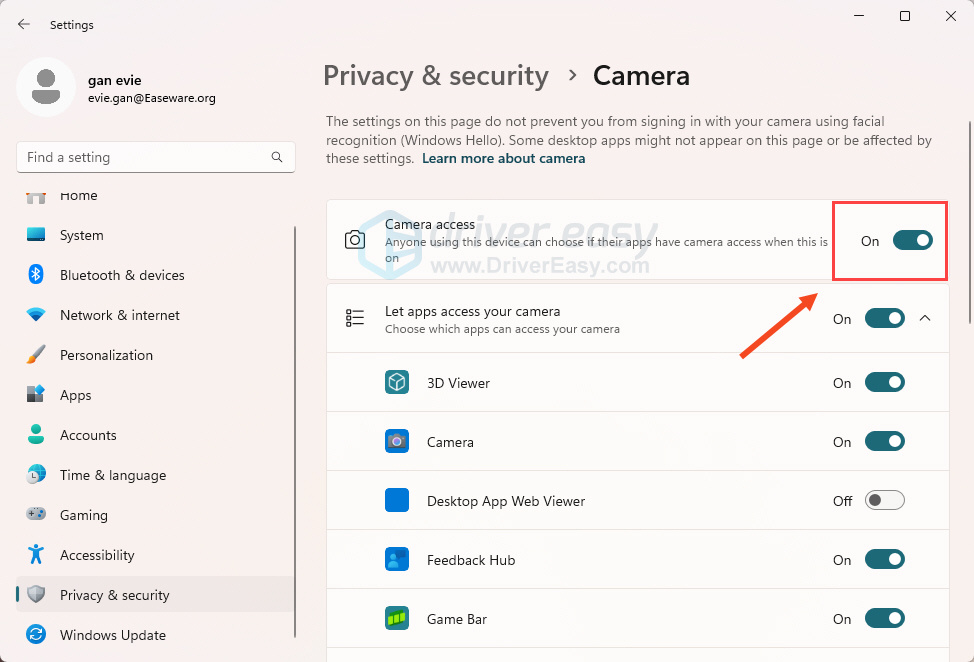
- Press the Windows key and I simultaneously to open the Settings Window.
- Select Privacy & security on the left panel, then click Camera under the App permission on the right.
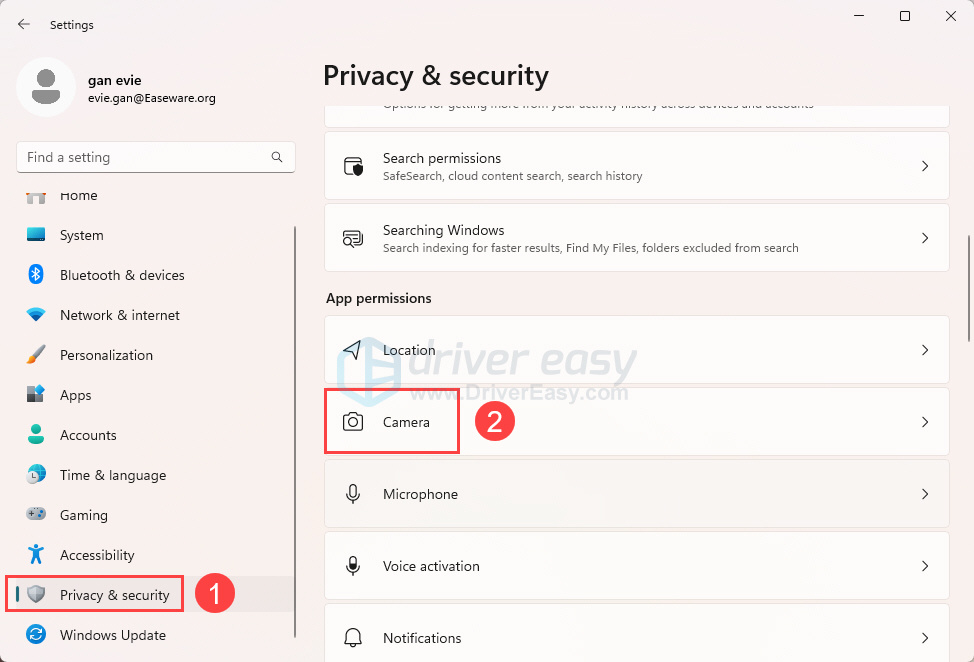
- Check if Camera access is toggled on.
Solution 2: Check for antivirus software
You can disable the antivirus software temporarily and see if the camera works. If it works, the problem is caused by the antivirus software. If you don’t want to disable it or turn it off, in the antivirus software, you can check if there are settings related to blocking access or permission to use the camera. If yes, change the settings.
Solution 3: Check for camera drivers
The camera cannot work properly if there is a problem with the camera driver. In many cases, updating the driver would resolve the problem. But before that, ensure that your camera can work with the system version. To check this, follow these steps.
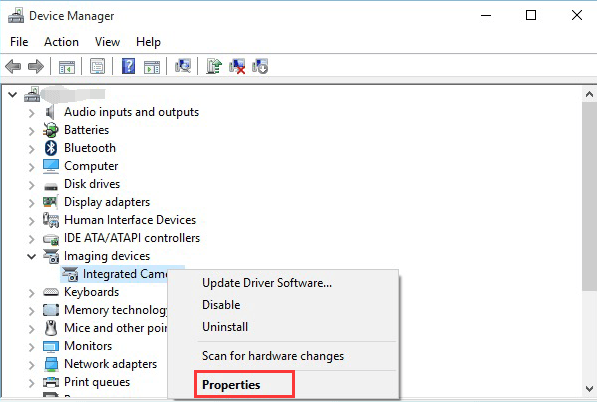
1. Go to Device Manager.
2. Expand the category of Imaging devices. Mostly, the camera device can be found under this category. Right-click on the name of your camera, and then select Properties.
Note that in Windows 10, some cameras/webcams may show up under “Sound, video and game controllers”). So if you don’t find your camera under Imaging devices, find it under “Sound, video and game controllers”.
If you don’t even see your camera show up in Device Manager, for an external camera, try to plug it into another port. For an integrated camera, update the motherboard drivers.
3. Go to the Driver tab and click Driver Details.
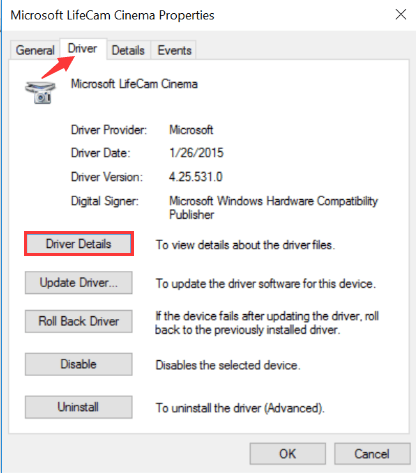
4. In the Driver File Details dialog box, look for a file name that includes stream.sys. If you find the file there, your camera was designed before Windows 7. In this case, you are required to replace it with a newer camera.
If you don’t find the stream.sys file, update the camera drivers.
The steps above may resolve the problem, but if they don’t, try to update the camera drivers. If you’re not confident playing around with drivers manually, you can do it automatically with Driver Easy.
Driver Easy will automatically recognize your system and find the correct drivers for it. You don’t need to know exactly what system your computer is running, you don’t need to risk downloading and installing the wrong driver, and you don’t need to worry about making a mistake when installing.
You can update your drivers automatically with either the FREE or the Pro version of Driver Easy. But with the Pro version it takes just 2 clicks (and you get full support and a 30-day money back guarantee):
1) Download and install Driver Easy.
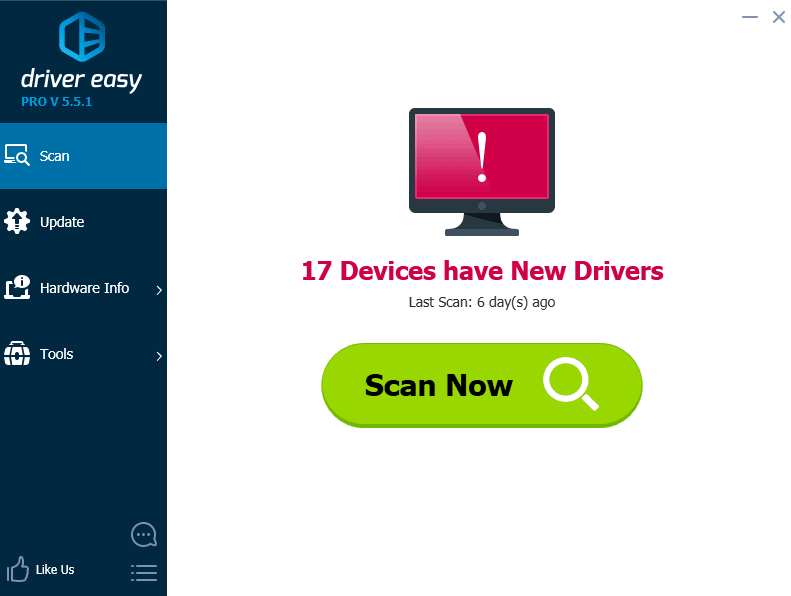
2) Run Driver Easy and click the Scan Now button. Driver Easy will then scan your computer and detect any problem drivers.
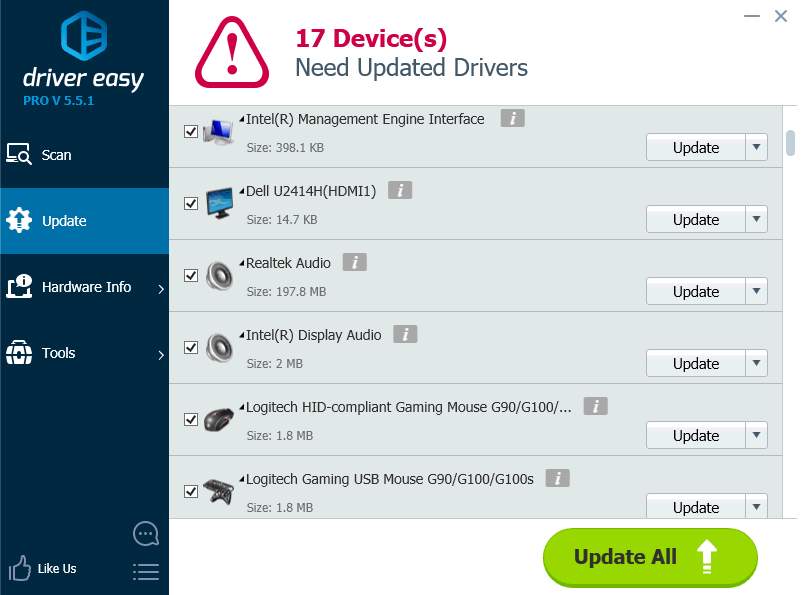
3) Click the Update button next to the camera driver to automatically download and install the correct version of this driver (you can do this with the FREE version). Or click Update All to automatically download and install the correct version of all the drivers that are missing or out of date on your system (this requires the Pro version – you’ll be prompted to upgrade when you click Update All).
Hopefully you find this article helpful. If you have any questions, ideas or suggestions, feel free to leave a comment below.


