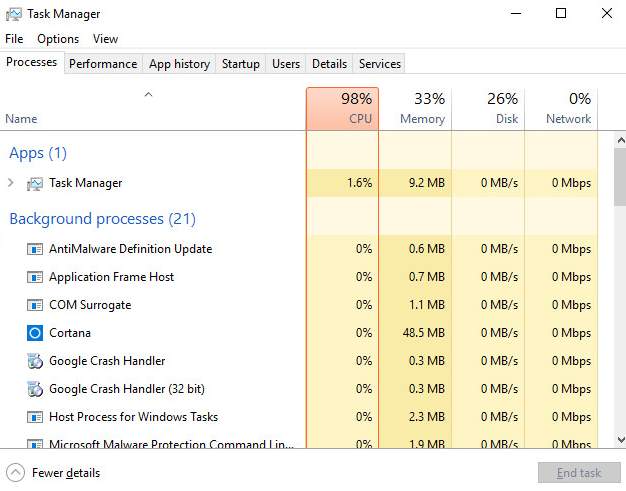
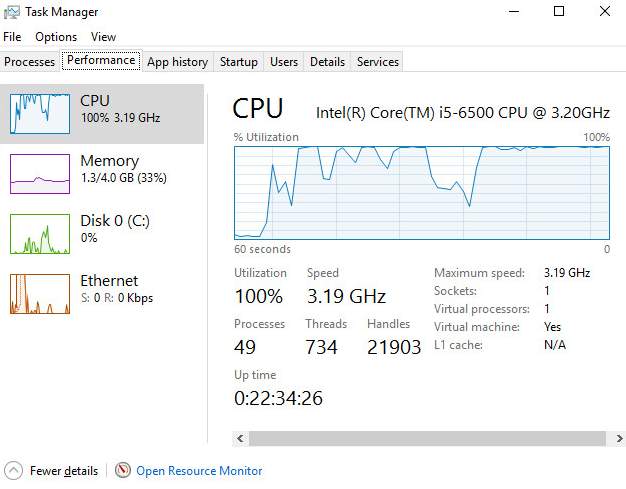
We find that the system CPU usage would go as high as 98%, sometimes even 100% in Windows 10 out of no apparent reasons.
High system CPU usage is not a problem you should neglect. However, the causes of this are rather varied: it could be related to OneDrive, Background Task Infrastructure Service, Windows spotlight or other apps.
But there has not a hotfix from Microsoft that works on all computers under all environments. In such case, we are to introduce some common work-arounds that have helped so many others.
To fix your system high CPU usage problem, please try the following methods below:
Option One: Modify Settings in Registry Editor
Option Two: Modify Lock Screen Background
Option Three: Disable Windows Notification
Option Four: Disable P2P Share
Other Options
Option One: Modify Settings in Registry Editor
WARNING: Faulty modifying settings in Registry Editor could cause irretrievable errors to your system. So before you make any changes, please make sure that you have backed up your Registry first.
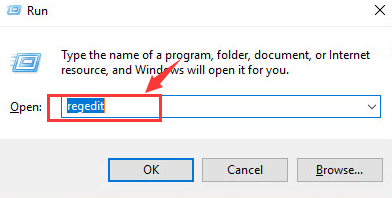
1) Press Windows key and R at them same time, and then type in the search box regedit and hit Enter.
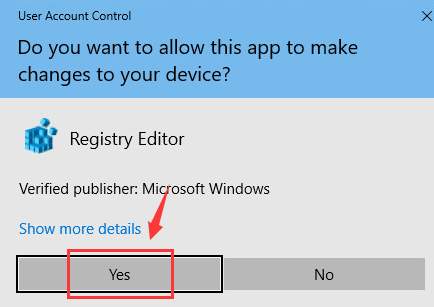
When prompted with the administrator permission, click Yes to continue.
2) Follow the path to locate the correct system files:
HKEY_LOCAL_MACHINE\SYSTEM\CurrentControlSet\Services\TimeBroker
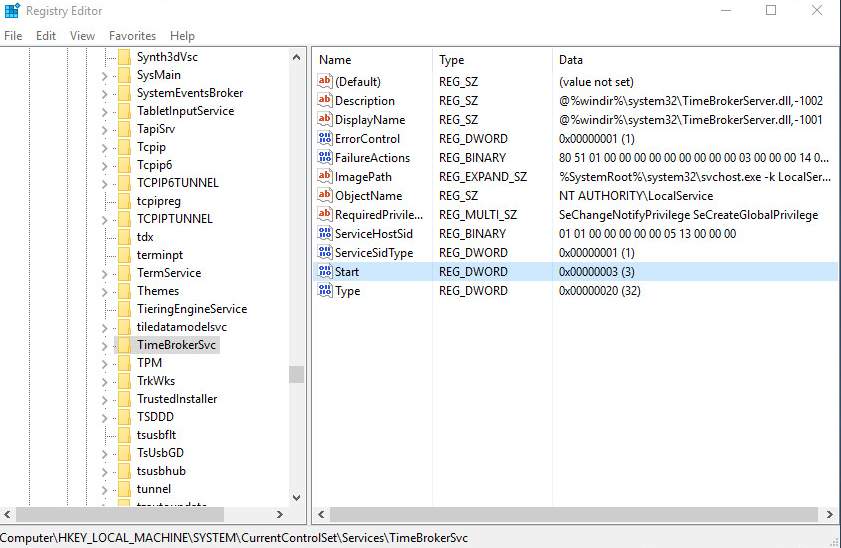
3) On the right side of the pane, right click Start entry, then choose Modify….
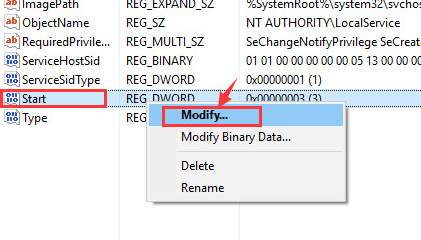
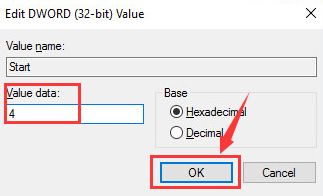
4) Change the Value data to 4, then hit OK to save the change.
5) Some features of your Cortana will be affected after the change. If you are a heavy user of Cortana, this option might not be appropriate for you.
Option Two: Modify Lock Screen Background
Background services are believed to be at fault for what’s happening with the CPU. So it is suggested that you disable services related to it.
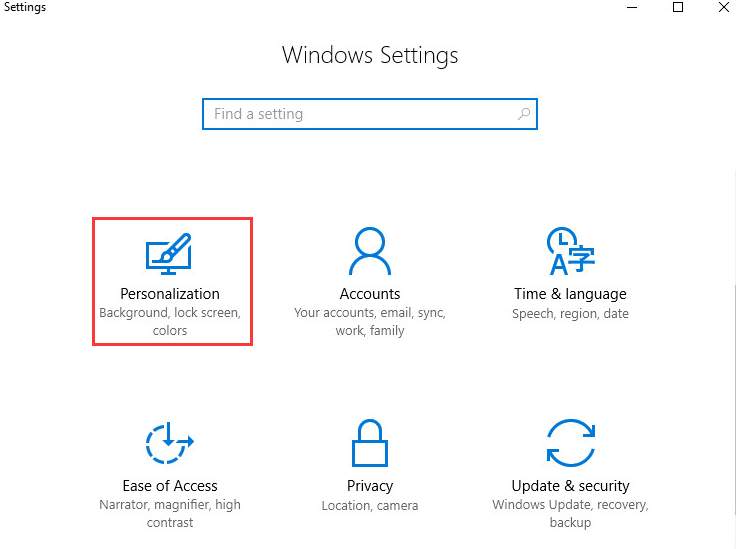
1) Click Start button, then choose Settings. In the Settings pane, choose Personalization.
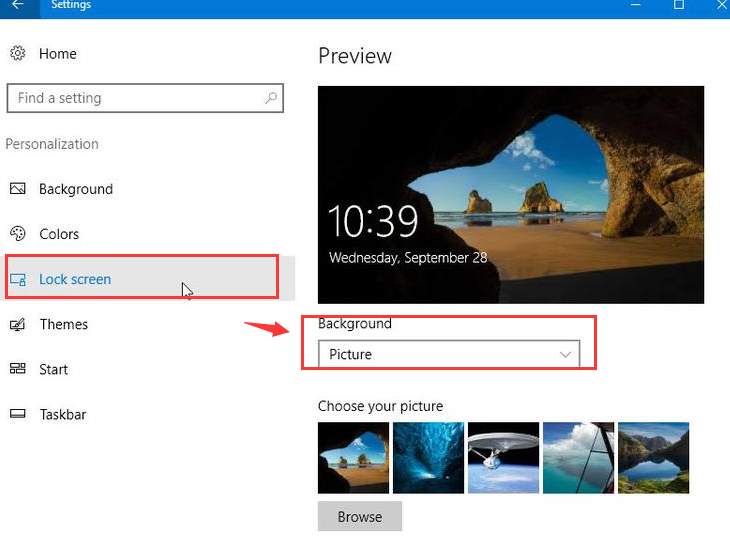
2) On the left side of the pane, choose Lock screen. Then on the right side, choose Picture from the drop-down box under Background category.
Option Three: Disable Windows Notification
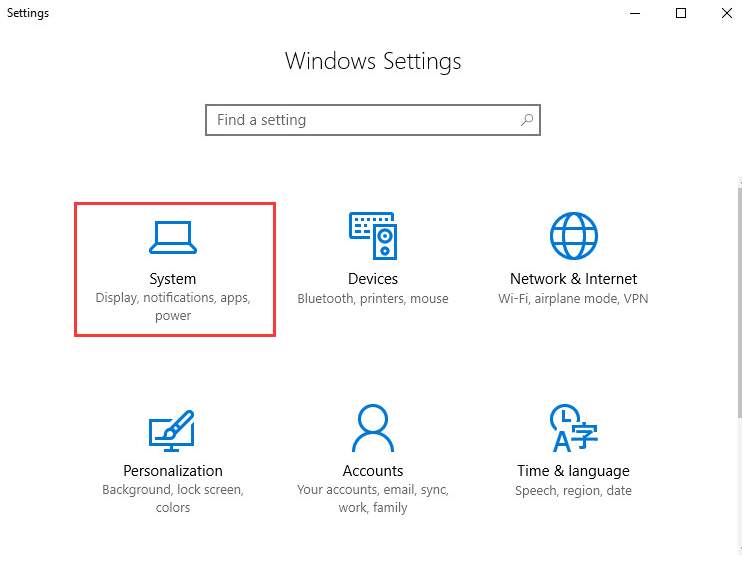
1) Click Start button, then choose Settings. In the Settings pane, choose System.
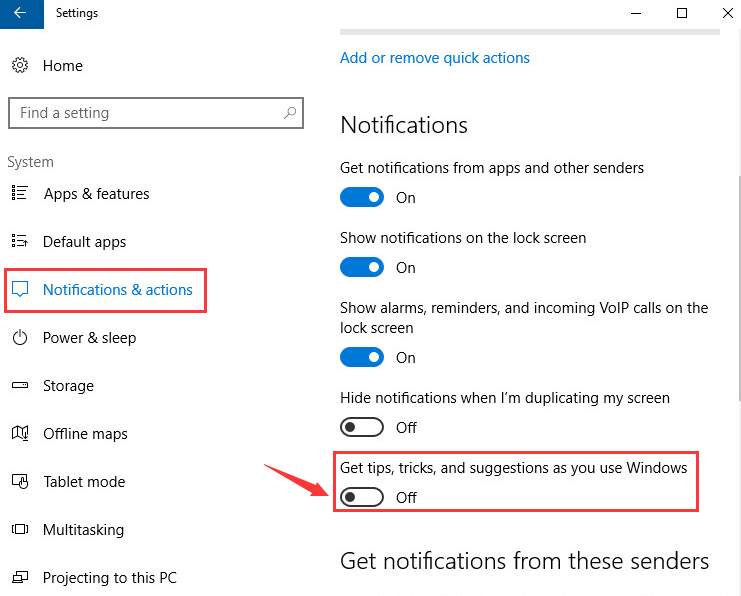
2) On the left side of the pane, choose Notifications & actions. Then scroll down a little bit on the right side pane, toggle Off the option Get tips, tricks, and suggestions as you use Windows.
Option Four: Disable P2P Share
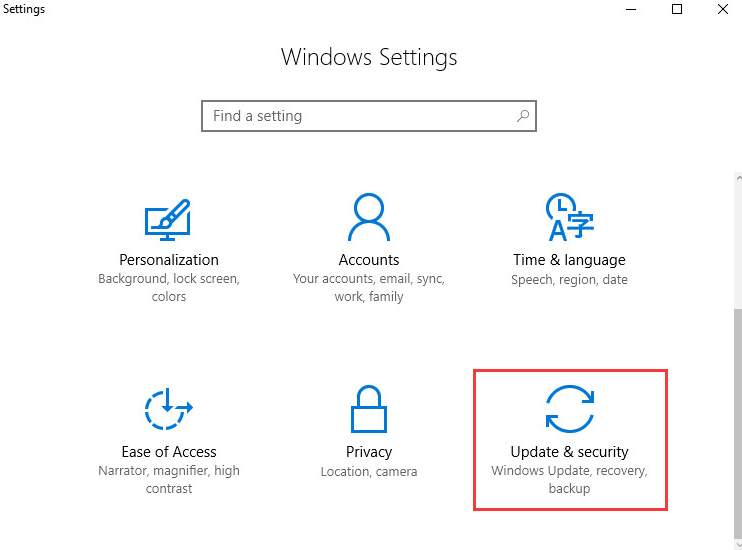
1) Click Start button, then choose Settings. In the Settings pane, choose Update & security.
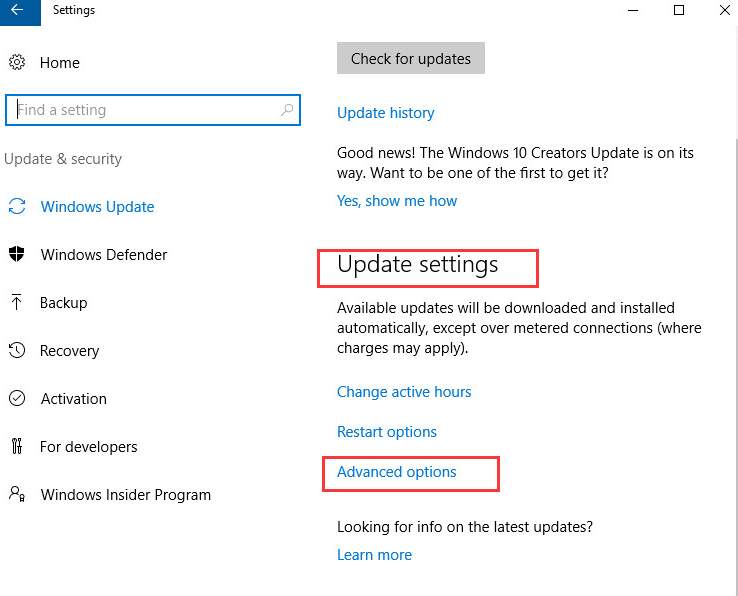
2) Scroll down a little bit until you see Update settings, and then choose Advanced options.
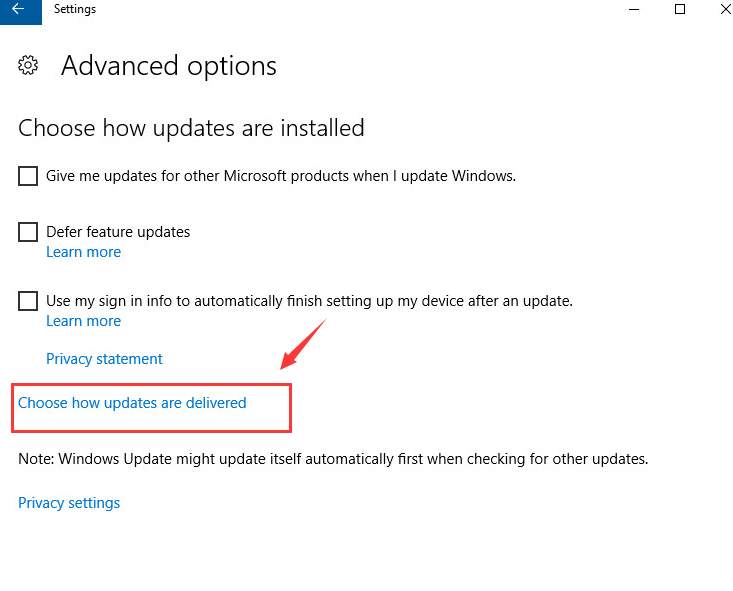
3) Click Choose how updates are delivered.
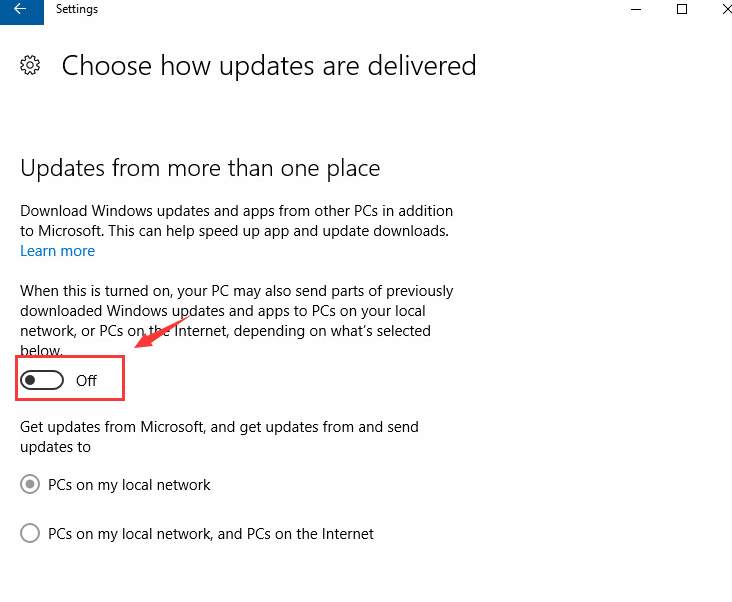
4) Then toggle the Updates from more than on place to Off.
Other Options
1) Disable or turn of programs and applications that you are not using, especially for a while.
2) Update drivers.
There could be some minor bugs in the outdated device drivers or that they are not compatible with the latest version of your Windows 10, thus with the high CPU usage problem.
To get this problem fixed, try updating your device drivers.
If you are also looking for a much faster and time-saving method to update device drivers, Driver Easy is here for you. Just a couple of clicks and a couple of minutes, your device drivers will be updated automatically!
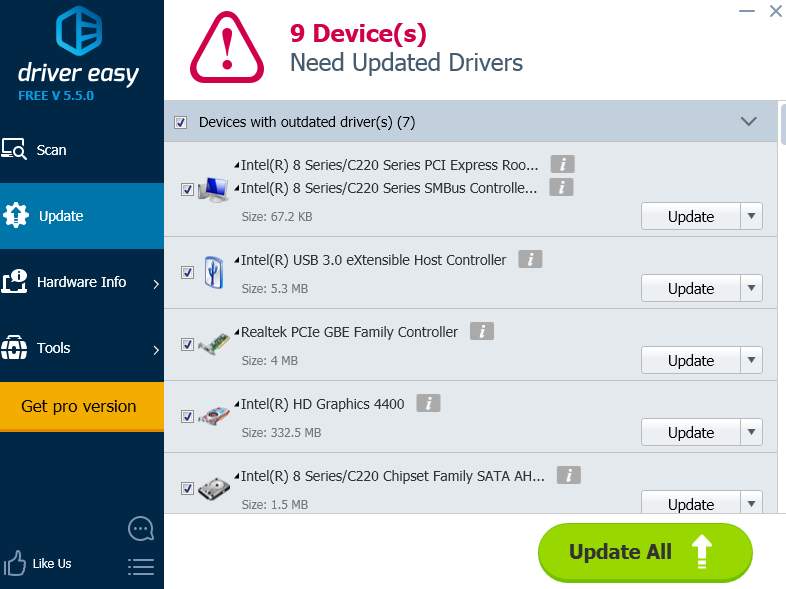
Not only so, it is totally free of charge. Tempted? Come and have a try at Driver Easy now!


