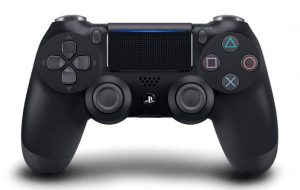
Have you ever thought about using your PS4 controller on your Windows PC? Perhaps you’re thinking that your controller is designed specifically for Sony’s PlayStation 4 console, so it may not be working on a Windows computer.
But the truth is you can! And the process of setting it up is very easy. You don’t need any advanced computer skills to accomplish this. Just follow the three simple steps below, and you’ll be able to use your PS4 controller to play your Windows games.
Step 1: Connect your PS4 Controller via USB or Bluetooth
To use your PS4 controller on your PC, the first step you need to take is to connect it to your computer physically. There are two ways to connect your controller to your computer.
Method 1: Connect your PS4 Controller via USB
The simplest way to connect your controller to your Windows computer is to use a micro-USB cable. There are upsides to doing this. Once you connect it to your controller and your computer, you need no further configuration. And the cable is easy to find — a regular micro-USB cable like the one used for modern smartphones will work.
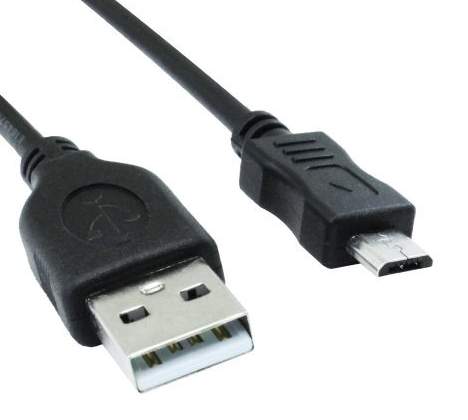
To use a micro-USB cable to connect your controller and your PC:
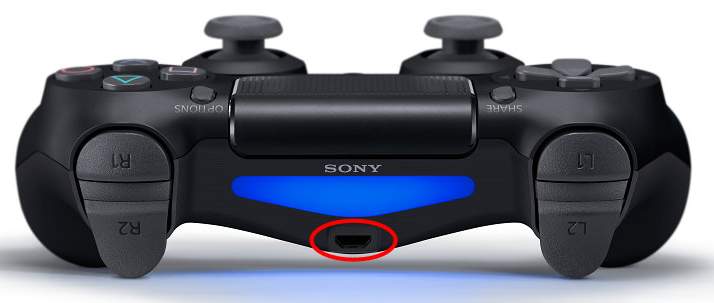
1) Plug the smaller end of your micro-USB cable into the port on the front side of your controller (below the light bar).
2) Plug the bigger end of your micro-USB cable into a USB port on your computer.
3) The cable connection is completed. You can go to the next step. (If you are on Windows 10, go directly to Step 3).
Method 2: Connect your PS4 Controller via Bluetooth
You may not like cables. Cables knot easily. They tend to create confusion. And you may wonder if you can connect it without a cable.
Yes, you can connect your controller using Bluetooth.
If your computer has the Bluetooth feature, you can pair your controller with your computer directly. But if not, you will need an external Bluetooth adapter to enable your computer to communicate with your controller.
There are two options you can try:
- Sony DualShock 4 USB Wireless Adaptor. This is the official PlayStation Bluetooth adapter that is compatible with your PS4 controller.
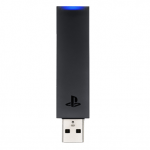
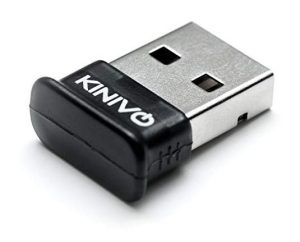
- A third-party Bluetooth USB adapter. We recommend using Kinivo BTD-400. This is a cheaper option, but is still able to recognize your PS4 controller.
To make sure your Bluetooth adapter runs perfectly, you should install the latest Bluetooth adapter driver on your computer. If you don’t know how to do this manually, you can do it automatically with Driver Easy.
Driver Easy will automatically recognize your system and find the correct drivers for it. You don’t need to know exactly what system your computer is running, you don’t need to risk downloading and installing the wrong driver, and you don’t need to worry about making a mistake when installing.
You can download and install your drivers by using either Free or Pro version of Driver Easy. But with the Pro version it takes only 2 clicks (and you get full support and a 30-day money back guarantee):
1) Download and Install Driver Easy.
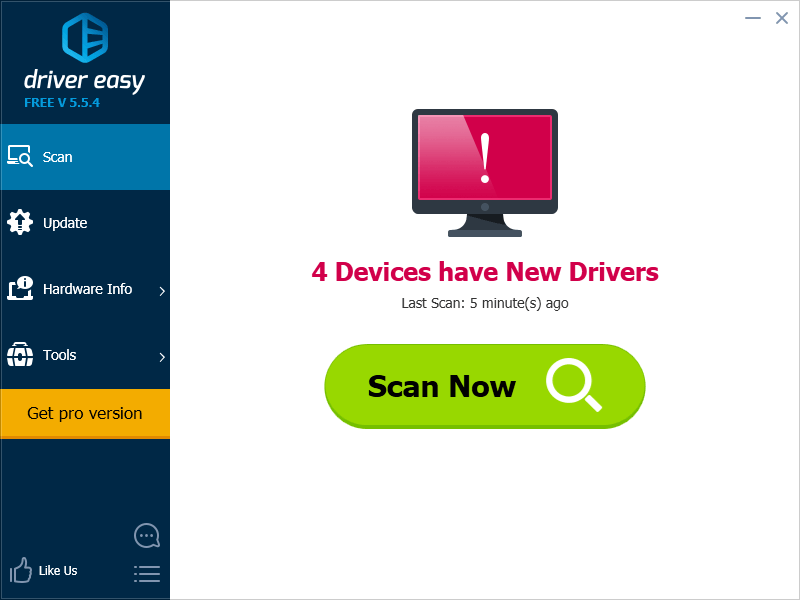
2) Run Driver Easy and hit the Scan Now button. Driver Easy will then scan your computer and detect any problem drivers.
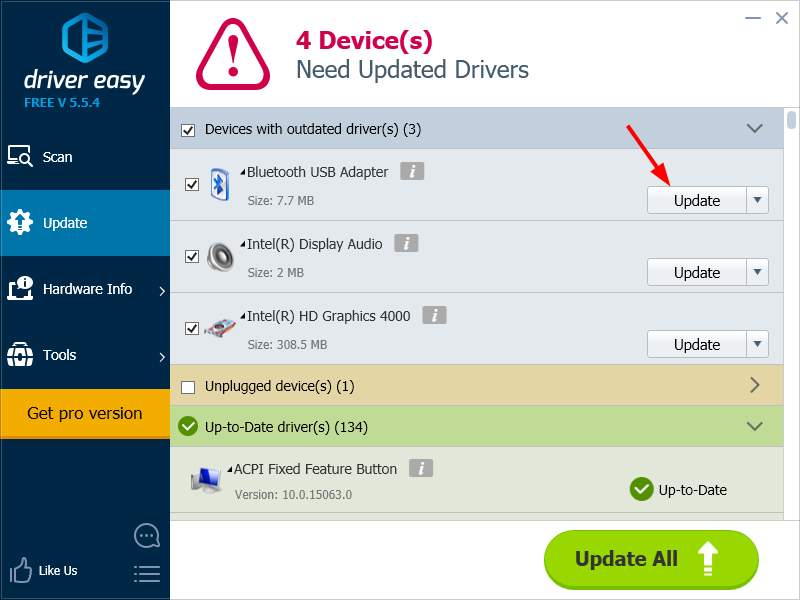
3) Click the Update button next to the Bluetooth adapter to download the latest and correct driver for it. You can also hit the Update All button at the bottom right to automatically update all outdated or missing drivers on your computer (this requires the Pro version — you will be prompted to upgrade when you click on Update All).
Once your Bluetooth adapter is ready, it’s time to connect your devices. To do so:
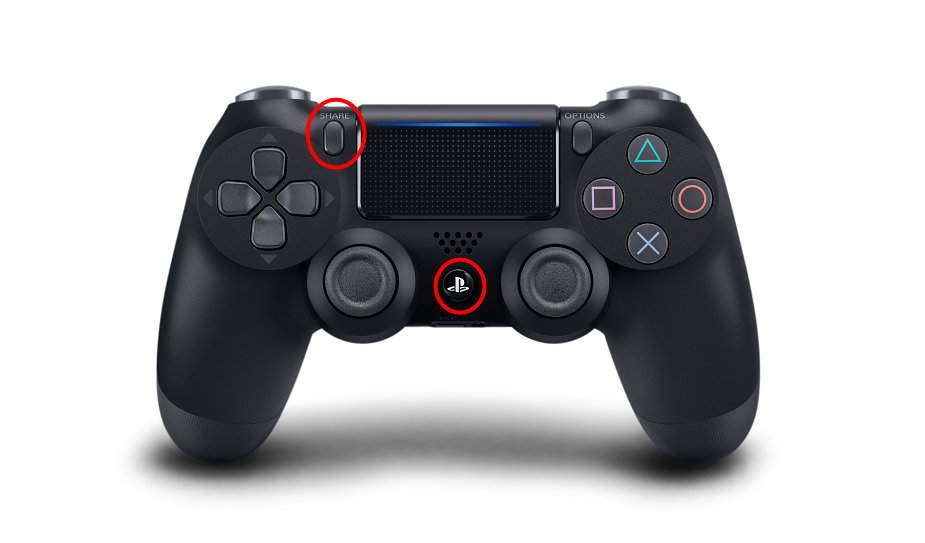
1) Press and hold the Share button and the PS button on your controller until the light bar on it starts flashing.
2) Pair your PS4 controller with your computer. Note that the steps to do this on Windows 10 are different from Windows 7. The following will show you how to pair your controller on these different systems.
If you are using a Windows 10/11 computer:
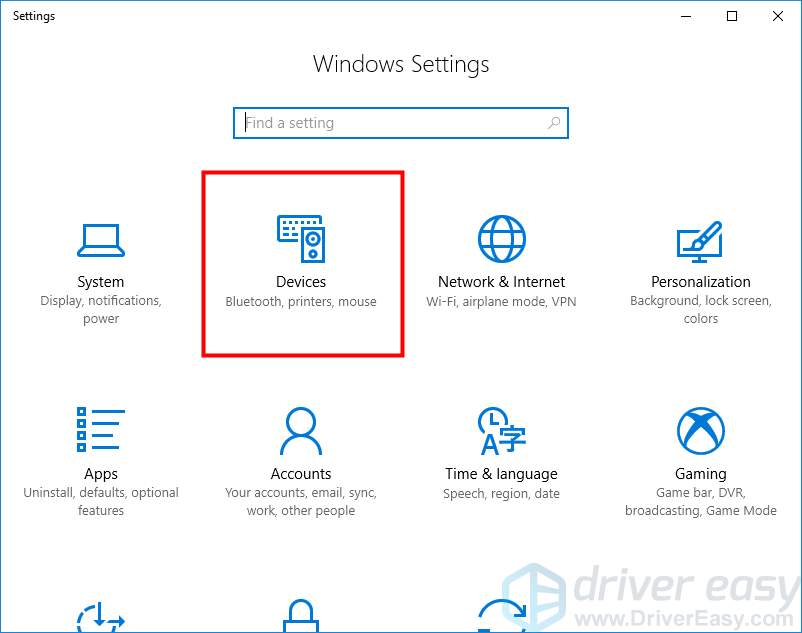
i. On your keyboard, hold down the Windows logo key and press the I key to open the Settings windows.
ii. Select Devices.
iii. Select Bluetooth & other devices.
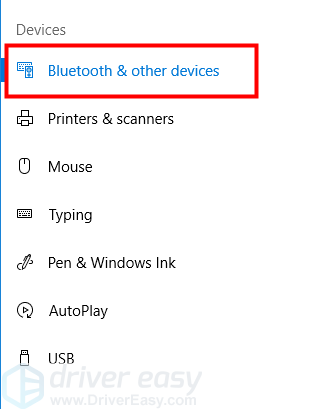
iv. Select Wireless Controller and then click Pair. The system will then pair your PS4 controller.
* If prompted for a pair code, enter “0000“.

v. The wireless connection is completed. You can go to Step 3.
If you are using Windows 7, pair your controller with the steps as follows:
i. Click the Start button and then click Devices and Printers.
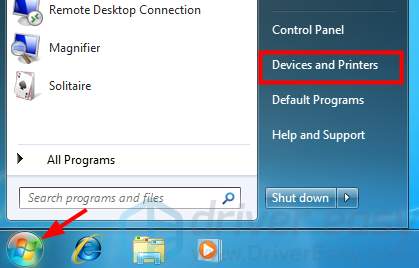
ii. Click Add a device.

iii. Select your controller and add it as a device on your computer.
* If prompted for a pair code, enter “0000“.
iv. You have set up your Bluetooth connection. Please go to the next step.
Step 2: Install an Xbox 360 controller driver (if on Windows 7 or below)
NOTE: This step is only for users on Windows 7 or below. If you are using Windows 10, please skip this step and go directly to Step 3.
You are not able to use your PS4 controller on a PC if you just physically connect it to your computer. Games on Windows cannot recognize your PS4 controller directly. You need a third-party application to emulate an Xbox 360 controller (which is fully supported by Windows) with your PS4 controller. For these applications to work fine, you should install an Xbox 360 controller software on your computer.
If you haven’t installed the software on your computer (you have never used an Xbox 360 controller on your computer), you should go to Microsoft to download the software:
1) Go to the Xbox 360 controller for Windows page.
2) Click Downloads. Then select your operating system and language. After that, click the file that appears below to download it.
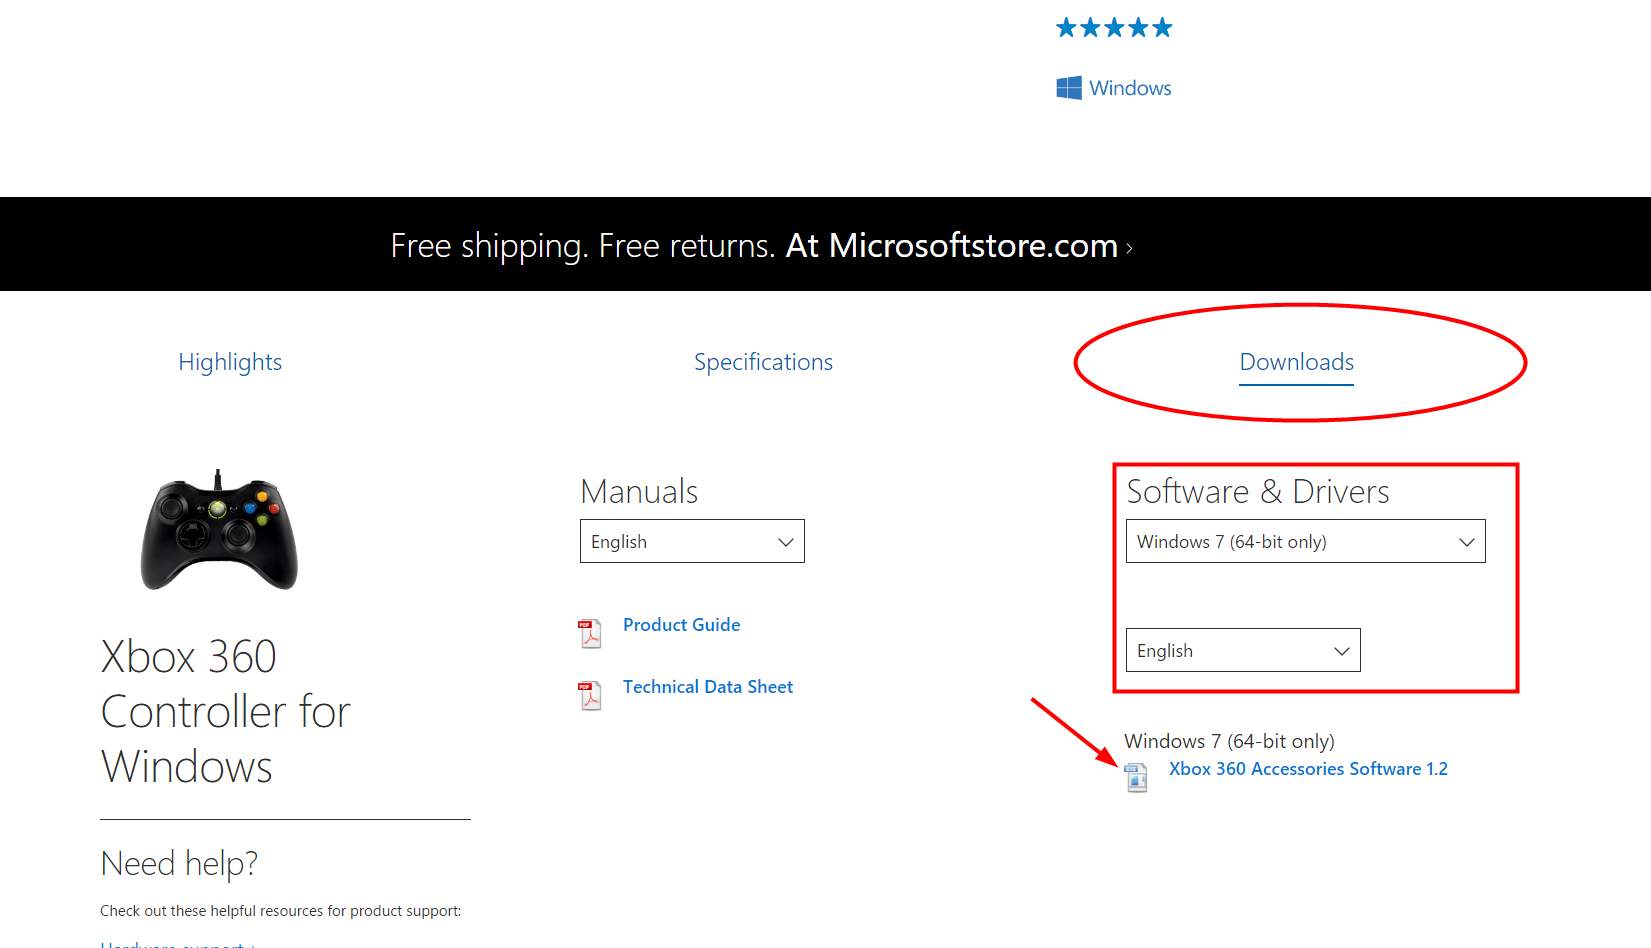
3) Open the file you have just downloaded and install it on your computer.
4) Restart your computer. Then go to Step 3.
If you have used an Xbox 360 controller or installed its driver on your computer previously, you may still need to update the driver as it may be out of date. You can still do this automatically with Driver Easy:
1) Run Driver Easy and hit the Scan Now button.
2) Click the Update button next to the controller to download the latest and correct driver for it.
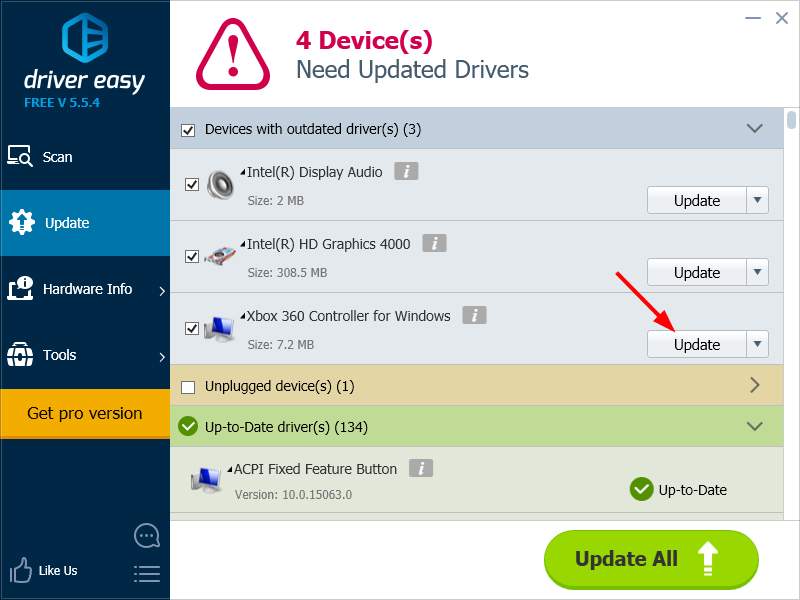
3) Restart your computer.
The latest driver is installed. Now you can take the next step.
Step 3: Use a third-party Xbox controller emulator
As mentioned above, you need a third-party program to let your computer take your PS4 controller for an Xbox controller. This will enable you to use your PS4 controller on your PC. The following will introduce two applications that can do this — Steam and DS4Windows.
If you are a Steam user, you’re in luck — your Steam client can help your computer recognize your controller. Steam has already rolled out its native support for DualShock 4.
To configure your PS4 controller on Steam:
1) Disconnect your PS4 controller. (For wired controllers, unplug the micro-USB cable from your computer. For wireless one, go to Bluetooth settings and unpair your controller)
2) Open your Steam client and log in to your Steam account.
3) Click Big Picture Mode (the gamepad icon) in the top right corner of the Steam client.
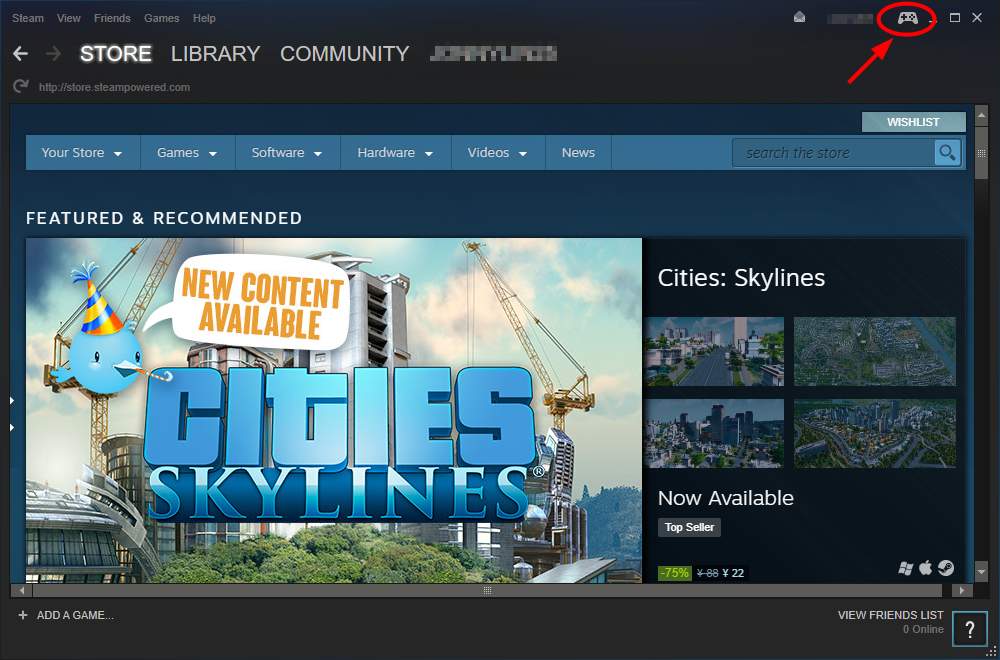
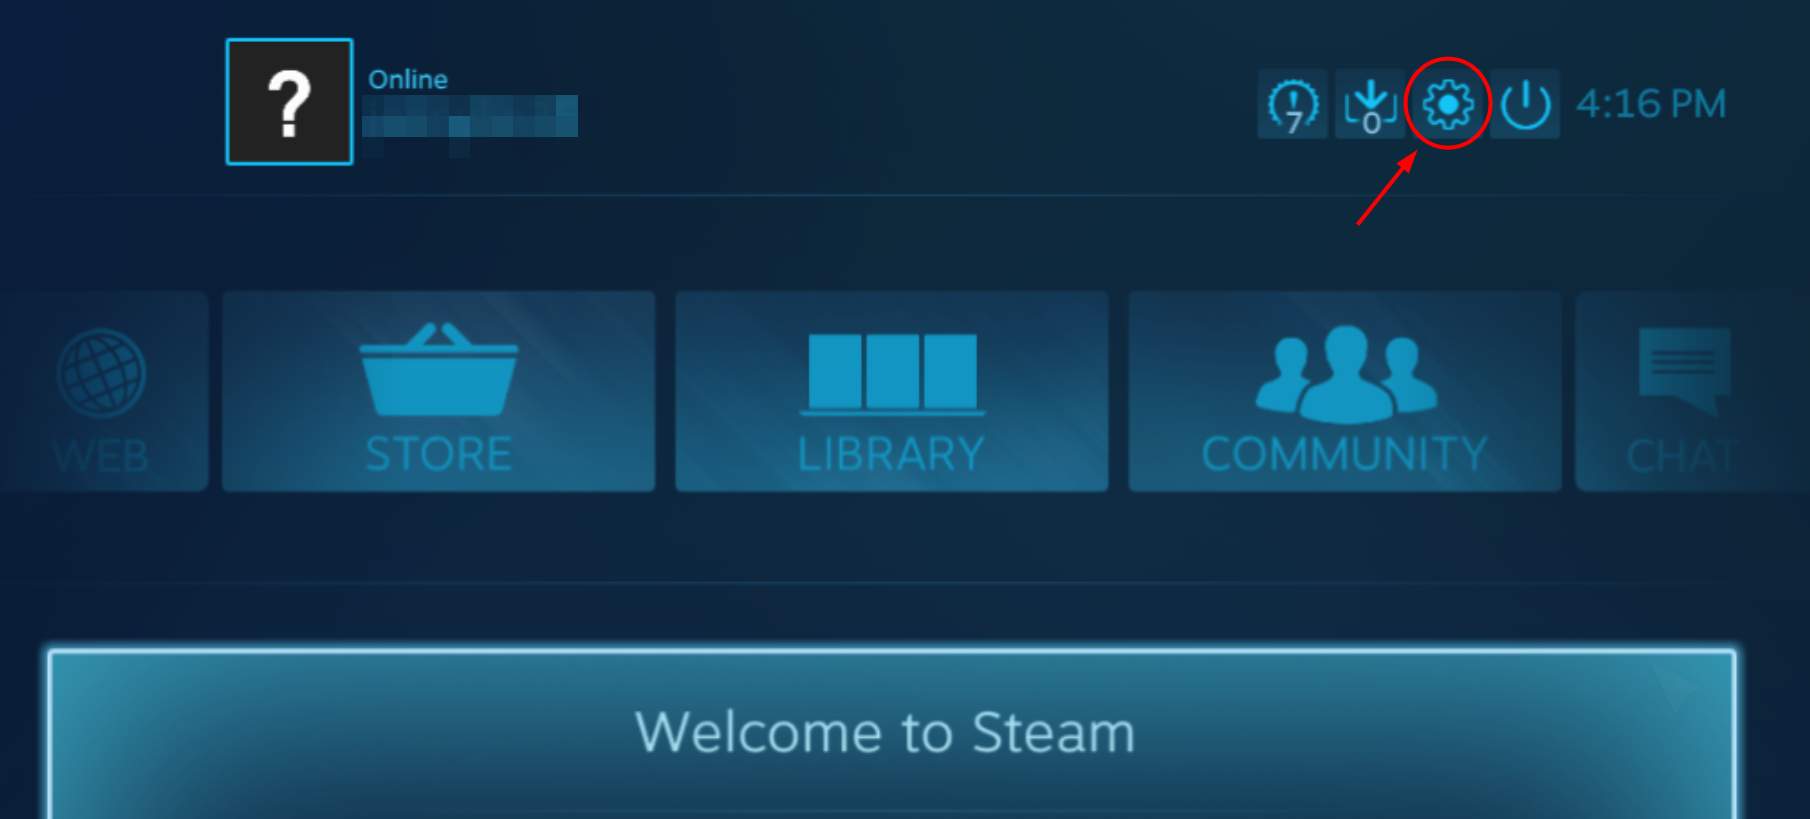
4) In Big Picture Mode, click Settings in the top right corner.
5) Select Controller Settings.
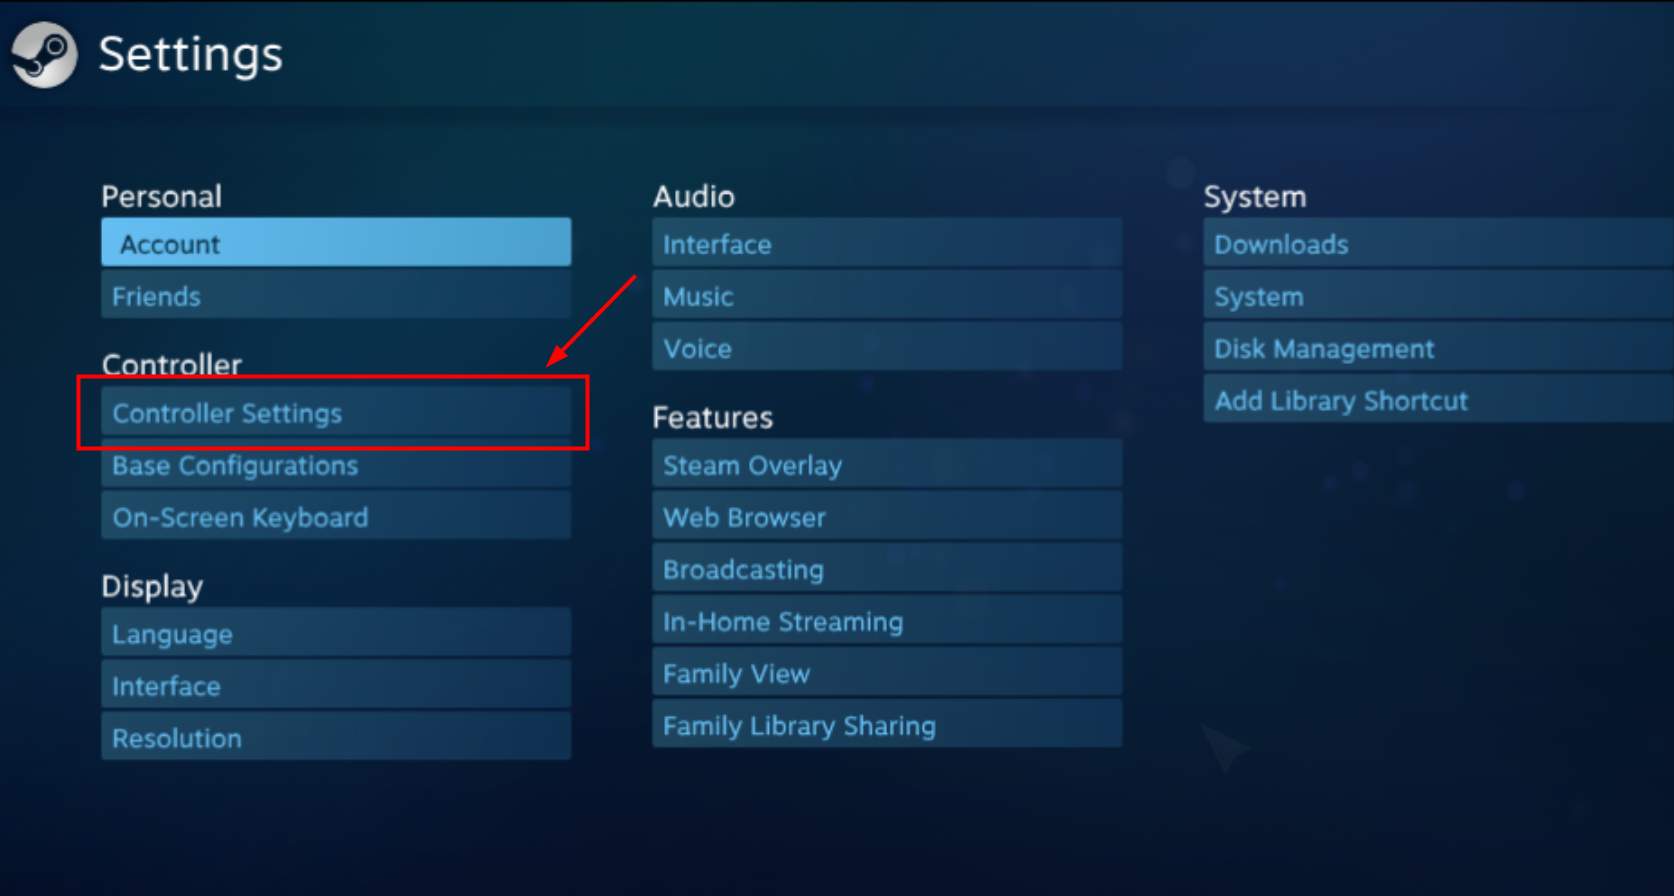
6) Check PS4 Configuration Support.
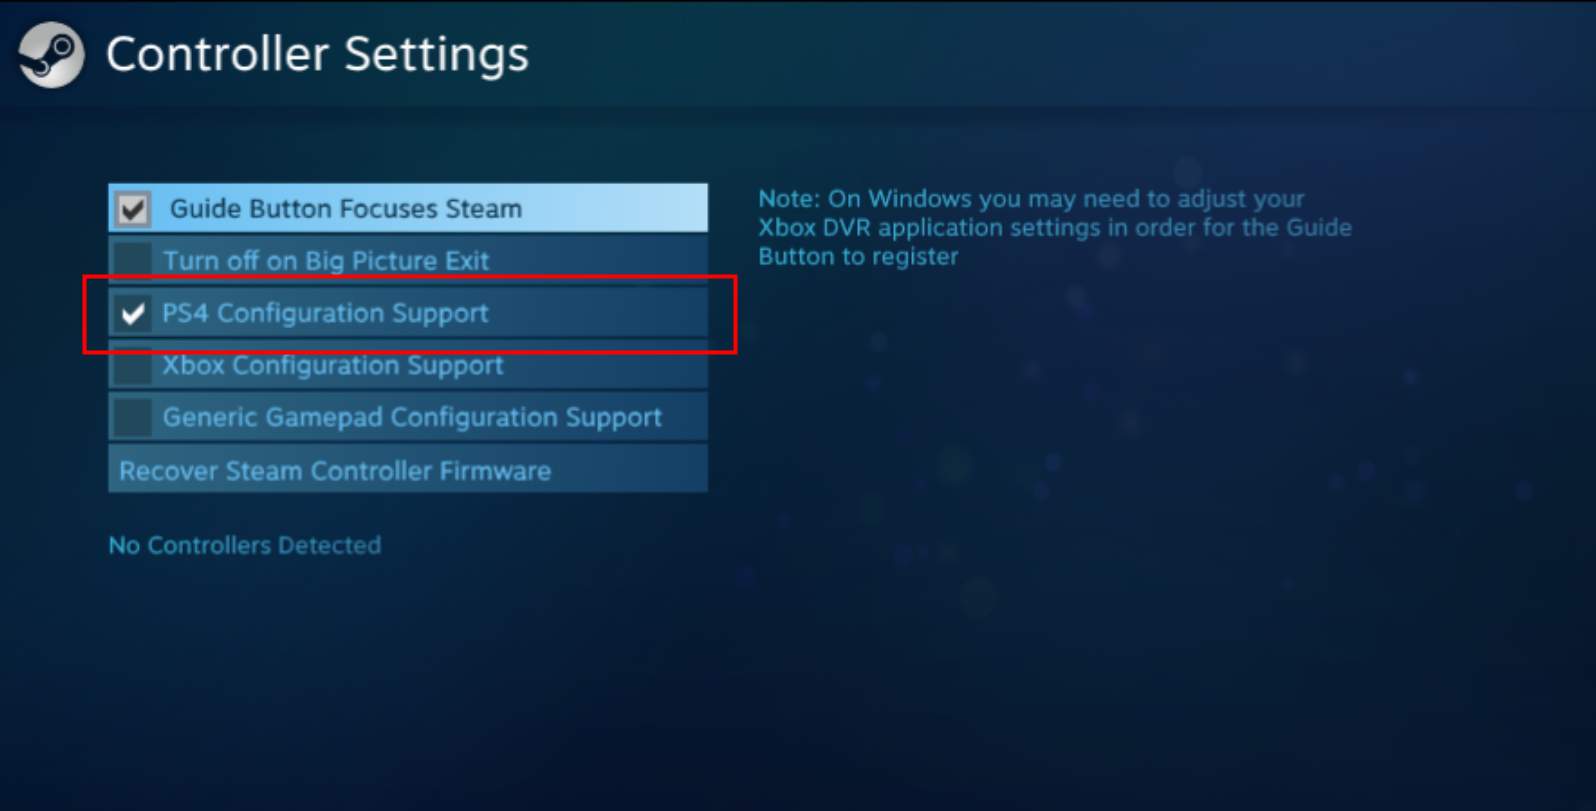
7) Connect your controller to your computer. Steam will detect the controller shortly.
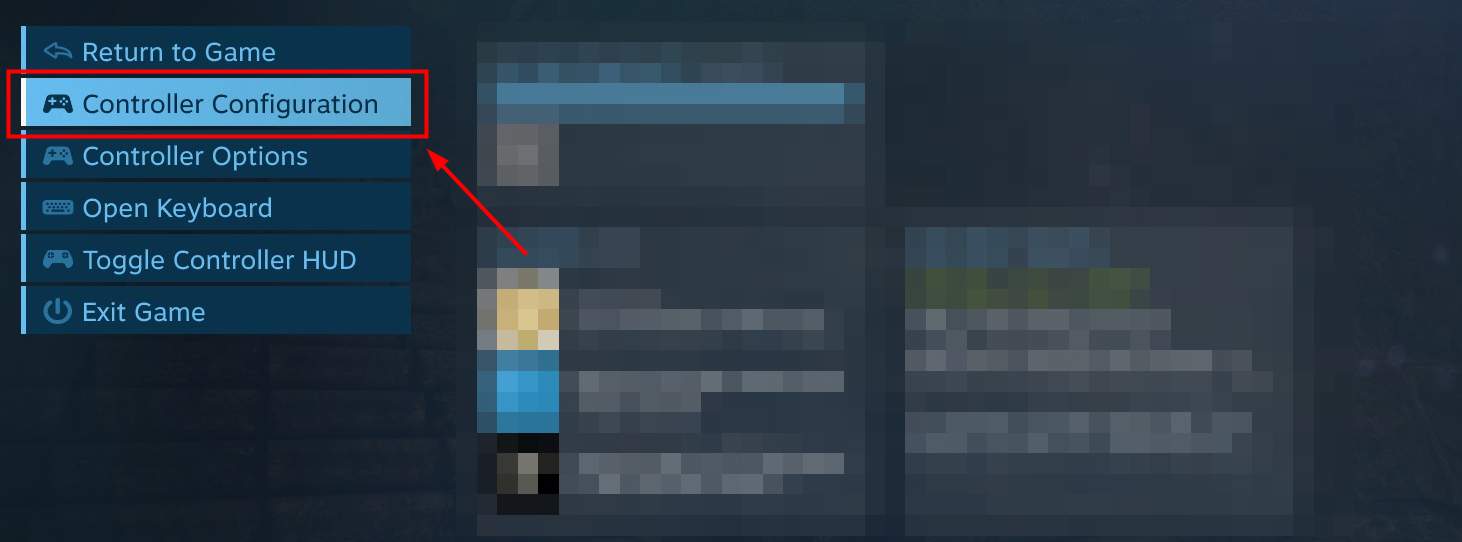
8) Launch a game that supports a game controller in your game library. Then press the PS button on your PS4 controller. After that, select Controller Configuration.
9) Modify the button settings of your controller in Controller Configuration.
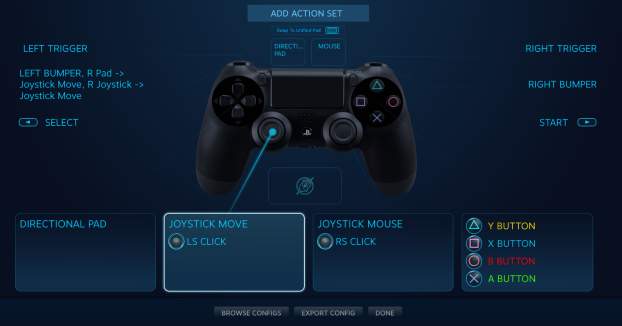
10) Exit Controller Configuration and enjoy your games with your controller on Steam!
If you don’t use Steam, or the game you play does not support Steam’s configuration well, there are alternatives for you. Some controller emulators, like DS4Windows, can map your PS4 controller onto the Xbox controller driver.
The steps as follows show you how to use your controller with DS4Windows.
1) Go to the DS4Windows website. Then download and install the program.
2) Extract all the files from the compressed folder you have downloaded.
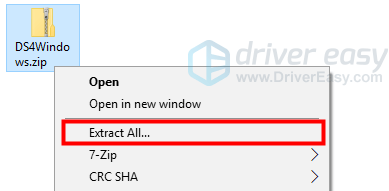
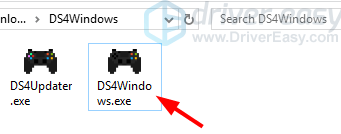
3) Launch DS4Windows.exe in the extracted folder.
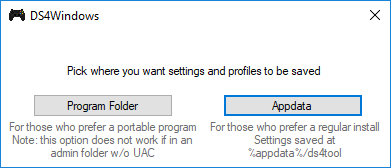
4) Choose where you want to save your settings and profiles. (Program Folder is easier to find but requires administrator privileges to save files, while Appdata, sometimes hidden by the system, allows restricted users to access itself. Make your choice according to your own needs.)
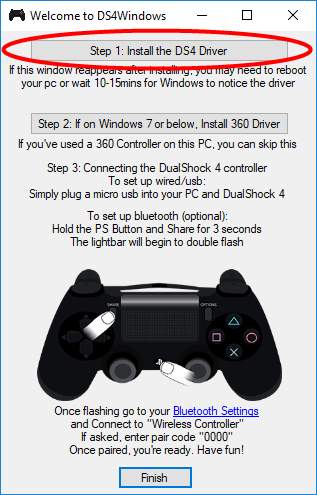
5) Click the Step 1: Install the DS4 Driver button. It will download the driver specifically for this program.
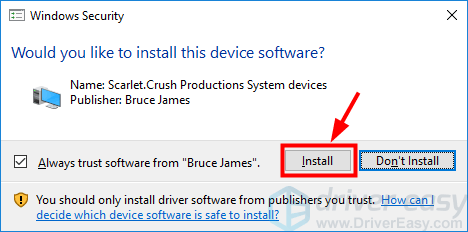
6) Click the Install button to install this driver.
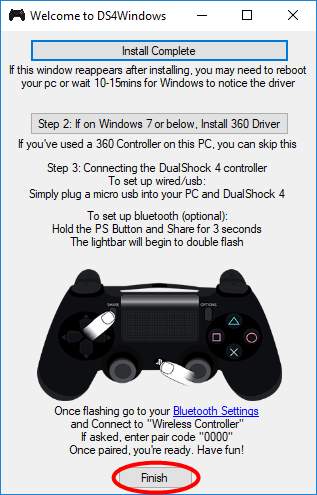
7) If you see “Install Complete” appear on the button you clicked, the driver installation has been completed. Click Finish to close the Welcome to DS4Windows window.
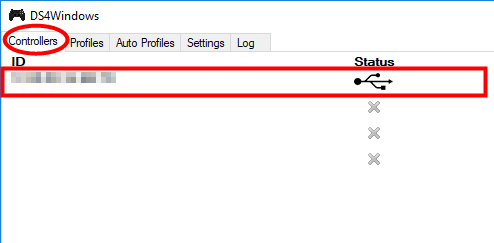
8) In the DS4Windows window, click the Controllers tab. Your PS4 controller will be shown in the list of connected controllers.
(If not, please restart your computer. Your computer would then discover the driver and your controller. After that, open DS4Windows again and you should see your controller in the list.)
Now you can use your PS4 controller on your PC to play games. Enjoy it!


