New technologies have made your HP printer smarter than ever, making it simple and convenient to print. From now on, you can print anything anytime at any place. Moreover, you can just print documents from your mobile devices. Are you looking for how to connect your HP printer to WiFi? Start from here and begin a joyful journey of easy printing.
You have 4 options to connect your HP printer to WiFi:
- HP Auto Wireless Connect
- Wireless Setup Wizard
- WPS Push Button Connect
- Connect your HP printer without a router
Method 1: HP Auto Wireless Connect
HP Auto Wireless Connect allows you to connect your printer to your wireless network automatically. You don’t need to connect any cables or enter your wireless network settings such as your network name or password.
To use this option, you need to install the software for your printer first.
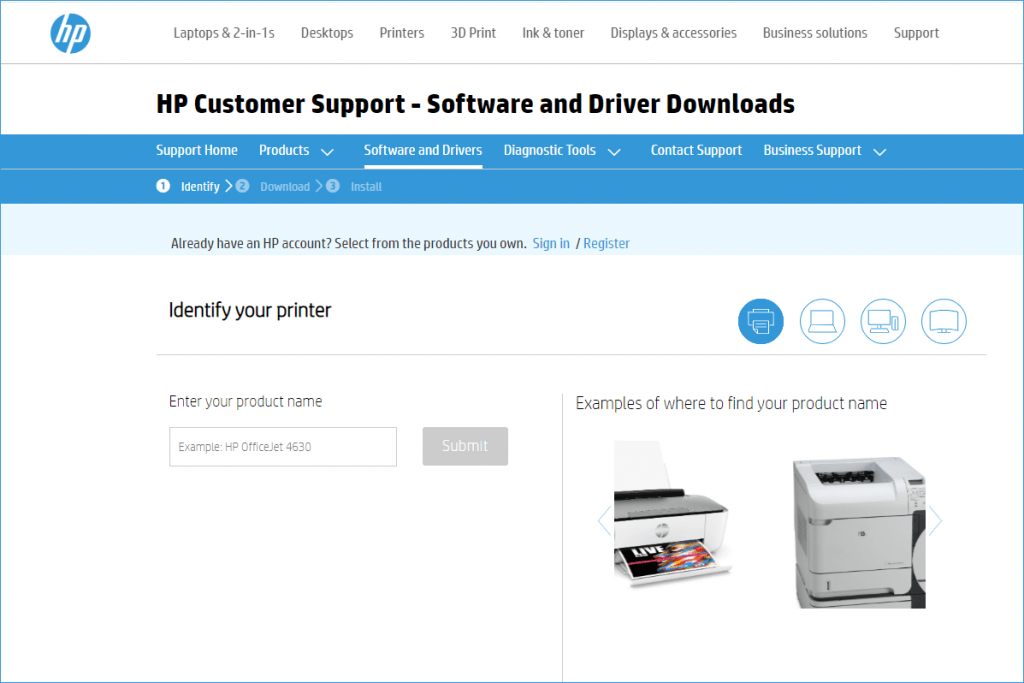
- Go to the HP Support page for software download and enter your printer model. Download the driver according to your Operating System and follow the on-screen instructions to install it into your computer.

- Turn on your printer and run the software.
- When you’re prompted for Network connection type (Ethernet/Wireless), choose Wireless and then click Yes, send my wireless settings to the printer (recommended).
Wait for your printer to connect. This may take a few minutes. When it’s done, just click Finish. Now your HP printer is ready for a print job.
Method 2: Wireless Setup Wizard
You can connect your HP printer to WiFi with Wireless Setup Wizard on your printer’s control panel. This method applies only to the HP printer with a graphics display.
- Power on your printer.
- Unplug any USB or Ethernet cables from your printer.
- From the control panel of your printer, tap the wireless icon or go to the Network menu.
- Select Wireless Settings and then tap Wireless Setup Wizard.
- Find your network and enter the WEP or WPA key, then click OK.
Method 3: WPS Push Button Connect
If both your router and HP printer support WPS (Wi-Fi Protected Setup) push-button mode, you can simply connect your printer to WiFi with a simple push on your printer and router within 2 minutes.
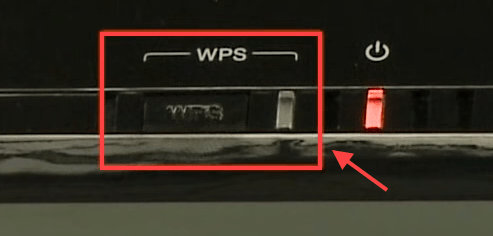
- Step 1: Push the WPS button on your printer.

If there’s no physical push button on your printer, you can go to the control panel to start the WPS pushbutton mode. Tap the Wireless menu, then click Wi-Fi Protected Setup. Follow the on-screen instructions to complete the setup. Select the WPS Button option. Then you’ll be prompted to press the WPS button on your router.
- Step 2: Press the WPS push button on your router within 2 minutes.

Method 4: Connect your HP Printer without a router
Actually, you don’t need an Internet connection to finish your print job. Wi-Fi Direct™ and HP Wireless Direct allow you to print documents directly from your smartphones, tablets, or computer. All you need is to connect your device to the printer’s HP WiFi just like any other wireless network.
Wi-Fi Direct or HP Wireless Direct?
Both features enable your devices to connect your printer directly, but there are certain differences between them. For instance, Wi-Fi Direct allows your devices to maintain an Internet connection simultaneously. However, you can’t get access to the network with HP Wireless Direct.
How to connect to Wi-Fi Direct or HP Wireless Direct?
- Step 1: Turn on HP Wireless Direct or Wi-Fi Direct from the printer’s control panel. On the printer control panel, touch the HP wireless direct icon, or navigate to the Network Setup or Wireless Settings menu and touch Wireless Direct, and then turn on the connection.
- Step 2: On your computer or mobile devices, connect to Wi-Fi Direct or HP Wireless Direct the same way you would for any other wireless network.
Wi-Fi Direct: DIRECT-xx-HP-[printer model]
HP Wireless Direct: HP-Print-xx-[printer model
- Step 3: You’ll be prompted for a WPA2 password if you’re using Wi-Fi Direct or HP Wireless Direct on security.
- Step 4: On your computer, open a document or photo on your computer or mobile devices, and click File> Print.
- For mobile devices, you can just tap Print from an app menu. If the app doesn’t support printing, you’ll need to install the latest version of the HP Printer Service Plugin application.
Bonus Tip
If your HP printer bumps into a connection problem or common printing issues such as not printing, the first thing you can always try is to update your HP printer driver.
As a translator for your computer and printer, drivers maintain the close interaction between them. Therefore, things can go wrong if the driver is outdated or corrupt.
Option 1 – Manually update your printer driver
To update your driver, you can go to HP Support for Software & Driver Download to get the latest and correct driver and install it manually.
Option 2 – Automatically update your printer driver
If you don’t have the time, patience or computer skills to update your video and monitor drivers manually, you can do it automatically with Driver Easy – Driver Easy will automatically recognize your system and find the correct drivers for your exact HP wireless printer.
- Step 1: Download and install Driver Easy.
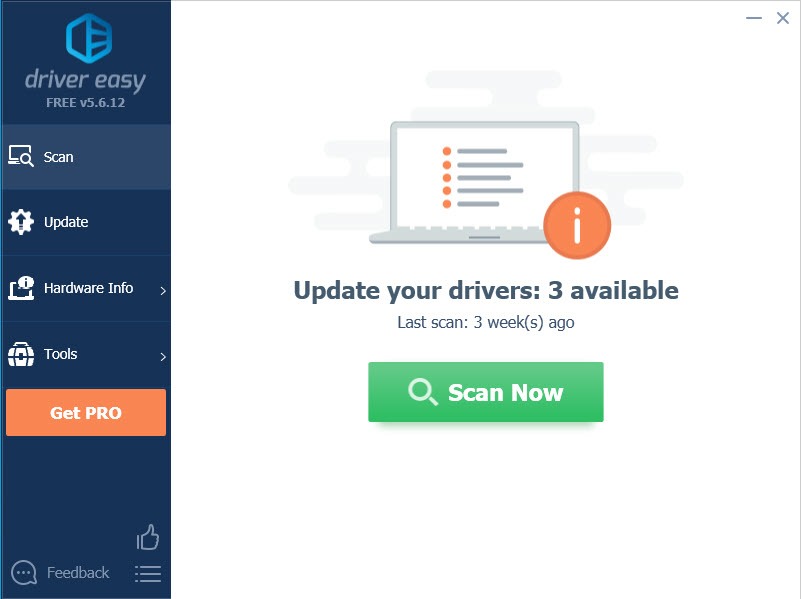
- Step 2: Run Driver Easy and click the Scan Now button. Driver Easy will then scan your computer and detect any problem drivers.

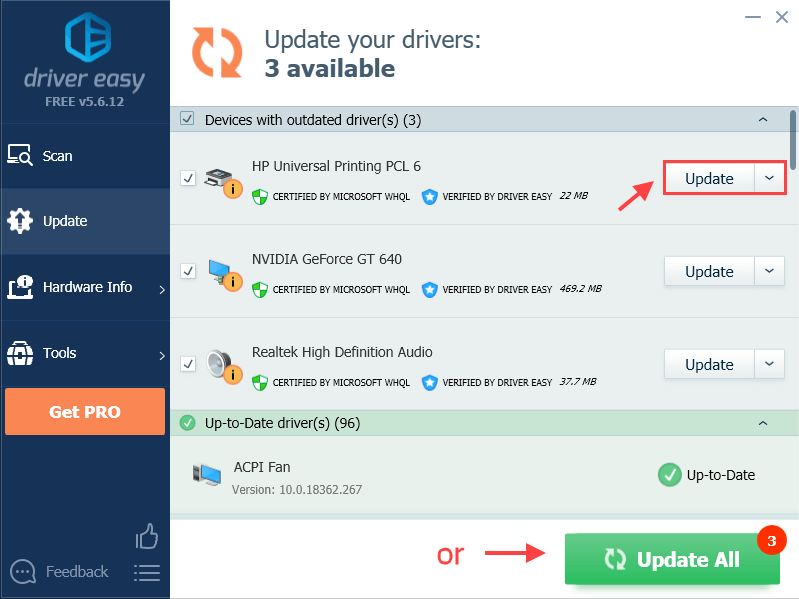
- Step 3: Click Update button next to the HP printer driver to automatically download the correct version of that driver, then you can manually install it (you can do this with the FREE version).
- Or click Update All to automatically download and install the correct version of all the drivers that are missing or out of date on your system. (This requires the Pro version which comes with full support and a 30-day money back guarantee. You’ll be prompted to upgrade when you click Update All.)

- Step 4: After updating the drivers, you’d better perform a restart for the changes to take effect.
Did you find the methods above helpful? Feel free to leave us a comment if you have any questions or suggestions. ?


