Clownfish voice changer is one of the most popular voice translating applications in the world. This app works great with Skype and other communication platforms which is used by many users around the world. And clownfish is trusted by tons of people. So it could be annoying when your Clownfish voice changer could not work.
Try these fixes:
You don’t have to try them all; just work your way down the list until you find the one that works for you.
- Update the Clownfish to the latest version
- Check the version of the platform
- Installing your microphone in clownfish
- Install the application in the default folder
Fix 1: Update the Clownfish to the latest version
The outdated version of the Clownfish could be the reason for the not working issue. To fix the problem, update your Clownfish application is an easy way to try.
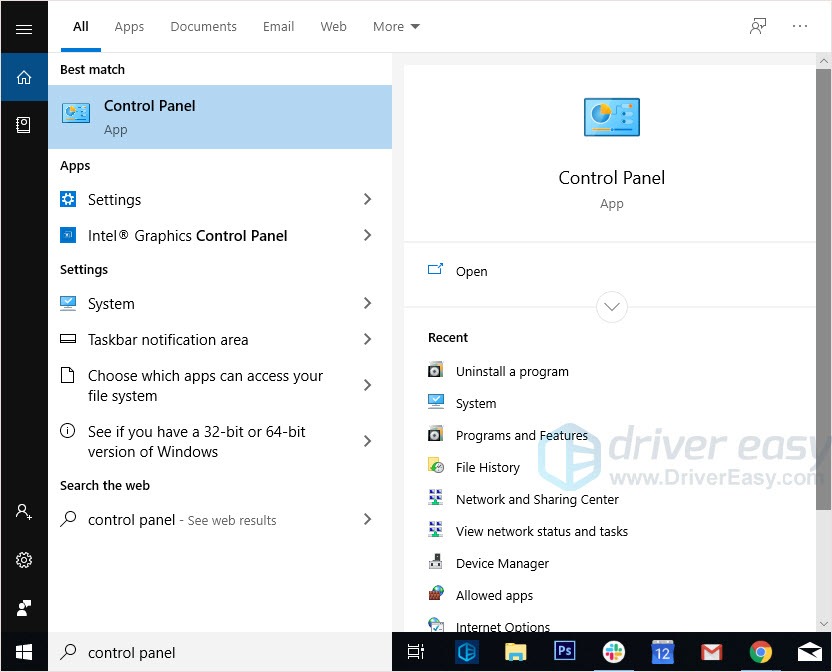
- Type control panel in the search bar and press the Enter key.
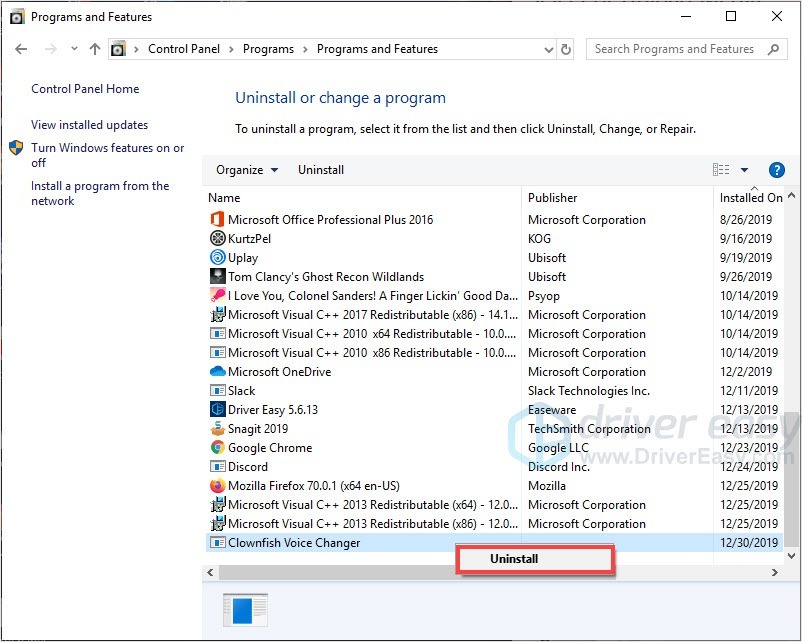
- Set Control Panel view by Category, then click Uninstall a program.

- Right-click on Clownfish Voice Changer and click Uninstall.
- Go to the Clownfish Voice Changer official website.
- Download and install the app.
- Restart your computer and check the app.
Fix 2: Check the version of the platform apps
Clownfish Voice Changer is used on Skype, Discord and other apps. So when you’re using the latest Clownfish but it doesn’t work, it could be the platform application problem.
Check you’ve updated the platform app to the latest version and restart the program again.
Fix 3: Installing your microphone in clownfish
To solve the Clownfish Voice Changer not working problem, the microphone should not be ignored. Because the application needs to use your microphone to detect your voice and translating it to the system. With wrongly installed microphones or incorrect, outdated microphone drivers, Clownfish Voice Changer may not work properly.
- Run Clownfish.
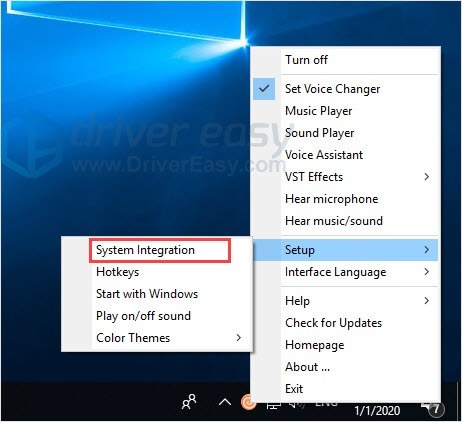
- Right-click on the Clownfish icon in the Taskbar.
Note: Click the ^ button if Clownfish was hidden in the Taskbar.
- Click Setup > System integration.
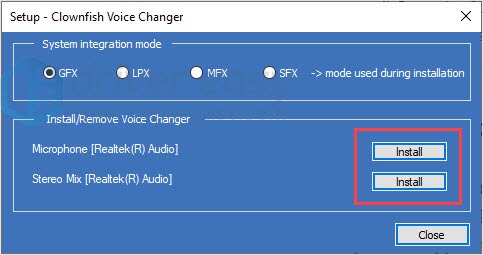
- Select the microphone which is working properly and click Install.
- Restart your computer and check the app.
You can either search the microphone’s official website or use Driver Easy with one click. Because Windows won’t release the latest drivers in time.
If you don’t have time or patience to manually update your drivers, try Driver Easy.
Driver Easy will automatically recognize your system and find the correct drivers for it. You don’t need to know exactly what system your computer is running, you don’t need to risk downloading and installing the wrong driver, and you don’t need to worry about making a mistake when installing.
You can update your drivers automatically with either the FREE or the Pro version of Driver Easy. But with the Pro version it takes just 2 clicks (and you get full support and a 30-day money back guarantee):
- Download and install Driver Easy.
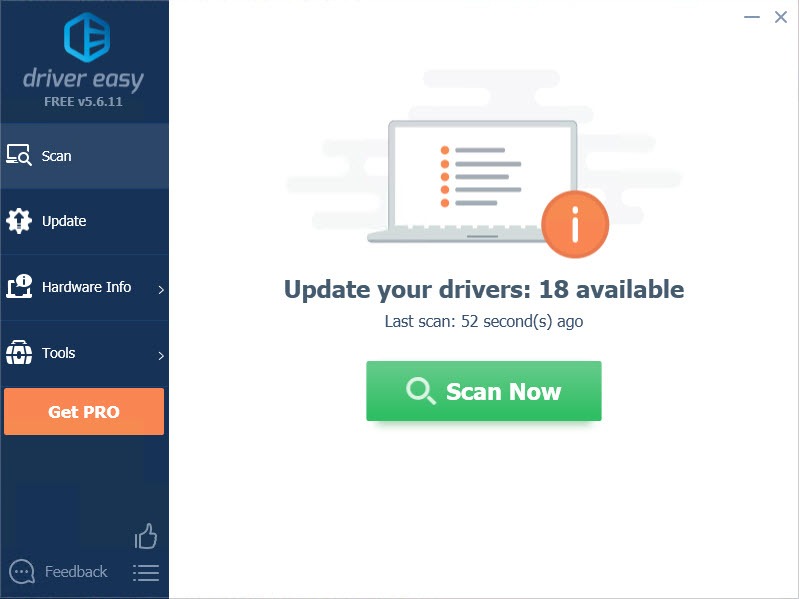
- Run Driver Easy and click the Scan Now button. Driver Easy will then scan your computer and detect any problem drivers.
- Click the Update button next to the flagged driver to automatically download the correct version of that driver, then you can manually install it (you can do this with the FREE version).
Or click Update All to automatically download and install the correct version of all the drivers that are missing or out of date on your system. (This requires the Pro version which comes with full support and a 30-day money back guarantee. You’ll be prompted to upgrade when you click Update All.)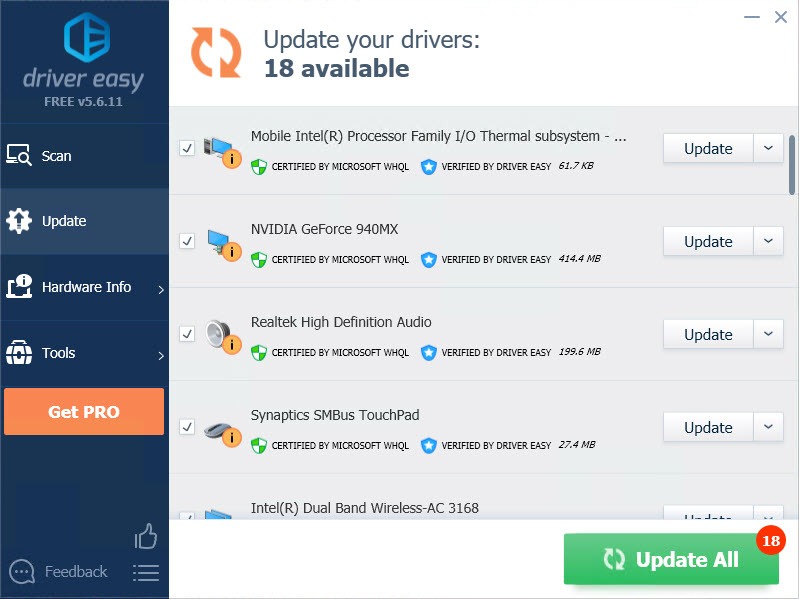
Be sure to attach the URL of this article if needed for more expedient and efficient guidance.
Fix 4: Install the application in the default folder
If the Clownfish application was not installed in the default folder, you may encounter this problem.
Therefore, you can either remove the Clownfish folder or reinstall Clownfish to fix the problem.
To reinstall the Clownfish Voice Changer, you follow the steps in Fix 1.
Hope this article will meet your need. If you have any questions, please leave comments below, and we’ll try our best to help.


