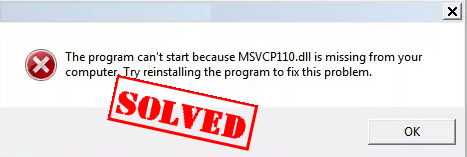
If the error MSVCR110.dll is missing pops up in your computer, don’t worry. This is a common error and you can fix MSVCR110.dll is missing quickly and easily.
How do I fix MSVCR110.dll is missing
You can try the following solutions to fix the issue. You don’t need to try them all; just work you way down until it solves your problem.
- Install the MSVCR110.dll file
- Reinstall the Visual C++ Redistributable Packages
- Reinstall the program
- Run a virus scan for your system
- Copy the file from trusted source
- Bonus Tip
What is MSVCR110.dll is missing
The msvcr110.dll is a part of Microsoft Visual C++. Some programs or applications that are running with Visual C++ need the msvcr110.dll file in your computer.
So the error msvcr110.dll is missing (or msvcr110.dll is not found) appears when you want to run a program that requires Microsoft Visual C++ Redistributable.
1: Install the MSVCR110.dll file
If MSVCR110.dll is missing or not found in your computer, you can fix your problem by restoring the missing file in your computer. To do so, use the Dll-files.com Client.
The DLL-files.com Client will fix your DLL error in one click. You don’t have to know what system is running on your computer, and you don’t need to worry about downloading the wrong file. The DLL-files.com handles it all for you.
1) Download and install the DLL-files.com Client.
2) Run the application.
3) Type MSVCR110.dll in the search box and click Search for DLL file.

4) Click msvcr110.dll in the search result.
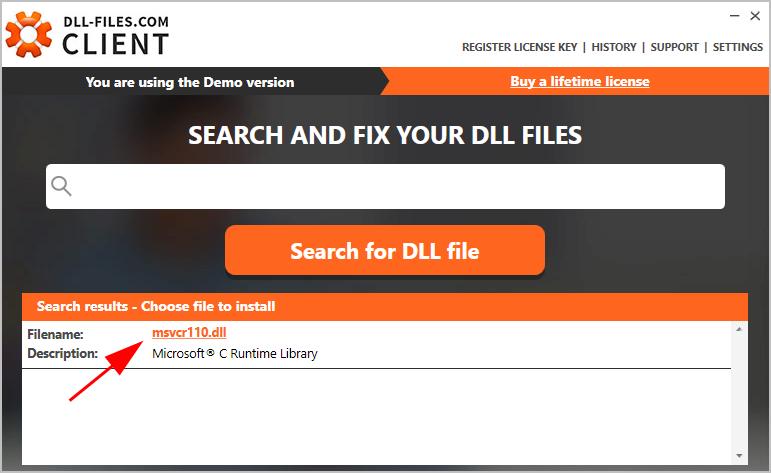
5) Click Install (you’re required to register the program before you can install the files – you’ll be prompted when you click Install).
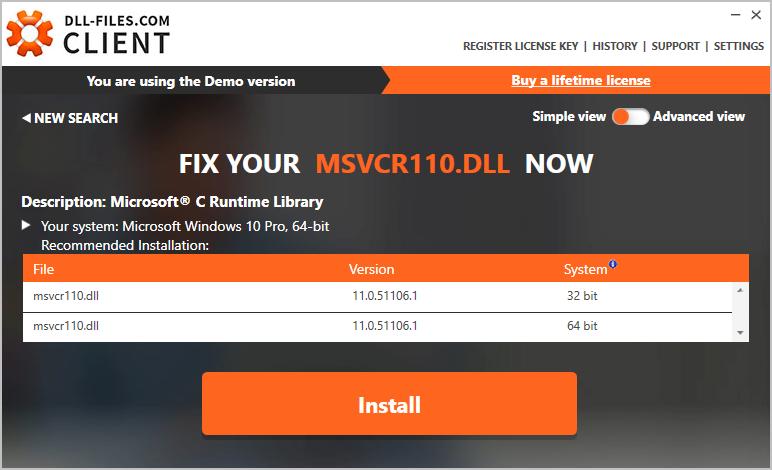
Once install, check if your MSVCR110.dll missing problem has been fixed.
2. Reinstall the Visual C++ Redistributable Packages
As mentioned, the error occurs when trying to run the program that requires Microsoft Visual C++ Redistributable 2012, so you can reinstall the package in your computer to solve the problem.
- Go to Microsoft download center.
- Click Download.

- Select the file according to your system type (x64 for 64-bit and x86 for 32-bit). Then click Next.
Tip: You can check if you are running 32-bit or 64-bit via cmd in your Windows: Open cmd.exe, and type systeminfo, and press Enter, and then you can see your system type is x86-based or x64-based.
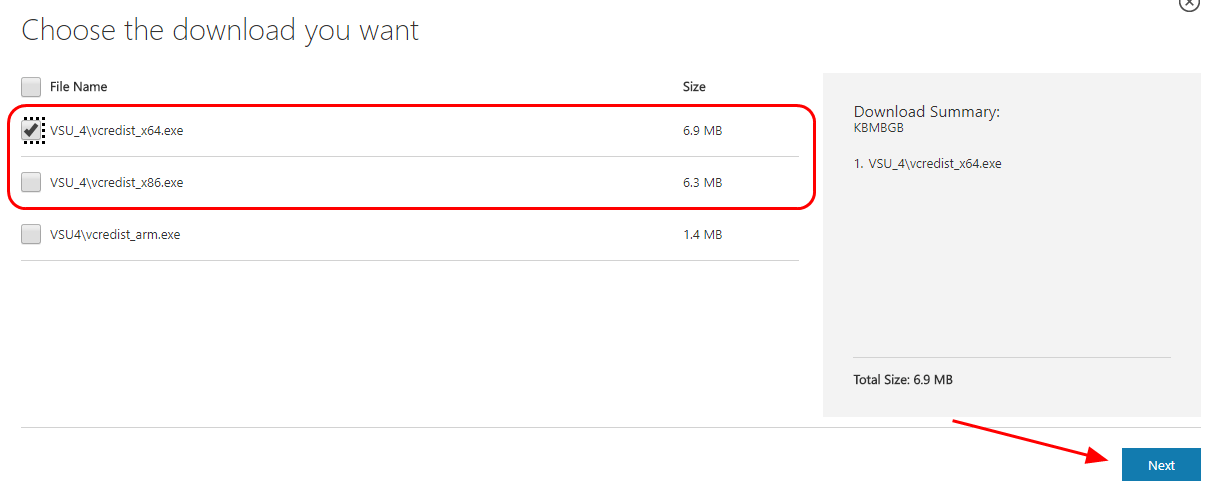
- After downloading, double click the downloaded .exe file, and follow the instructions to install.
- Restart your Windows. Then open the same program to see if it works.
This should resolve your problem. If not, try the following steps.
3. Reinstall the program
The dll file may be corrupted when installing the program, so you can also try to reinstall the program that gives the error to fix it.
- Uninstall the program that gives the error,
- Delete the associated file/folder in your computer.
- Reinstall the program.
- Launch the program again to see if the error is removed.
4. Run a virus scan for your system
The virus in your system can also cause the msvcr110.dll is missing error, so you should run the full virus scan in your computer to make the system works properly.
Run a complete check with your anti-virus program, and Windows Defender may not be able to help, so you can try another anti-virus program, like Norton.
After scanning, follow the on screen instructions to fix any problem detected by your anti-virus program, then restart your computer to see if the problem is solved.
5. Copy the file from trusted source
You can also fix this error by copying the same file from another computer and paste it to your own. To do so:
- Find another computer that runs the same operating system as yours.
The versions (Windows 10/8/7) and architectures (32-bit/64-bit) of both operating systems must be the same. - On that computer, open File Explorer (by pressing the Windows logo key and E on your keyboard), then go to C:WindowsSystem32 and copy the msvcr110.dll there.
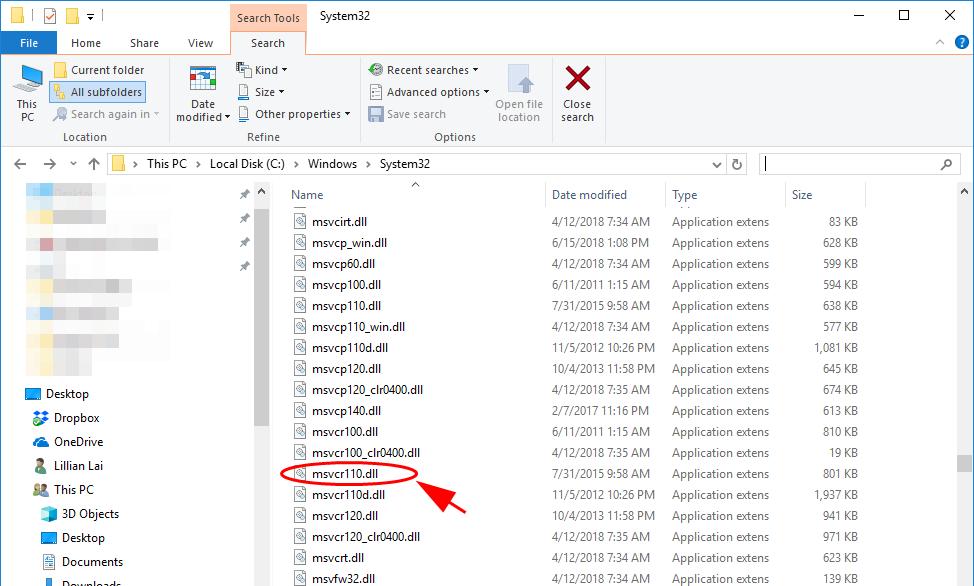
- Paste the copied file to the same location (C:WindowsSystem32) on your own computer. (You may need an external storage device, like a flash drive.)
Try launching the application again and it should be working.
6. Bonus Tip: Update available drivers
A missing or outdated device driver can bring various problems to your computer, so updating device drivers should be an always go-to option to prevent your computer from further issues.
You can update your drivers manually or automatically. The manual process is time consuming, technical and risky, so we won’t cover it here. Nor do we recommend it unless you have excellent computer knowledge.
Updating your drivers automatically, on the other hand, is very easy. Simply install and run Driver Easy, and it will automatically find all the devices on your PC that need new drivers, and install them for you. Here’s how to use it.
1) Download and install Driver Easy.
2) Run Driver Easy and click Scan Now.
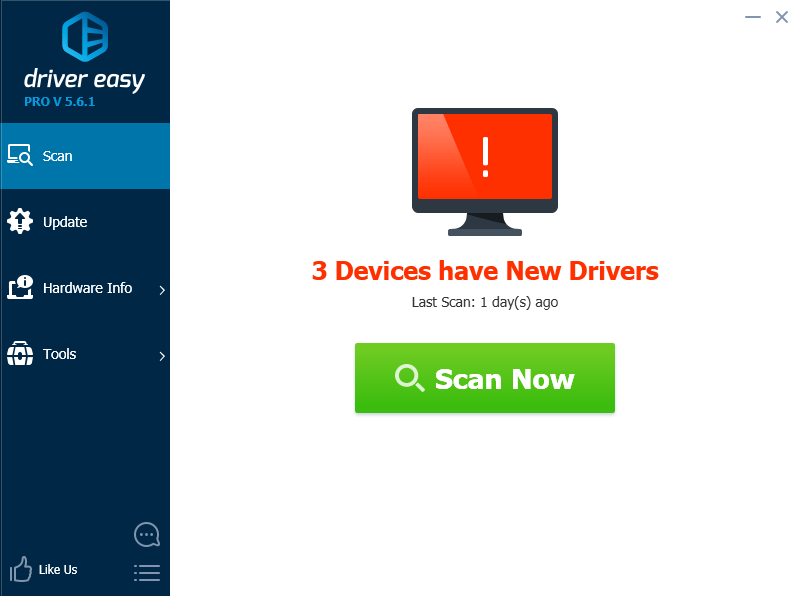
Driver Easy will now scan your computer and detect any problem drivers.
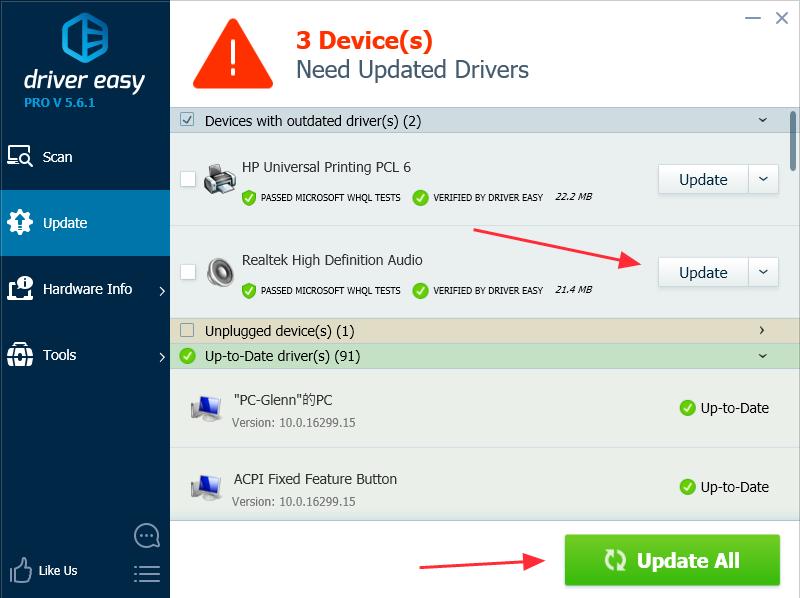
3) If you have the Free version of Driver Easy, click the Update button next to a flagged driver to automatically download the correct driver, then install it in your computer.
But if you have the Pro version you can click Update All to automatically download and install all missing or outdated drivers.
(If you click the Update All button in the Free version you’ll be asked if you want to upgrade to the Pro version.)
4) Restart your computer, and give the program another try.
That’s all there is to it. Which method helps? Feel free to leave us a comment below and we’ll see what more we can do to further help.


