


Phasmophobia has been one of the most popular Early Access games on Steam. But after recent updates, many players reported the game is using high CPU, even 100%. If you’re in the same boat, no worries, we’ve got some quick fixes for you.
Try these fixes…
You don’t have to try them all; just work your way down the list until you find the one that does the trick!
1: Disable unnecessary background programs
2: Change your PC’s power plan
3: Allow high graphics performance for the game
6: Install the latest Windows Updates
System requirements for Phasmophobia
You may need to check out the requirements first to see if your PC/laptop has the sufficient specs for the game.
Minimum Requirement:
| OS | Windows 10 (64-bit) |
| Processor | Intel Core i5-4590 / AMD FX 8350 |
| Graphics | NVIDIA GTX 970 / AMD Radeon R9 290 |
| Memory | 8 GB RAM |
| Storage | 16 GB available space |
| Network | Broadband Internet connection |
| Additional Notes | Minimum Specs are for VR, lower specs may work for Non-VR. |
Recommended Specifications:
| OS | Windows 10 (64-bit) |
| Processor | Intel i5-4590/AMD Ryzen 5 1500X or greater |
| Graphics | NVIDIA GTX 970 / AMD Radeon R9 290 or greater |
| Memory | 8 GB RAM |
| Storage | 16 GB available space |
| Network | Broadband Internet connection |
Fix 1: Disable unnecessary background programs
Programs running in the background can be eating your CPU, so don’t forget to close the ones you don’t need before you start the game. Here’s how:
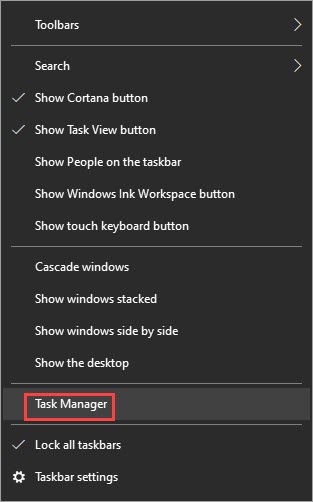
- Right-click your taskbar, then click Task Manager.
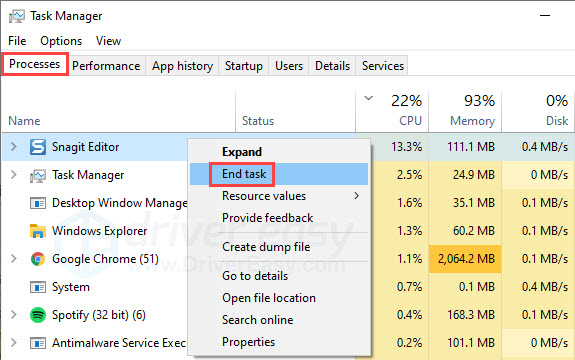
- Under the Processes tab, look for the processes that are CPU-hogging. Right-click it then click End task.
If your CPU usage is still high, try the next fix.
Fix 2: Change your PC’s power plan
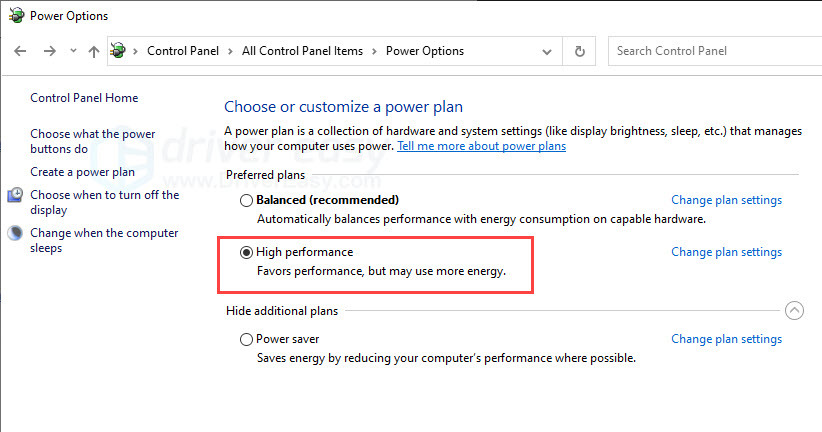
By default, your PC’s power plan is set to “Balanced”. It aims at balancing energy consumption and performance, and thus your CPU speed may be limited. If you’re experiencing high CPU usage, try setting the power plan to “High Performance”. Here’s how:
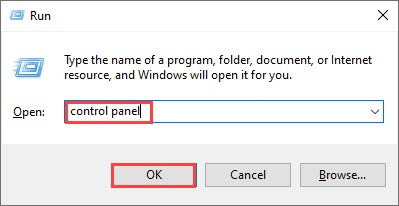
- On your keyboard, press the Windows logo key and R to invoke the Run box.
- Type control panel, then click OK.
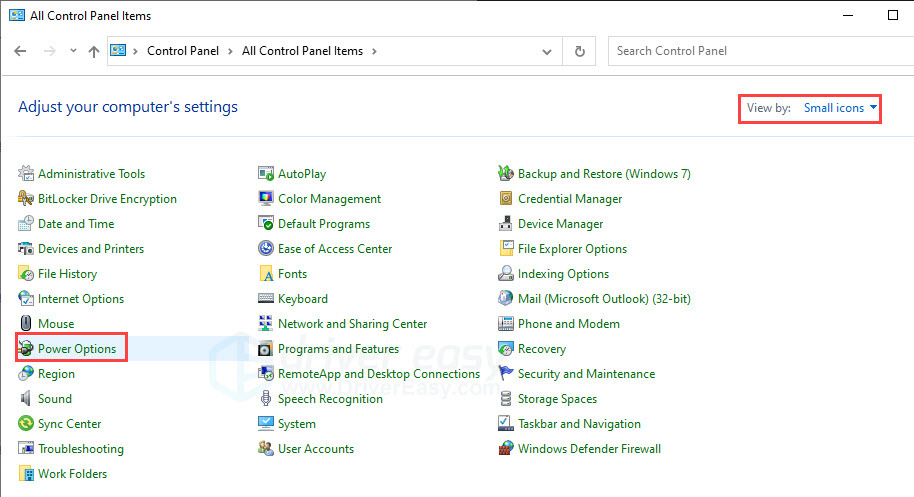
- Choose View by: Small icons, then click Power options.
- Set the power plan to High performance.
- Restart your PC to apply the changes.
If this doesn’t fix your problem, try the next fix.
Fix 3: Allow high graphics performance for the game
To fix high CPU usage while playing Phasmophobia, you can force your graphics to run in high performance mode for the game. In this way, anything that requires GPU in the game will be using GPU, instead of CPU.
However, this method doesn’t guarantee better performance since every game/program differs, so you may want to try different modes to see which one helps most with your high CPU usage without affecting the game. Here’s how:
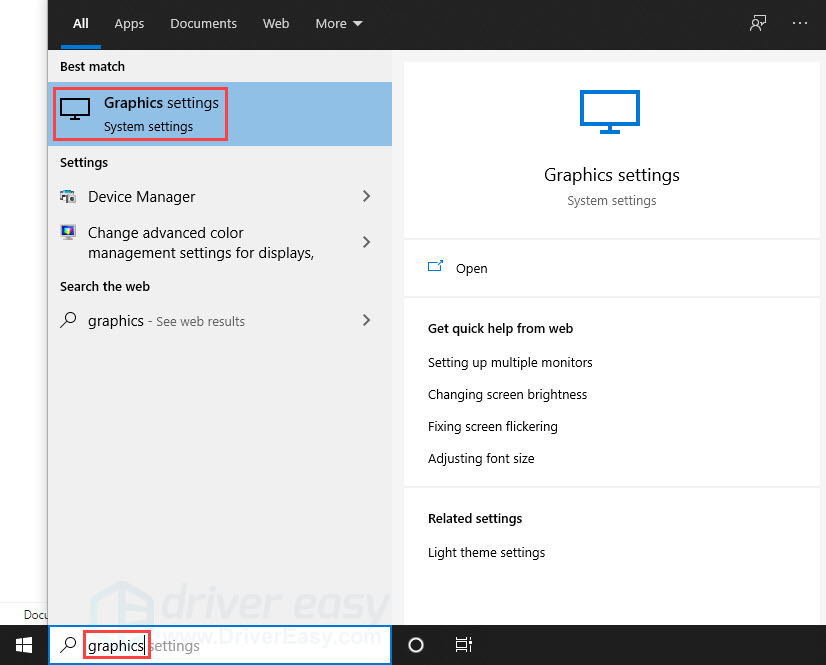
- In the search bar next to the Start button, type graphics then select Graphics settings.
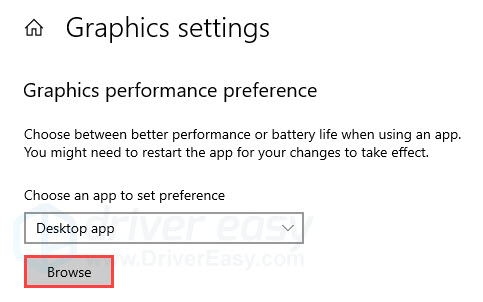
- Click Browse and add Phasmophobia.exe to the list. The default installation location should be C:\Program Files (x86)\Steam\steamapps\common.
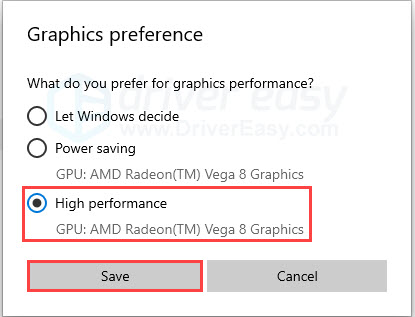
- Once the game executable is added, click Options.

- Select High performance, then click Save.
If this doesn’t solve your problem, try the next fix.
Fix 4: Update your device drivers
Outdated or faulty drivers could trigger the high CPU usage problem. By updating your device drivers, bugs and compatibility issues can be fixed so you’re less likely to experience high CPU usage while playing Phasmophobia .
There are two ways you can get the right drivers for your PC: manually or automatically.
Manual driver update – You can run a scan and update the drivers via Device Manager. Since Windows may not always give you the latest available updates, you may need to go to the manufacturer’s website, and search for the most recent correct drivers. Be sure to choose only drivers that are compatible with your Windows version.
Automatic driver update – If you don’t have the time, patience, or computer skills to update your device drivers manually, you can, instead, do it automatically with Driver Easy. Driver Easy will automatically recognize your system and find the correct drivers for your system, then it will download and install them correctly:
1) Download and install Driver Easy.
2) Run Driver Easy and click the Scan Now button. Driver Easy will then scan your computer and detect any problem drivers.
3) Click the Update button next to the flagged drivers to automatically download the correct version of the drivers, then you can manually install them (you can do this with the FREE version).
Or click Update All to automatically download and install the correct version of all the drivers that are missing or out of date on your system. (This requires the Pro version which comes with full support and a 30-day money-back guarantee. You’ll be prompted to upgrade when you click Update All.)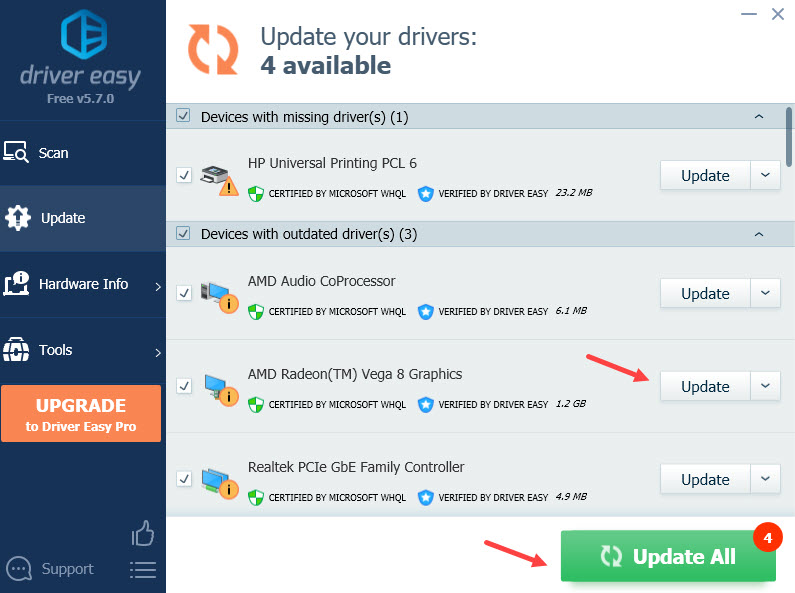
Restart your PC for the new drivers to take effect. Run a game to see if the problem persists.
Fix 5: Adjust in-game settings
Most of us are familiar with or have at least tried to adjust graphics settings in-game for a better performance. But not all settings affect only the GPU, but also your CPU.
It’s hard to tell what settings exactly you should adjust, since we all have different PC specs and every game varies. But in general, you can try to lower or disable V-Sync, shadow quality, resolution, and anti-aliasing. Steam players also suggested turning off volumetric lighting helped, so it’s definitely worth a try.
Tweaking these settings may or may not reduce your CPU usage, but at least you should get a FPS boost. You may have to tinker around to find what works best for you. If this fix doesn’t solve your problem, there’s one more fix you can try.
Fix 6: Install the latest Windows updates
High CPU usage may also be a sign that your system needs an update. If your system isn’t updated regularly, there could be compatibility issues and bugs. Make sure that you always install the available updates. Here’s how:
- In the search bar next to your Start button, type update, then click Check for updates.
(If you don’t see the search bar, click the Start button and you’ll find it in the pop-up menu.)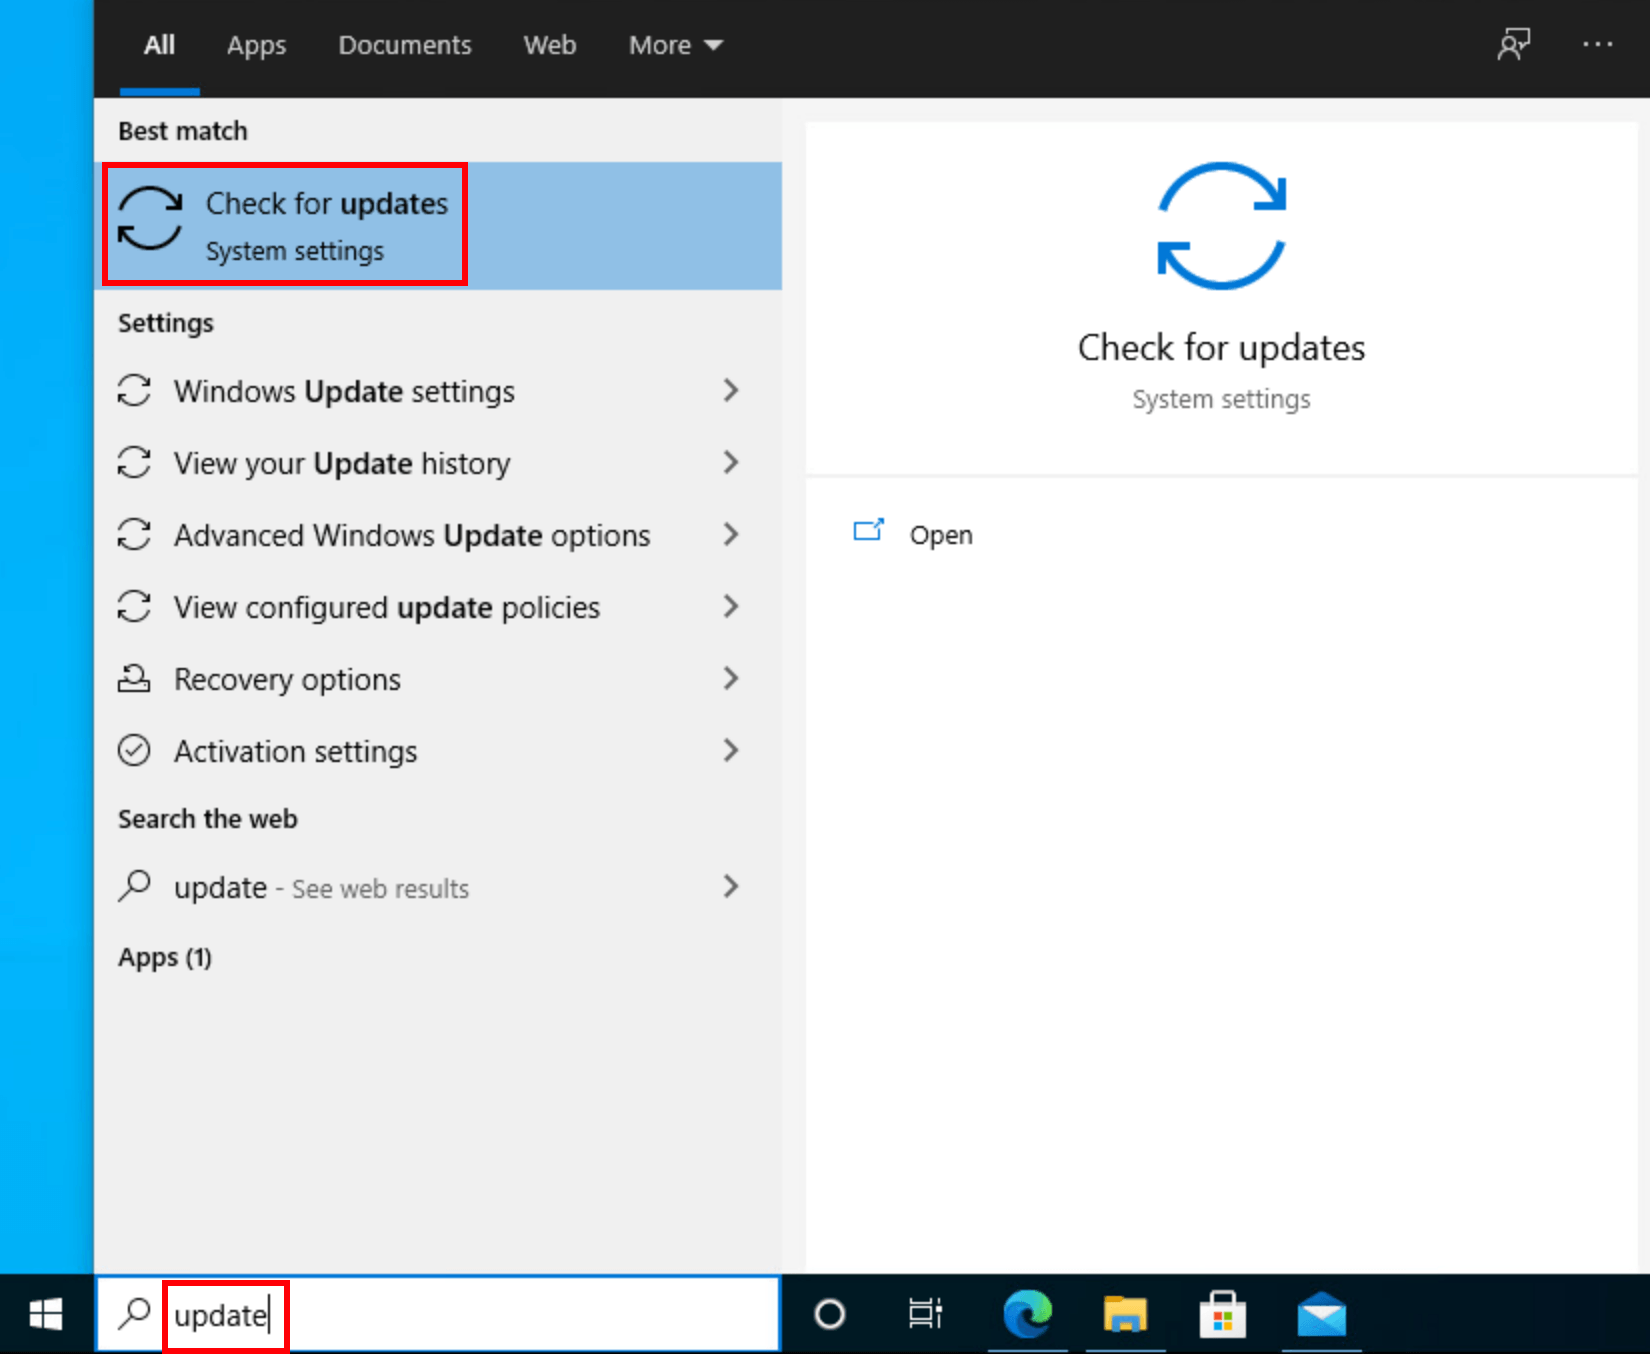
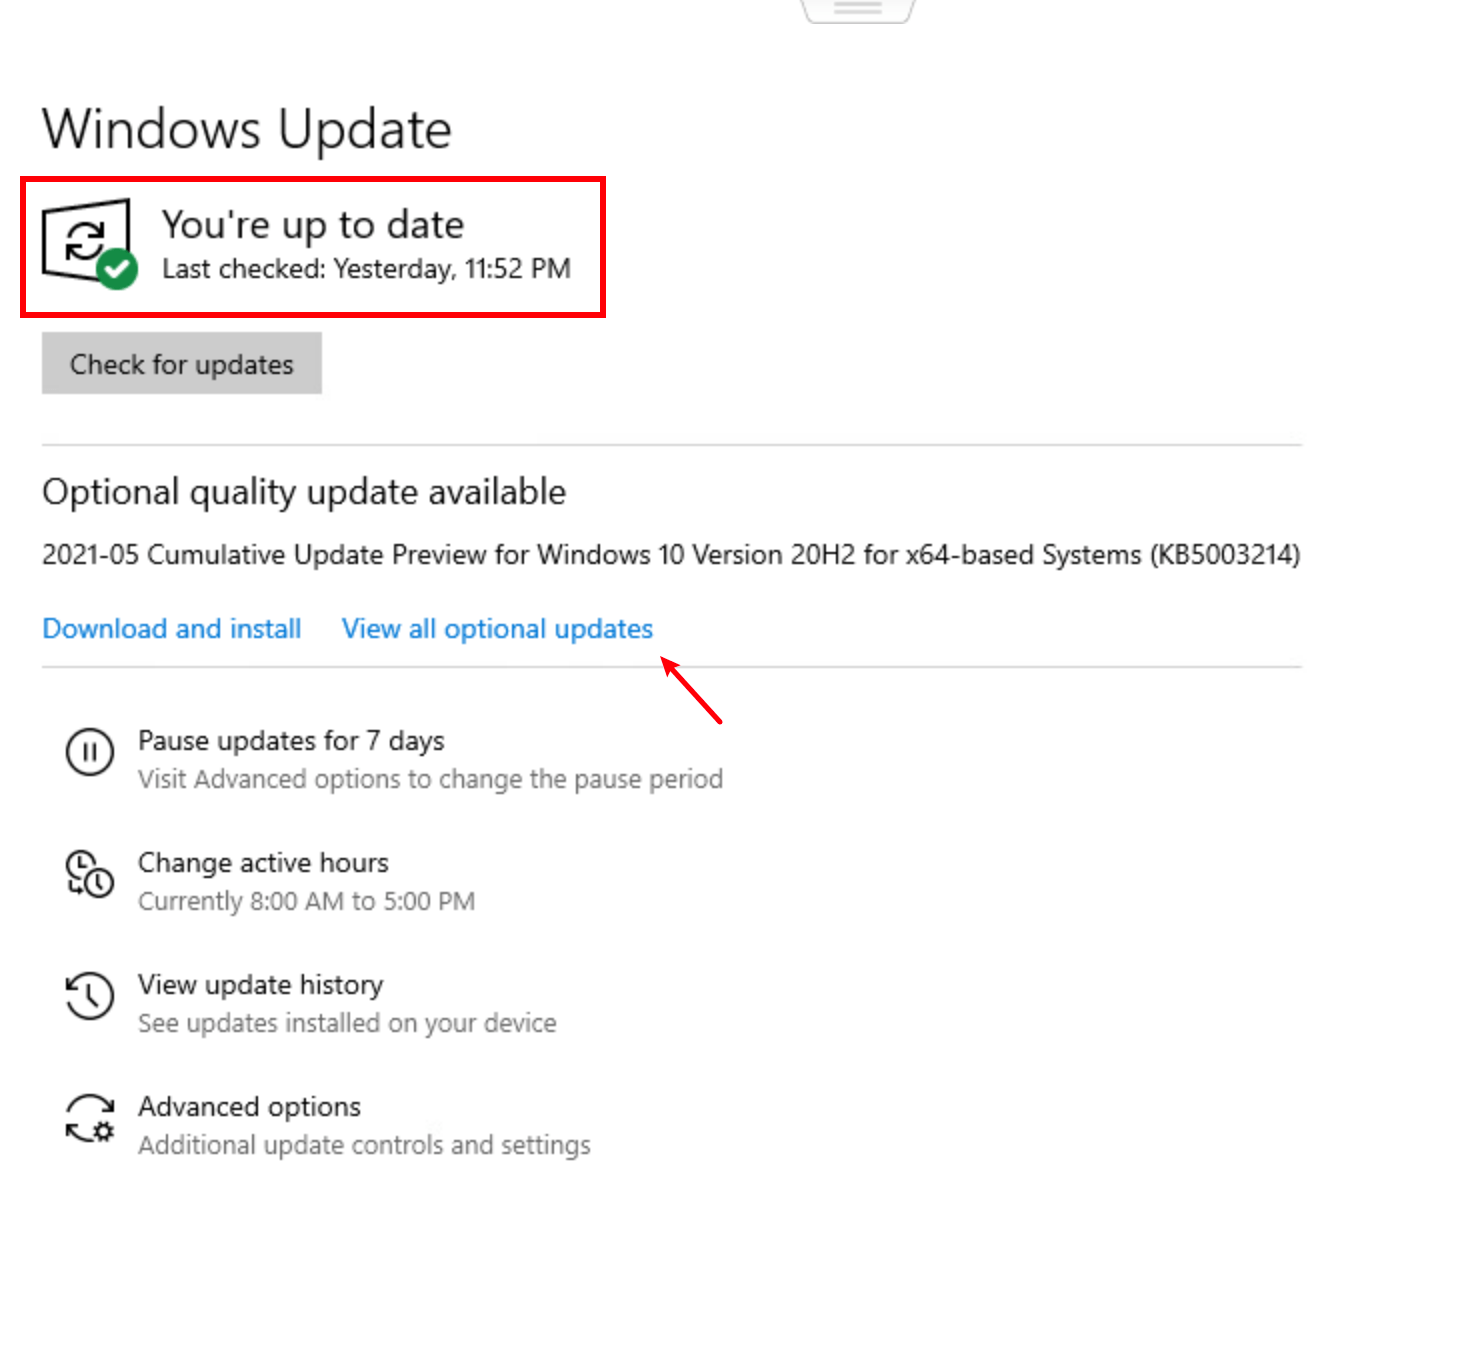
- Windows will scan for any available updates. If there are no available updates, you’ll get a You’re up to date sign. You could also click View all optional updates and install them if needed.
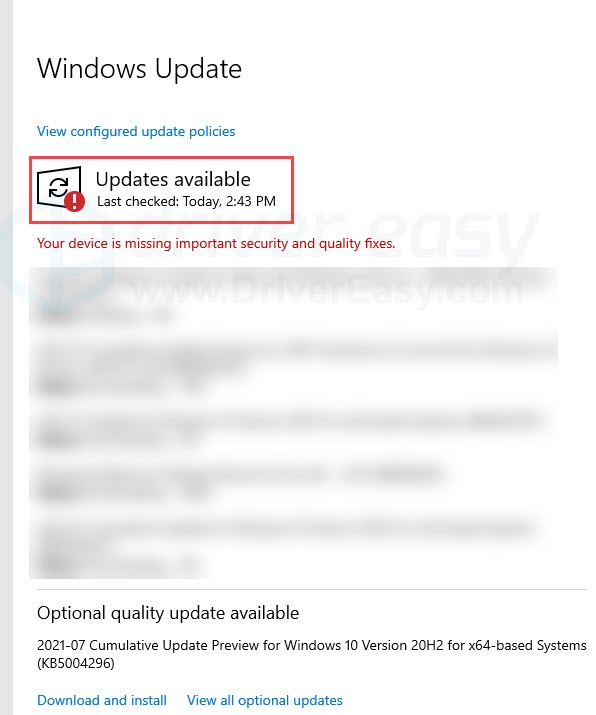
- If there are available updates, Windows will automatically download them for you. Follow instructions to complete the installation if needed.
- Restart your PC to apply the changes.
Hopefully this article helps! Please feel free to leave a comment down below if you have any suggestions or questions.