Scanner not working is a common issue in Windows 10, especially in new Windows 10. If your scanner doesn’t work in Windows 10, don’t worry. You’re not alone. Many Windows 10 users have reported this issue. You can fix the problem with one of the solutions below.
There are three solutions you can try to fix the problem. You may not have to try them all. Just try them one by one until you find the one that works for you.
Try these fixes when your scanner is not working
Solution 1: Repair Corrupted System Files
The problem can be caused by corrupted system files. To check and repair the corrupted files, follow these steps:
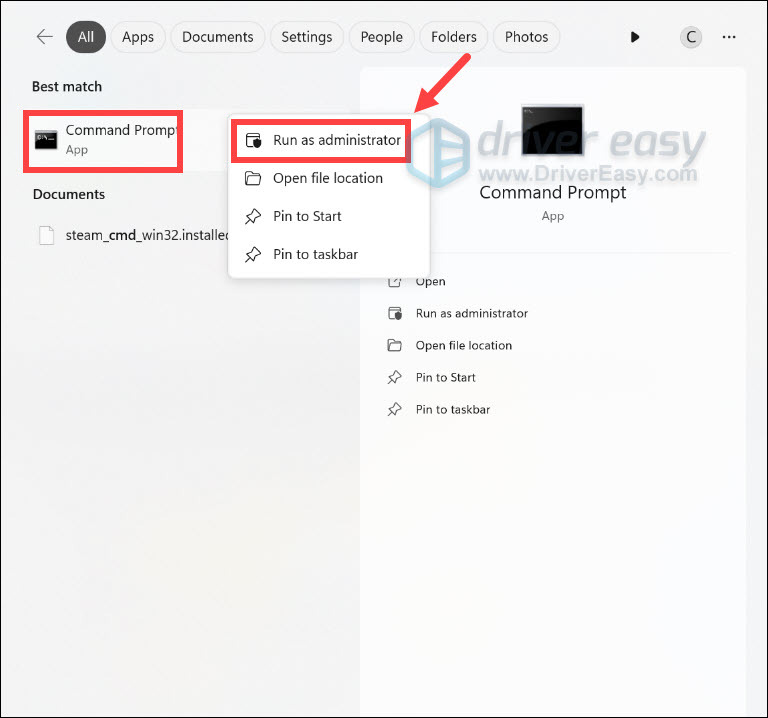
- On your Windows search bar, type cmd. Right-click Command Prompt from the results and select Run as administrator.
- When the Command Prompt opens, type sfc /scannow and press Enter.
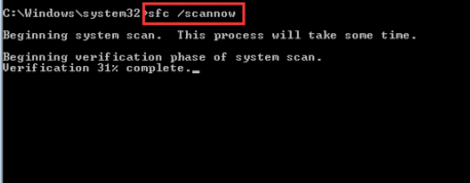
- The process will take several minutes until the verification is 100% complete.
Solution 2: Configure Related Services
If some related services are not started, the scanner cannot work properly. Here are the related services for scanning. So make sure that these services are started:
- Remote Procedure Call RPC
- DCOM Server Process Launcher
- RPC Endpoint Mapper
- Shell Hardware Detection
- Windows Image Acquisition (WIA)
The steps below are for your reference on how to check for the service status. Here, let’s take Shell Hardware Detection for example.
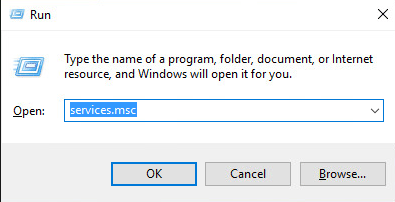
- Hold Down the Windows logo and press the R key. A Run dialog box will pop up. Type services.msc in the run box and click OK button.
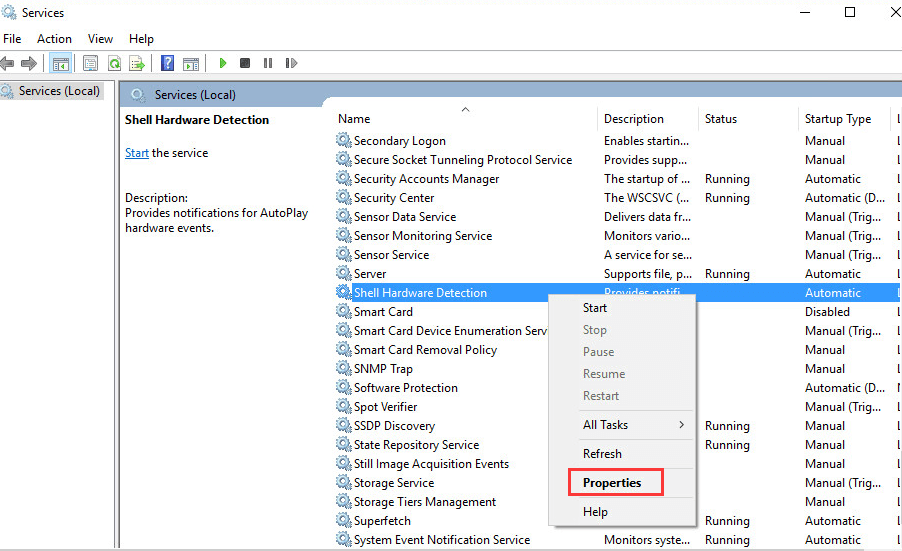
- Find Shell Hardware Detection from Name list. Right-click on it and select Properties from the context menu.
- If you see “Service status” is Stopped, click Start button and OK button. Then the service will start again.
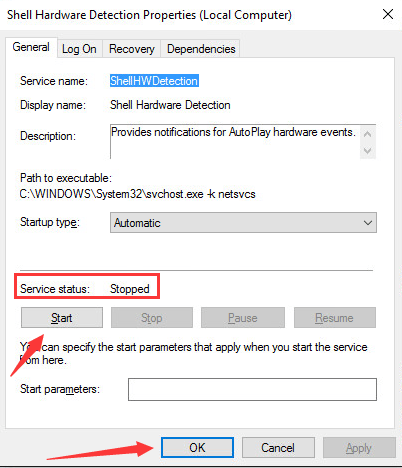
IMPORTANT: Repeat steps these steps to check and configure other related services.
Solution 3: Update the Driver for Your Scanner
If the scanner driver is having a problem, the scanner cannot scan correctly. So updating the driver may resolve the problem. You can go to your scanner’s manufacturer’s website to download the latest Windows 10 driver. For some models, the manufacturer might not release a Windows 10 driver. In this case, try the driver for Windows 7 or Windows 8, which is always compatible with Windows 10.
If you don’t have time, patience, or computer skills to update drivers manually, you can do it automatically with Driver Easy.
Driver Easy will automatically recognize your system and find the correct drivers for it. You don’t need to know exactly what system your computer is running, you don’t need to risk downloading and installing the wrong driver, and you don’t need to worry about making a mistake when installing.
You can update your drivers automatically with either the 7 days free trial or the Pro version of Driver Easy. It takes just 2 clicks, and you get full support and a 30-day money-back guarantee with the Pro version:
- Download and install Driver Easy.
- Run Driver Easy and click the Scan Now button. Driver Easy will then scan your computer and detect any problem drivers.

- Click the Activate & Update button next to the flagged device to automatically download and install the correct version of this driver.
Or click Update All to automatically download and install the correct version of all the drivers that are missing or out of date on your system (You’ll need the Pro version for this – when you select Update All, you’ll get a prompt to upgrade. If you’re not prepared to purchase the Pro version yet, Driver Easy provides a 7-day trial at no cost, granting access to all Pro features like fast downloads and easy installation. No charges will occur until after your 7-day trial period ends.)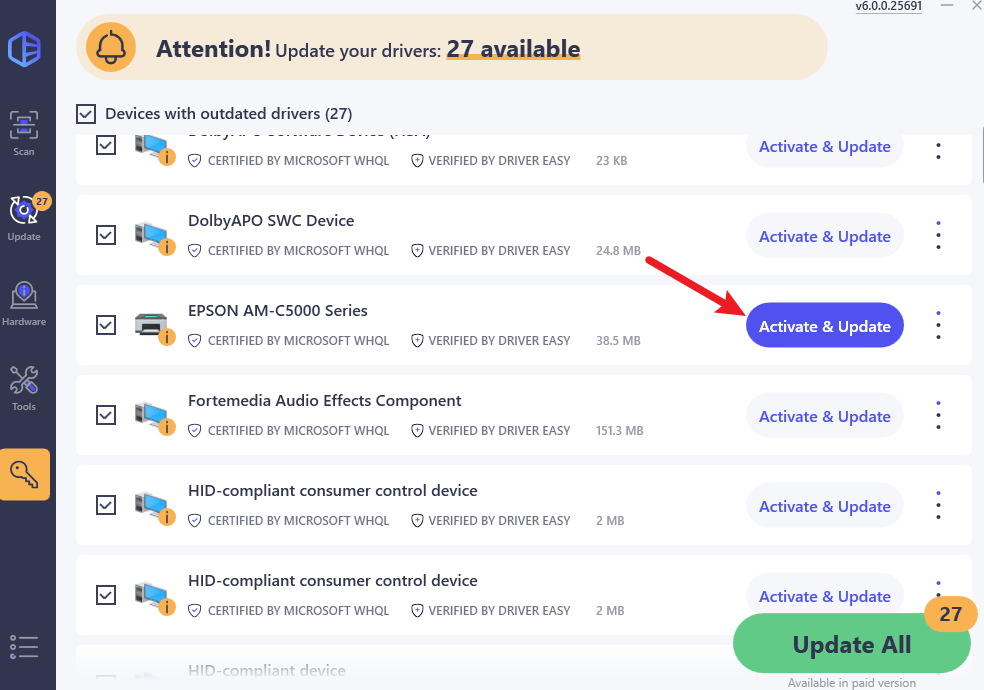
- After updating, restart your computer to take effect.
Hope the solutions help you fix the scanner not working in Windows 10 issue. If you have any questions, please leave your comments. We’d love to hear any ideas or suggestions.


