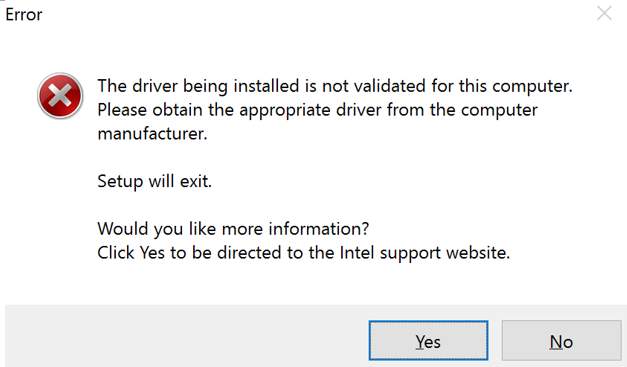
 Have you got error like this?
When installing the Intel driver, if you get error message saying “The driver being installed is not validated for this computer. Please obtain the appropriate driver from the computer manufacturer.“, don’t worry. You can install the driver successfully by following the instructions in this article.
Why this error occurs?
You must wonder why this error would occur as you downloaded the driver from Intel official website. Read on then you’ll know why.
To update Intel drivers, you can download the new driver not only from the Intel but also from the computer manufacturer. Intel supplies the generic versions of drivers for the generic purpose. And the computer manufacturer changes and customizes the Intel generic drivers in order to get the hardware work at its best performance.
Usually, you’re recommended to download the driver from the computer manufacturer first. If you install the driver from Intel, your computer may block the installation, then you’ll get errors like this.
How do you install the driver successfully?
There’re 3 ways you can install the Intel graphics driver. You can pick up the way that you like.
Way 1: Install the driver from computer manufacturer
Way 2: Install the driver automatically using Driver Easy
Way 3: Install the driver manually using the .inf file
Way 1: Install the driver from computer manufacturer
Since you can’t install the Intel generic graphics driver, go to the computer manufacturer’s website to check and download the new driver.
NOTE: The computer manufacturer may have stopped providing support for your PC model. In this case, this way doesn’t work for you. Move on and use another way.
Way 2: Install the driver automatically using Driver Easy
Install the driver manually may cause failure installation like this. So to install the driver successfully, you can do it automatically with Driver Easy.
Driver Easy will automatically recognize your system and find the correct drivers for it. You don’t need to know exactly what system your computer is running, you don’t need to risk downloading and installing the wrong driver, and you don’t need to worry about making a mistake when installing.
You can update your drivers automatically with either the FREE or the Pro version of Driver Easy. But with the Pro version it takes just 2 clicks (and you get full support and a 30-day money back guarantee):
1) Download and install Driver Easy.
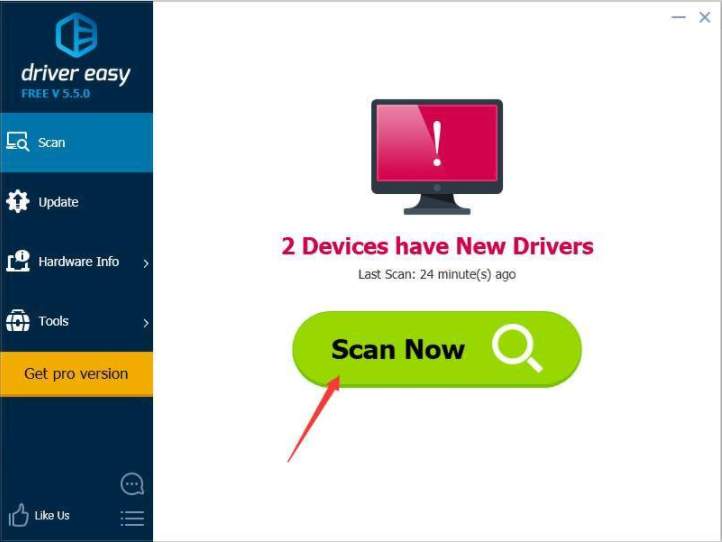
2) Run Driver Easy and click Scan Now. Driver Easy will then scan your computer and detect any problem drivers.
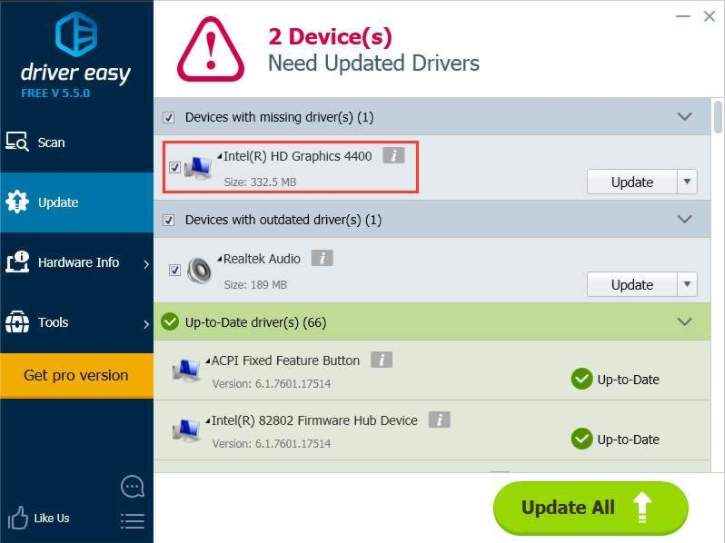
3) Click the Update button next to a flagged Intel graphics card driver to automatically download and install the correct version of it (you can do this with the FREE version). Or click Update All to automatically download and install the correct version of all the drivers that are missing or out of date on your system (this requires the Pro version – you’ll be prompted to upgrade when you click Update All).
Way 3: Install the driver manually using the .inf file
If you still want to install the Intel generic graphics driver, you can install it manually using the .inf file.
Refer steps below.
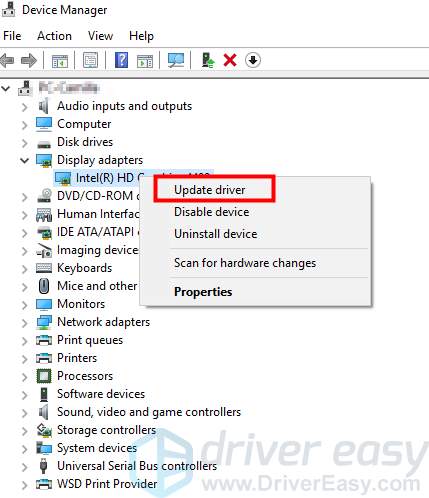
1) Open Device Manager.
2) Expand the Display adapters branch. Right-click the Intel graphics card and click Update driver (In your case, the name might be Update Driver Software…).
3) Click Browse my computer for driver software.
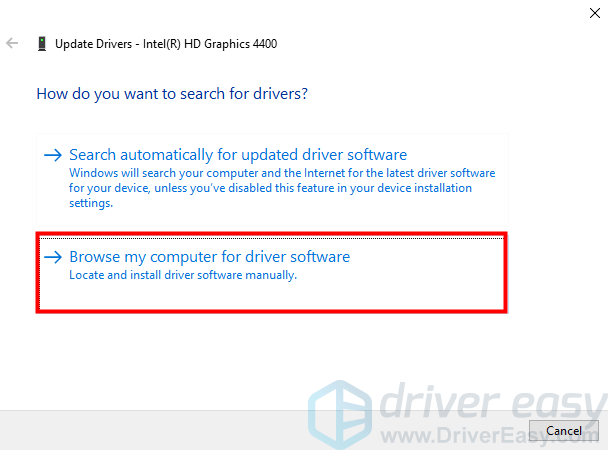
4) Click Let me pick from a list of available drivers on my computer.
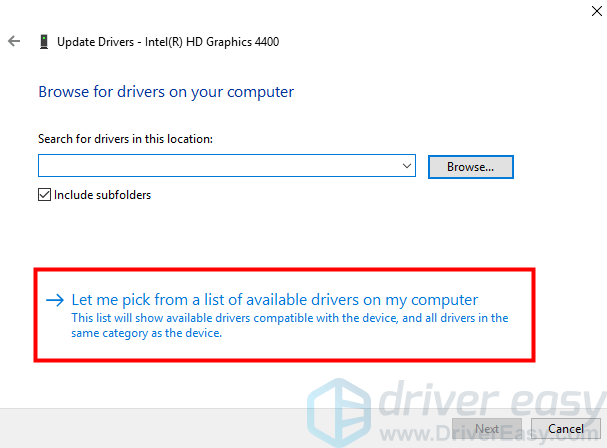
5) Click the Have Disk button.
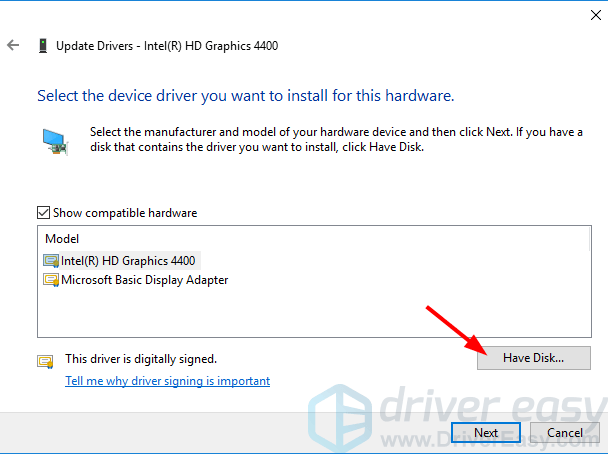
6) Click the Browse button.
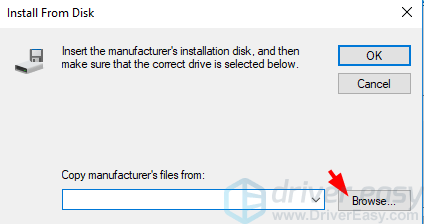
7) Navigate to folder where you saved the downloaded Intel driver file. (If you download the driver in .zip file, you need to extract it first.)
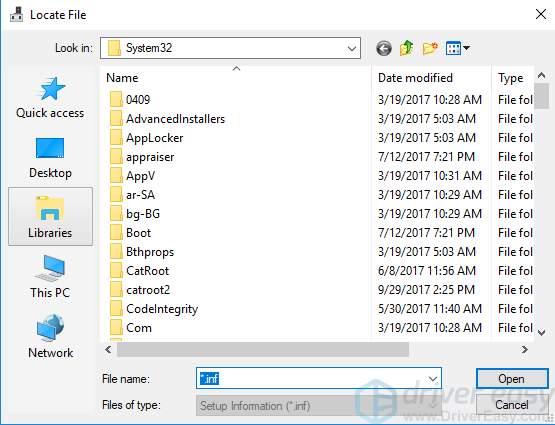
8) Go to the “Graphics” sub-folder.
Usually, the .inf file will be selected automatically. If not, select the .inf file on your own .
9) After selecting the .inf file, follow the on-screen instructions to finish installing the driver.
Hope you can have the driver installed successfully with the instructions in this article.
If you have any questions, please leave your comments below. I’d be happy to answer your questions.


