Picture this: You’re in the middle of an intense gameplay or working on a project, then suddenly, there’s no signal on your monitor, leaving you out of nowhere. Generally, the no signal message on the screen indicates that the monitor isn’t getting any input from your PC. Fortunately, there are some troubleshooting steps you can take.
1. Ensure the display cable is securely connected
A loose connection between your monitor and your PC will trigger the monitor’s no-signal issue. If you’re seeing the no signal message on your screen when your Windows system is running, the first thing you should check is whether your display cable is firmly connected or not. You should also ensure that the cable is not damaged by testing it on other devices.
If you’ve confirmed that the problem is not on the cable’s end, try the next fix.
2. Check if you selected the correct input source
If you don’t select the correct input source for your monitor, you’ll also get the no signal issue. Before you select the correct input source for your monitor, you need to know what ports your PC and the monitor have.
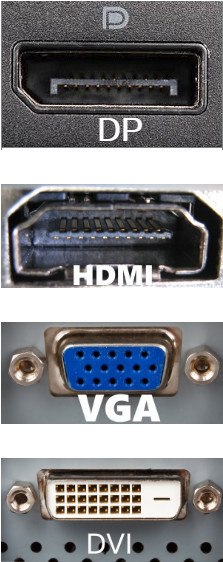
Follow the instructions below to select the correct input source for your monitor:
- Ensure your PC and your monitor are both turned on.
- Press the menu button on the edge of your monitor.
- Navigate to Input Source and select the correct input source. For example, if you connect your monitor to the VGA port on your PC, then set the input source as VGA.
See if this issue reappears. If not, you have fixed this problem!
3. Test with integrated graphics (if available)
If your processor (CPU) includes integrated graphics, you can connect your monitor directly to the motherboard’s display output. This approach helps determine whether the issue originates from the dedicated graphics card.
Before proceeding
You should confirm that your computer has an integrated graphics:
1. Check what processor you have: Press the Windows logo key + R, then type msinfo32 and hit Enter. Select System Summary from the left navigation pane and you should be able to see your CPU specifications.


2. Search for the information on the integrated graphics:
For Intel Processors:
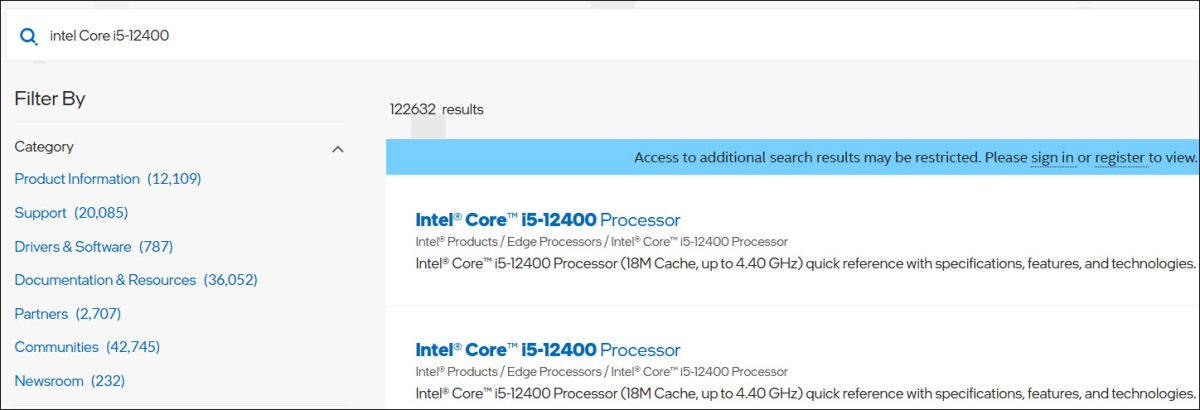
Visit the homepage of the ofifcial website. Then input your processor model in the search field (e.g. Intel Core i5-12400).
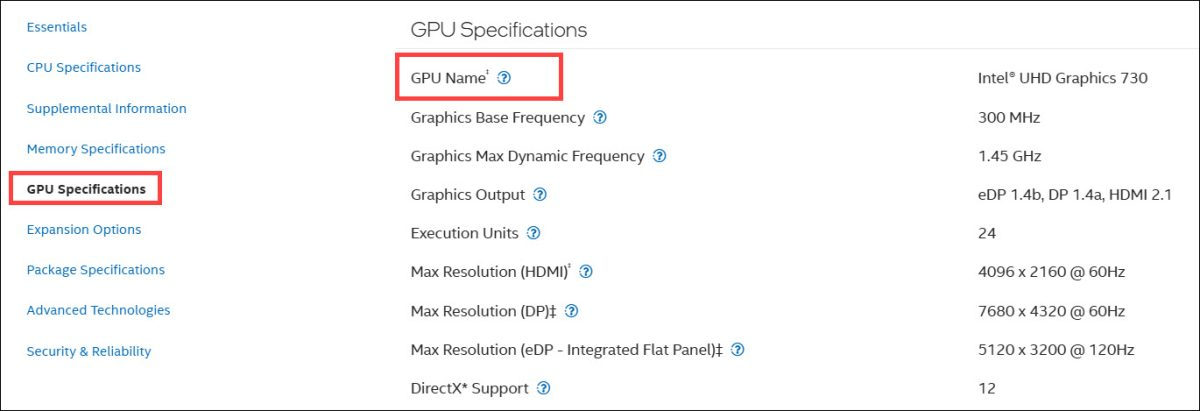
Review the specifications for a section labeled GPU Specifications. If the section is listed with a specific model (e.g., Intel® UHD Graphics 730), your CPU includes integrated graphics.
For AMD Processors:
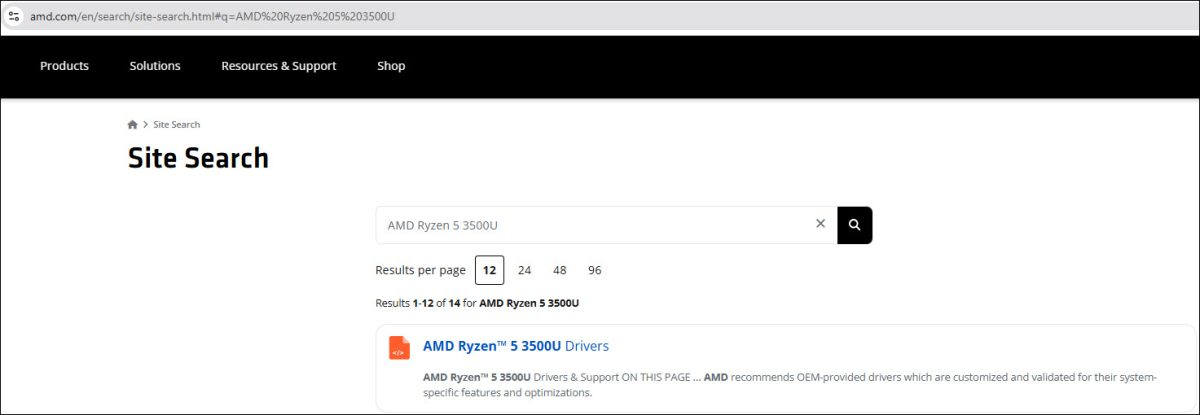
Visit the homepage of the ofifcial website. Then input your processor model in the search field (e.g. AMD Ryzen 5 3500U).
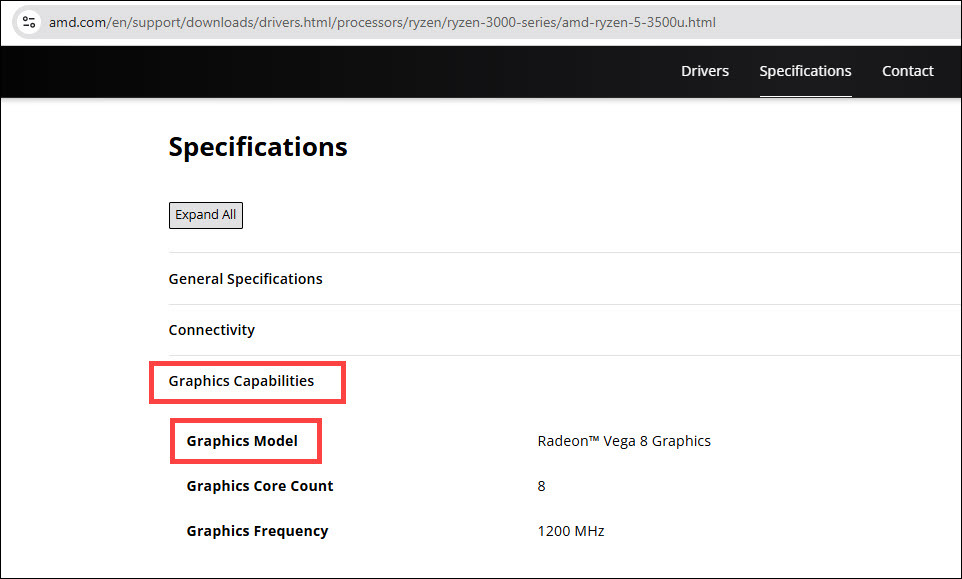
Review the specifications for a section labeled Graphics Capabilities. If the section is listed with a specific model (e.g., Radeon™ Vega 8 Graphics), your CPU includes integrated graphics.
Once you know that your CPU has an integrated graphics as well as the specific model, take the following steps to test with your integrated graphics.
Steps to test
1. Shut down your system completely and disconnect the monitor from the dedicatd GPU.
2. Connect the monitor to the motherboard’s display output.
3. Turn on the computer and monitor.
Interpreting the results
Scenario 1: If the display works
This suggests a potential issue with the dedicated graphics card. Consider the following steps:
1. Reseat the dedicated GPU
- Power down and unplug the computer.
- Open the case and carefully remove te graphics card.
- Inspect the card and its slot for any visible damage or debris.
- Firmly reinsert the GPU into its slot.
- Reconnect any necessary power cables to the GPU.
- Close the case, reconnect peripherals, and power on the syste.
2. Update graphics driver
- Boot the computer using the integrated graphics.
- Download and install the latest drivers for your dedicated GPU from the manufacturer’s website or use Driver Easy to help you do the work.
Driver Easy can simplify the process of updating drivers, solving issues caused by outdated drivers.
✓ Automatically detect all missing, outdated or mismatched drivers
✓ One click to update all drivers
✓ All drivers certified
✓ No internet? – Scan offline then download the right network driver on another PC
✓ Safe restore: roll back to the previously installed driver
And much more…
3. Test the dedicated GPU again
- Reconnect the monitor to the dedicated GPU.
- Power on the computer and check for display output.
- If there’s still no signal, the GPU might be faulty. Test it in another system if possible, or consult the manufacturer for further assistance.
Scenario 2: If there’s still no display
This indicates a broader issue that could involve the motherboard, CPU, RAM, or other components. It’s advisable to seek assistance from a professional technician or contact the manufacturer’s support.


