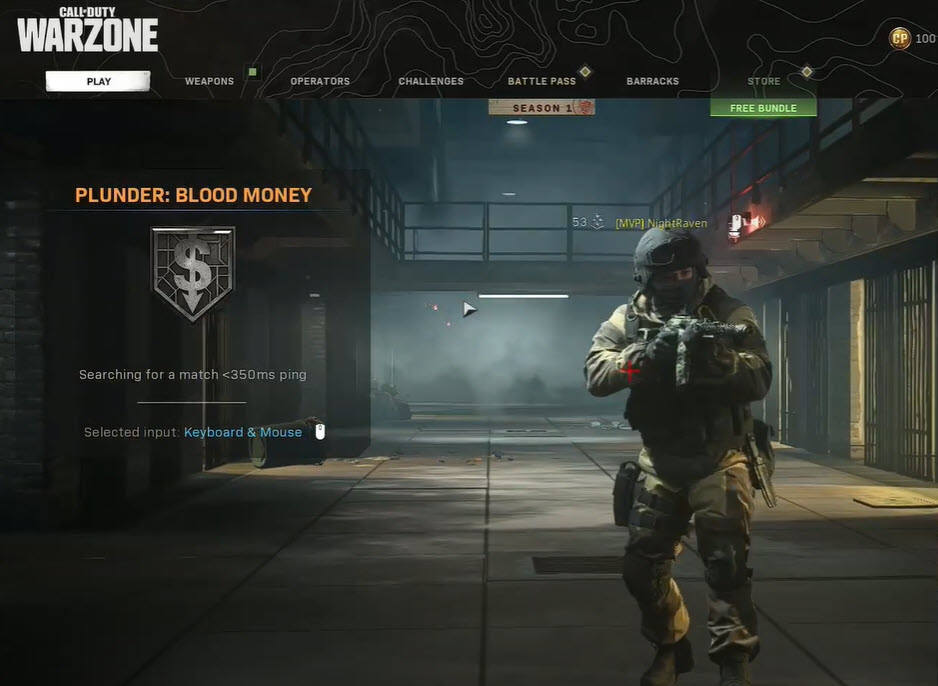
Stuck in “Searching for a match” when playing Call of Duty: Warzone? You’re definitely not the only person to experience this issue. Although it’s hard to pinpoint the exact cause of this problem, you can use some simple solutions to fix it.
Try these fixes:
You may not try them all; just work your way down the list until you find the one that works for you.
- Install the latest game patch
- Update your network driver
- Restart your modem and router
- Close other bandwidth-heavy applications
- Enable Crossplay
- Change your region
- Repair game files
- Create a new account
Fix 1: Install the latest game patch
Sometimes the developers will release new patches to fix bugs or issues. So you need to make sure the game itself is updated. Steam and Activision update Warzone automatically by default, so if you’re on these two platforms, you should be good.
Here’s how to update the game files on Battle.net:
- Launch the Battle.net client.
- In the left panel, click Call of Duty: MW. Then, click Options and select Check for Updates.
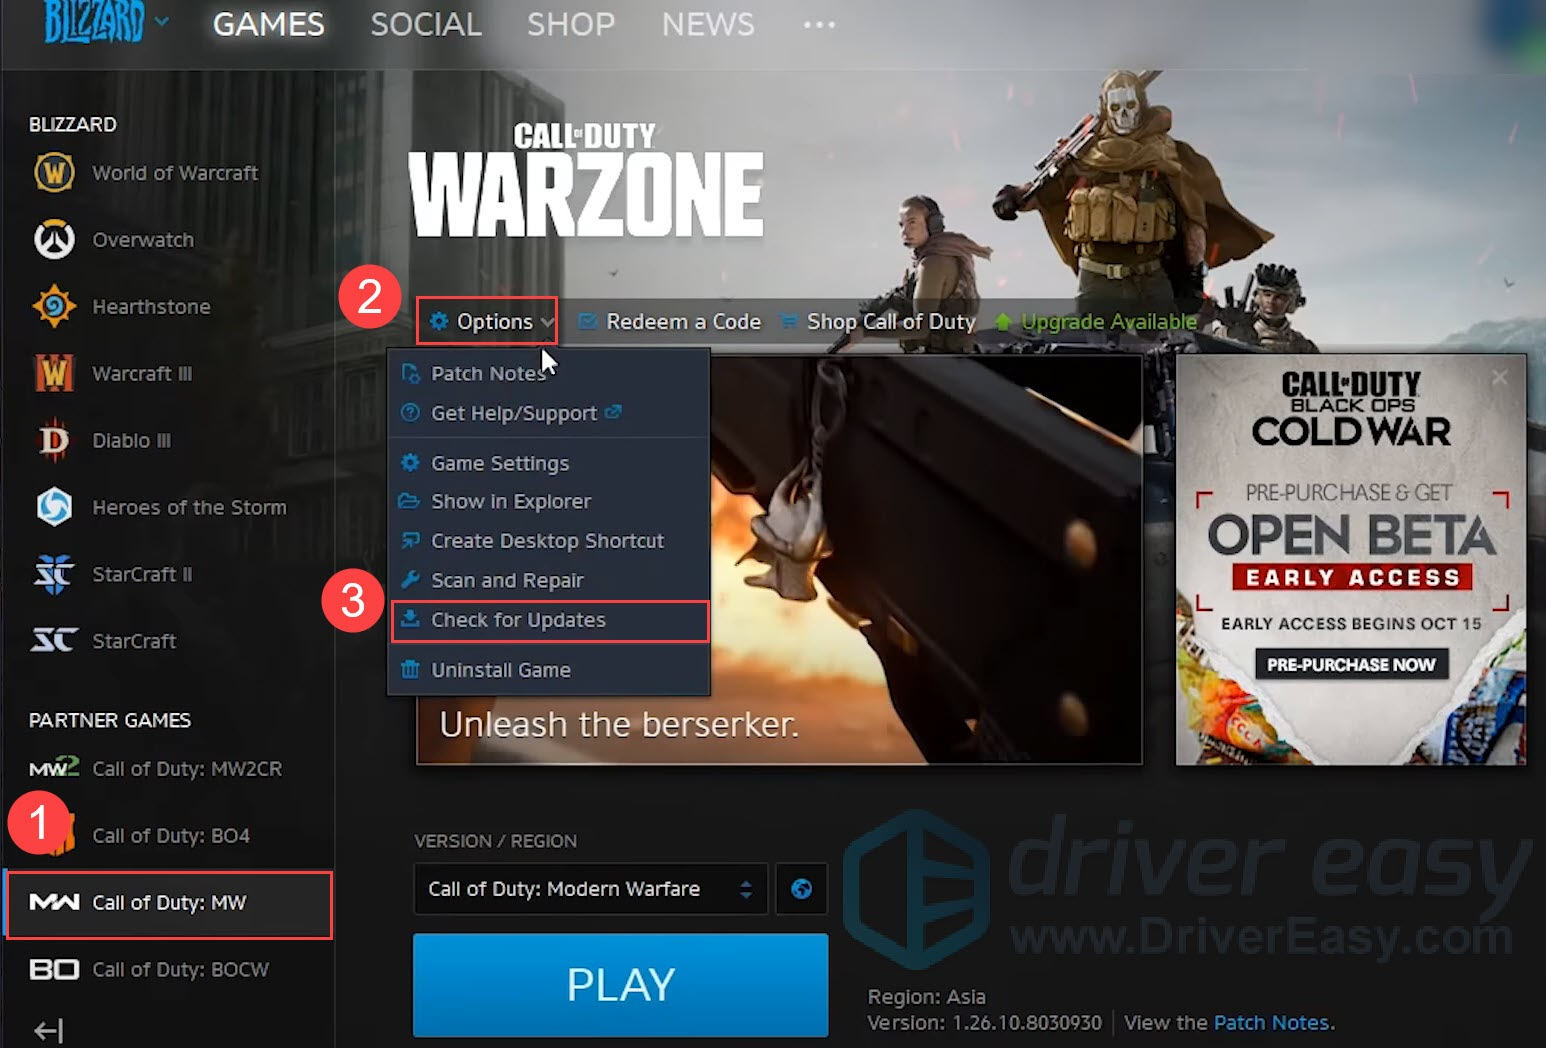
- It will automatically check for the available update and install it.
After doing this, relaunch Warzone to see if this method helps.
If it doesn’t work, there are more fixes you can try.
Fix 2: Update your network driver
Call of Duty: Warzone matchmaking attempts to put you in matches with other nearby players to help offset the effects of ping. So if your ISP’s ping rate is too high, you might experience the issue of Warzone not finding matches. To fix the potential network problem, you should always make sure your network driver is up to date.
One way to do that is to visit the motherboard manufacturer’s website and search for your model, then download and install the network driver manually. But if you don’t have the time, patience or computer skills to update the driver manually, you can do it automatically with Driver Easy.
Driver Easy will automatically recognize your system and find the correct drivers for it. You don’t need to know exactly what system your computer is running, you don’t need to risk downloading and installing the wrong driver, and you don’t need to worry about making mistakes when installing.
You can update your drivers automatically with either the 7 days free trial or the Pro version of Driver Easy. It takes just 2 clicks, and you get full support and a 30-day money-back guarantee with the Pro version:
- Download and install Driver Easy.
- Run Driver Easy and click the Scan Now button. Driver Easy will then scan your computer and detect any problem drivers.

- Click the Activate & Update button next to the flagged device to automatically download and install the correct version of this driver.
Or click Update All to automatically download and install the correct version of all the drivers that are missing or out of date on your system (You’ll need the Pro version for this – when you select Update All, you’ll get a prompt to upgrade. If you’re not prepared to purchase the Pro version yet, Driver Easy provides a 7-day trial at no cost, granting access to all Pro features like fast downloads and easy installation. No charges will occur until after your 7-day trial period ends.)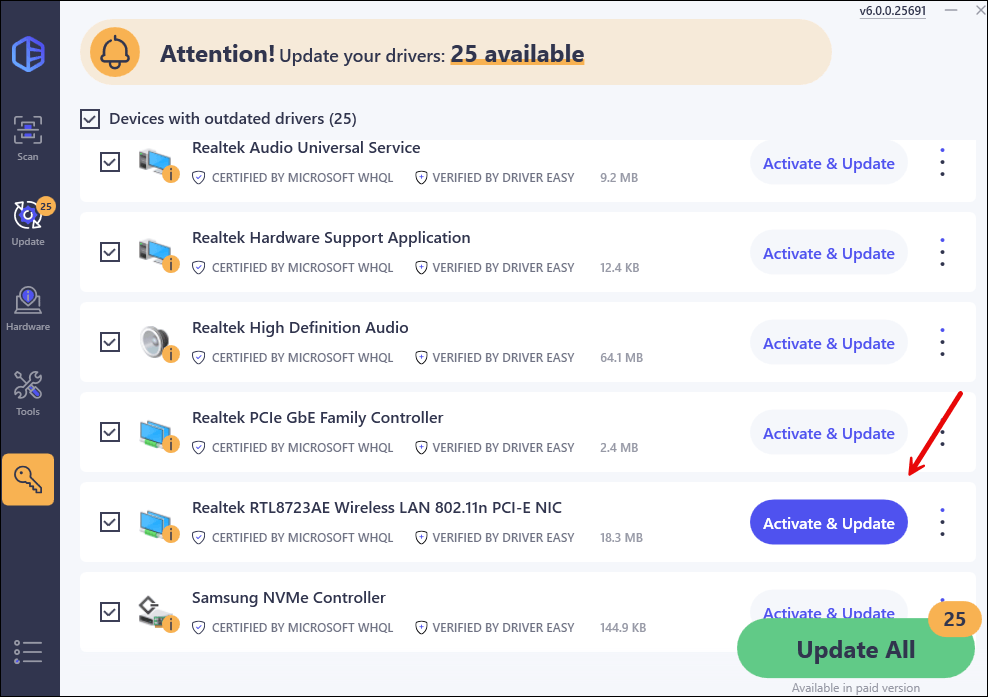
- After updating, restart your computer to take effect.
Once you’ve updated your network driver, restart your computer and launch Warzone. If the problem persists, take a look at the next fix below.
Fix 3: Restart your modem and router
Another simple way to fix the network issue is by restarting your modem and router. By doing so, your Internet connection speed may be back to normal and the Warzone matching issue may be resolved. Here’s how to do:
- Unplug your modem and router from the power supply for 1 minute.
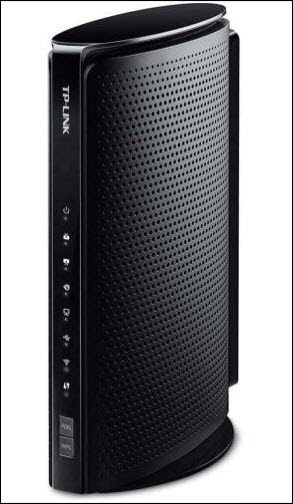
modem
router - Plug your modem and router into the power supply again and wait until the indicators are back to their normal state.
- Launch Warzone again to see if the problem is solved.
If this doesn’t work, move on to the next fix.
Fix 4: Close other bandwidth-heavy applications
Your available bandwidth can also be consumed by other applications, which will affect in-game performance and get you stuck in “searching for a match”. Make sure you close all bandwidth-heavy programs before playing Warzone. To do so:
- On your keyboard, press the Ctrl, Shift and Esc keys at the same time to open Task Manager.
- In Task Manager, click the Network tab first, then right-click the bandwidth-hogging applications and select End task.
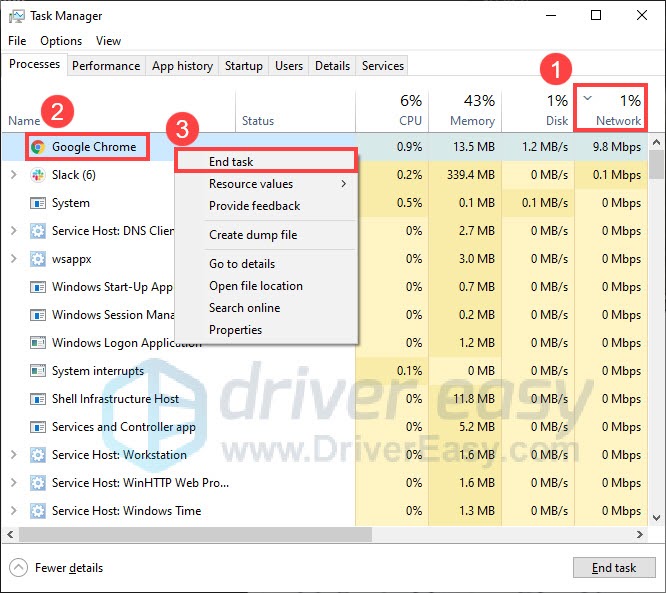
After closing all the unnecessary programs, check if you can join a match in Warzone.
If this doesn’t help, continue to the next fix below.
Fix 5: Enable Crossplay
If there aren’t enough players for a single match on your platform, you might find yourself stuck in the “Searching for a match” screen. The simplest solution is to enable Crossplay in the setting menu. Enabling Crossplay will allow matchmaking with other gaming platforms and increase your chances of finding enough players for a match. Here’s how:
- Launch Call of Duty: Warzone.
- Go to Settings.
- Navigate to the Account tab, then change Crossplay from “Disabled” to “Enabled”.
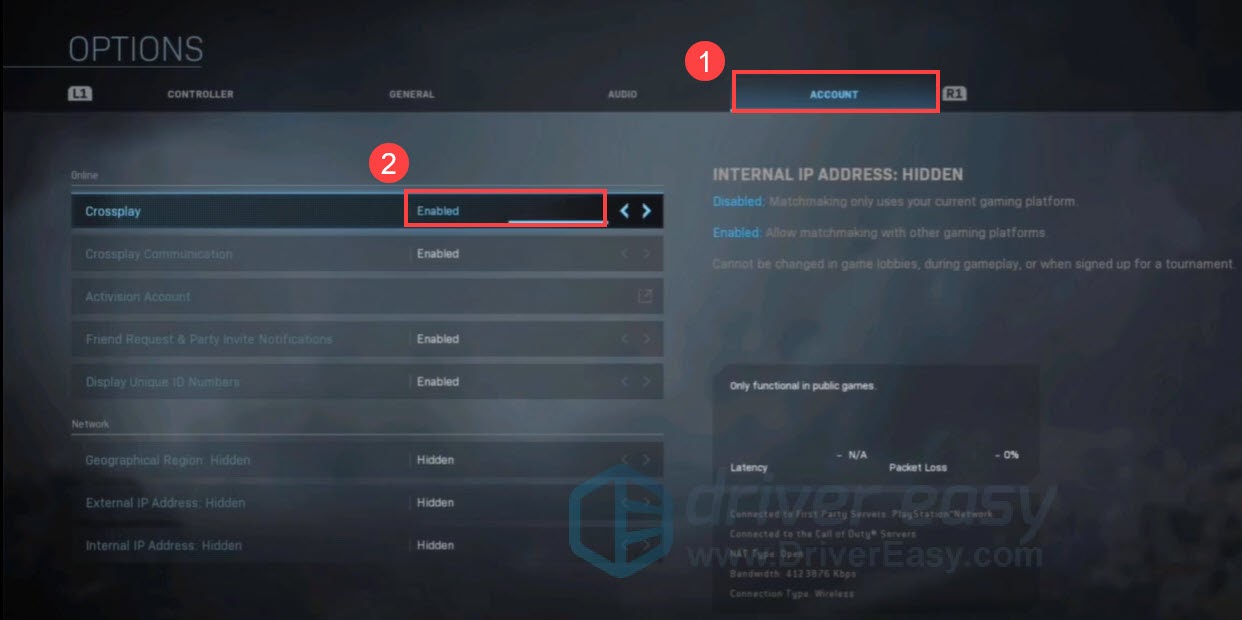
If the problem remains after enabling Crossplay, check out the next fix.
Fix 6: Change your region
Some Warzone PC players have reported that they fixed the matching issue by switching to another region. To do so:
- Close the game.
- Launch the Battle.net client.
- On the page of Warzone, click the globe icon above the PLAY button, then select a region from Americas, Europe and Asia.
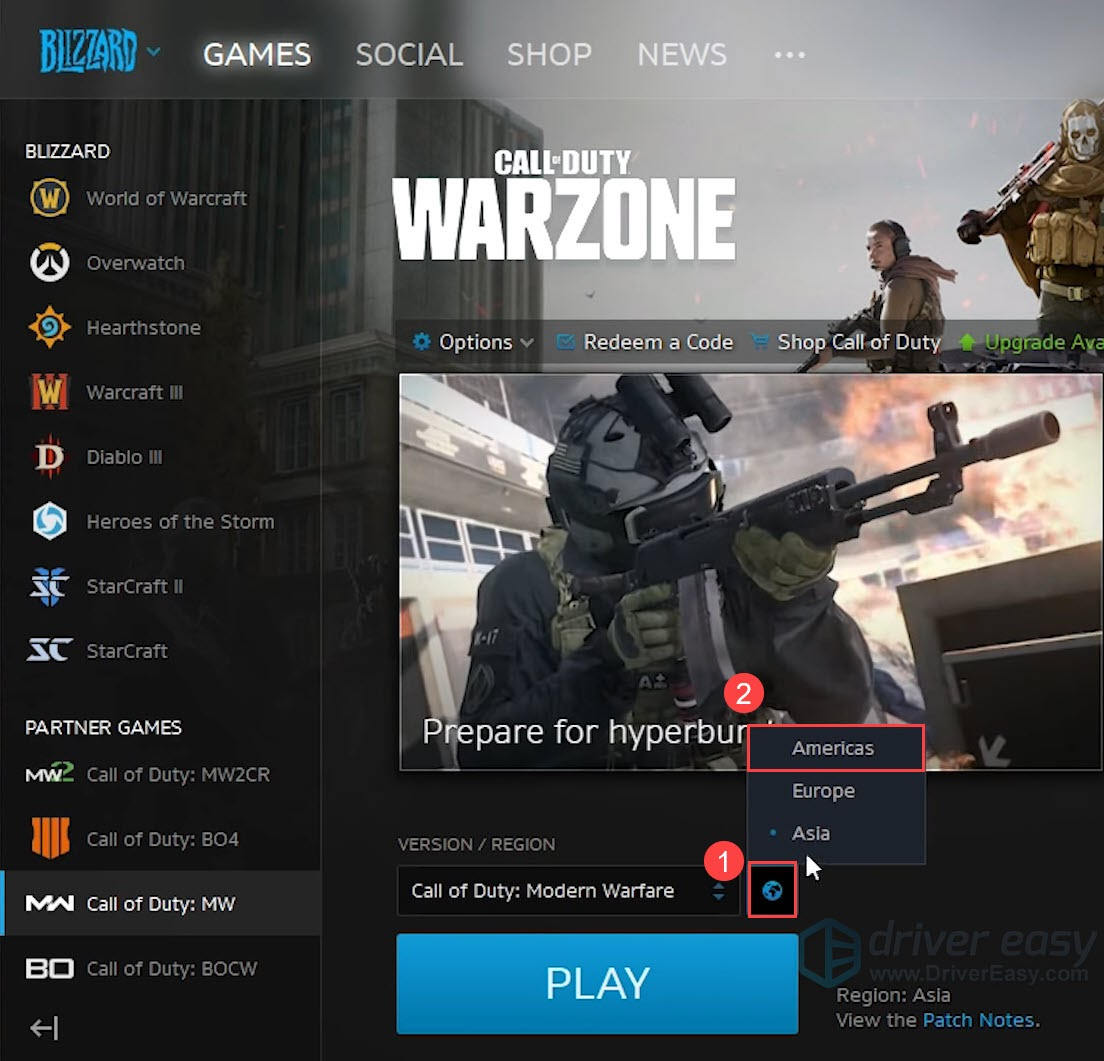
This should fix your problem, but if not, try the next fix below.
Fix 7: Repair game files
The Warzone matching issue can also be caused by corrupted and damaged game files. We can use the repair tool to fix it. Here’s how:
On Battle.net
- Launch the Battle.net client.
- Find Call of Duty: Warzone in your game list, then the cogwheel next to the PLAY button, and select Scan and Repair.
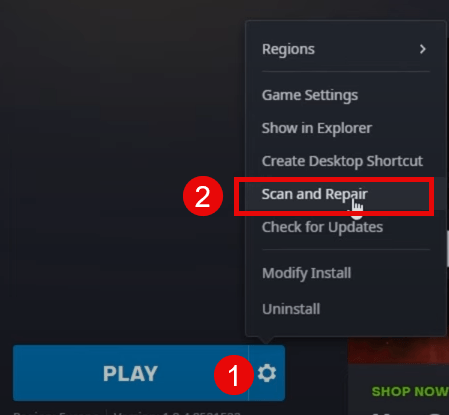
- Click Begin Scan.

On Steam
- Launch Steam.
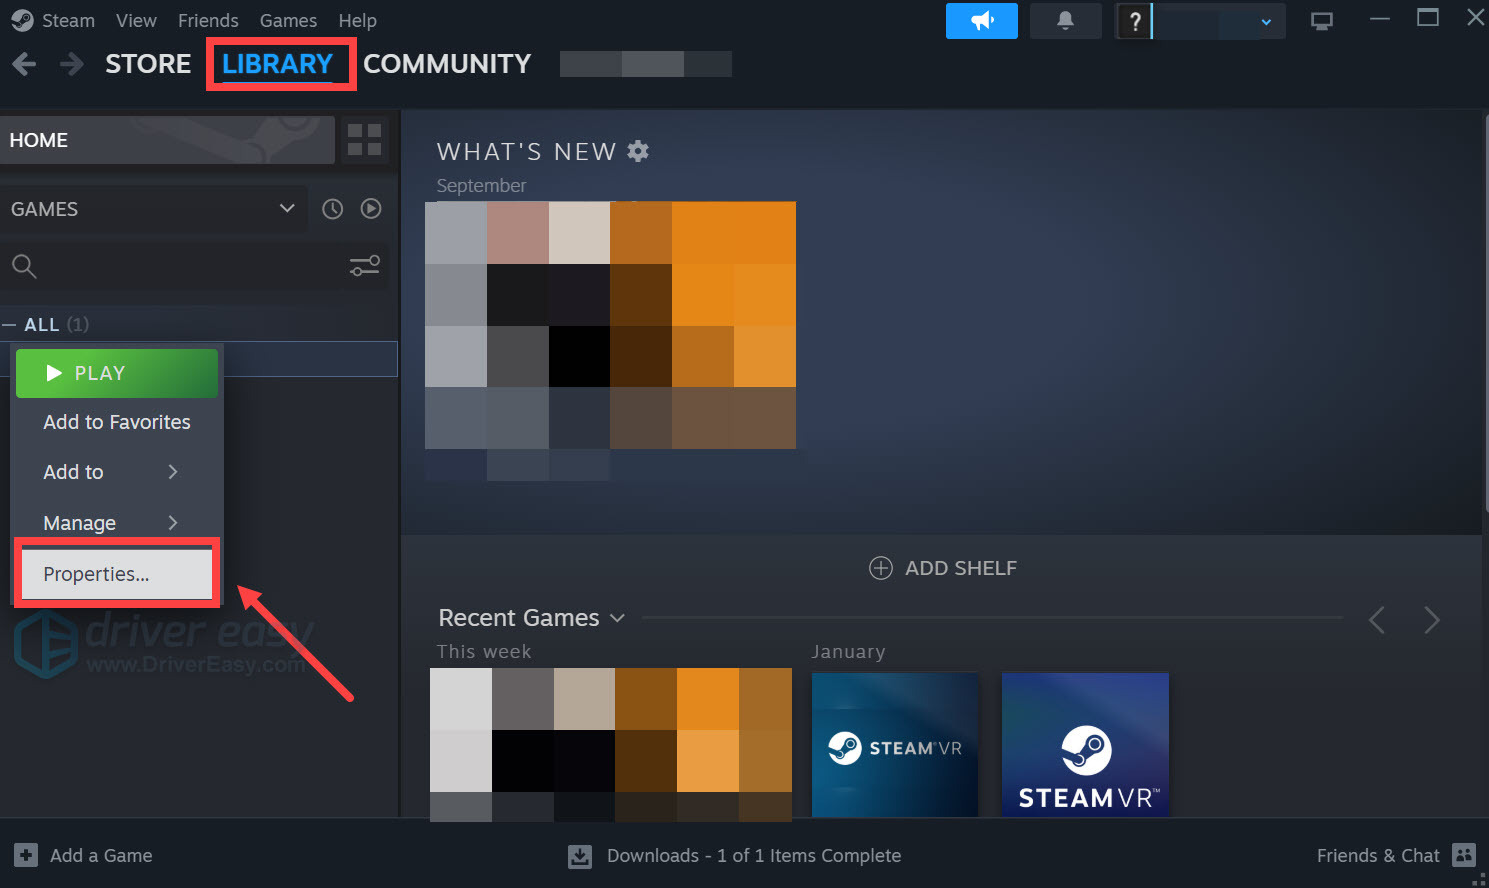
- In the LIBRARY, right-click Warzone and select Properties from the drop-down menu.
- Select the Installed Files tab and click on the Verified integrity of game files button.
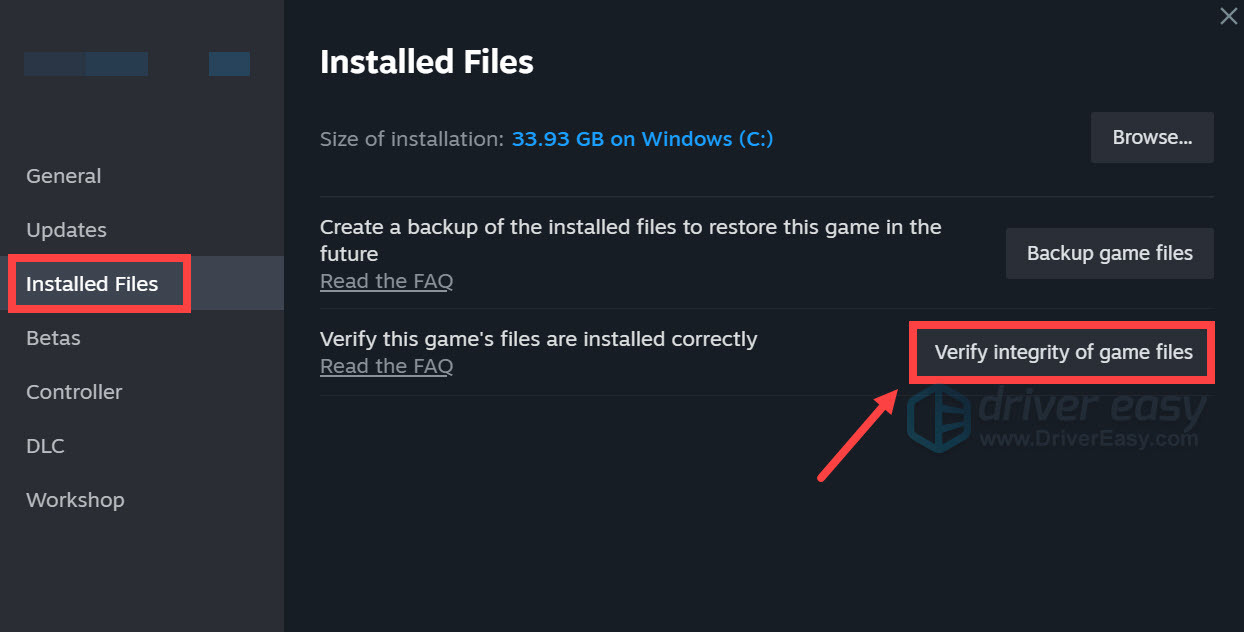
- Steam will verify the game’s files – this process may take several minutes.
Relaunch Warzone after the process finishes, and see if everything goes back to normal. If Warzone keeps not finding matches, head to the last fix below.
Fix 8: Create a new account
If you are stuck in “Searching for a match < 350ms ping”, your account might be accidentally banned or shadowbanned. Try to unlink your game account through Activision’s website and if it doesn’t let you, you may have been banned or shadowbanned.
If your account is shadowbanned, then you can only wait a week for Activision to investigate your account and if you’re not cheating it’ll be fixed. Or you can try to create a new account.
That’s all about how to fix Call of Duty: Warzone not finding matches on PC. Hopefully, this post helped. If you have further questions or suggestions, feel free to leave a comment below.


