Built-in camera or external webcam is essential when you’re trying to stream or participate in a video call. But sometimes one can run into a bothering situation where the webcam is only displaying a black screen. If you’re on the same boat, no worries. In this post, we’ll guide you through the steps on how to fix it.
Before performing the troubleshooting steps listed below, we suggest you restart your computer. If you’re using an external webcam via USB, try unplugging and replugging it. If a simple restart or reconnecting doesn’t make any difference, try the fixes below.
Try these fixes
You may not need to try them all; simply work your way down the list until you find the one that solves your issue.
- Allow app permissions for your camera
- Update your device drivers
- Download & install all Windows updates
- Perform a clean boot
1. Allow app permissions for your camera
In order to use your webcam with apps on Windows, you’ll need to turn on some permissions through Settings. Then check the app permissions if you’re trying to use your webcam with apps. Below is how you can do this on Windows 10 or Windows 11.
On Windows 10
- On your keyboard, press the Windows logo + I keys simultaneously to open Settings.
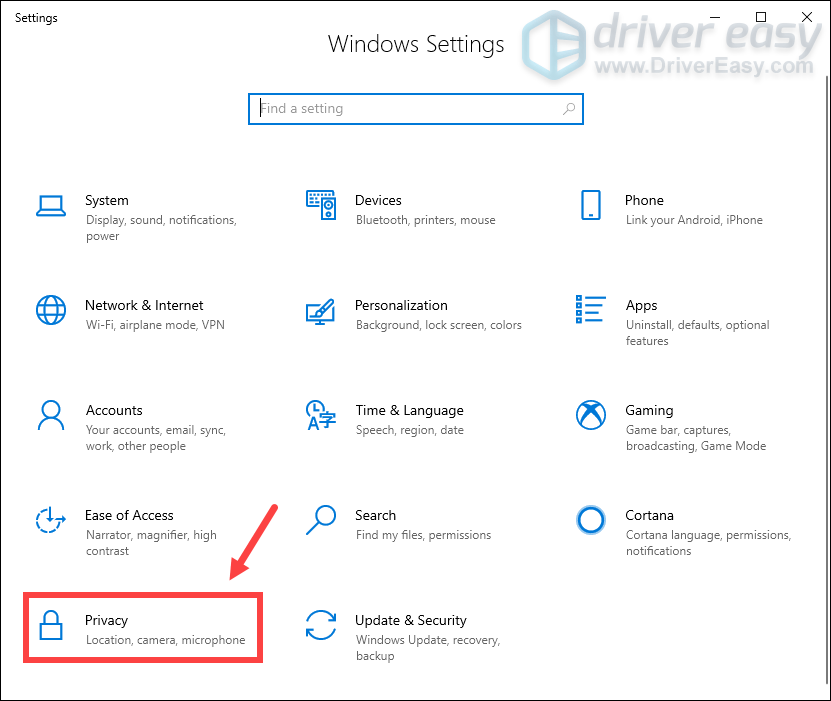
- Select Privacy.
- Find Camera from the navigation pane on the left side and click on it. Scroll down and find the section Allow access to the camera on this device, click on the Change button to make sure Camera access for this device is turned on.
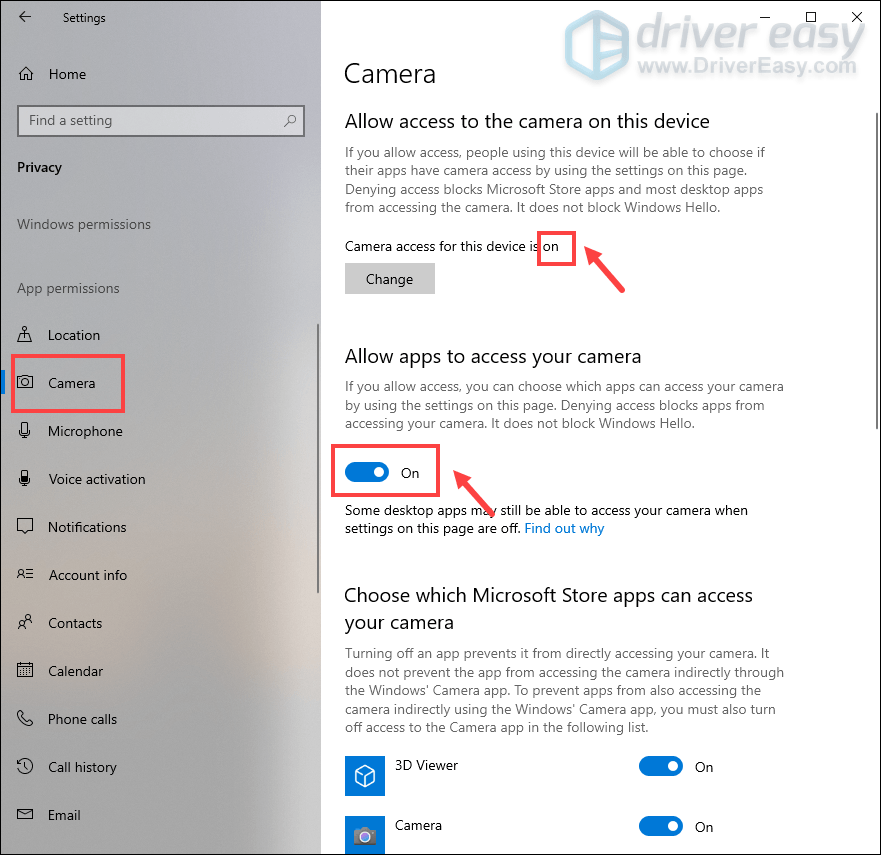
- Scroll down to the section Choose which Microsoft Store apps can access your camera. Then turn on camera access for the apps you want.
- If you’re trying to use your webcam on some desktop apps, including Internet browsers and video conferencing apps, you may not be able to find them on the list. What you need to do is scroll down and find Allow desktop apps to access your camera. Then make sure it’s turned on.
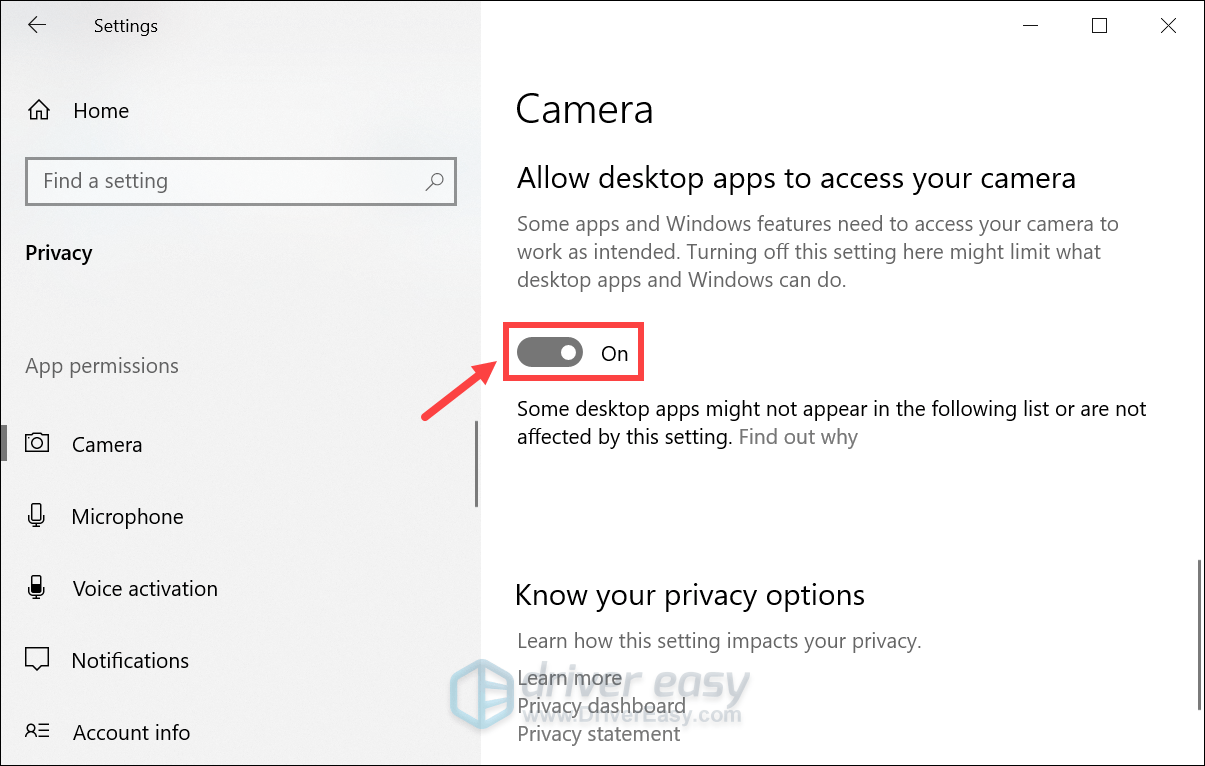
After applying the changes, check if you can use your webcam normally.
On Windows 11
- On your keyboard, press the Windows logo + I keys simultaneously to open Settings.
- Select Privacy & security from the left pane. Then scroll down and click Camera.
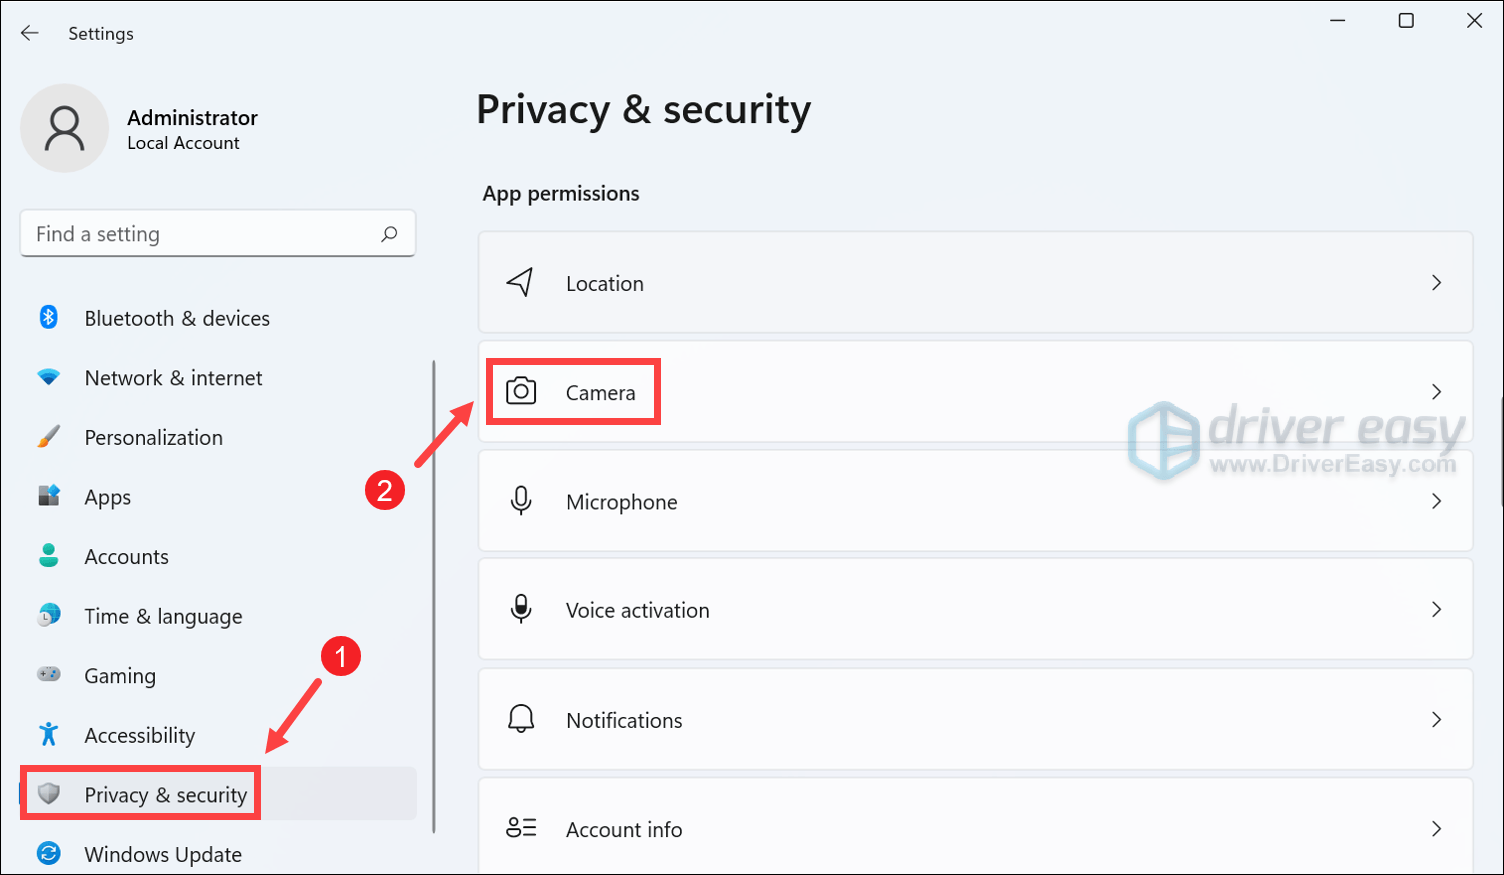
- Make sure Let apps access your camera is turned on. Then turn on camera access for the apps you’re trying to use.
If you can’t find your apps from the list, scroll down and turn on Let desktop apps access your camera.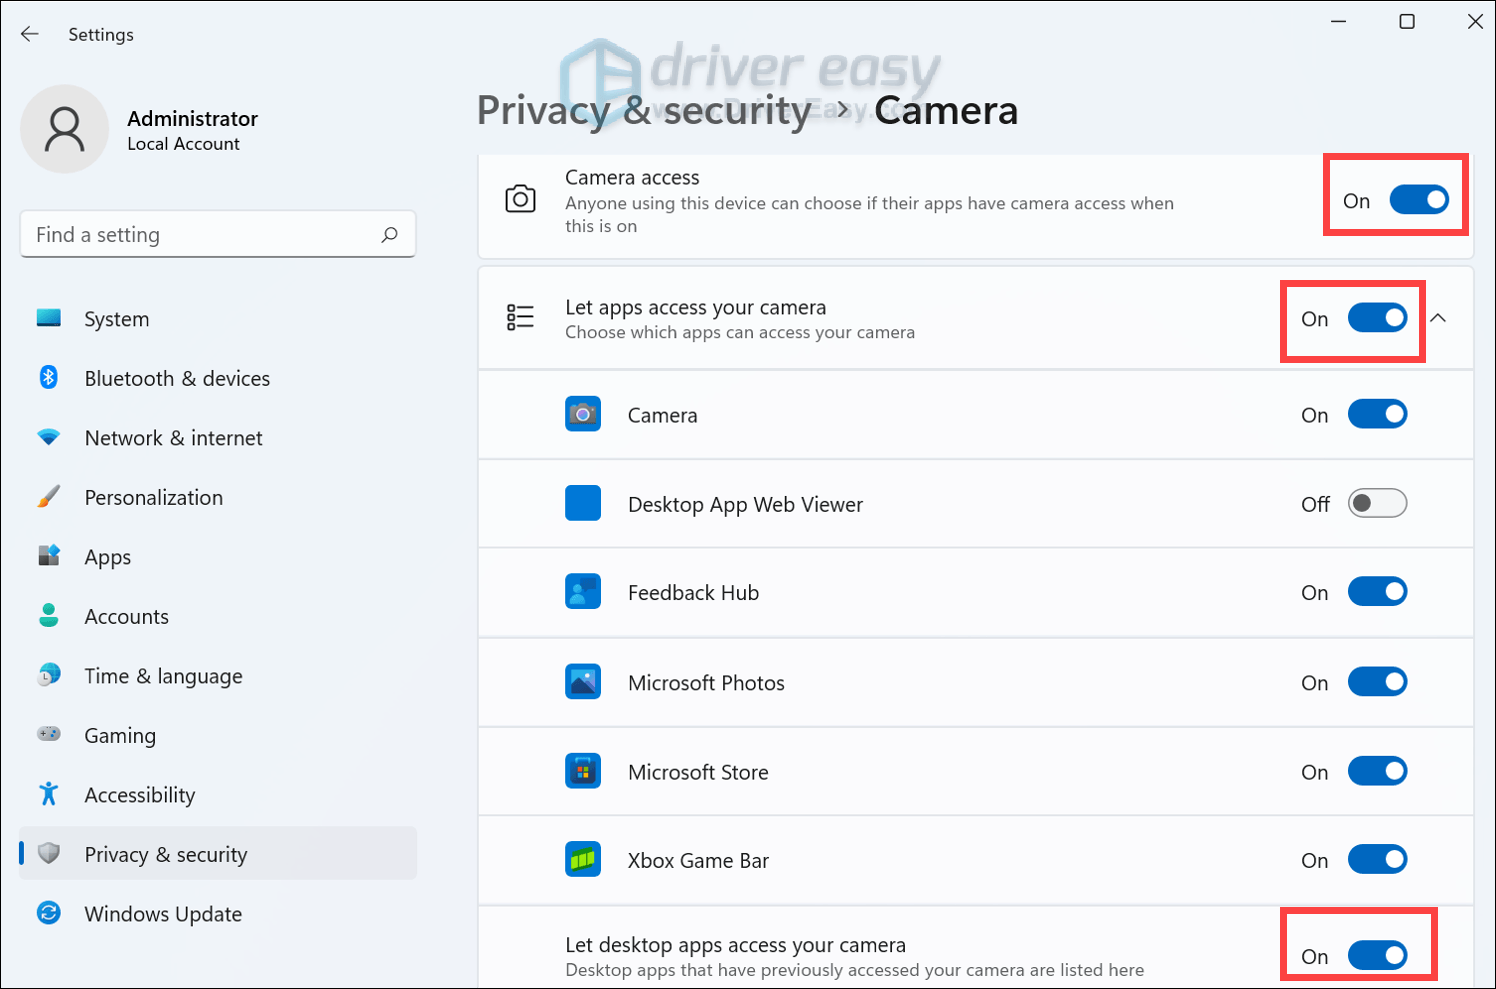
If your problem persists after making the changes above, try the next fix below.
2. Update your device drivers
Most of the time, a black screen issue is caused by an outdated webcam or graphics driver. If you can’t remember when was the last time you updated your drivers, definitely do it right away. This may be the best shot you can take without much troubleshooting.
To update your webcam and graphics drivers, you can go to the hardware or peripherals’ official websites. Then find, download and install the correct drivers that are compatible with your Windows version.
However, updating drivers manually can be a tedious process and you may be prone to install the wrong drivers. In this case, you can try Driver Easy to help you do all the busy work. It’s a useful driver updater that automatically detects any missing or outdated drivers, then downloads and installs the latest version for your system, direct from the device manufacturers. With Driver Easy, updating drivers is just a matter of a few mouse clicks.
- Download and install Driver Easy.
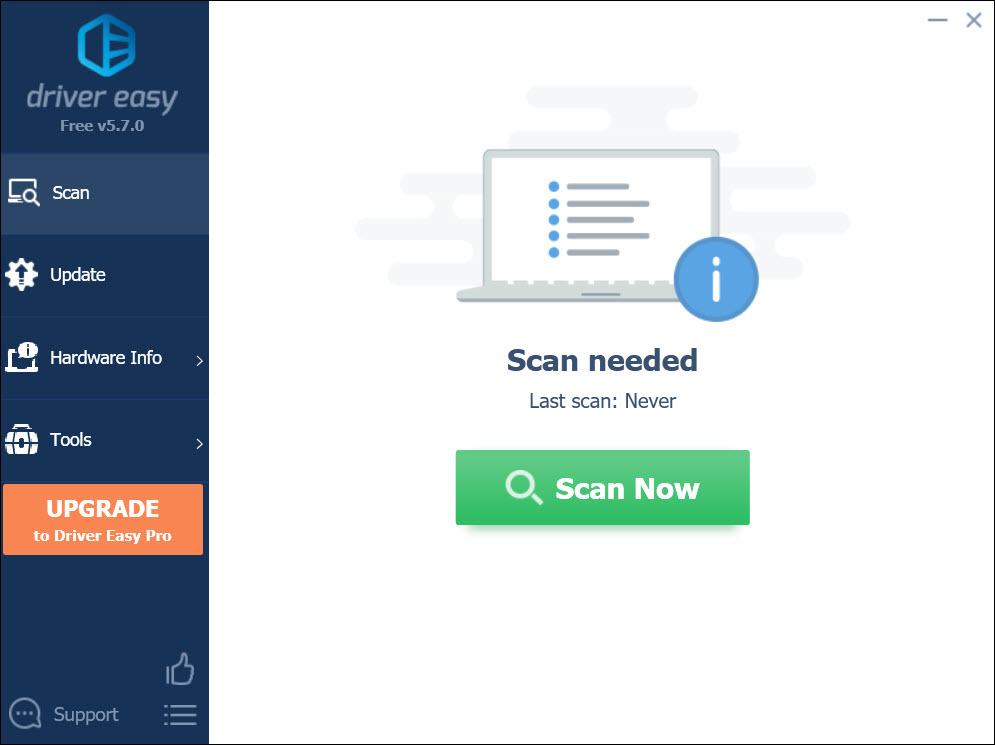
- Run Driver Easy and click the Scan Now button. Driver Easy will then scan your computer and detect any problem drivers.
- Click Update All to automatically download and install the correct version of all the drivers that are out of date on your system.
This requires the Pro version which comes with full support and a 30-day money back guarantee. You’ll be prompted to upgrade when you click Update All. If you don’t want to upgrade to the Pro version, you can also update your drivers with the FREE version. All you need to do is to download them one at a time and manually install them.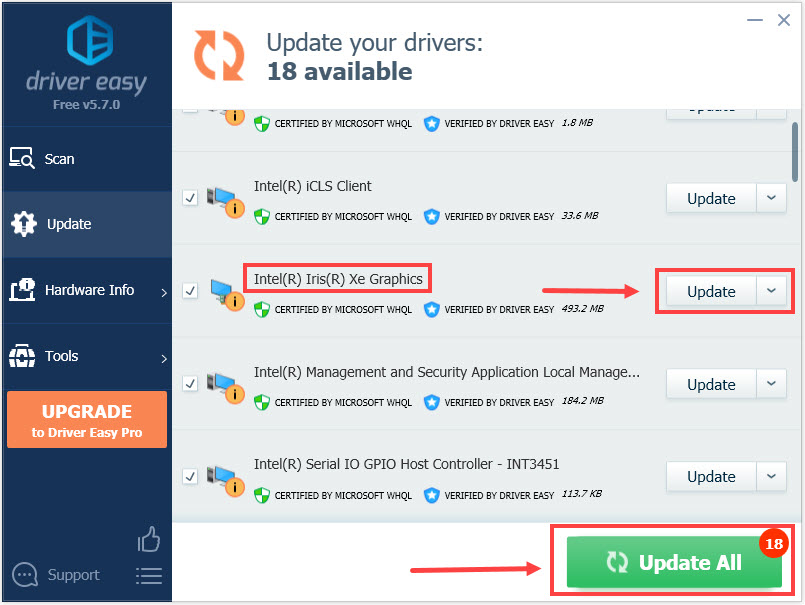
After the update is finished, you need to reboot your device. Then check if you can use your webcam. If the problem persists, move on to the next fix.
3. Download & install all Windows updates
Windows updates usually fix compatibility issues and bring new features. If you’re encountering any issues with your software or devices, you should first check if there are any Windows updates available. You can follow the instructions below to check for updates on Windows 10 or Windows 11.
On Windows 10
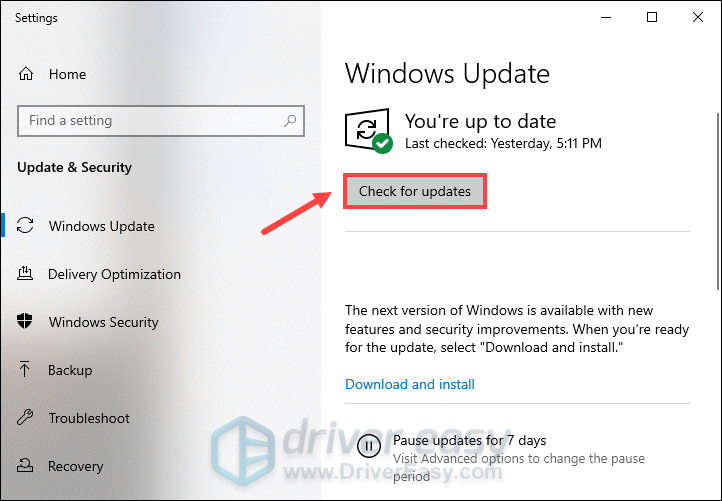
- In the Search box, type in check for updates. Click Check for updates from results.

- Click on the Check for updates tab. If there are any updates available, it’ll automatically start to download and install it. Simply wait for it to complete and you should be asked to restart your computer.
Then test if your problem has been solved. If not, proceed to the next fix.
On Windows 11
- On your keyboard, press the Windows logo + I keys simultaneously to open Settings.
- Click Windows Update.
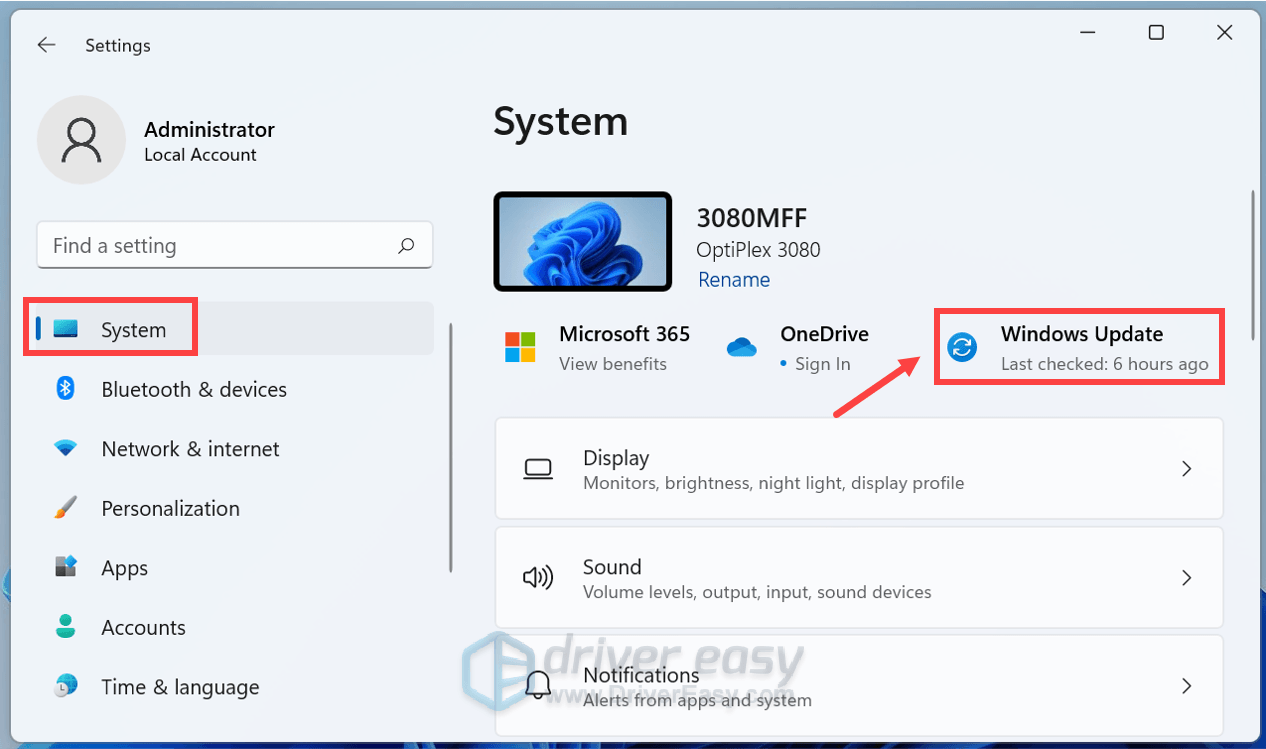
- Click on the tab Check for updates. Then Windows will start downloading the updates if they are available.

Then restart your computer. After the reboot, test your webcam. If it’s still displaying a black screen, proceed to the next fix.
4. Perform a clean boot
Your issue might be caused by software conflicts. In this situation, you can perform a clean boot. It’s a troubleshooting technique that helps identify and resolve performance issues. You can follow the instructions below to do this.
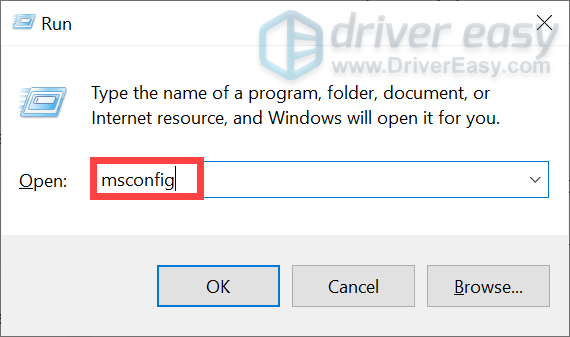
- On your keyboard, press the Windows logo + R keys simultaneously to open the Run box.
- Type or paste msconfig and press Enter.
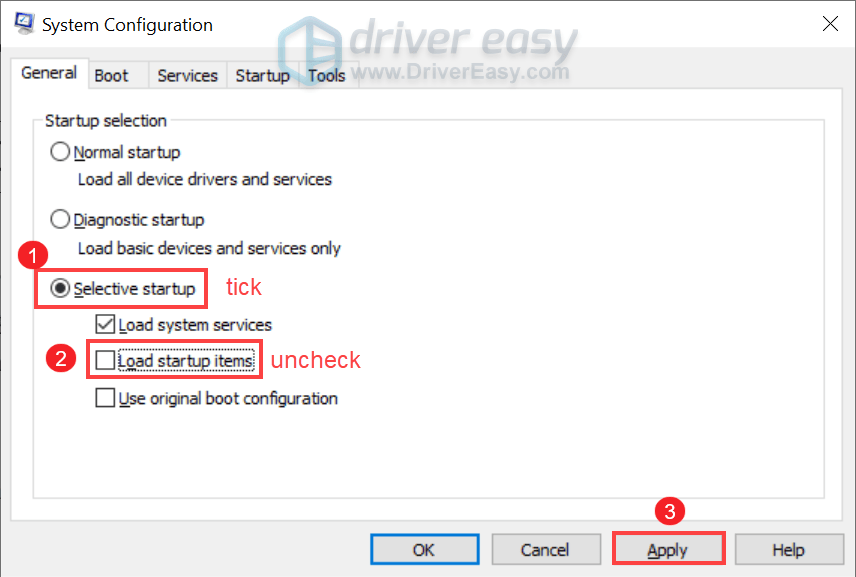
- Under the General tab, tick Selective startup. Then make sure you uncheck Load startup items. Then click Apply.
- Select the Services tab. Check the box next to Hide all Microsoft services. Then click Disable all > Apply.
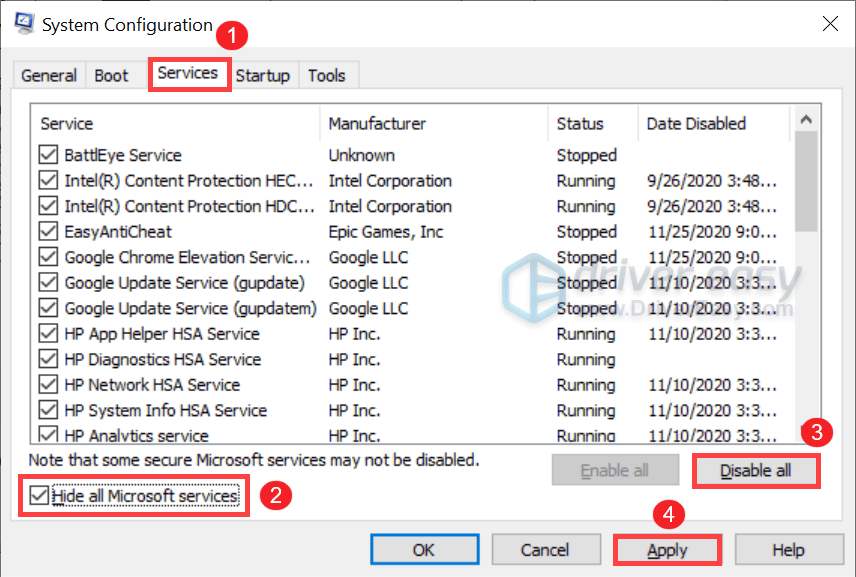
- Then click OK.
When your device boots up, check if your problem has been solved. If it’s functioning properly, reset your computer to start as usual by performing the steps below.
- On your keyboard, press the Windows logo + R keys simultaneously to open the Run box.
- Type or paste msconfig and press Enter.

- Under the General tab, select the Normal Startup option, and then click OK.
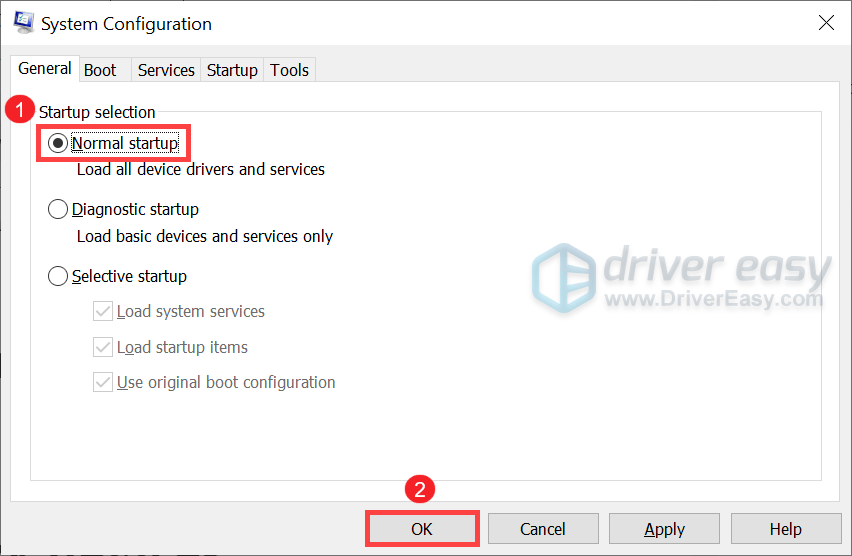
After restarting your computer, check if your webcam works properly.
Hopefully, you can use your webcam now. If you have any ideas or questions, do not hesitate to leave us a comment below.
*featured image created by storyset – www.freepik.com


