
If it seems to take forever to download a file on your computer, you can try the steps below to increase download speed on your PC.
How to increase download speed on PC easily
- Check your download speed
- Close any apps you aren’t using
- If you’re using a wireless network, stay closer to the router
- Limit how much bandwidth is used for downloading updates in the background
- Reset your DNS server
- Update your network adapter driver
Step 1: Check your download speed
You can first test your download speed and see if the speed with which your file is downloading is normal.
To test your computer’s current download speed, you can google internet speed, then click RUN SPEED TEST in the first result.
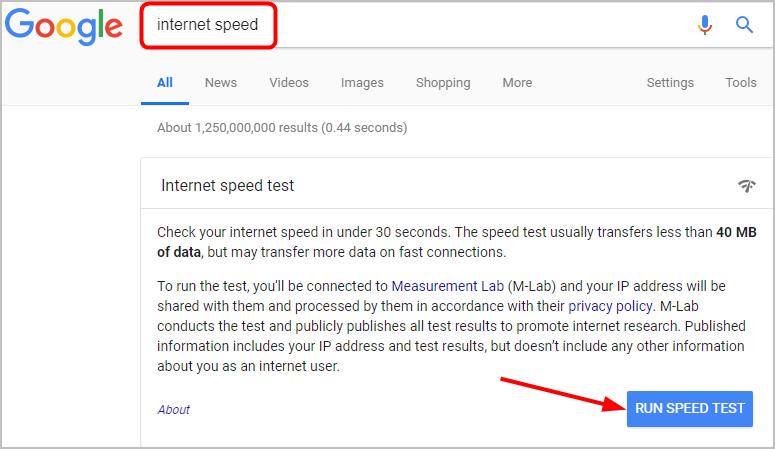
If the tested download speed is much slower than your Internet package and router allow for, you should minimize the number of devices connected to your network.
If the tested download speed is much faster than the file is actually downloading, you should try the steps below to help increase your download speed.
Step 2: Close any apps you aren’t using
If you’re downloading a big (or small) file, it helps to close apps that are taking up your bandwidth, especially online games and videos.
An easy and quick way to close apps in the background is through Task Manager:
- Right-click on the empty area of your taskbar, and select Task Manager.

- Click More details to view all the programs running on your computer.
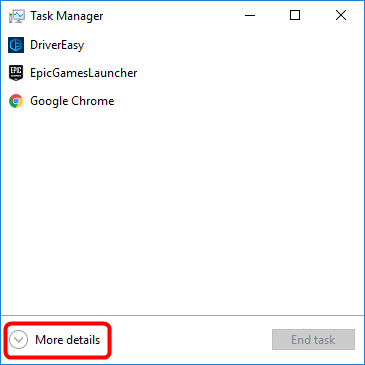
- Select any app you want to close, and click End task.
- Check if it helps increase your download speed. If not, try the steps below.
Step 3: If you’re using a wireless network, stay closer to the router
If you’re using a WiFi network and the wireless connection to your router is poor, it may result in slow Internet speed. We suggest you move your computer closer to your router for a stronger signal and faster download speed.
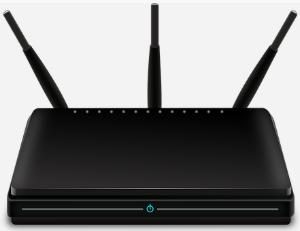
If it doesn’t help, you can also reset your router’s cache — unplug both the router and the modem, then wait for about a minute, and then plug everything back in. Or you can try Step 4, below.
Step 4: Limit how much bandwidth is used for downloading updates in the background
If your Internet speed suddenly slows down somehow, it’s possible that your computer is automatically downloading system updates in the background. So to increase the download speed of your file, you can manually disable the “downloading updates in the background” feature:
- Click the Start button > the Settings icon.
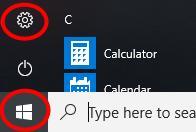
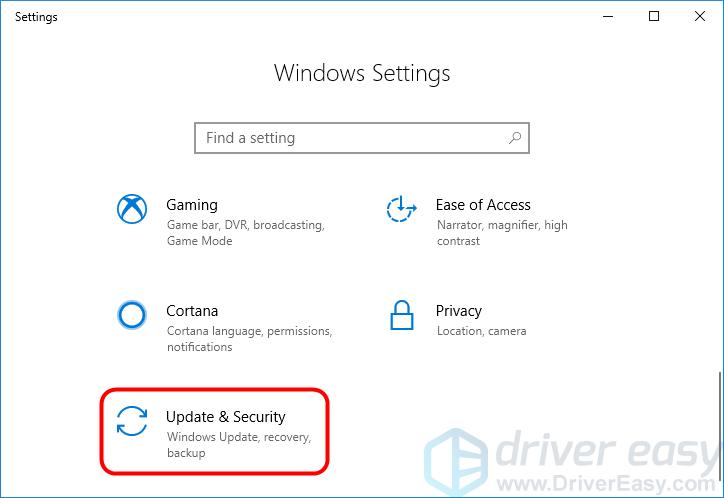
- Click Update & Security.
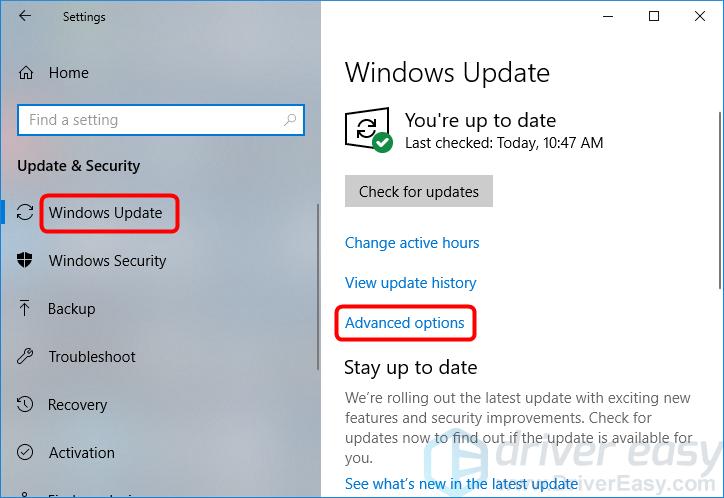
- Click Windows Update > Advanced options.
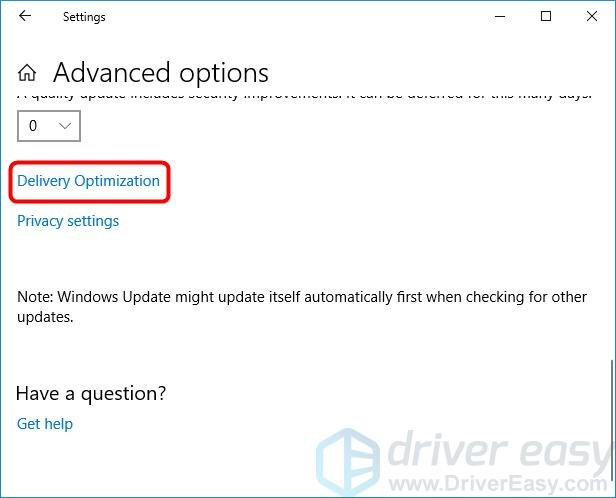
- Scroll down to click Delivery Optimization.
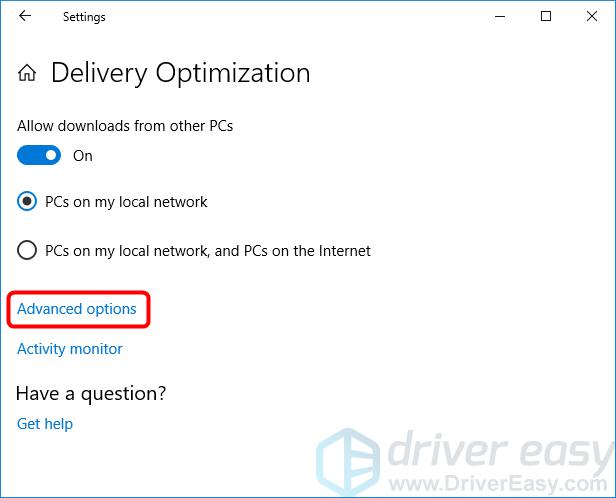
- Click Advanced options.
- Check the box beside Limit how much bandwidth is used for downloading updates in the backgrounds, and set the slider to 100%.
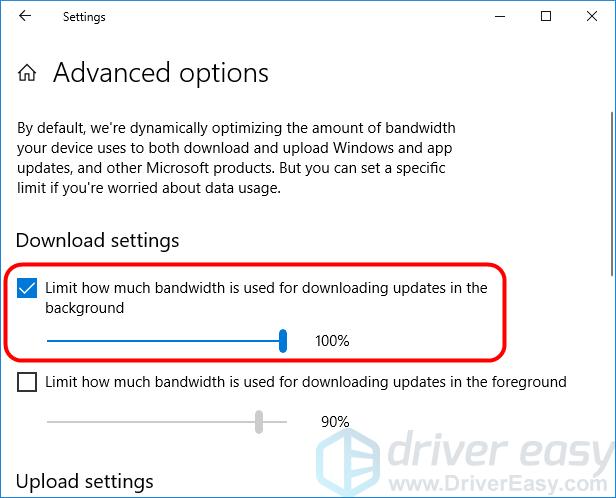
- Check if it helps boost your download speed. If not, try Step 5, below.
Step 5: Reset your DNS server
DNS (Domain Name System) is responsible for translating a website address into an IP address, so your computer will understand it. You can try resetting your DNS server to a reliable DNS server to increase your download speeds:
- Right-click the Internet access icon on the bottom right of your screen, then select Open Network & Internet settings.
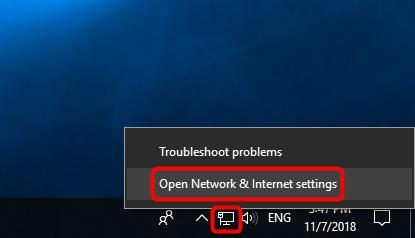
- If you use the wired Internet, click Ethernet. If you use the wireless Internet, click Wi-Fi.
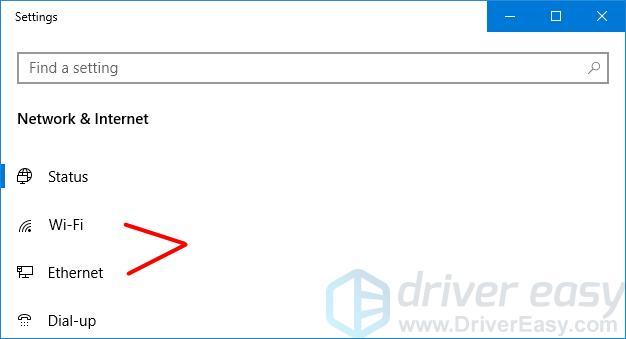
- Click Change adapter options.
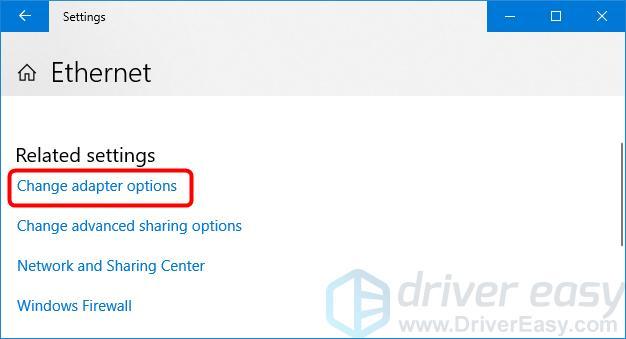
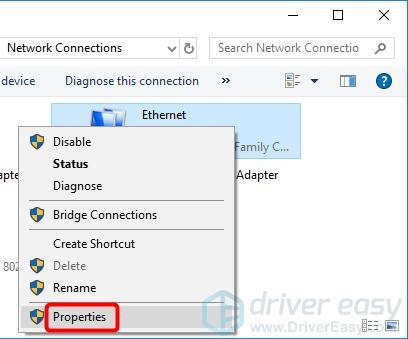
- Right-click on Ethernet or Wi-FI, and select Properties.
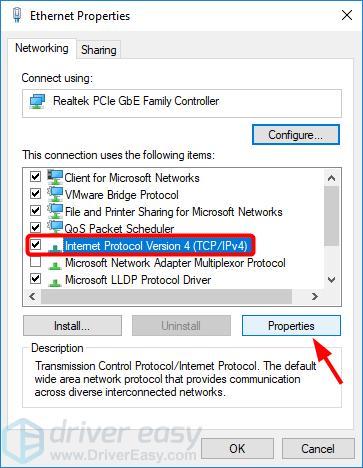
- Click Internet Protocol Version 4 (TCP/IPv4) and click Properties.
- Select Use the following DNS server addresses. Then enter preferred and alternate DNS addresses.
Reliable DNS servers include OpenDNS and Google Public DNS.
– If you want to use OpenDNS, enter 208.67.222.222 and 208.67.220.220
– If you want to use Google Public DNS, enter 8.8.8.8 and 8.8.4.4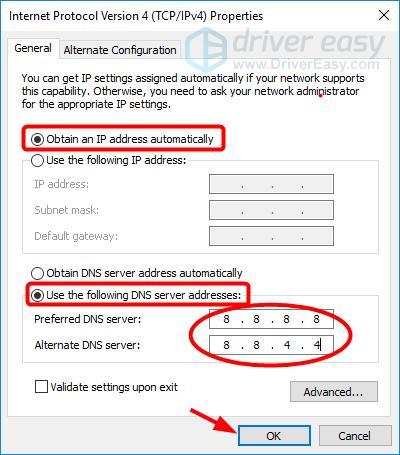
- Click OK.
- Click Close.
- Restart your computer and see if it helps increase your download speeds. If not, try Step 6, below.
Step 6: Update your network adapter driver
An outdated or corrupted network adapter driver may affect your network connection and reduce your download speeds. So another way to help increase your download speeds is to update your network adapter driver.
There are two ways to update your network adapter driver: manually and automatically.
Update your network adapter driver manually — You can update your driver manually by going to the hardware manufacturer’s website, and searching for the latest driver for your network adapter. But if you take this approach, be sure to choose the driver that’s compatible with the exact model number of your hardware, and your version of Windows.
OR
Update your network adapter driver automatically — If you don’t have the time, patience or computer skills to update your network adapter driver manually, you can do it automatically with Driver Easy. You don’t need to know exactly what system your computer is running, you don’t need to risk downloading and installing the wrong driver, and you don’t need to worry about making a mistake when installing. Driver Easy handles it all.
- Download and install Driver Easy.
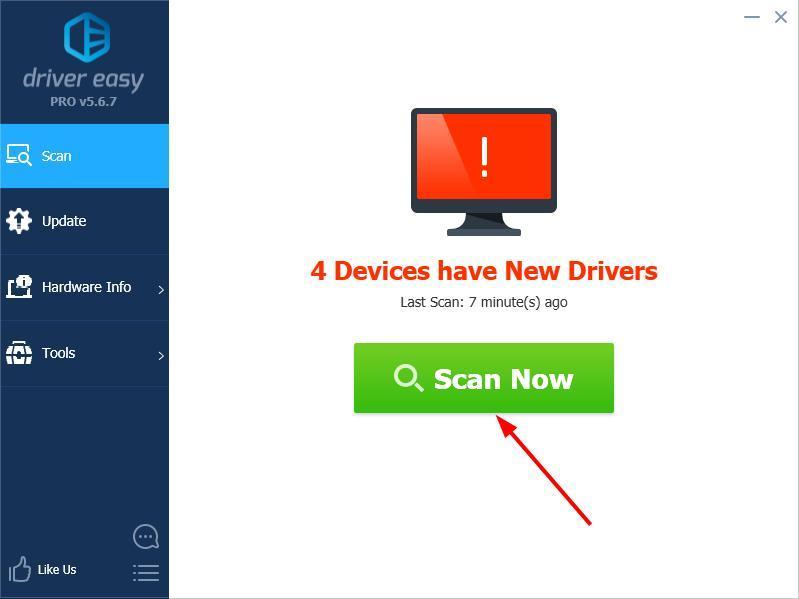
- Run Driver Easy and click Scan Now. Driver Easy will then scan your computer and detect any problem drivers.
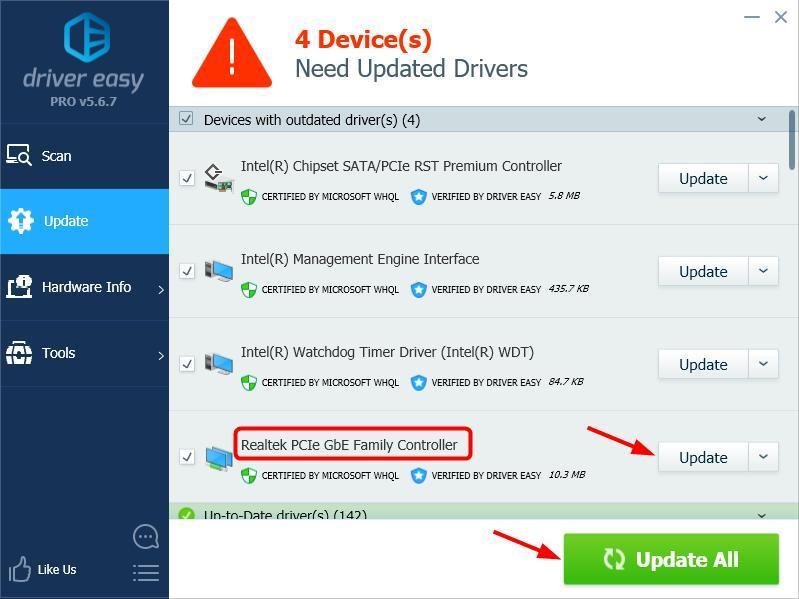
- Click Update next to any flagged devices to automatically download the correct version of their drivers, then you can install them manually. Or click Update All to automatically download and install them all automatically. (This requires the Pro version – you’ll be prompted to upgrade when you click Update All. You get full support and a 30-day money back guarantee.)
Note: If you need assistance, please contact Driver Easy’s support team at support@drivereasy.com.
That’s it.
If you have any other suggestion, please feel free to leave a comment below.


