Fallout 3 is an old but classic game. If you look at the Fallout 3 webpage on Steam, you’ll see the notice: Fallout 3 is not optimized for Windows 7 and later.

But you can still find a way to play it on your Windows 10 computer.
Follow our step-by-step guide and you’re able to play Fallout 3: Game of the year edition on Windows 10.
How to Play Fallout 3 on Windows 10 guide:
Only 2 steps, then you’re good to go!
Step 1: Download Games for Windows Live
- Go to XBOX webpage. Click the green “here” to download Games for Windows Live.
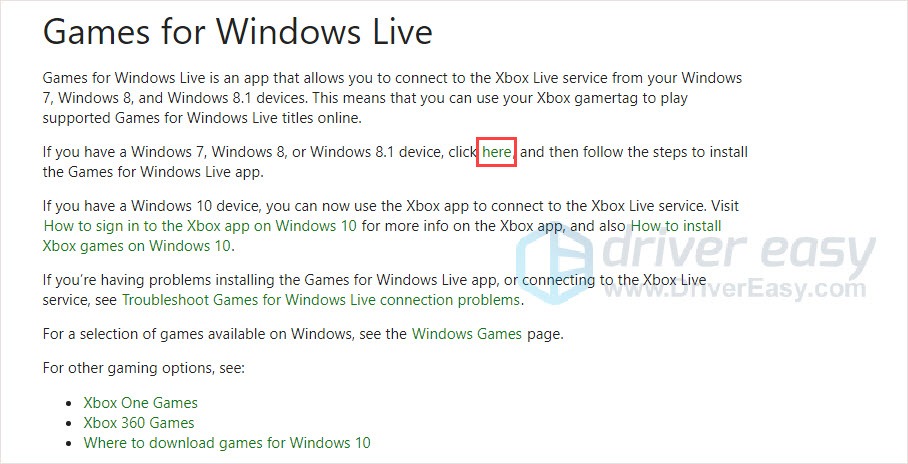
- Follow the on-screen instructions to install the program.
(NO need to register or login).
Step 2: Run Fallout 3 as administrator and in compatibility mode
- Run Steam. Right-click on Fallout 3 and click Properties.
- Under the LOCAL FILES tab, click Browse LOCAL FILES.
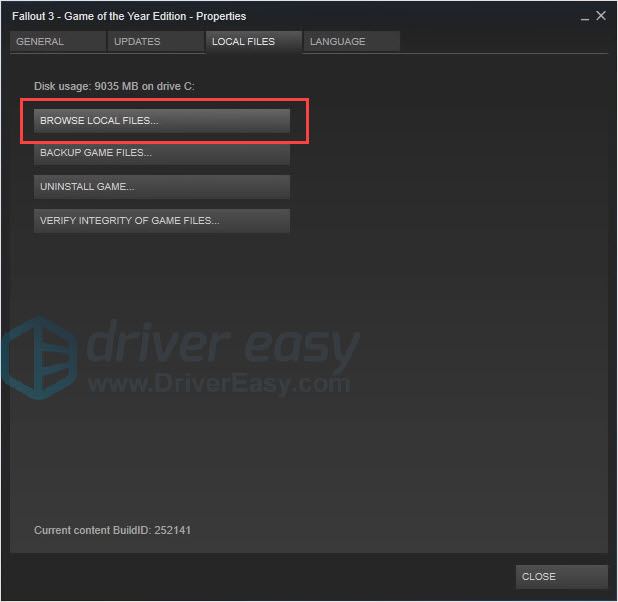
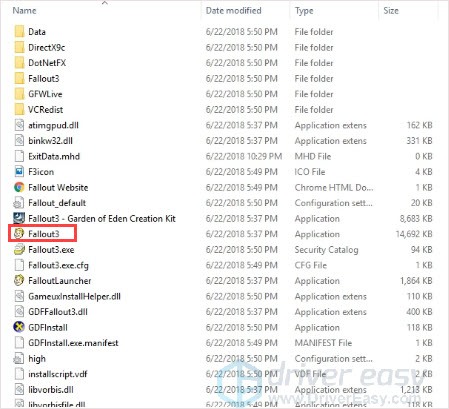
- Right-click on Fallout 3 and click the Properties.
- In the Compatibility tab, tick Run this program in compatibility mode for.
- Open the dropdown menu and choose Windows XP (Service Pack 3).
- Tick Run this program as an administrator.
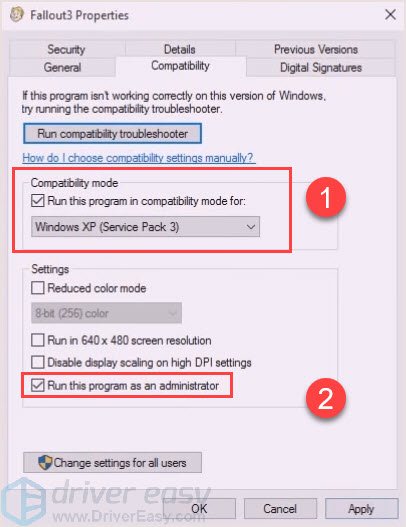
- Click Apply > OK.
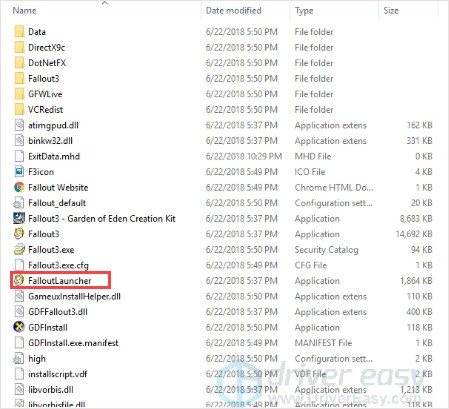
- In the same folder, right-click on Fallout 3 Launcher and click Properties.
- In the Compatibility tab, tick Run this program in compatibility mode for.
- Tick Run this program as an administrator.
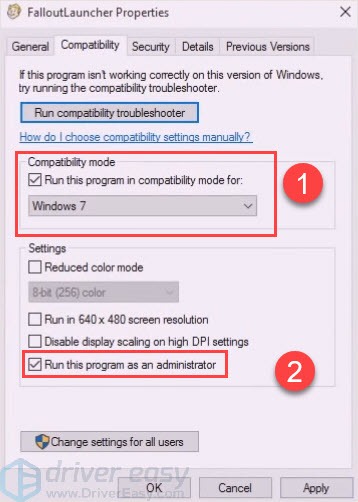
- Click Apply > OK.
- Run Fallout 3.
That’s it! You can play Fallout 3 now!
Bonus: Update your graphics card drivers
It is very important to update your graphics card drivers. Windows 10 doesn’t always give you the latest version. But with outdated or wrong drivers, your game may encounter a crash. So it’s really important to keep your drivers updating to get good gaming experience.
There are two ways you can update your driver: manually and automatically.
Option 1 – Manually– You’ll need some computer skills and patience to update your drivers this way, because you need to find exactly the right the driver online, download it and install it step by step.
OR
Option 2 – Automatically (Recommended)– This is the quickest and easiest option. It’s all done with just a couple of mouse clicks – easy even if you’re a computer newbie.
Option 1 – Download and install the driver manually
You can download graphics drivers from the manufacturer’s official website. Search for the model you have and find the correct driver that suits your specific operating system. Then download the driver manually.
Option 2 – Automatically update drivers
If you don’t have time or patience to manually update your graphics drivers, you can do it automatically with Driver Easy.
Driver Easy will automatically recognize your system and find the correct drivers for it. You don’t need to know exactly what system your computer is running, you don’t need to risk downloading and installing the wrong driver, and you don’t need to worry about making a mistake when installing.
You can update your drivers automatically with either the FREE or the Pro version of Driver Easy. But with the Pro version it takes just 2 clicks (and you get full support and a 30-day money back guarantee):
- Download and install Driver Easy.
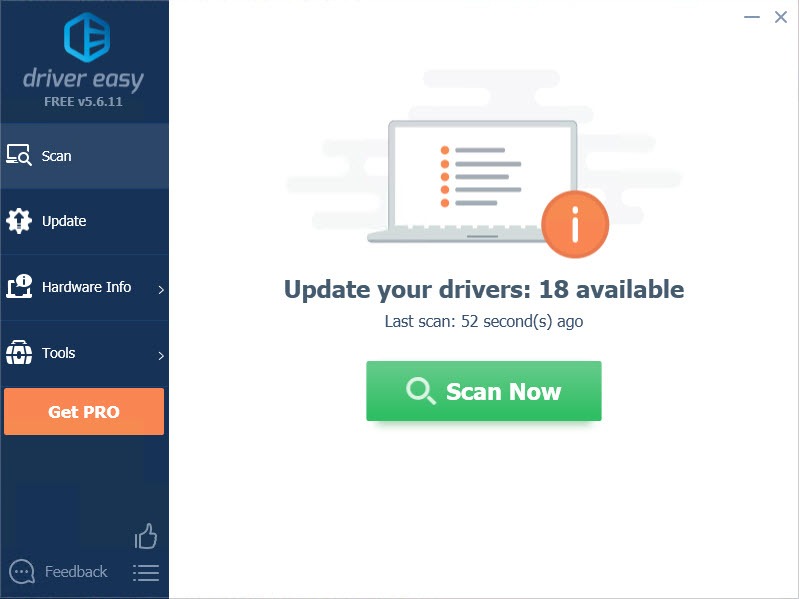
- Run Driver Easy and click the Scan Now button. Driver Easy will then scan your computer and detect any problem drivers.
- Click the Update button next to the flagged driver to automatically download the correct version of that driver, then you can manually install it (you can do this with the FREE version).
Or click Update All to automatically download and install the correct version of all the drivers that are missing or out of date on your system. (This requires the Pro version which comes with full support and a 30-day money back guarantee. You’ll be prompted to upgrade when you click Update All.)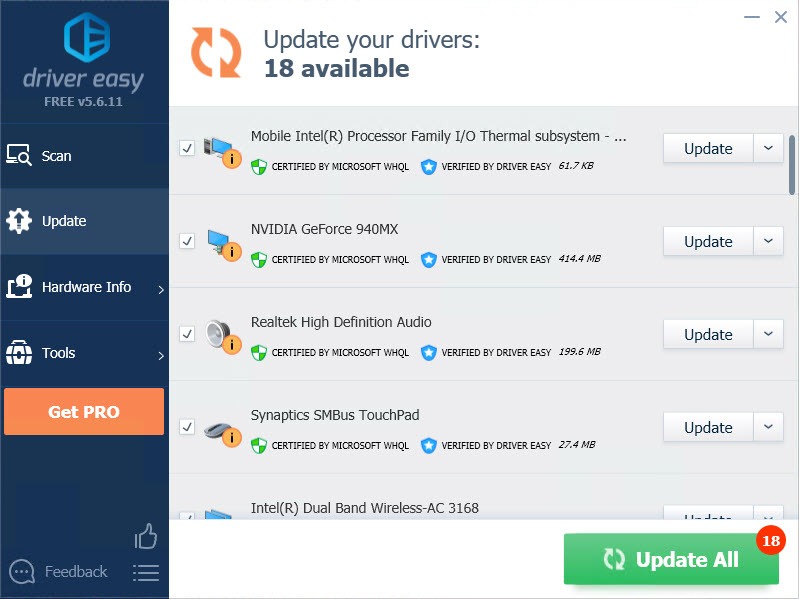
Be sure to attach the URL of this article if needed for more expedient and efficient guidance.
That’s it! If you have any questions, feel free to leave a comment below and we’ll see what more we can do.


