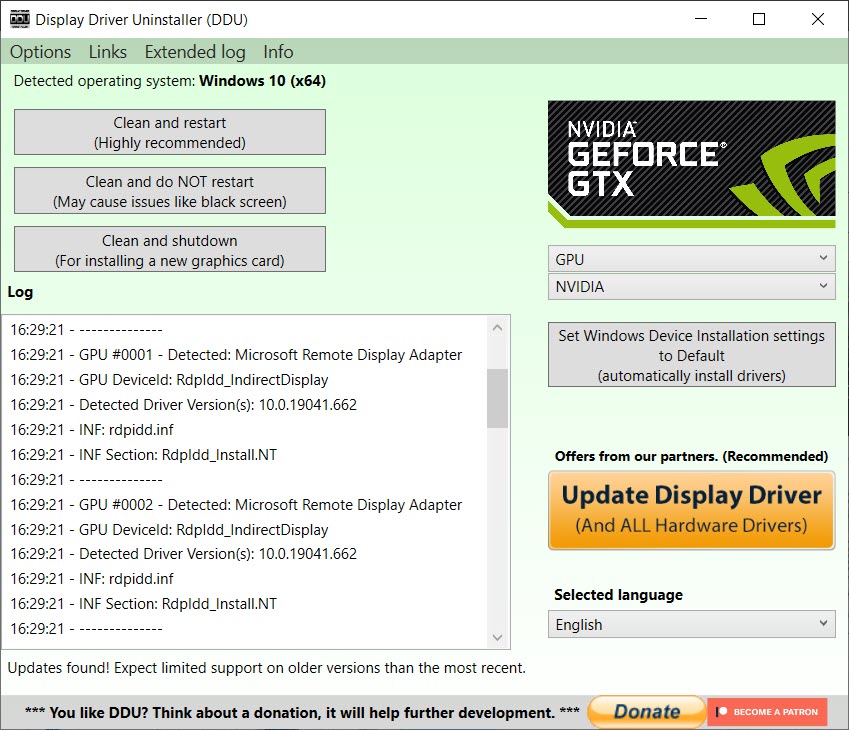
If your PC is having graphics-related issues, such as screen flickering and control panel not opening, one quick and nuclear solution is to reinstall the graphics driver with Display Driver Uninstaller, the most powerful driver removal utility.
In this step-by-step guide, we’ll show you how to reinstall drivers with DDU, and what you should do next to prevent the issues from happening again.
How to reinstall GPU drivers using DDU
Here’s how to do a clean reinstallation of your graphics driver:
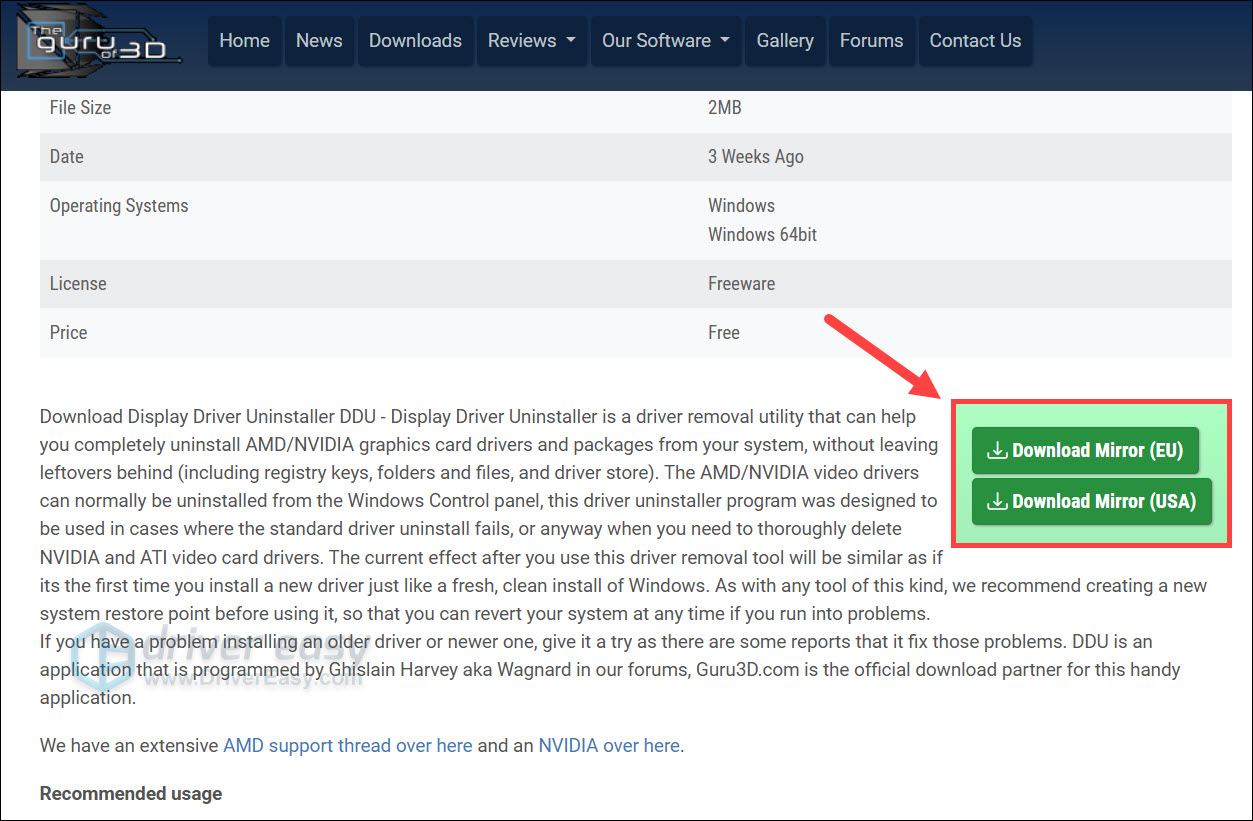
- First make sure you have DDU downloaded on your PC. If you haven’t, go to the official download page, scroll down and select a download mirror. If you’re planing to install a specific verison of graphics driver, make sure to download that installer first and install the driver offline after the reinstalltion.
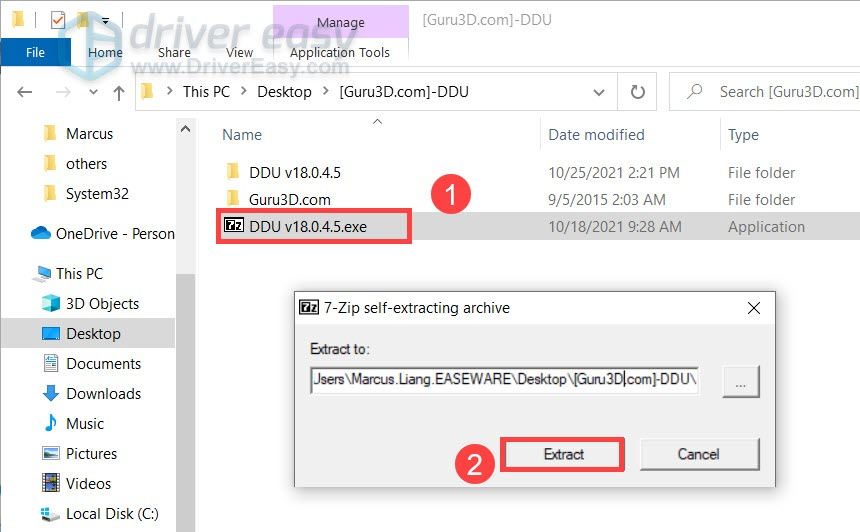
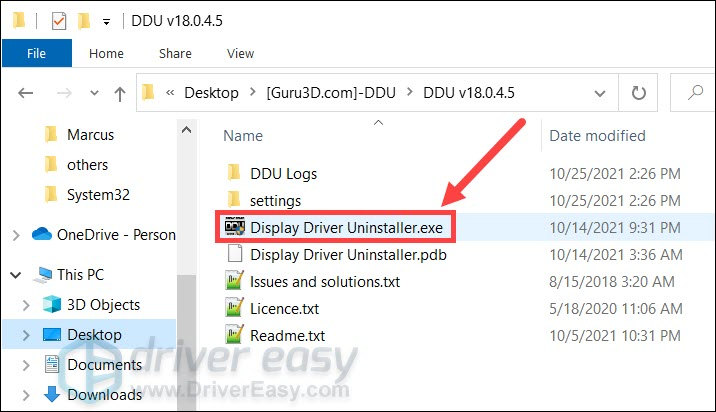
- Once downloaded, unzip the file to your Desktop. Then open the folder and double click DDU.exe to extract the files.
Next you need to boot your PC into Safe Mode. And here’s how to do that on both Windows 10 and 11.
Windows 10
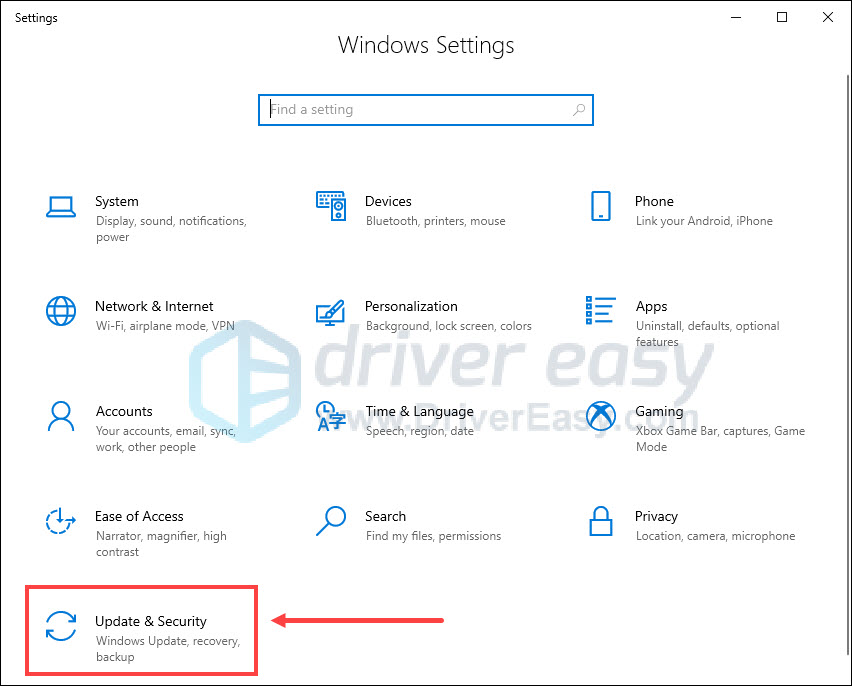
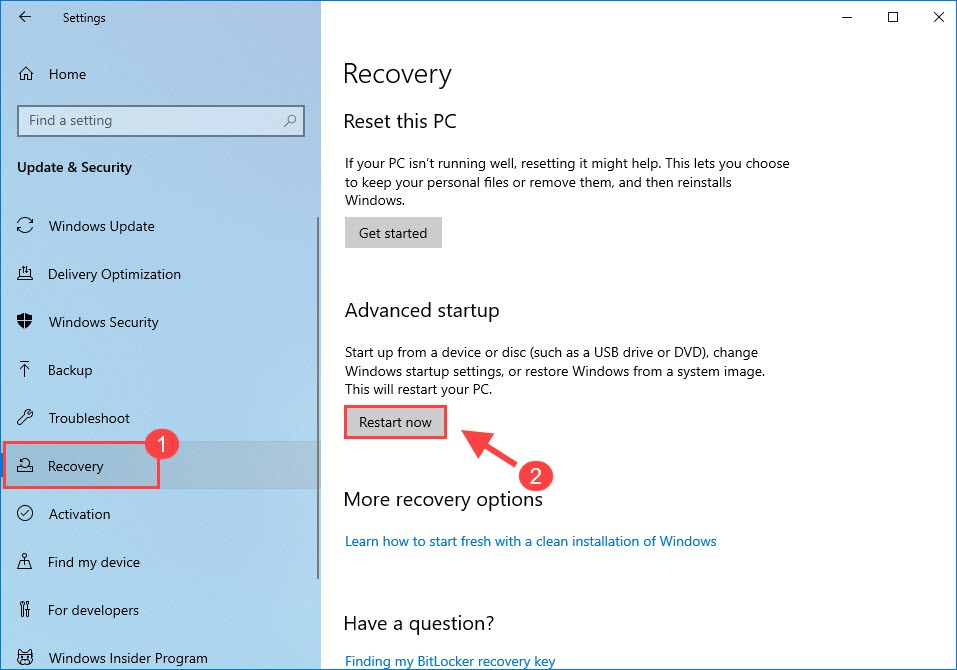
- Next you need to enter Safe Mode. On your keyboard, press Win+I (the Windows logo key and the i key). Select Update & Security.
- In the left pane, select Recovery. Under Advanced startup, click Restart now. (Note that you should now continue this tutorial on your phone/another computer.)
Windows 11
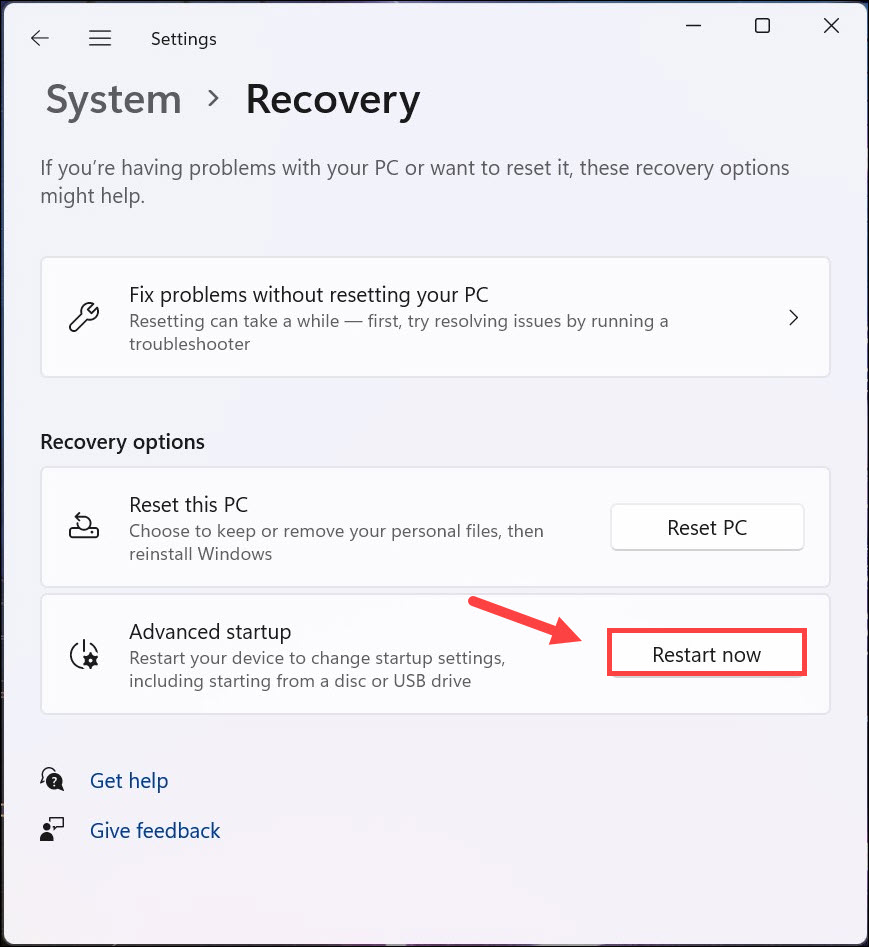
- On your keyboard, press the Windows logo key and the I key together to open Settings.
- Select System.
- Then click Recovery.
- Under Recovery options, next to Advanced startup, select Restart now.
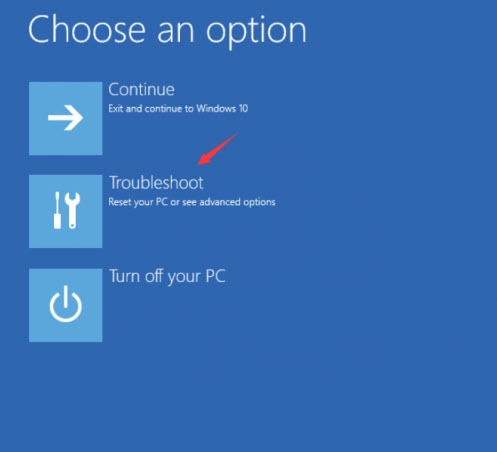
Then you will see a Choose an option screen.
- Click Troubleshoot.
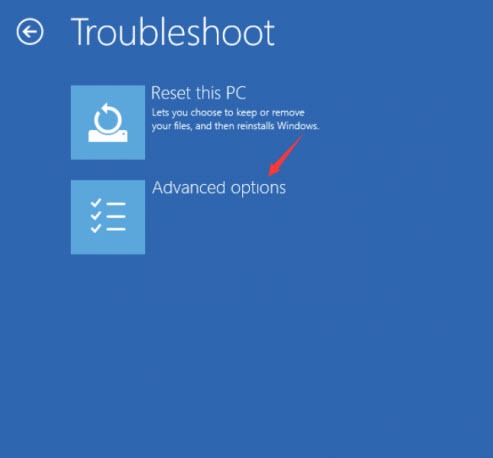
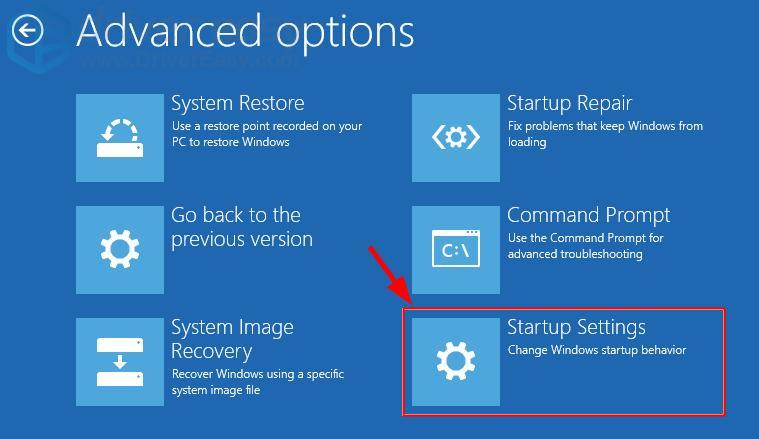
- Click Advanced options.
- Click Startup Settings.
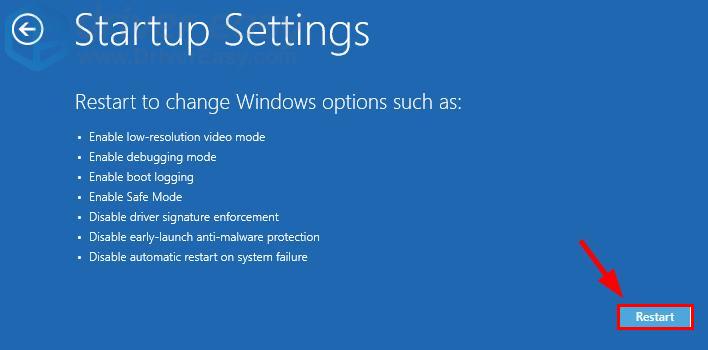
- Click Restart.
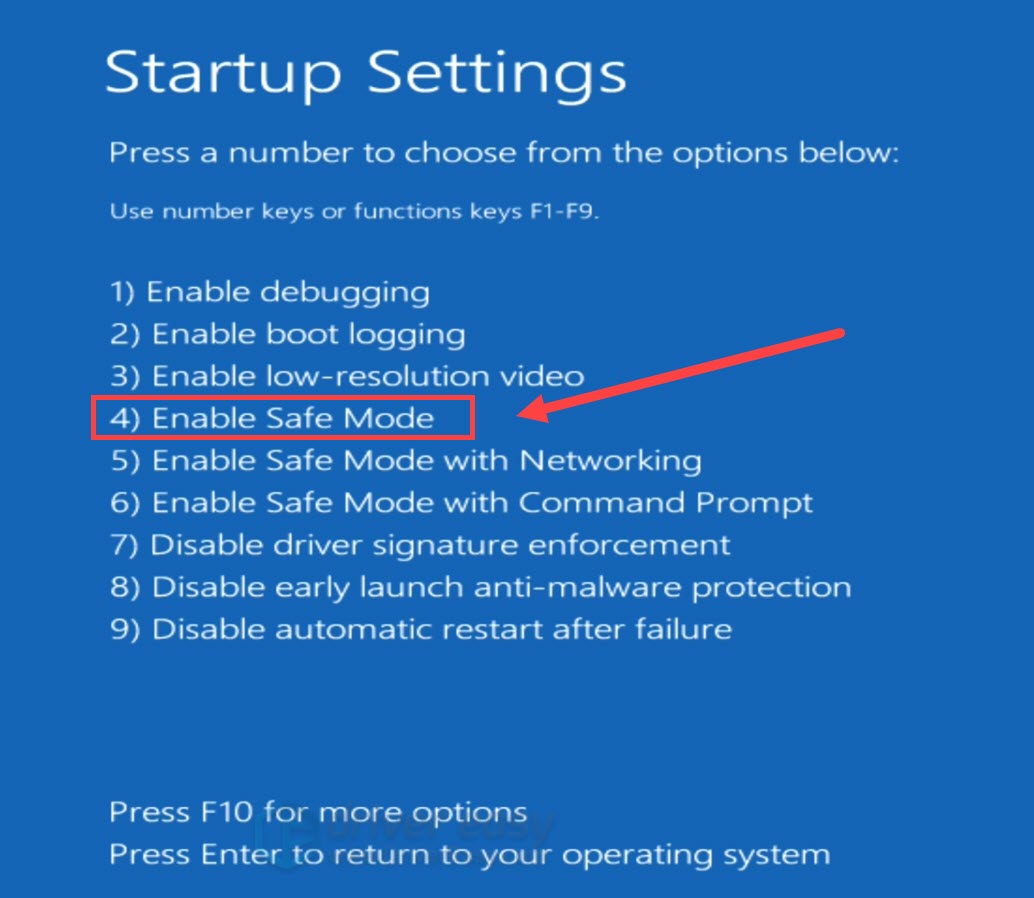
- You will see a list of different startup options. On your keyboard, press the number 4 key to enter Safe Mode without internet access.
Once you’re in Safe Mode, follow these instructions to reinstall with DDU.
- log in as you normally would and open DDU.
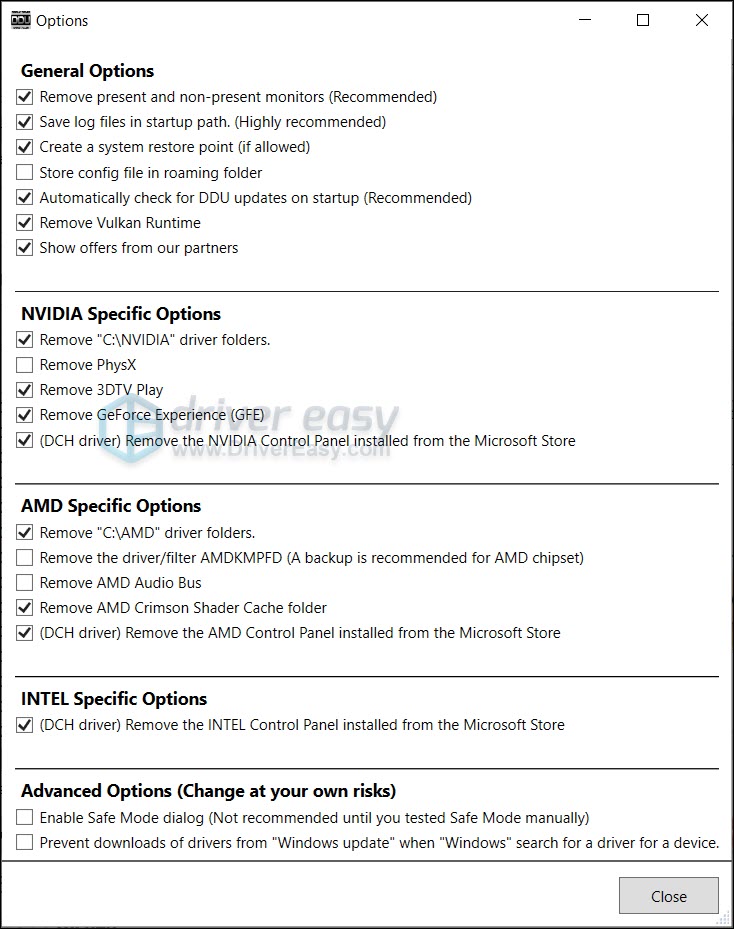
- In the pop-up Option window, choose your preferences. If you’re not sure, simply close the window.
- On the right, select your device type and your GPU manufacturer. Then click Clean and restart.
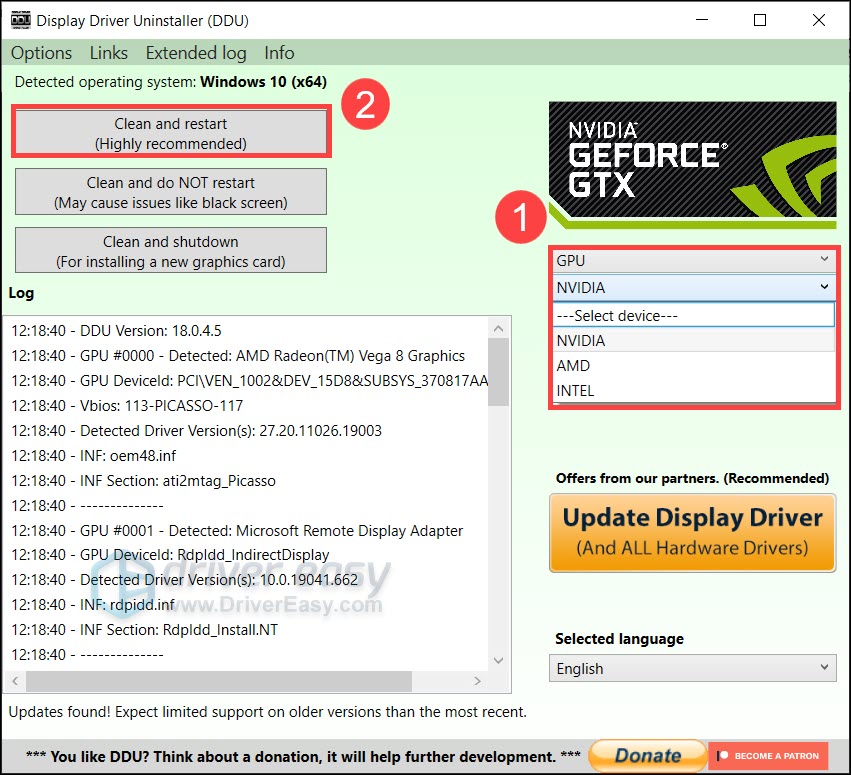
- Once DDU purged the graphics driver, your PC should restart. You can now check if the graphics issue persists.
So you’ve reinstalled the graphics driver, what next?
How to prevent graphics issues
After uninstalling GPU drivers with DDU, Windows will download and install the generic graphics driver automatically.
But that’s not good enough!
To get the most of your GPU and fix the issues once and for all, you need to keep your drivers up to date. An outdated graphics driver can lead to tons of graphics issues.
You can update your graphics driver manually, by visiting the manufacturer’s websites (NVIDIA/AMD/Intel), finding your model and downloading the latest correct installer. But if you’re not comfortable playing with device drivers, you can update automatically with Driver Easy. It’s an automatic driver updater that can scan and update all PC drivers quickly and safely.
- Download and install Driver Easy.
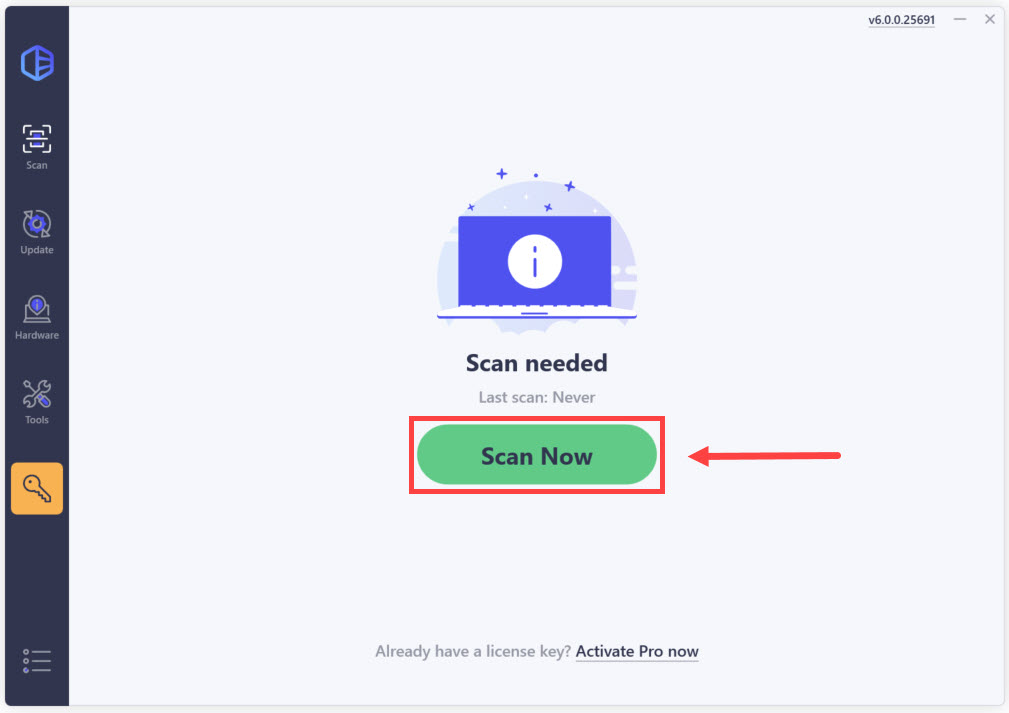
- Run Driver Easy and click the Scan Now button. Driver Easy will then scan your computer and detect any problem drivers.
- Click Update All to automatically download and install the correct version of all the drivers that are missing or out of date on your system.
(This requires the Pro version – you’ll be prompted to upgrade when you click Update All. If you are not sure whether Driver Easy is right for you, you can use the 7-day free trial to test out all the Pro features. You won’t be charged until your trial ends and you can cancel anytime.)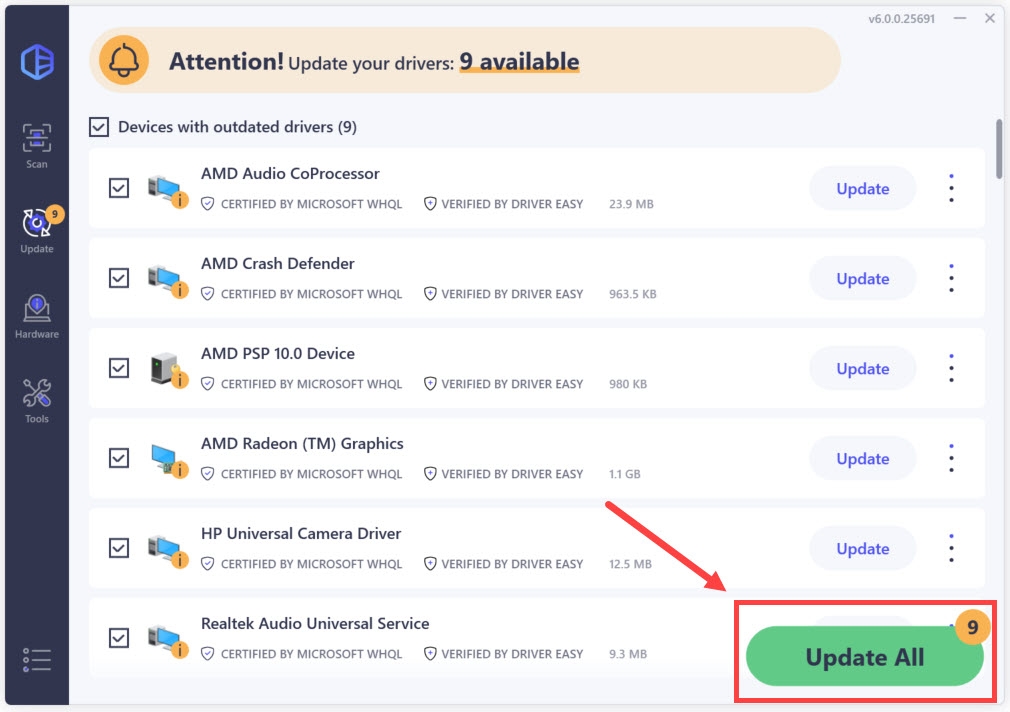
After updating your drivers, restart your PC for the changes to take full effect.
Hopefully this post helps you reinstall your graphics driver and get the GPU working properly. If you have any questions or ideas, feel free to leave a message down below.


