
Do you want to share with the world the most amazing part of your performance, or trim out the shaky recording at the very beginning or at the end of the video?
No more searching, Windows 10 has this very easy-to-use built-in tool called Photos that allow you to trim your video clip to the way you want. Here is how you do it:
1) Transfer the video clip you need to trim to your Windows 10 computer. Or you can connect your digital device with the video on to your computer, and locate it via File Explorer (hot keys: Windows logo key + E).
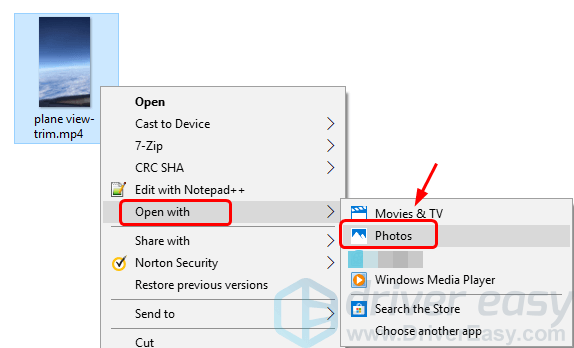
2) Right-click the video you want to trim and click Open with then Photos.
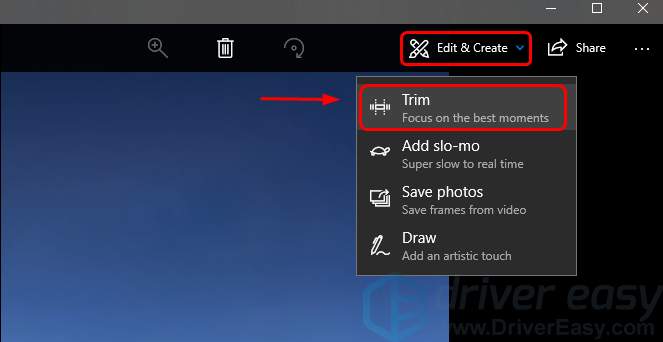
3) Click your video so the task bar on top will show up. Click Edit & Create, then Trim.
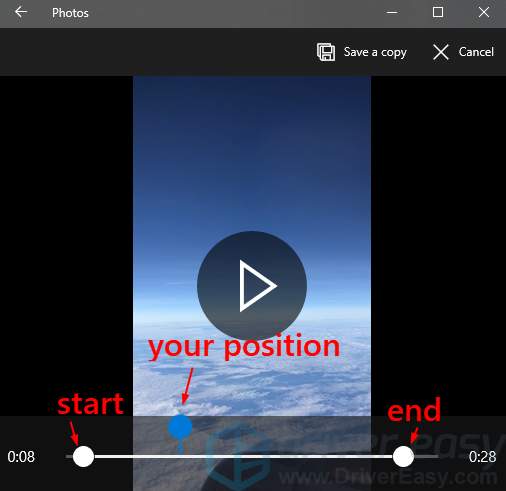
4) You will see two white dots on the progress bar, one marking the starting point of your video, and the other for the ending point. You will also see a blue dot, indicating where you are at when playing the video.
5) When you toggle the two white dots around, you will also see the length of the video.
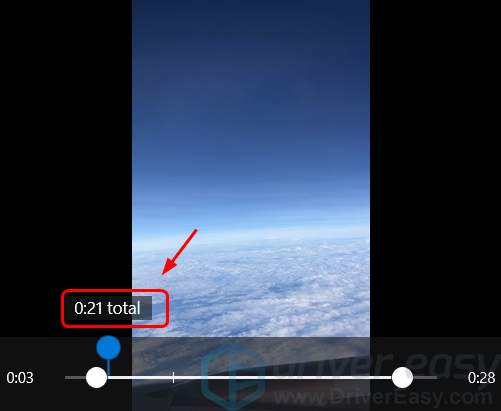
Try to drag the dots around and see what you want to leave out and what you want to save.
6) When you have decided what to include in your video, single-click the video so you can view the new video clip from its new beginning.
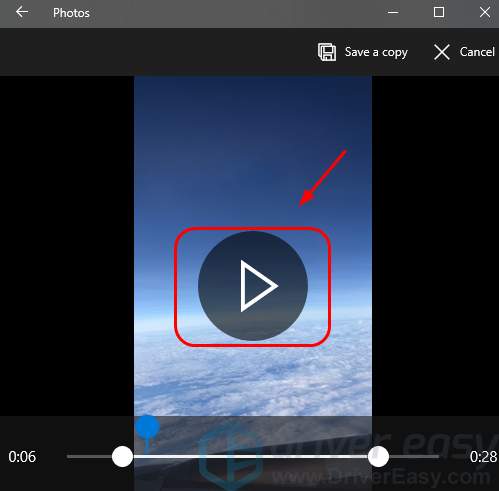
7) Do the rest of the adjusting if you need.
8) When you finish all the editing, click the Save a copy button on top, and save it as you will. Just as the name suggests, you don’t need to worry that your original video clip will be trimmed, what it does here is actually saving a copy.
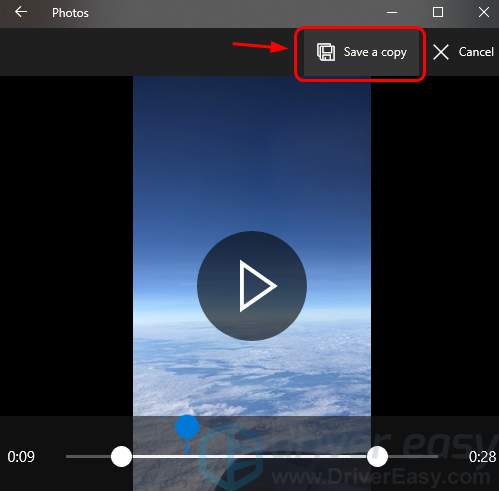
9) When the saving is done, you will be able to see the new video playing automatically.
Share the very best part of your video with your friends and families!
NOTE: Photos only allows you to trim your videos, i.e., you can only snip out part of your videos and make it a new one on the base of your original material. If you want do add video effects, edit the sound track, add subtitles to your video, you still need a more advanced video editor.
Feel free to let us know if you need any further support. 🙂


