Windows Update is a feature that automatically checks and provide updates for our computer.
But sometimes it can be such a big pain that you want to turn it off.
Here are 3 easy-to-follow methods you can try to stop Windows update in Windows 10.
Try these methods
You may not have to try all the methods (methods 1-3) to disable Windows Update on your Windows 10; just work your way down the list until you find the one that works for you.
- Disable the Windows Update Service
- Meter your Wifi network
- Change Group Policy Settings
- Bonus tip: Update your device drivers via Driver Easy
Method 1: Disable the Windows Update Service
Method 2 is pretty much self-explanatory. By disabling the Windows Update Service, Windows will stop checking for updates, hence sparing you the wanted Windows updates. To do so:
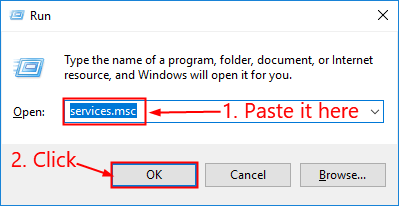
1) On your keyboard, press the Windows logo key  and R at the same time. Then copy & paste services.msc into the box and click OK.
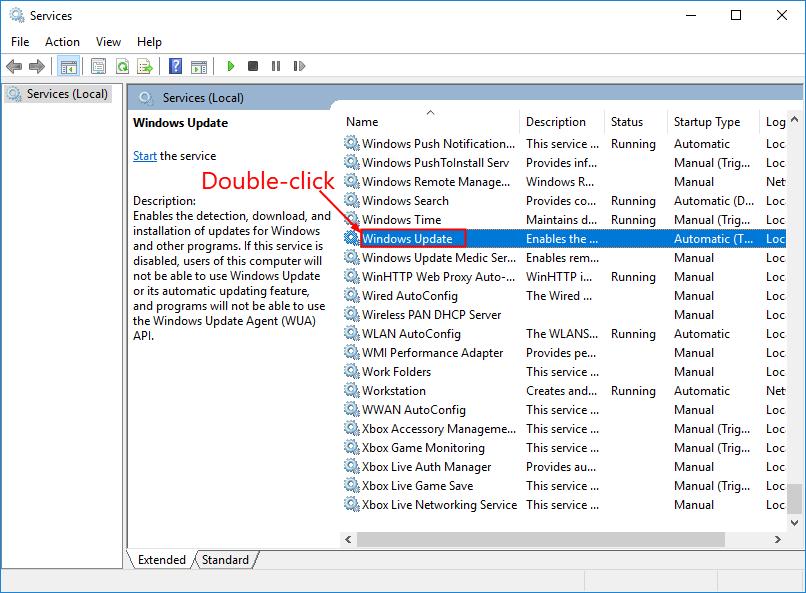
2) Scroll down to the bottom, locate and double-click on Windows Update.
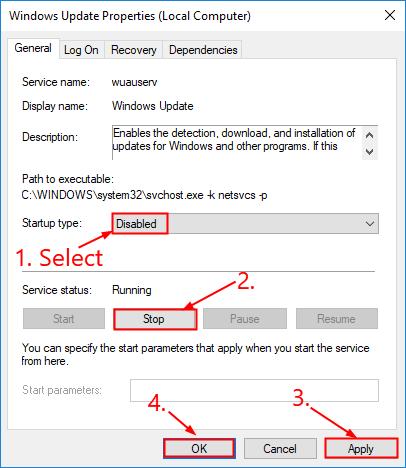
3) In Startup type, select Disabled, then click > Stop ( make sure the word Stop is grayed out) > Apply > OK.
4) Restart your computer for the changes to take effect.
Method 2: Meter your Wifi network
If you’re using Wifi network, then method 2 will just do the trick. By metering your Wi-fi network, Windows will automatically take it that you’re on a limited data plan (even if you aren’t) and stop forcing Windows updates on your computer. Here’s how:
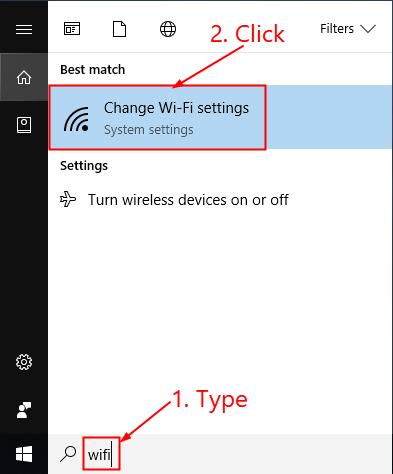
1) On your keyboard, press the Windows logo key, type wifi and click Change Wi-Fi settings.
2) Click on the name of your Wifi connection.
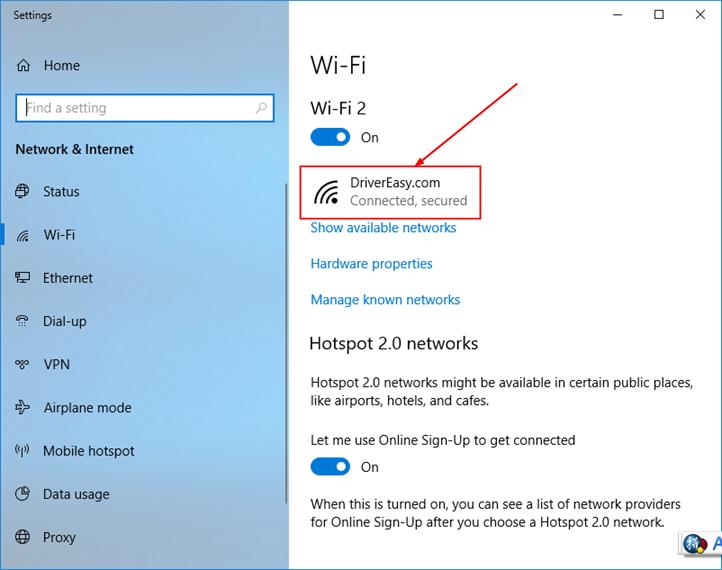
3) Toggle the Set as metered connection switch On.
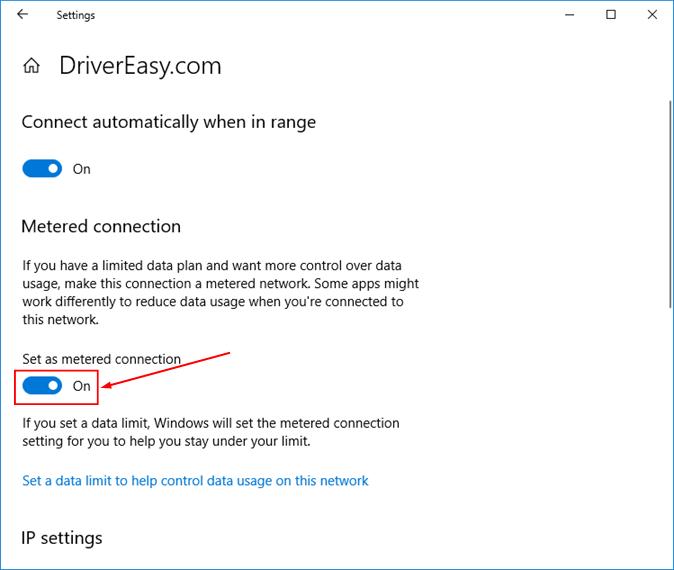
4) Hopefully it solves your woes and you won’t see another ‘unsolicited’ Windows update on your computer.
Method 3: Change Group Policy Settings
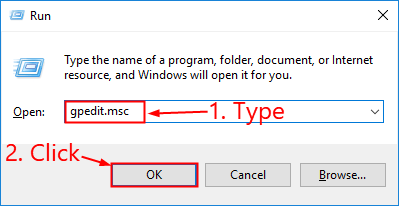
1) On your keyboard, press the Windows logo key and R at the same time, then type gpedit.msc into the box and click OK.
3) Double-click on Computer Configuration > Administrative Templates > Windows Components.
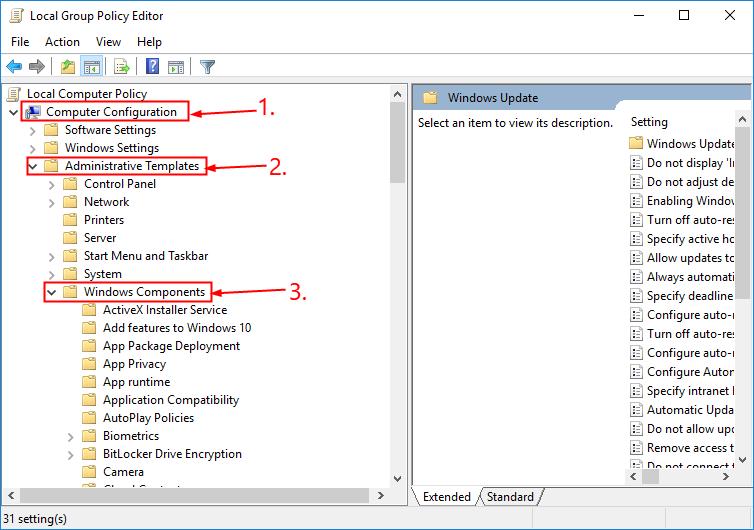
4) Double-click on Windows Update > Configure Automatic Updates.
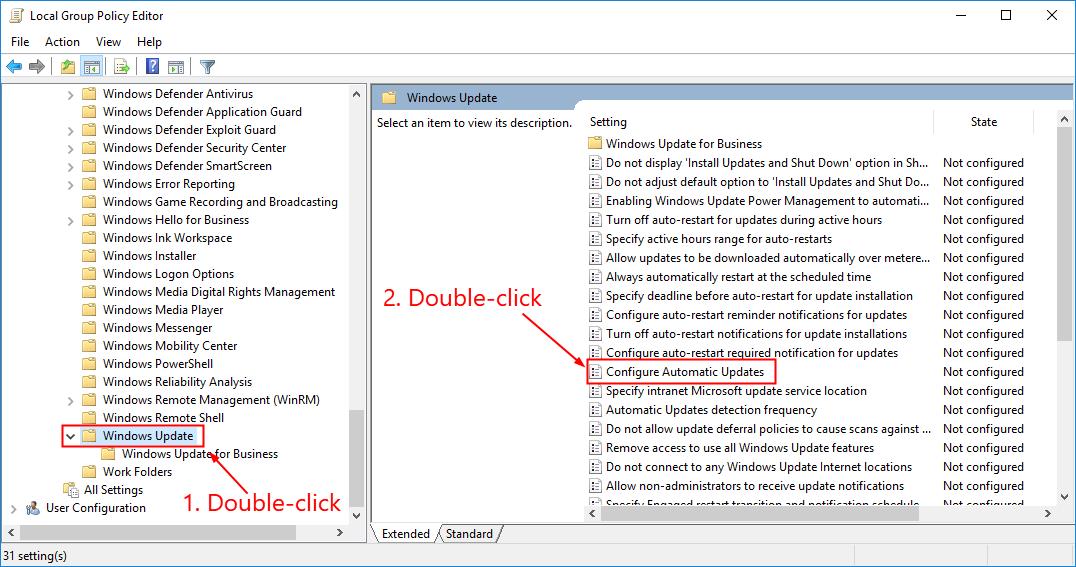
5) Choose Disabled, and then click Apply > OK.
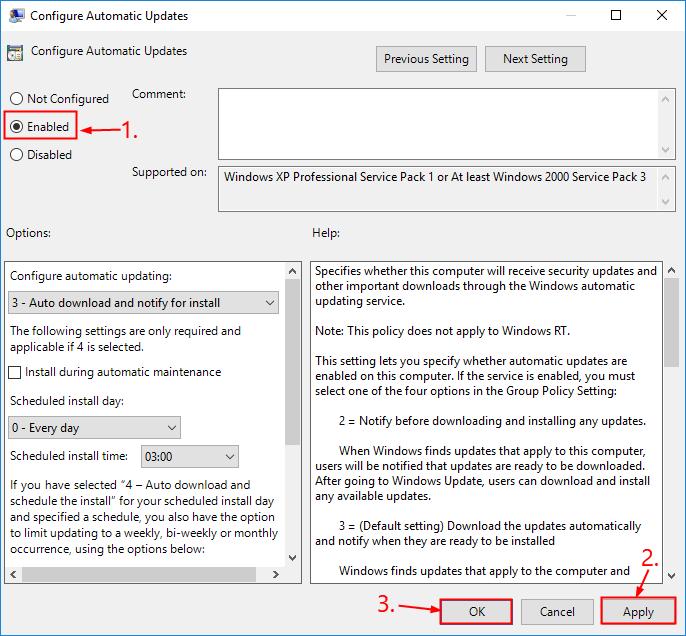
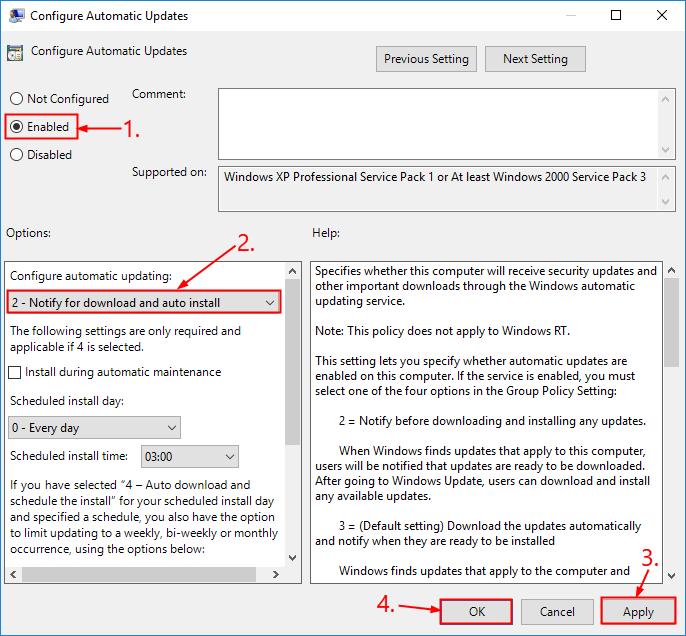
6) Restart your computer for the changes to take effect.
Bonus tip: Update your device drivers via Driver Easy
Despite the undue pain Windows Update brings to us (like buggy updates, Internet data hogging, untimely computer shut-downs for an update etc.), Windows does has its point: to keep your drivers up-to-date for the best computer performance. If you don’t have the time, patience or computer skills to update your drivers manually, you can do it automatically with Driver Easy.
Driver Easy will automatically recognize your system and find the correct drivers for it. You don’t need to know exactly what system your computer is running, you don’t need to risk downloading and installing the wrong driver, and you don’t need to worry about making a mistake when installing.
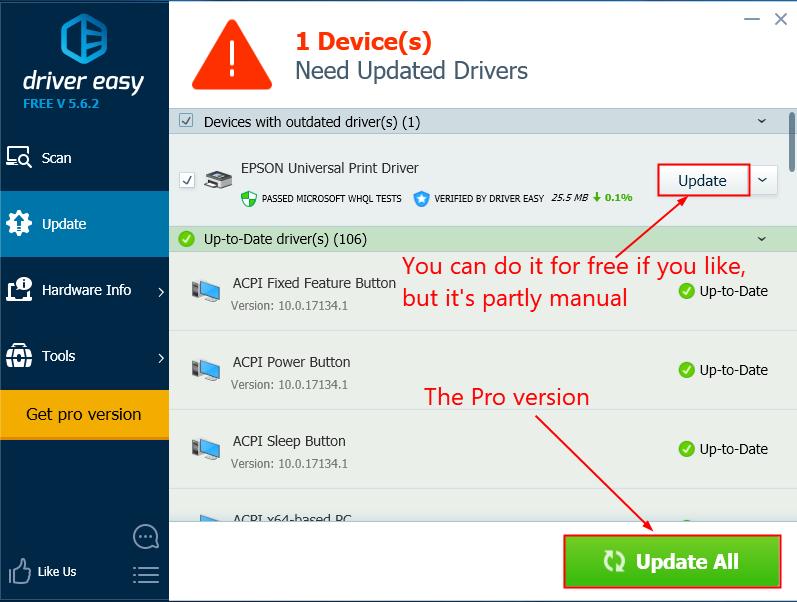
You can update your drivers automatically with either the FREE or the Pro version of Driver Easy. But with the Pro version it takes just 2 clicks:
1) Download and install Driver Easy.
2) Run Driver Easy and click the Scan Now button. Driver Easy will then scan your computer and detect any problem drivers.
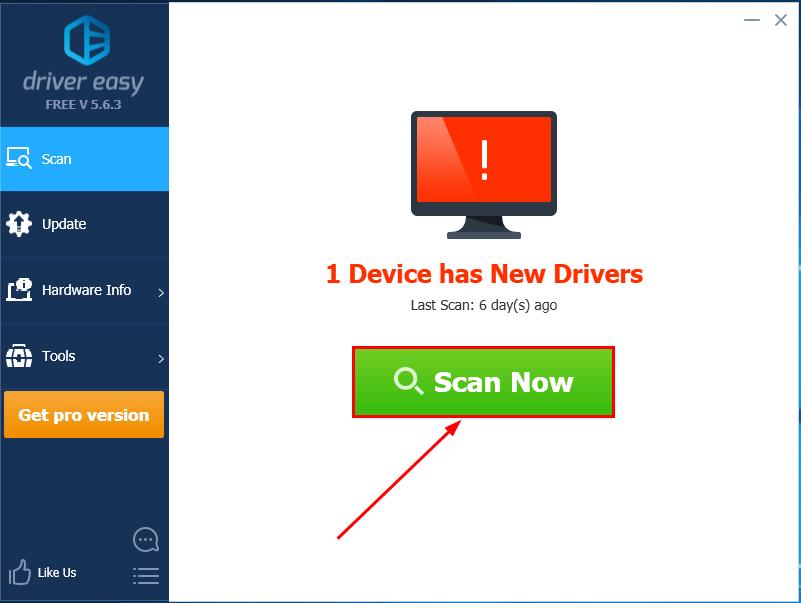
3) You can upgrade to the Pro version and click Update All to automatically download and install the correct version of ALL the drivers that are missing or out of date on your system.
4) Restart your computer to finish the update.
That’s it – 3 easy methods for you to turn off Windows Update on your computer. Hope this helps and feel free to comment below if you have any further questions. ?


