Minecraft is a famous game around the world. Game developers keep releasing new editions, normally the game will update itself. But you can also update the game manually. This post will guide you.
Before updating the Minecraft Windows 10 edition, you need to update your Windows 10 to the latest version.
If you’ve already done it, skip to update steps.
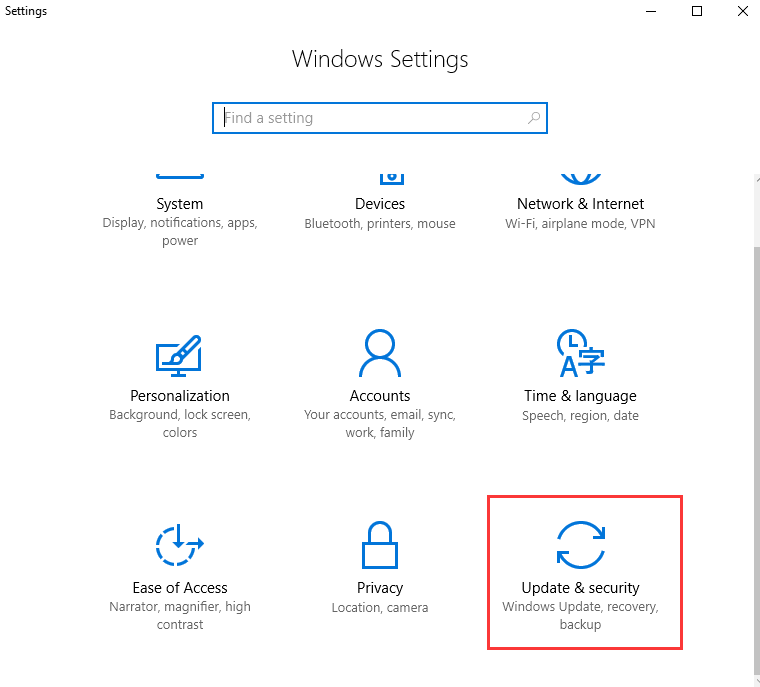
- Press the Windows logo key + I together and click Settings.
- Click Update & Security.
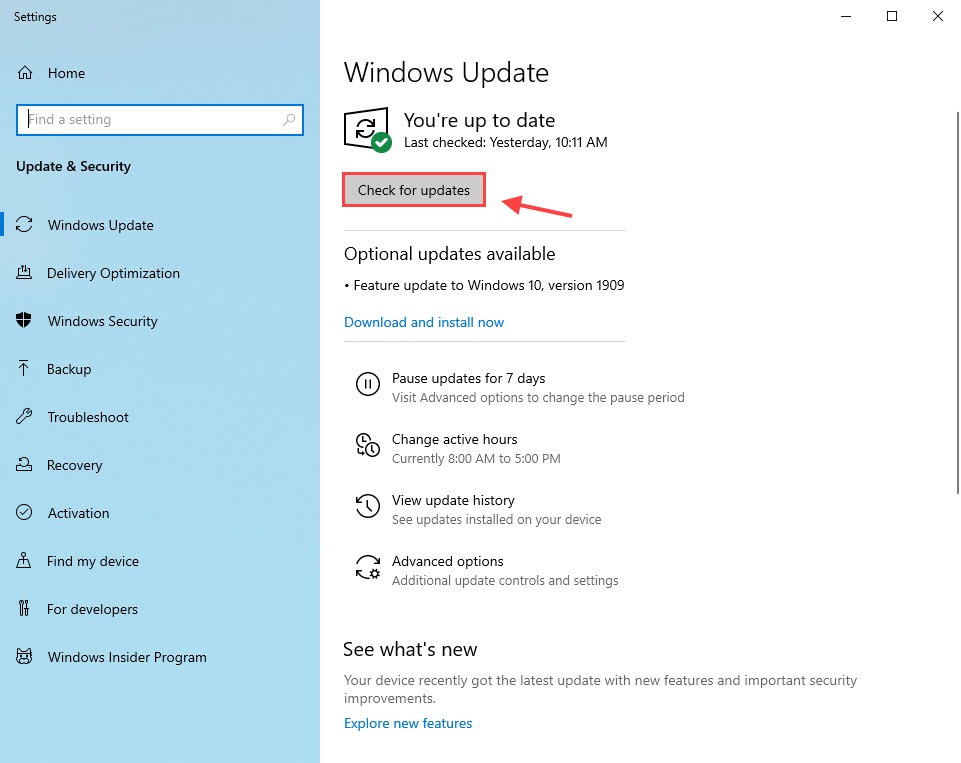
- Choose the Windows Update tab on the left and click Check for updates.
Update your Minecraft Windows 10 edition
To update your Minecraft Windows 10 edition, just follow the steps below:
- Run the Microsoft Store.
- Click the three dots on the top right corner and select Downloads and updates.
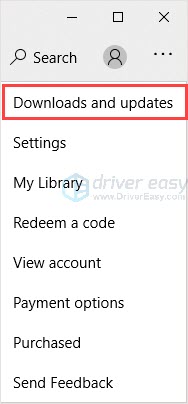
- Click Get updates.
After doing this, Microsoft Store will check and install the latest updates for all the apps you have through the store, including Minecraft.
What to do if your Minecraft windows 10 edition won’t update? Read on to find how.
Minecraft Windows 10 edition won’t update
If your Minecraft won’t update, you can try the 2 fixes to fix the issue.
Fix 1: Reset Minecraft
- Press the Windows logo key + I together and click Settings.
- Click Apps.
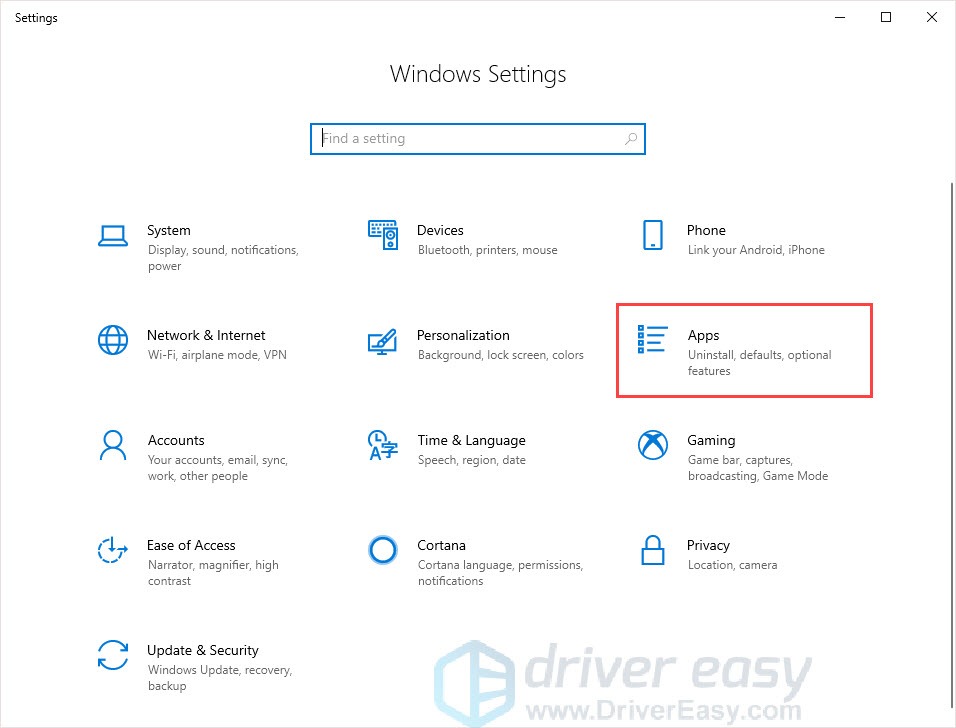
- Choose the Apps & features tab on the left.
- In the right panel, scroll down and find Minecraft.
- Click Minecraft and click Advanced options.
- Click Reset.
- Go to Microsoft Store and check for updates.
Fix 2: Reinstall Minecraft
If this method doesn’t work, you can reinstall the Minecraft to fix the issue.
- Press the Windows logo key + R.
- Type appwiz.cpl and press Enter.

- Right-click on Minecraft and click Uninstall.
- Press the Windows logo key + E to open File Explorer.
- Type %Appdata% in the address bar and press Enter.
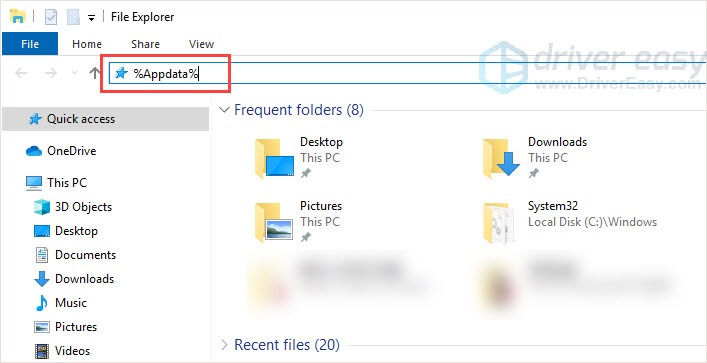
- Find the Minecraft folder and delete it.
- Go to Minecraft official website to download the latest version.
- Install and run the program to check.
Bonus tip: Update your drivers
To get a better gaming experience, it’s recommended to update your drivers. Take graphics card as an example.Graphics card manufacturers like Nvidia, AMD and Intel constantly release new graphics drivers to fix bugs and improve the gaming performance and experience.
If the graphics driver on your PC is outdated or corrupted, you may not be able to enjoy the optimal gaming experience, and sometimes you may run into the Control crash issue.
To prevent and fix issues, you’d better update your drivers.
There are two ways you can update your drivers:
Manual driver update – You can update your graphics drivers manually by going to the manufacturer’s website for your graphics card, and searching for the most recent correct driver. Be sure to choose only drivers that are compatible with your Windows version.
Automatic driver update – If you don’t have the time, patience or computer skills to update your video and monitor drivers manually, you can, instead, do it automatically with Driver Easy.
Driver Easy will automatically recognize your system and find the correct drivers for your exact graphics cards, and your Windows version, and it will download and install them correctly:
- Download and install Driver Easy.
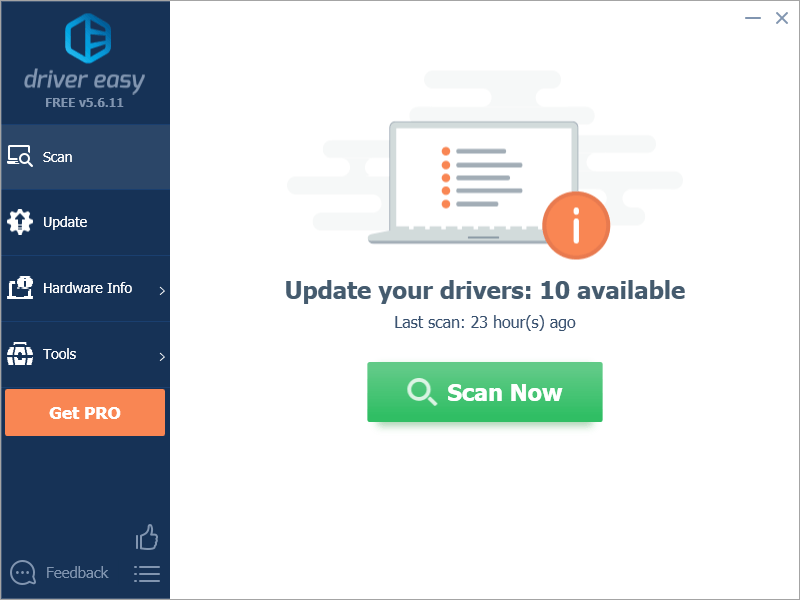
- Run Driver Easy and click Scan Now. Driver Easy will then scan your computer and detect any problem drivers.
- Click Update All to automatically download and install the correct version of all the drivers that are missing or out of date on your system. You need the Pro version of Driver Easy to do this, so you’ll be prompted to upgrade.
Don’t worry; it comes with a 30-day money-back guarantee, so if you don’t like it you can get a full refund, no questions asked.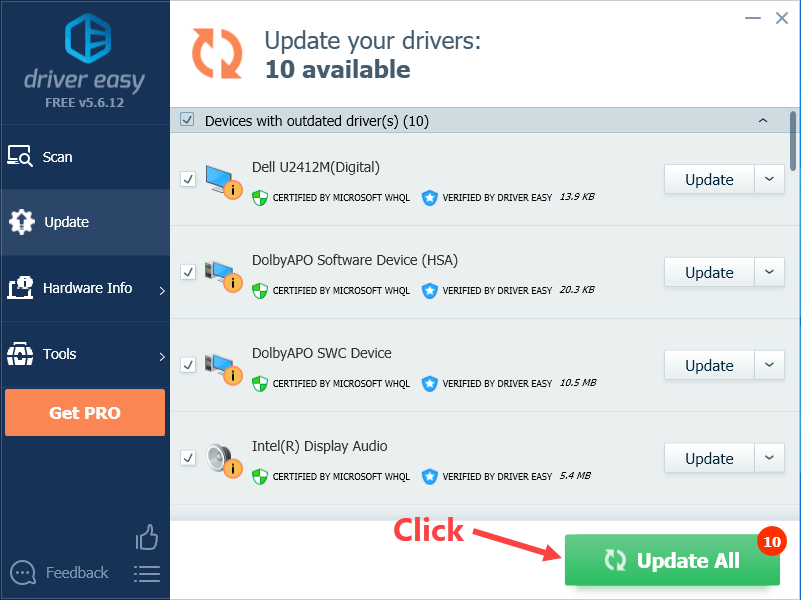
(Alternatively, if you’re comfortable manually installing drivers, you can click ‘Update’ next to each flagged device in the free version to automatically download the correct driver. Once it’s downloaded, you can manually install it.)
Hope this post could meet your need. If you have any questions or suggestions, please leave your comments below. We’ll try our best to help.


