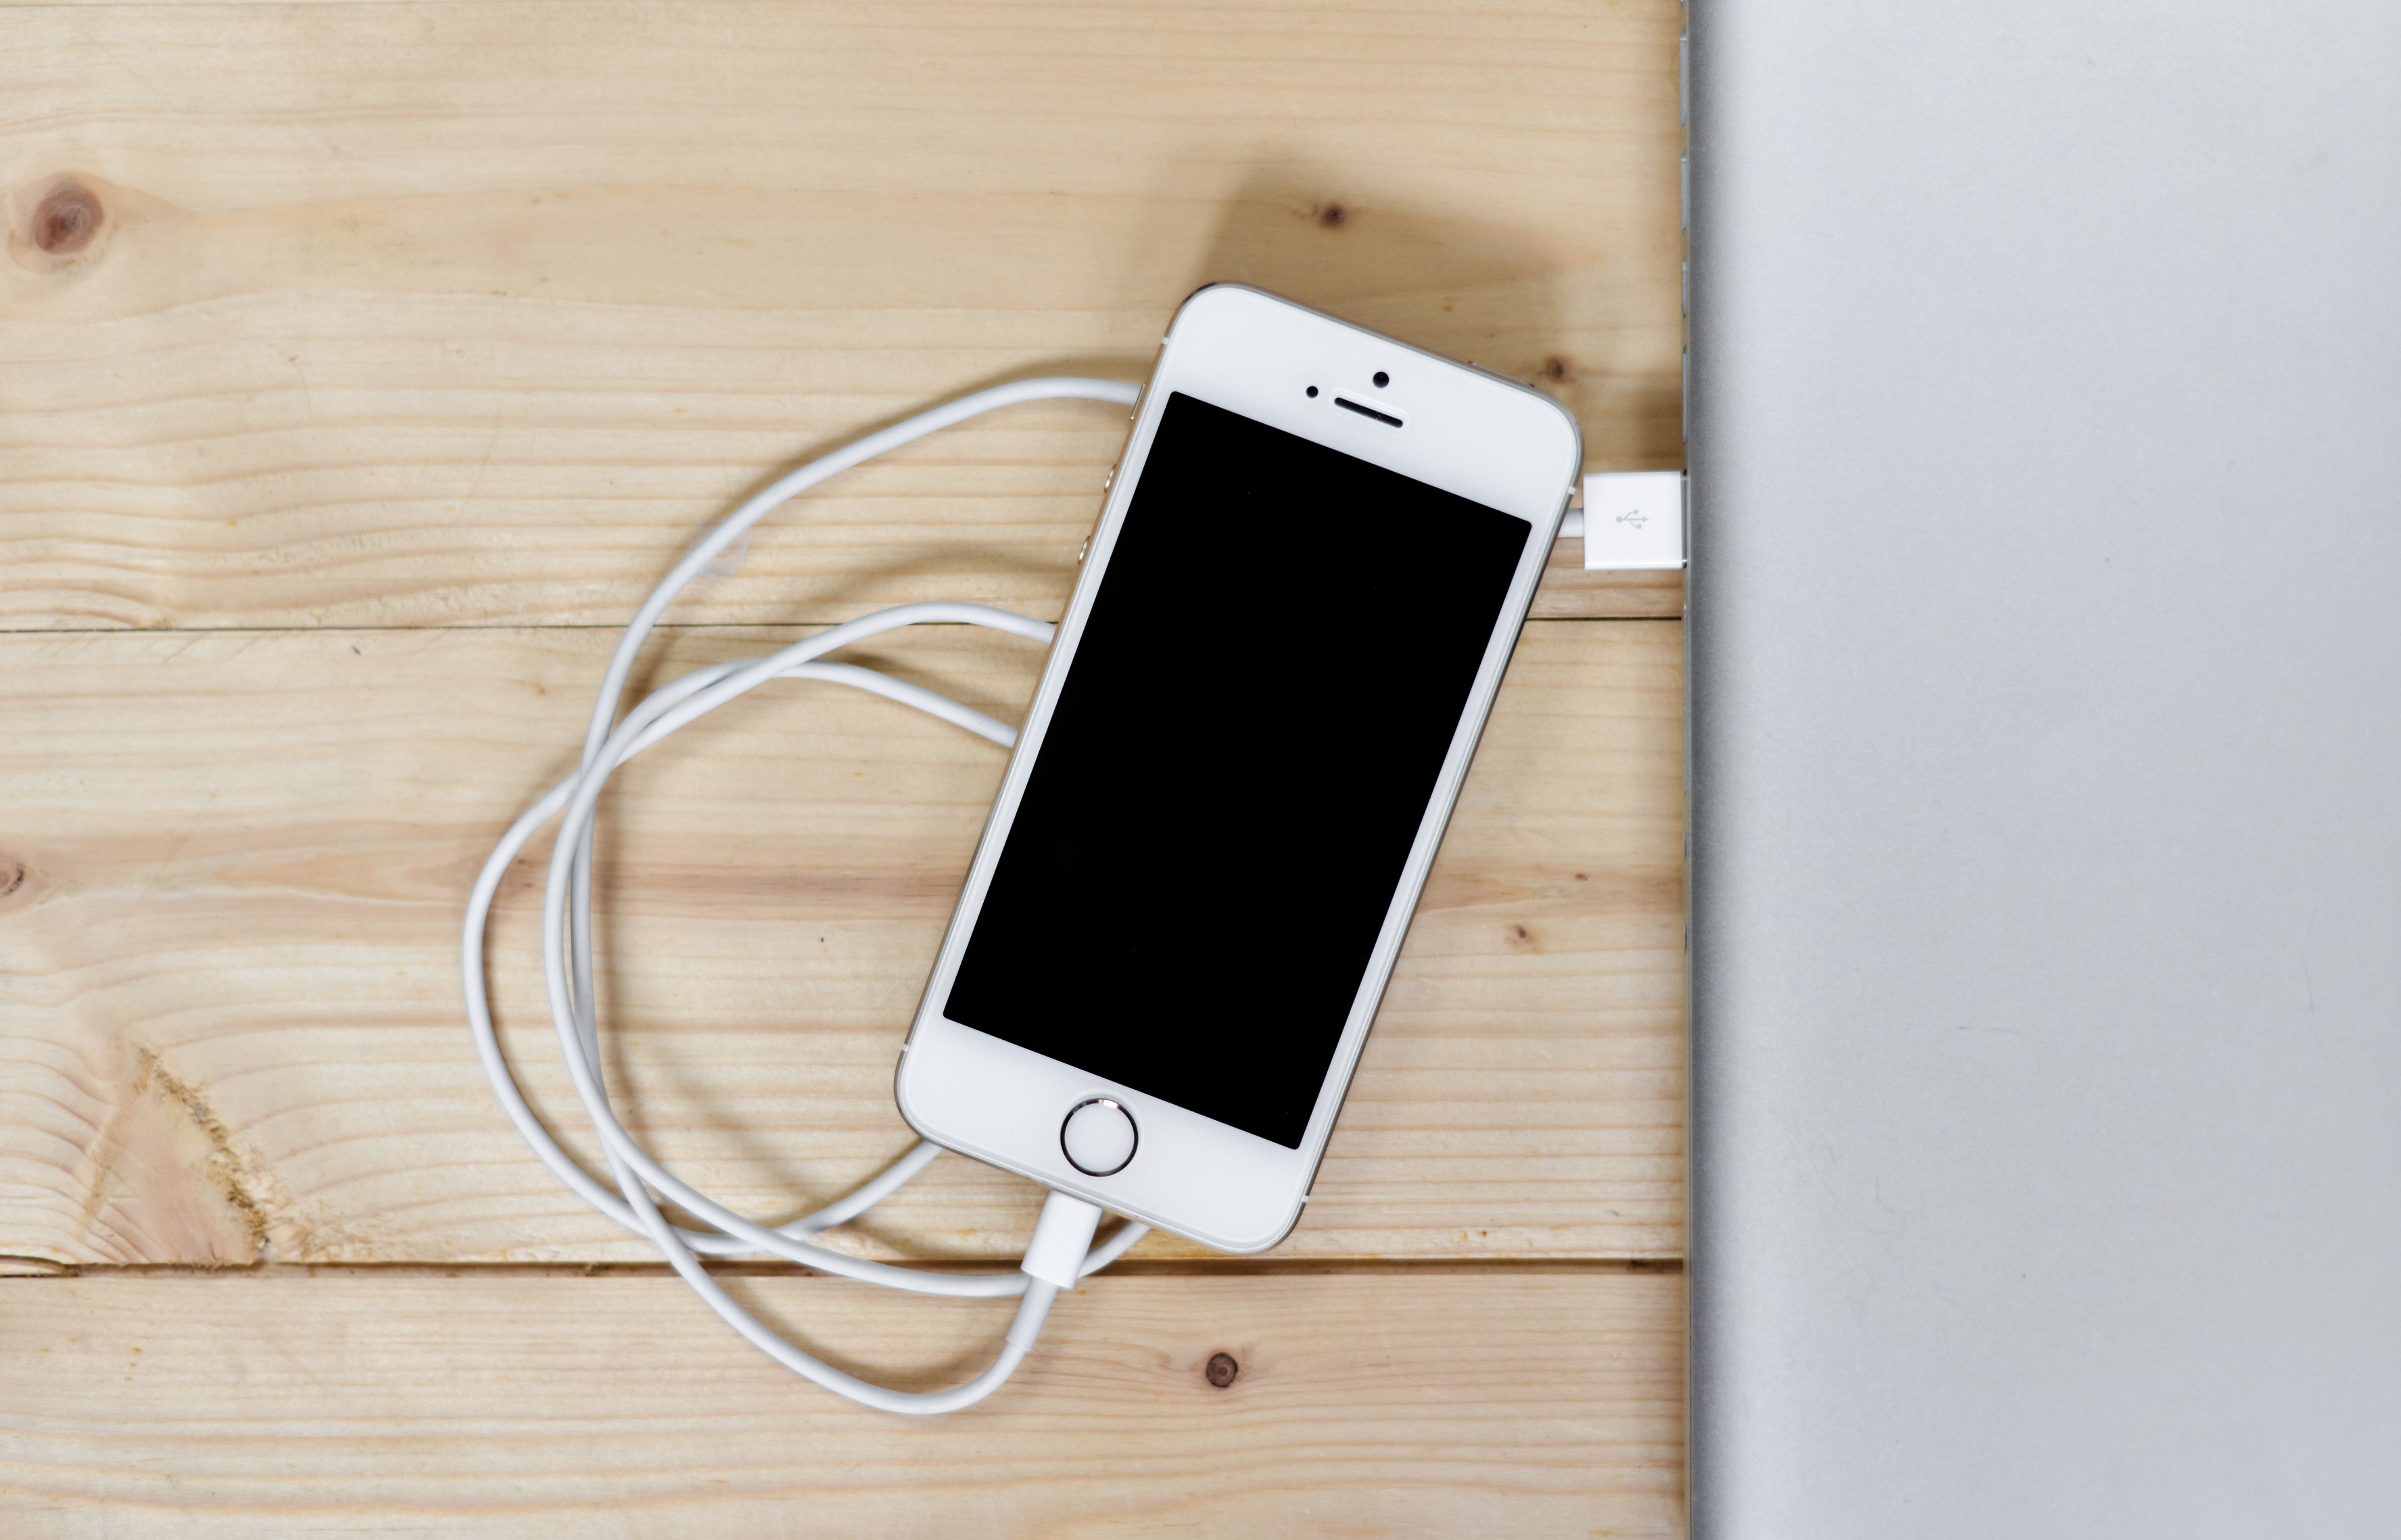
If you find that your iPhone won’t connect to your computer, don’t worry! You’re not alone. Many iPhone users are reporting this issue.
The good news is you can fix it on your own. You should be able to fix this issue easily with the fixes in this article.
Try these fixes:
Here are the fixes you can try. You don’t need to try them all; just work your way down the list until you find the one that works for you.
- Basic tips for you to check
- Update iTunes to the latest version and perform a Windows update
- Update the driver for Apple iPhone
- Reinstall Apple Mobile Device USB driver
- Restart Apple Mobile Device Service
- Update Apple Mobile Device USB driver
Fix 1: Basic tips for you to check
When you notice that your iPhone won’t connect to your computer, here are some basic tips for you to check first:
- Check if the Lightning cable is broken. If it is broken, try using a new one to connect your iPhone to your computer.
- If your current Lightning cable is in good condition, try connecting your iPhone to another USB port. See if your iPhone can connect your computer.
- Disconnect your iPhone and then reconnect it to your computer. If this issue persists, try restarting your iPhone and your computer and then connect your iPhone to your computer again.
- Unlock your iPhone before you try connecting it to your computer. And when you connect your iPhone, tap Trust when you’re prompted to select Trust or Don’t Trust your computer.
If this issue persists, don’t worry, try the next fix, below.
Fix 2: Update iTunes to the latest version and perform a Windows update
This issue is probably caused by your outdated iTunes or Windows system. Try updating iTunes to the latest version and then perform a Windows update to see if you can fix this issue.If you haven’t installed iTunes on your PC, click here to download iTunes from its official website and then install it on your PC.
If the current operating system on your computer is Windows 10, iTunes will automatically update itself when the new version is released.If you’re using Windows 7 or Windows 8 / 8.1, you can follow the instructions below to update iTunes:
1) Launch iTunes.
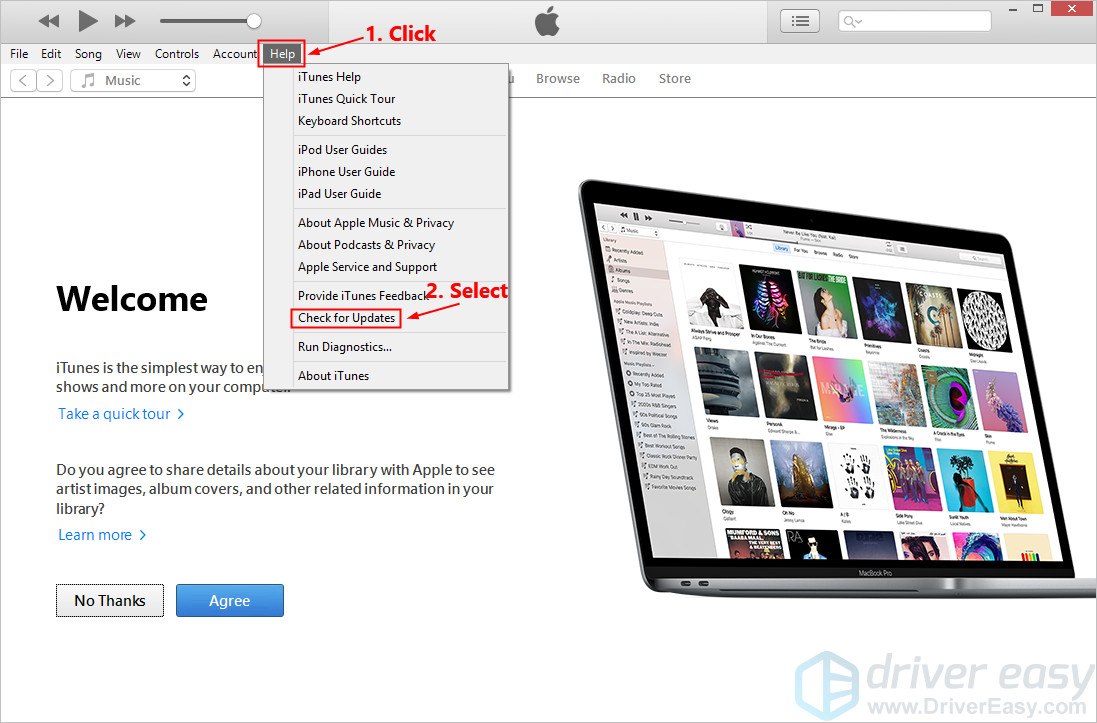
2) Click Help and then select Check for Updates.
3) After updating iTunes to the latest version, go and check if there are any Windows updates available.
4) After you performed a Windows update, try connecting your iPhone to your computer.
See if this issue reappears. If not, you’ve resolved this issue. If this issue persists, try the next fix, below.
Fix 3: Update the driver for Apple iPhone
Try updating the driver for Apple iPhone to see if you can resolve this issue. Here is how to do it:
1) Disconnect your iPhone from your computer and close iTunes.
2) Unlock your iPhone and go to the Home Screen.
3) Reconnect your iPhone to your computer. If iTunes opens, close it.
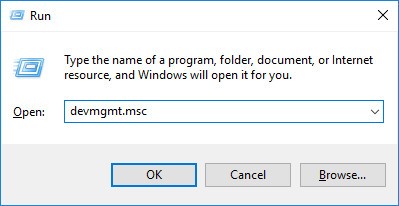
4) On your keyboard, press the Windows logo key and R at the same time to open the Run dialog. Type devmgmt.msc and press Enter to open Device Manager.
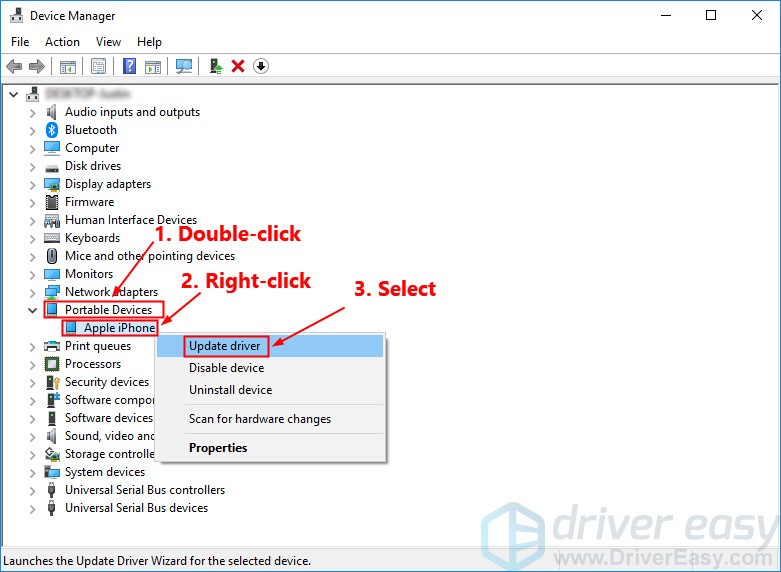
5) Double-click Portable Devices to expand the list. Right-click Apple iPhone and then select Update driver.
6) Select Search automatically for updated driver software and follow the on-screen instructions to update the driver for Apple iPhone.
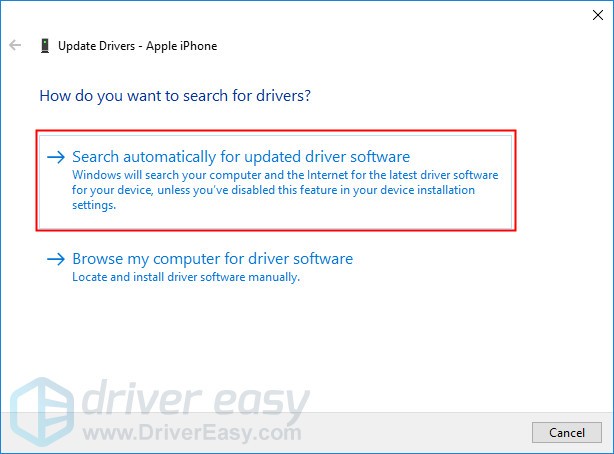
7) Open iTunes and then connect your iPhone to your computer.
See if this issue persists. If your iPhone won’t connect to your computer after you update the driver for Apple iPhone, try reinstalling Apple Mobile Device USB driver.
Fix 4: Reinstall Apple Mobile Device USB driver
You can try reinstalling Apple Mobile Device USB driver if your computer can’t recognize your iPhone. If you downloaded iTunes from Apple’s official website, you can follow the steps below to reinstall Apple Mobile Device USB driver:
1) Disconnect your iPhone from your computer and close iTunes.
2) Unlock your iPhone and go to the Home screen.
3) Reconnect your iPhone to your computer. If iTunes opens, close it.
4) On your keyboard, press the Windows logo key and R at the same time to open the Run dialog. Type %ProgramFiles%\Common Files\Apple\Mobile Device Support\Drivers and press Enter.
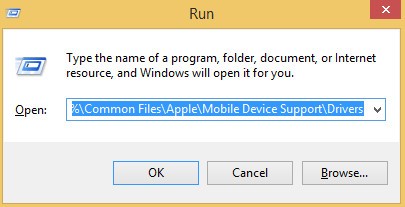
5) In the pop-up window, right-click the usbaapl64.inf or usbaapl.inf file and select Install.
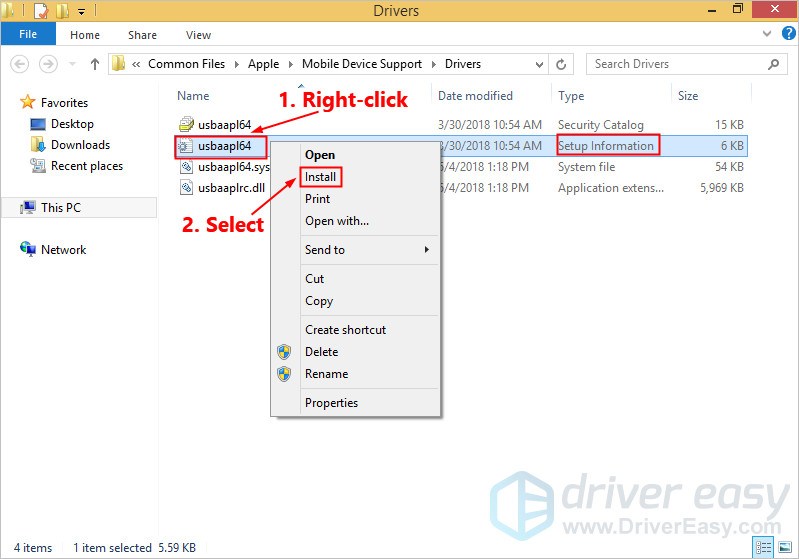
6) Disconnect your iPhone from your computer, then restart your computer.
7) Reconnect your device and open iTunes.
If your iPhone still won’t connect to your computer, try restarting Apple Mobile Device Service.
Fix 5: Restart Apple Mobile Device Service
If Apple Mobile Device Service is not running on your computer, your iPhone won’t connect to your computer. If the current operating system on your computer is Windows 7 or Windows 8 /8.1, follow the instructions to restart Apple Mobile Device Service:
1) Close iTunes and disconnect your iPhone from your computer.
2) On your keyboard, press the Windows logo key and R at the same time to invoke the Run dialog. Type services.msc and press Enter.
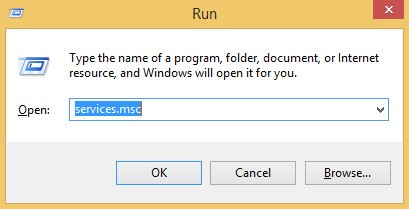
3) Right-click Apple Mobile Device Service and select Properties.
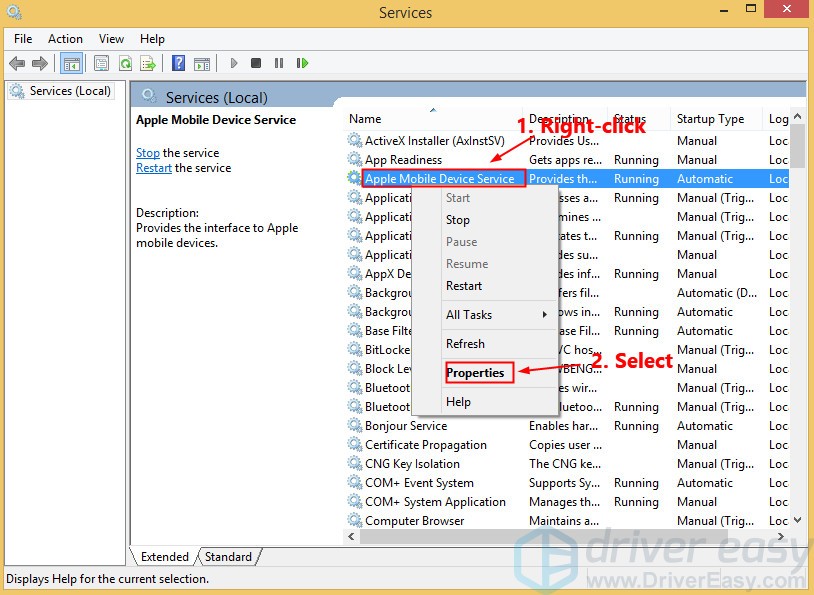
4) Set the Startup type to Automatic.
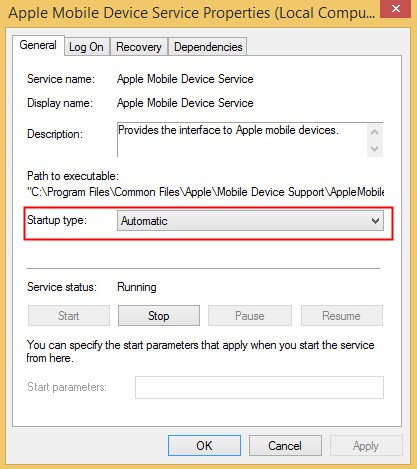
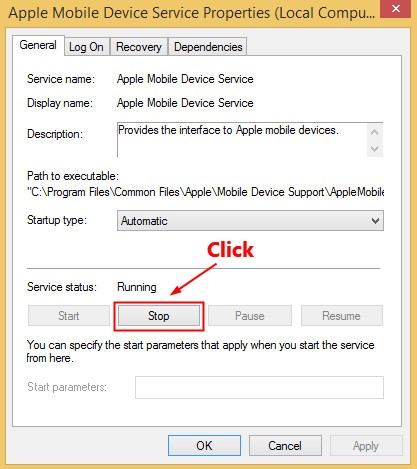
5) Click Stop to stop the service.
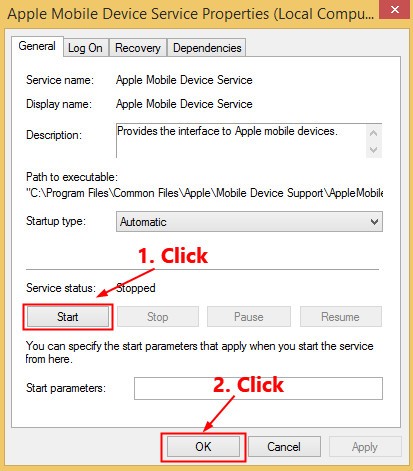
6) After the service has stopped, click Start to restart the service. Then click OK.
7) Restart the computer. Open iTunes and then connect your iPhone to your computer.
See if this issue persists. If not, you’ve fixed this issue.
Fix 6: Update Apple Mobile Device USB driver
If you’re using Windows 7 or Windows 8 / 8.1, the fixes above may resolve this issue, but if they don’t, or you’re not confident playing around with drivers manually, or if your computer is running Windows 10, you can update Apple Mobile Device USB driver automatically with Driver Easy.
Driver Easy will automatically recognize your system and find the correct drivers for it. You don’t need to know exactly what system your computer is running, you don’t need to risk downloading and installing the wrong driver, and you don’t need to worry about making a mistake when installing. Driver Easy handles it all.
1) Download and install Driver Easy.
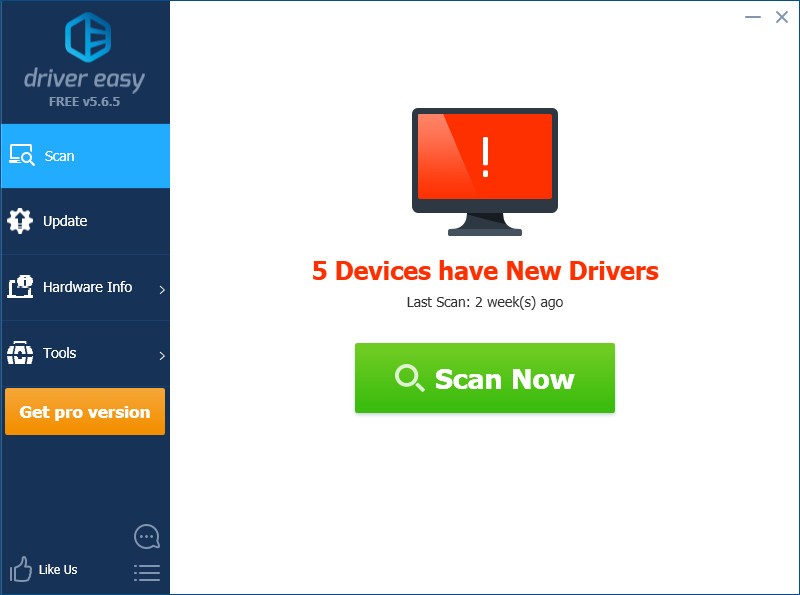
2) Run Driver Easy and click Scan Now. Driver Easy will then scan your computer and detect any problem drivers.
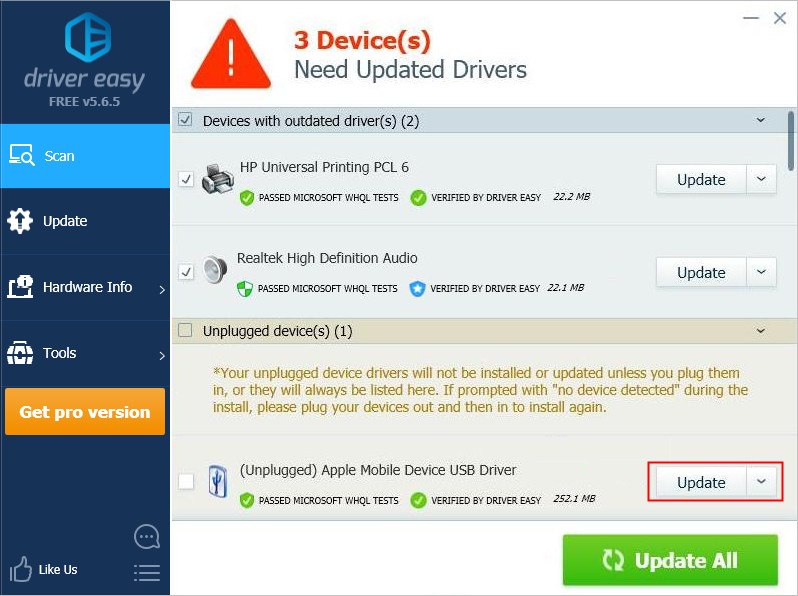
3) Click Update next to the flagged Apple Mobile Device USB driver to automatically download the correct version of its driver, then you can install it manually. Or click Update All to automatically download and install the correct version of all the drivers that are missing or out of date on your system (This requires the Pro version – you’ll be prompted to upgrade when you click Update All. You get full support and a 30-day money back guarantee).
Hopefully one of the fixes above helped you resolve this issue. If you have any questions or suggestions, you’re more than welcome to leave us a comment below.


