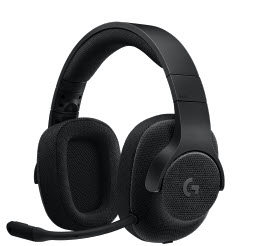
If you’re using a Logitech G433 microphone and it isn’t working now, you’re not alone. Many users are reporting this issue. But don’t worry, you can fix it. Try the solutions here.
Fixes to try:
You may not have to try them all, just work your way down the list until you find the one that works for you.
Fix 1: Double-check physical connection
Ensure your microphone is securely connected to your computer. If the connection is a bit loose, it may appear to be plugged in fine. Try unplugging your microphone, then plug it back in to make sure the connection is secure (or try plugging the device into a different USB port).
If your issue persists, move on to the next fix below.
Fix 2: Update your audio driver
Audio issues are likely to occur if you’re using a faulty driver for your microphone, or if it’s outdated. Try updating your Logitech G433 driver to see if it fixes your issue. There are two ways you can get the latest correct driver:
- Option 1 – Automatically install the Logitech G433 driver (Recommended)
- Option 2 – Download and install the driver manually
Option 1 – Automatically install the Logitech G433 driver
If you don’t have the time, patience or computer skills to update your Logitech G433 driver manually, you can do it automatically with Driver Easy.
Driver Easy will automatically recognize your system and find the correct driver for it. You don’t need to know exactly what system your computer is running, you don’t need to risk downloading and installing the wrong driver, and you don’t need to worry about making a mistake when installing.
You can update your driver automatically with either the FREE or the Pro version of Driver Easy. But with the Pro version it takes just 2 clicks:
1) Download and install Driver Easy.
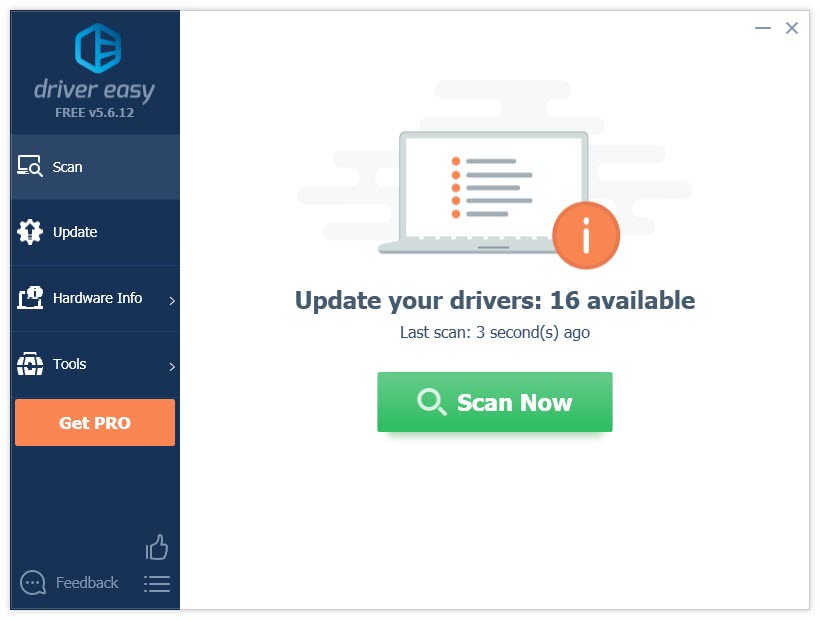
2) Run Driver Easy and click the Scan Now button. Driver Easy will then scan your computer and detect any problem drivers.
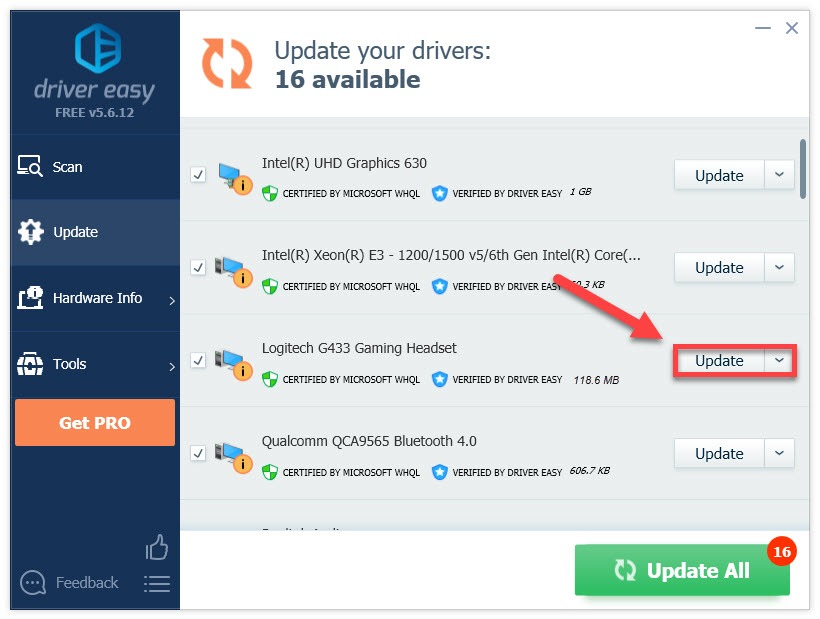
3) Click the Update button next to the Logitech G433 driver to automatically download the correct version of that driver, then you can manually install it (you can do this with the FREE version). Or click Update All to automatically download and install the correct version of all the drivers that are missing or out of date on your system (this requires the Pro version– you’ll be prompted to upgrade when you click Update All).
Option 2 – Download and install the driver manually
Logitech keeps updating the Logitech G433 driver. To get it:
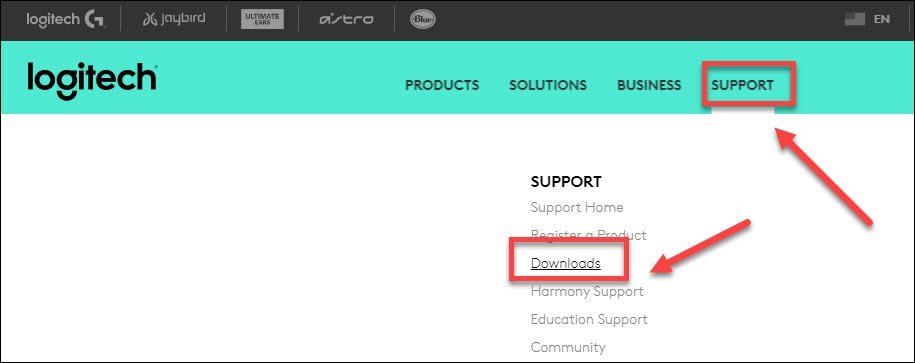
1) Go to the Logitech official website, then click SUPPORT > Downloads.
2) Type g433 and select G433 Gaming Headset.
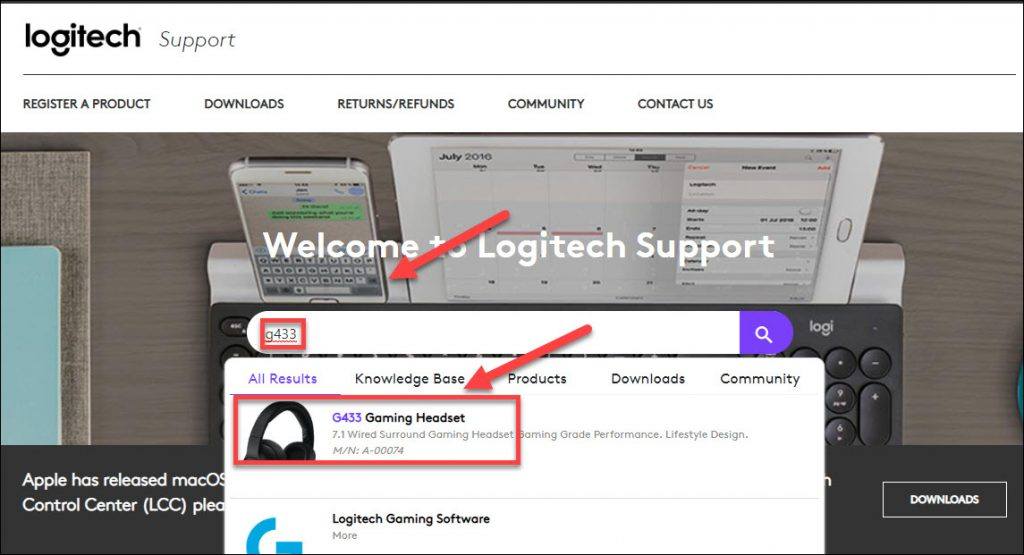
3) Click Downloads, then find the driver corresponding with your specific flavor of Windows version (for example, Windows 32 bit) and download the driver manually.
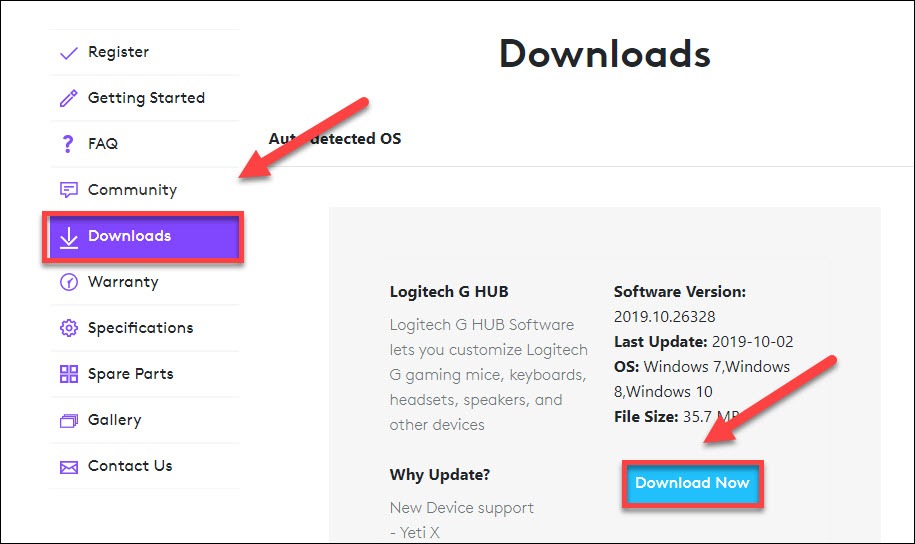
4) Once you’ve downloaded the correct driver for your system, double-click on the downloaded file and follow the on-screen instructions to install the driver.
Fix 3: Set your microphone as a default device
Your computer may not be able to set your microphone as the default device immediately after you plug it in. To see if that’s the core issue follow the instructions below:
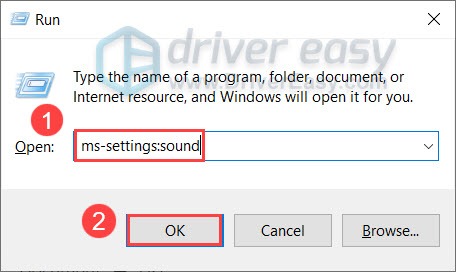
1) On your keyboard, press Win+R (the Windows logo button and the r button) at the same time to invoke the Run box. Type or paste ms-settings:sound and click OK.
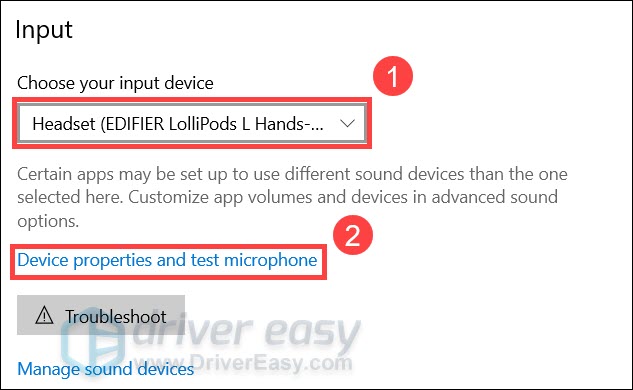
2) Under the Input section, make sure your input device is set to your desired one. Then click Device properties and test microphone.
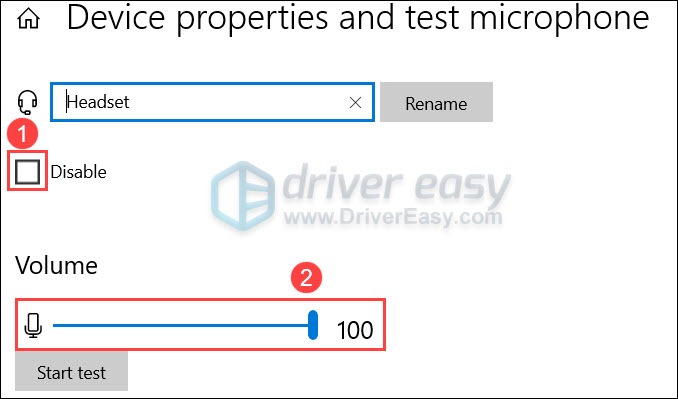
3) Make sure the box next to Disable is unchecked, and the slider under Volume is set to 100.
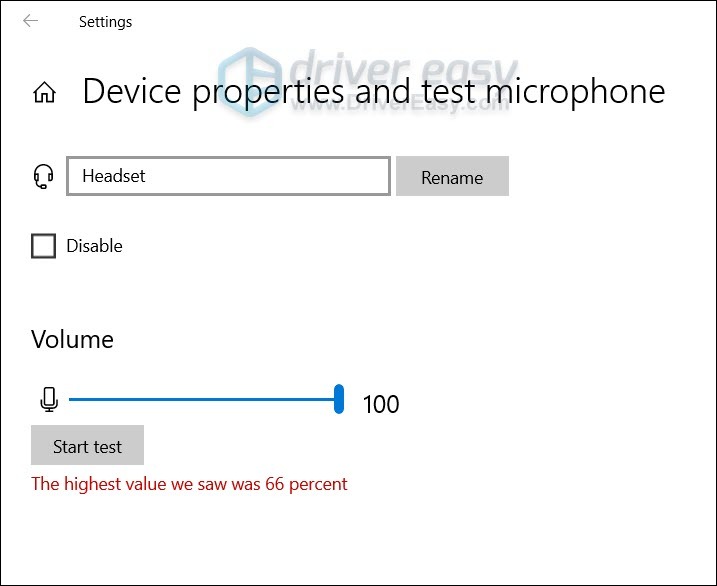
4) Click Start test and tap or speak to your microphone. Then click Stop test. If you’re prompted The highest value we saw was xx (xx > 0) percent, it means your microphone has been set up correctly.
Hopefully, one of the solutions here worked for you. Please feel free to leave a comment below if you have any questions or suggestions.


