iPhone comes with a batch of ringtones you can choose to get notified for incoming calls. But after playing around with these options, you may soon find these beep or boop sounds too boring. If this is the case with you, don’t worry. You can make your own ringtone out of your favorite song, without shelling out extra bucks! Read on and find out how…
3 steps to make ringtone for your iPhone
Here I break down the process of making your own iPhone to 3 easy-to-follow steps:
Step 1: Create a ringtone
In Step 1, we’ll be using iTunes to create a ringtone.
Here’s how to do it:
1) On your computer, launch iTunes.
2) Decide the song you’d like to use for your ringtone. Then make sure you’ve already purchased the song from your iTunes library and downloaded to your computer.
3) Ideally a ringtone lasts about 20-30 seconds. So please play the track around until you’ve found the exact snippet you want to make your ringtone. Then jot down the start and the stop times of the song.
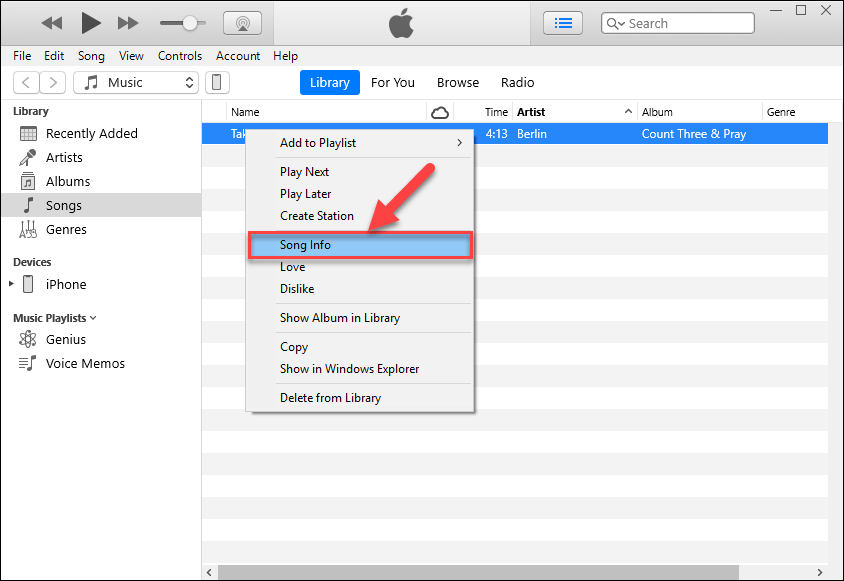
4) Right-click on the song and click Song info.

5) Click the Options tab, then change the start and stop times to the time you took note in step 3). Once done, click OK.

6) Make sure the song is still highlighted. Then click File > Convert > Create AAC Version. After that, you should be able to see a ringtone version (i.e. the AAC version) of the song appear right under the original soundtrack.

7) Drag the AAC version of the track (i.e. the 20-30 second one) to your desktop.
8) Depending on whether you can see the file extension .m4a:
- If yes, you can see the file extension .m4a, then change the file extension to .m4r and click Yes once prompted to confirm the change.

- If no, you cannot see the file extension, it means that Windows has hidden the extension name of the file. So you can change the settings to unhide it:
a) On your keyboard, press the Windows logo key, type file explorer options, then click on File Explorer Options once it shows up as a search result.

b) In the File Explorer Option window, click the View tab, then scroll down the sidebar in Advanced settings and un-tick the box for Hide entensions for known file types. Once done, click OK.

c) Go back to the desktop, and you should be able to see the file extension (.m4a) of the AAC version of the song. Change the extension to .m4r and click Yes once prompted to confirm the change.

Now you’ve successfully created the ringtone. Please move on to Step 2, below, to copy the ringtone to your iPhone.
Step 2: Copy the ringtone to your iPhone
In Step 2, we’ll still be using iTunes to sync the ringtone to the iPhone.
Here’s how to do it:
1) Connect your iPhone to your computer with a connection cable.
2) Launch iTunes and click the iPhone icon in the upper left corner.

3) Click Summary. Then in the right pane, scroll down to the Options section, tick the box for Manually manage videos and click Apply.

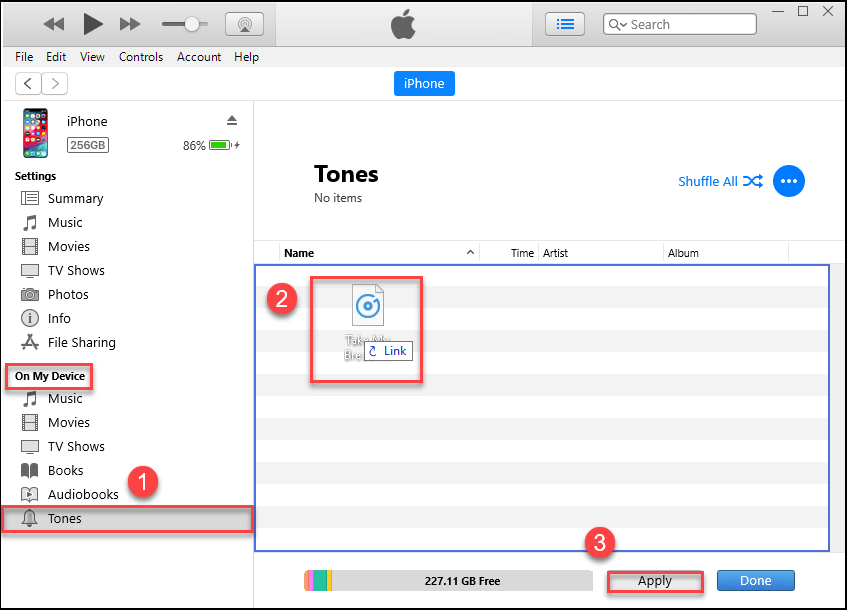
4) In the left pane, under the On My Device section, click Tones. Then drag the ringtone to the Tones folder and click Apply.

Now congrats – you’ve successfully synced the ringtone to your iPhone.
Step 3: Set the ringtone on your iPhone
In Step 3, we’ll set the desired track as our ringtone.
Here’s how to do it:
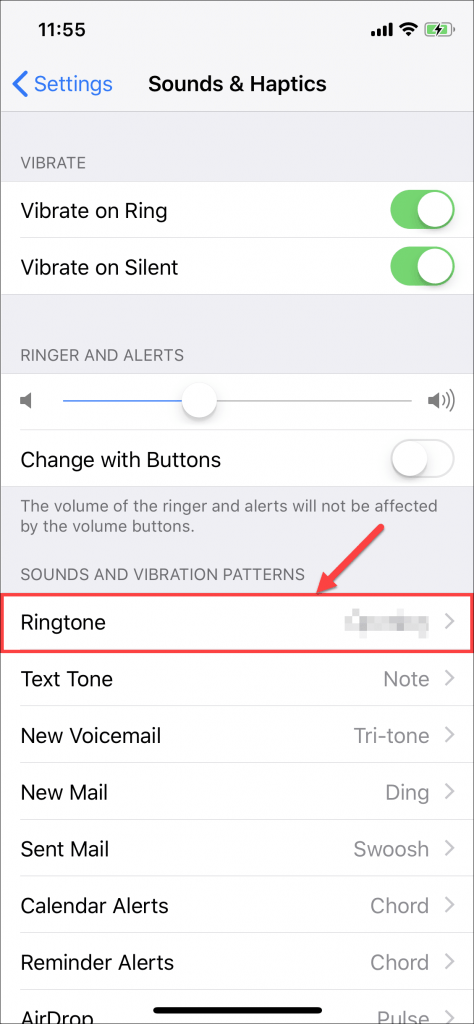
1) On your iPhone, tap Settings > Sounds & Haptics > Ringtone.
2) Tap Ringtone to change the ringtone to the one you’ve just created.

Voila – now you’ve successfully made a ringtone for your iPhone. You will be able to hear it when your phone rings. 🙂
There you go – 3 easy steps on how to make a ringtone for your iPhone. You’re more than welcome to leave us a comment below if you have any ideas, suggestions and questions. Thanks for reading!


