If you’ve recently upgraded to Windows 10 Creators Update, and found that your Microsoft Edge browser not working properly, you’re not alone. Many Windows users are reporting it. The good news is, you can easily fix it by yourself. Here are 4 fixes for you to try.
Note that you may not need to try them all. Just work your way down the list until you find the one works for you.
Step 1: Clean Boot Your PC
If it’s the first time you had a problem with your Edge browser, one of the first things you should do is to restart your PC, better yet, do a clean boot. It allows you to run your PC with only a minimal set of drivers and programs:
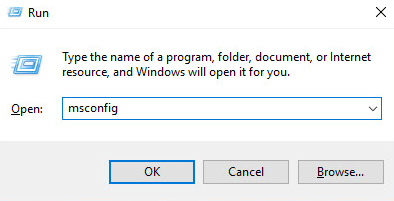
1) On your keyboard, press the Windows logo key and R at the same time, type msconfig and press Enter.
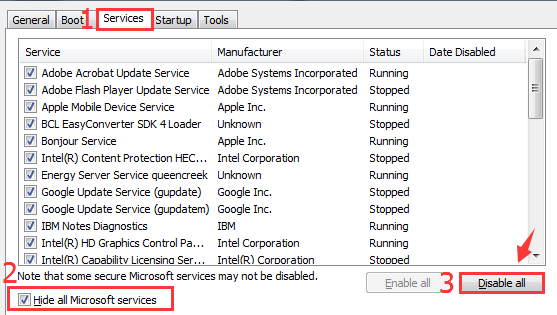
2) Go to Services tab, check the box for Hide all Microsoft services. Click the Disable all button.
3) Go to Startup tab and click Open Task Manager.
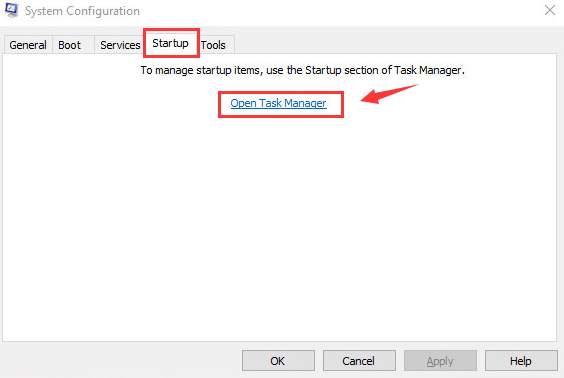
4) Select each item on the list and click Disable.
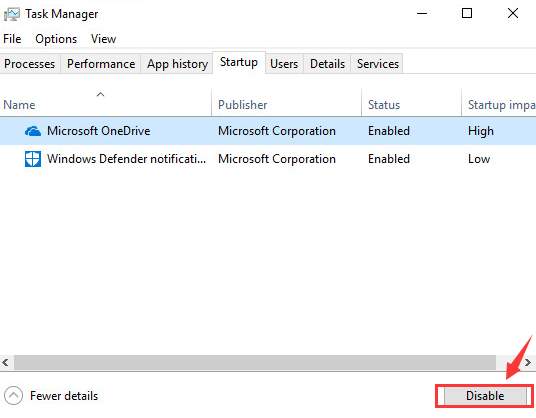
5) Close your Task Manager and restart your computer.
6) If Edge still opens and closes unexpectedly in a few seconds, move on to see if the steps below help.
Step 2: Reinstall through PowerShell
If your Edge browser isn’t installed correctly, not working or opening problem like this could happen. To fix it, you can reinstall Microsoft Edge:
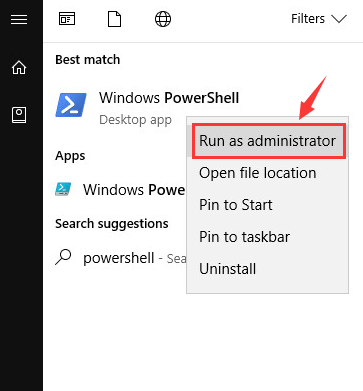
1) On your keyboard, press the Windows key and S at the same time, then type powershell. Right-click Windows PowerShell and select Run as administrator.
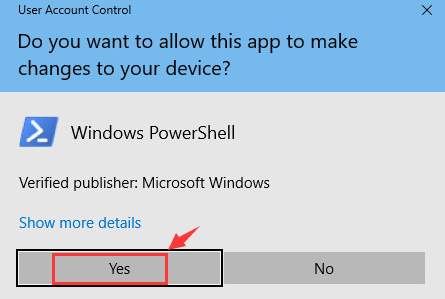
When prompted with the administrator permission, click Yes to continue.
2) In the PowerShell window, copy and paste in the following command:
Get-AppXPackage -AllUsers | Foreach {Add-AppxPackage -DisableDevelopmentMode -Register “$($_.InstallLocation)\AppXManifest.xml”}

3) You will see a Deployment Operation Progress pop up. Wait for the process to finish. Then try your Edge again.
Step 3: Use Group Policy Editor
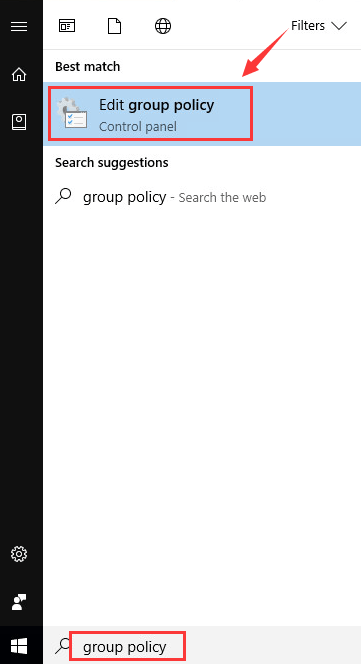
1) On your keyboard, press the Windows key and S at the same time, type group policy and click Edit group policy.
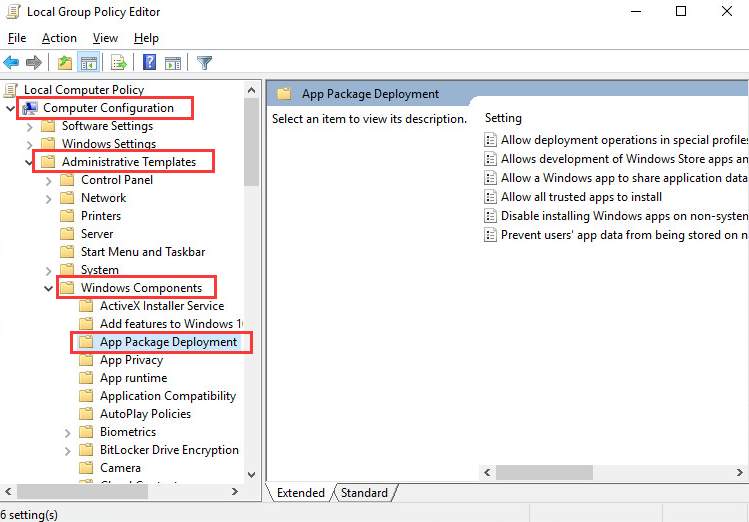
2) On the left side of the pane, go to Computer Configuration > Administrative Templates > Windows Components. Under Windows Components category, click App package Deployment.
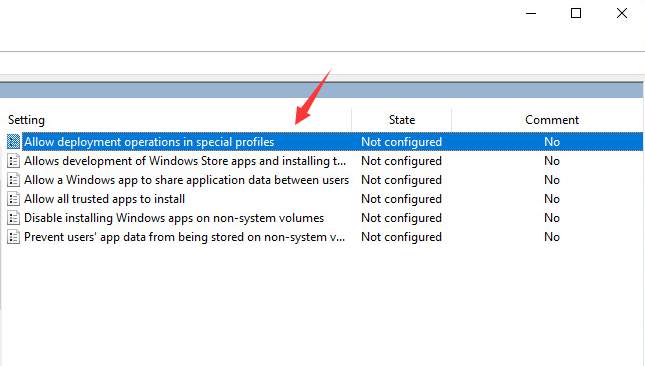
3) On the right side of the pane, double-click Allow deployment operations in special profiles.
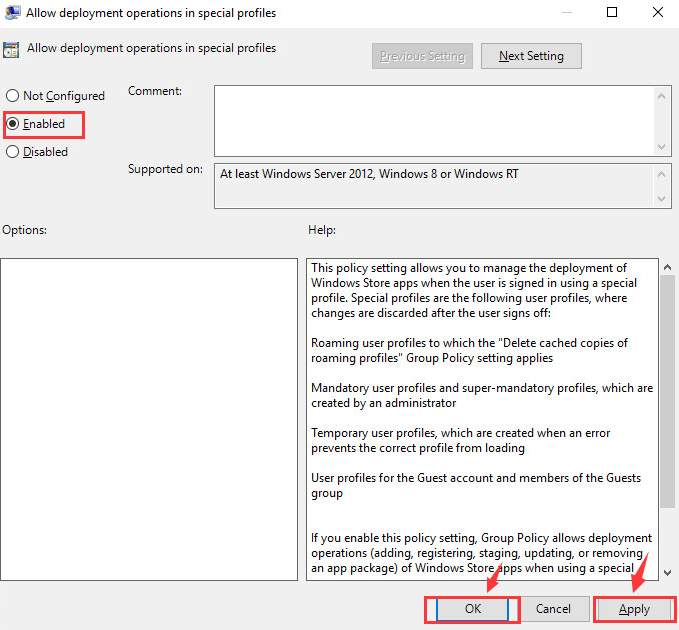
4) Click Enabled. Click Apply and OK.
Step 4: Reinstall Windows 10
If you’ve tried all the above methods but still no avail, you may need to consider reinstalling or refreshing your Windows 10.
For more detailed instructions, you can refer to the posts below:
How to burn Windows 10 Setup Files to a USB flash drive?
Pro Tip
It’s always suggested that you keep your device drivers up-to-date to eliminate such problems to the most.
If you don’t have the time, patience or computer skills to update your drivers manually, you can do it automatically with Driver Easy.
Driver Easy will automatically recognize your system and find the correct drivers for it. You don’t need to know exactly what system your computer is running, you don’t need to risk downloading and installing the wrong driver, and you don’t need to worry about making a mistake when installing.
You can update your drivers automatically with either the FREE or the Pro version of Driver Easy. But with the Pro version it takes just 2 clicks (and you get full support and a 30-day money back guarantee):
1) Download and install Driver Easy.
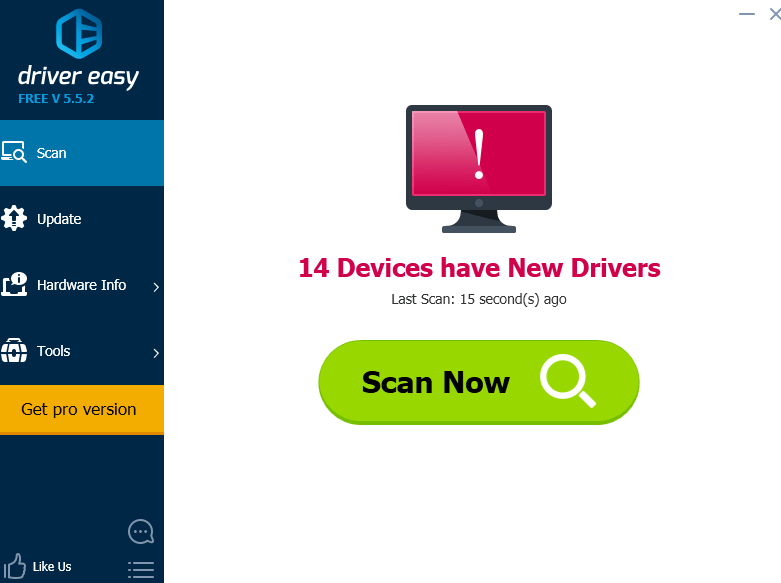
2) Run Driver Easy and click Scan Now button. Driver Easy will then scan your computer and detect any problem drivers.
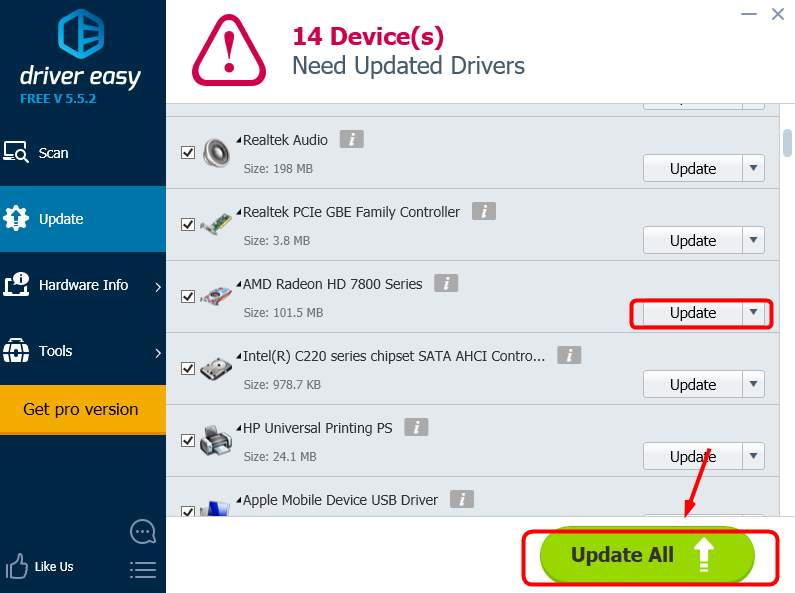
3) Click the Update button next to a flagged driver to automatically download and install the correct version of this driver (you can do this with the FREE version).
Or click Update All to automatically download and install the correct version of all the drivers that are missing or out of date on your system (this requires the Pro version – you’ll be prompted to upgrade when you click Update All).
