If you’re on Windows 10 and you find that Microsoft Teredo Tunneling Adapter stops working, you’re not alone. Many Windows users are reporting this problem as well.
But no worries, it’s possible to fix. Here are 3 different approaches for you to try. You may not have to try them all; just choose the one that fits your situation description and read on.
Part 1: If you accidentally deleted it
Part 2: If you see a yellow exclamation mark next to it
Part 3: If you see a Code 10 error
What is Teredo Tunneling?
Before we get down to the business, you might want to know what exactly Teredo Tunneling is (If you have already known this, please skip this part). To know what we are dealing with, first you need to know IPv4 and IPv6.
IPv4 is an IP protocol (with the format similar to 192.168.10.25) which assigns our computers with a unique address which is our identity to communicate with the world on the Internet. Most of us are on the IPv4 technology.
As there are more and more netizens and less and less available IPv4 addresses, IPv6 (with the format similar to 2001:DB8:0:0:8:0:417A) which brings in an uncountable number of addresses, is introduced.
When every computer is only using IPv4 as a way of communication, they understand each other perfectly, so the network connection runs smoothly. But with IPv6 added in, they find it impossible to talk to each other and thus the network connection is a problem. Therefore, Teredo Tunneling works as a translator that translates IPv4 to IPv6 and vice-versa so the communication over Internet is possible again.
Part 1: If you accidentally deleted it
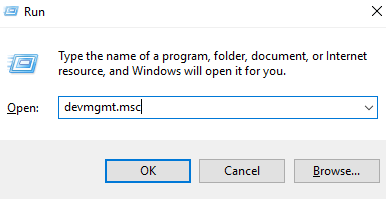
1) On your keyboard, press the Windows logo key and R at the same time, then type devmgmt.msc and press Enter.
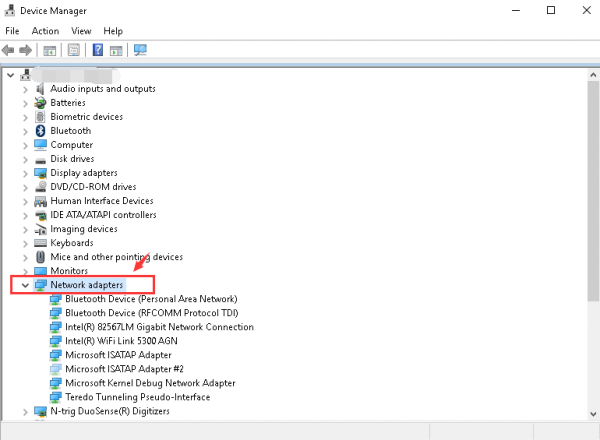
2) Expand Network Adapters.
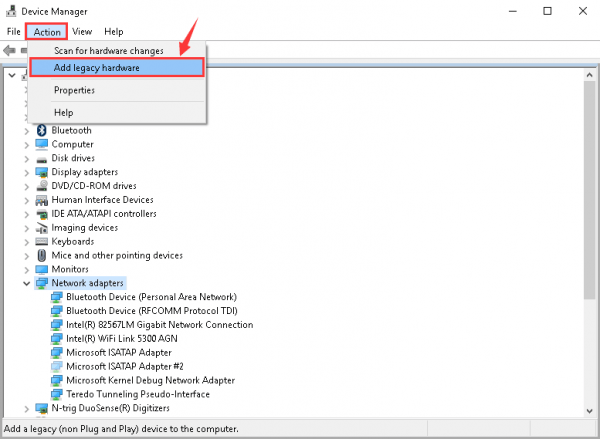
3) Click Action and Add legacy hardware.
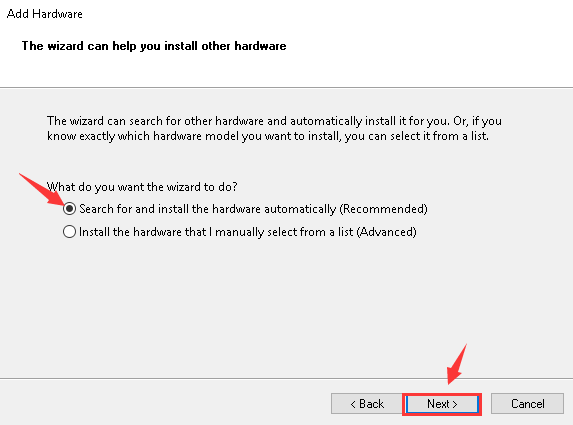
4) Click Next.
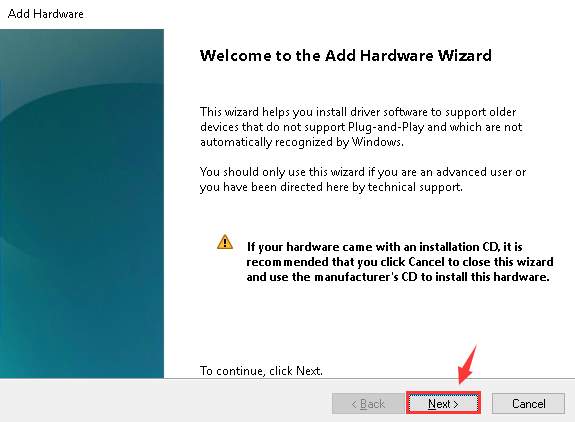
5) Click Next again. Then click Next one more time.
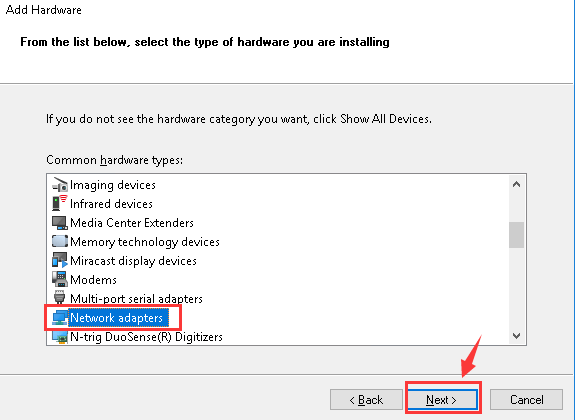
6) Highlight Network adapters, and click Next to continue.
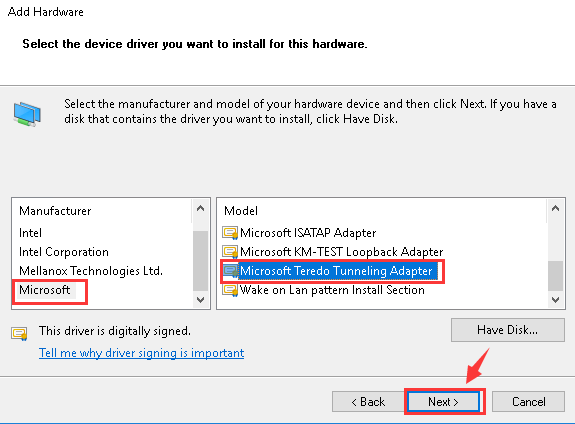
7) On the left side of the pane, click Microsoft. On the right side of the pane, click Microsoft Teredo Tunneling Adapter. Then click Next to continue.
8) Click Next to start the installation.
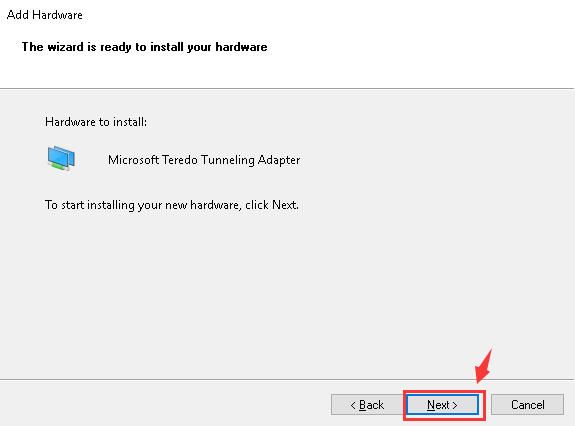
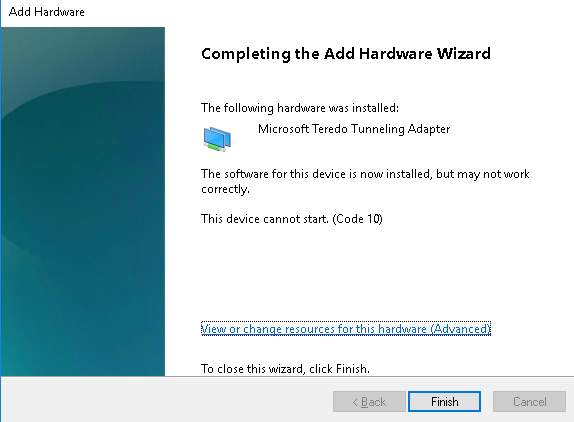
9) When you see this Window, your Microsoft Teredo Tunneling Adapter is successfully installed.
Part 2: If you see a yellow exclamation mark next to it
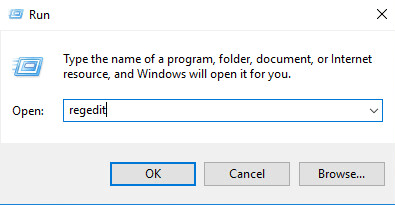
1) On your keyboard, press the Windows key and R at the same time. Type in regedit and press Enter. If prompted for administrator permission, please click Yes.
2) IMPORTANT: Before you do any changes in your Registry Editor, please back it up first in case any unrecoverable error happens.
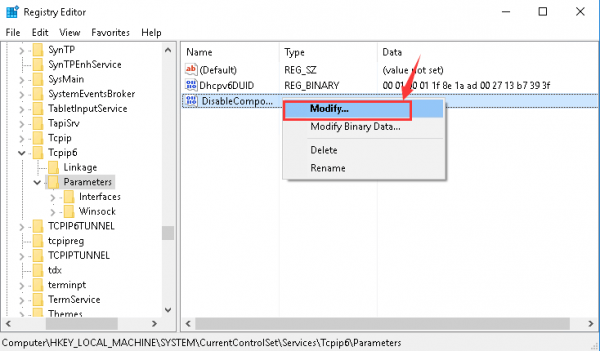
Follow the path:HKEY_LOCAL_MACHINE\SYSTEM\CURRENTCONTROLSET\SERVICES\TCPIP6\PARAMETERS
To locate DisableComponets on the right side of the pane.
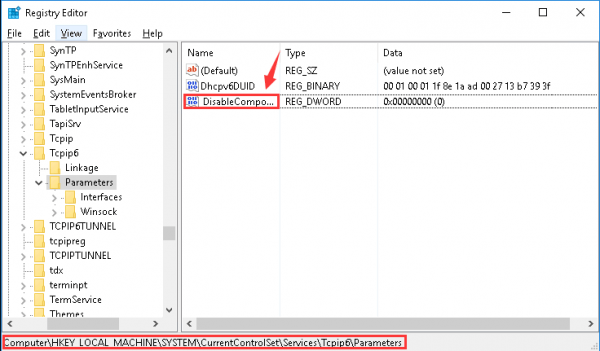
3) Right-click DisableComponet and click Modify.
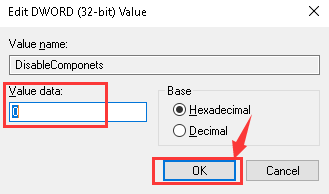
4) Change the value to 0 and click OK to save.
5) Restart your computer. See if Microsoft Teredo Tunneling Adapter works.
Part 3: If you see a Code 10 error
If this is what you see in the statues of your Microsoft Teredo Tunneling Adapter:
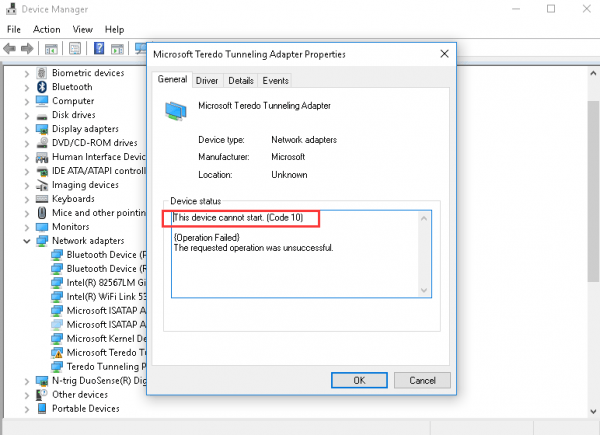
Here is how you can fix it:
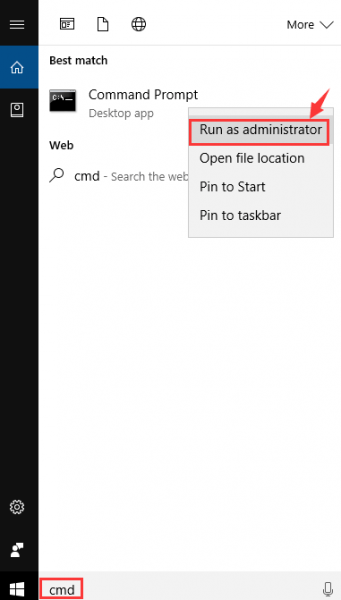
If prompted for administrator permission, please click Yes to continue.
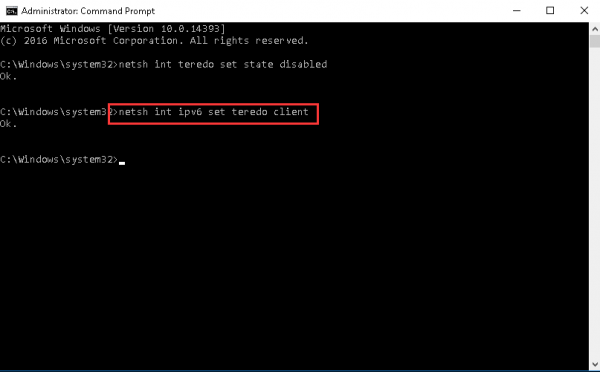
2) Type in the following command:netsh int teredo set state disabled
Then press the Enter key on your keyboard.
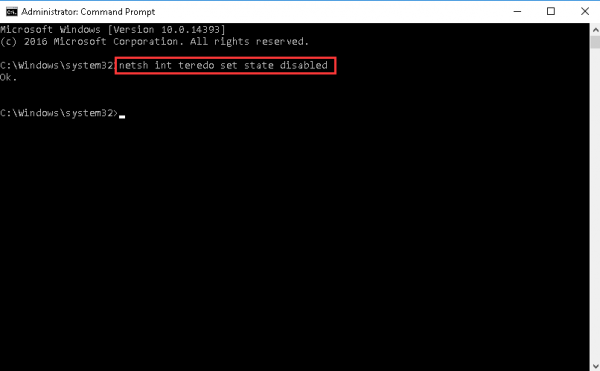
Leave this window open.
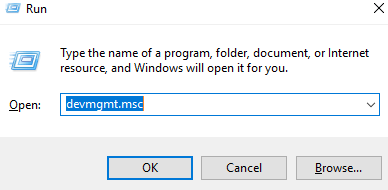
3) On your keyboard, press the Windows key and R at the same time. Type devmgmt.msc and press Enter.
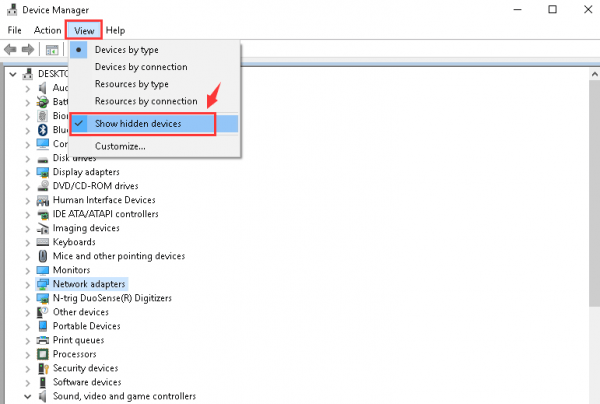
4) Click View and Show hidden devices.
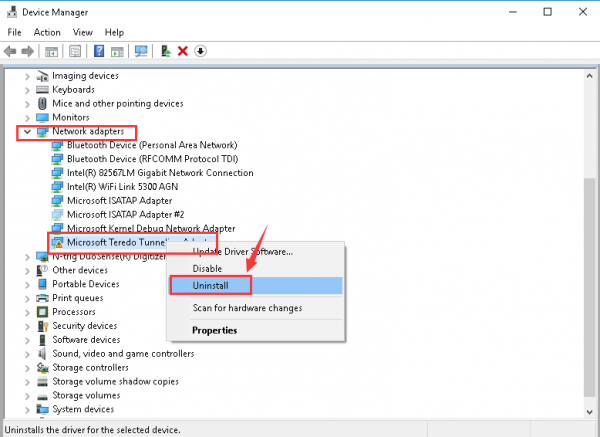
5) Expand Network adapters, and right-click Microsoft Teredo Tunneling Adapter and click Uninstall.
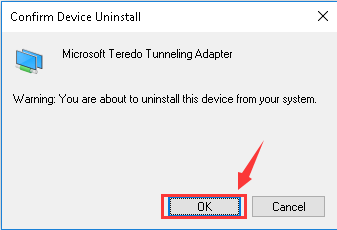
6) Click OK to confirm the uninstall of this device.
netsh int ipv6 set teredo client
Make sure that you have typed every letter correctly and then press the Enter key on your keyboard.
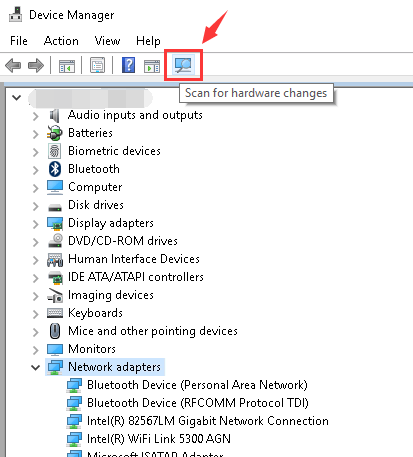
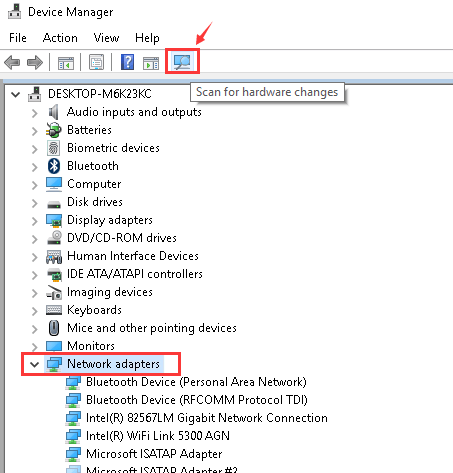
8) Go back to Device Manager. Click Network adapters and Scan for hardware changes.
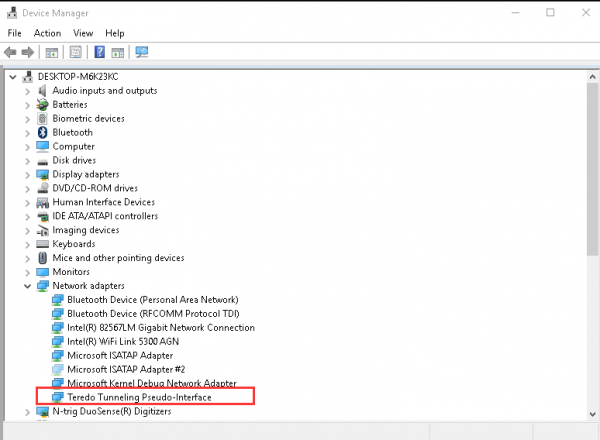
9) You should be able to see Teredo Tunneling Pseudo-Interface option without the yellow exclamation mark.
Related Post:
Teredo Tunneling Pseudo-Interface Driver Issue in Windows 7


