


You’ve got the GeForce RTX 4090, a powerful GPU that can handle even the most demanding games. But here’s the thing—your graphics card is only as good as its driver. The driver ensures your GPU communicates smoothly with your system.
Keeping your RTX 4090 driver updated is crucial as this helps you get the most out of your hardware, improve performance, fix bugs, and unlock the latest features. In this article, we’ll show you how to do just that.
Method 1: Update your RTX 4090 driver automatically (Recommended)
While you can update your RTX 4090 driver manually, the process can be time-consuming and tedious. You’ll need to find the correct driver version, download it, and install it carefully. If you pick the wrong version or miss an update, it could lead to performance issues or compatibility problems. Plus, keeping track of updates over time can be a hassle.
If you’d rather skip all that, you can update your drivers automatically with Driver Easy. Driver Easy is an easy-to-use driver updater that automatically scans your system for outdated drivers, downloads the latest versions, and installs them for you. You don’t need to worry about finding the right driver or dealing with installation mistakes. Driver Easy handles everything.
- Download and install Driver Easy.
- Run Driver Easy and click the Scan Now button. Driver Easy will then scan your computer and detect any problem drivers.

- Click Update All to download and install the latest drivers for your PC (this requires the Pro version).
Alternatively, click Activate & Update next to a flagged device (e.g. NVIDIA GeForce RTX 4090) to start a 7-day free trial. This gives you full access to Pro features like fast driver downloads, one-click installation, and automatic updates for missing or outdated drivers—free for the trial period.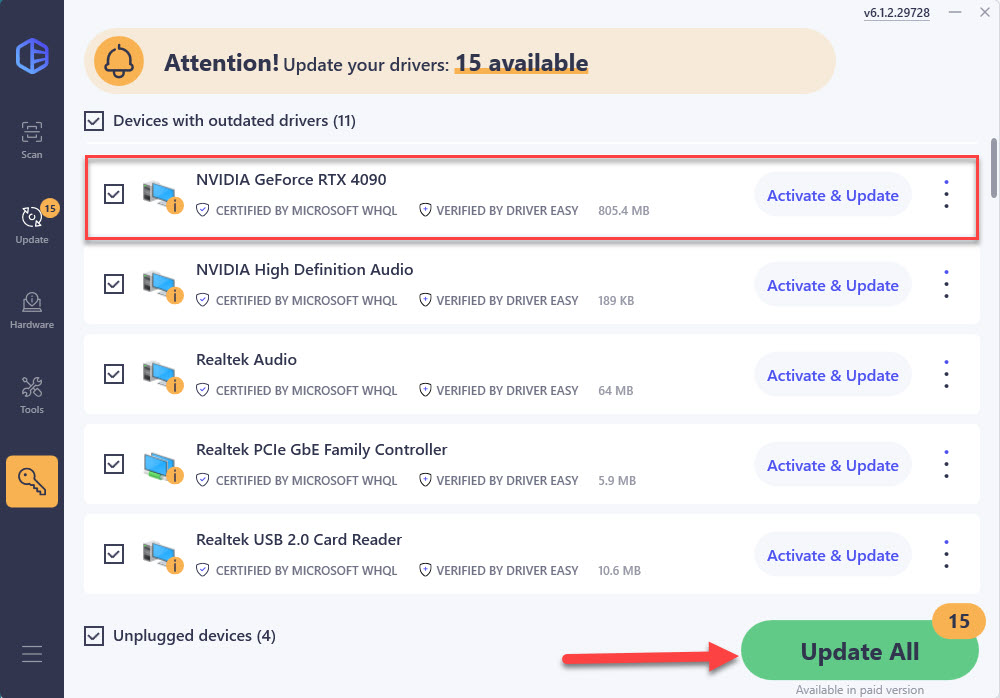
- Restart your computer for the changes to take effect.
Pro Tip: Choose a more stable driver version with Driver Easy
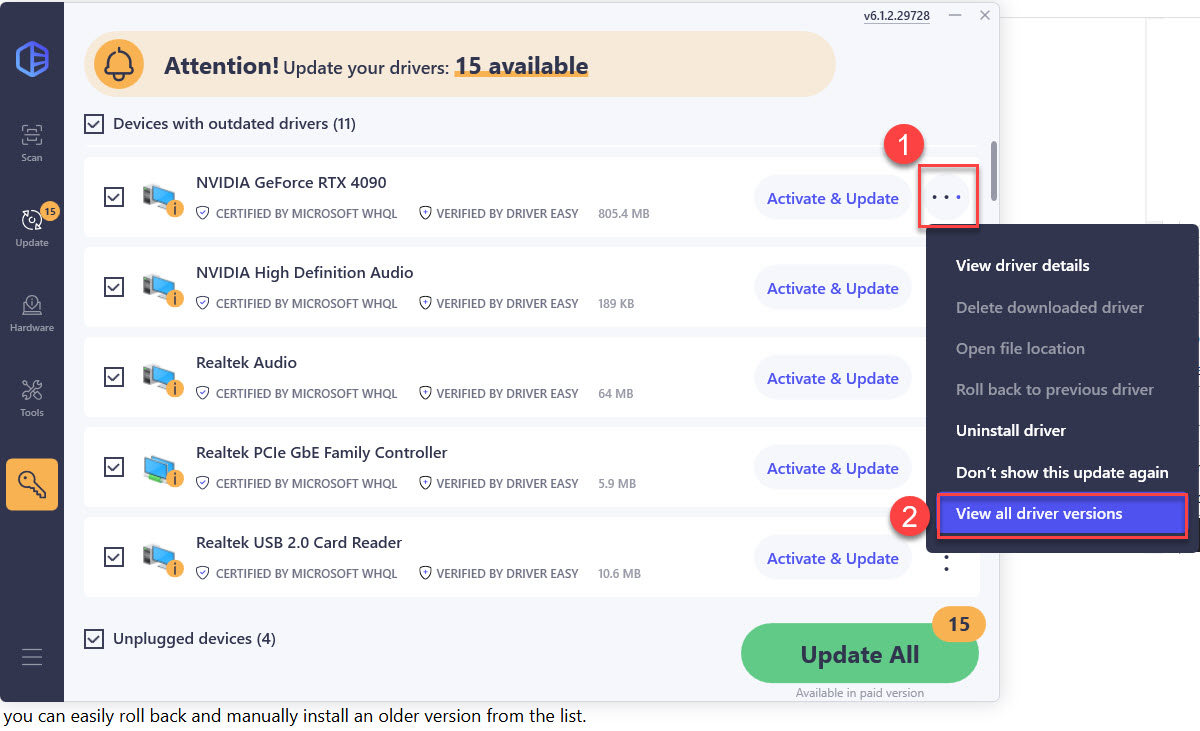
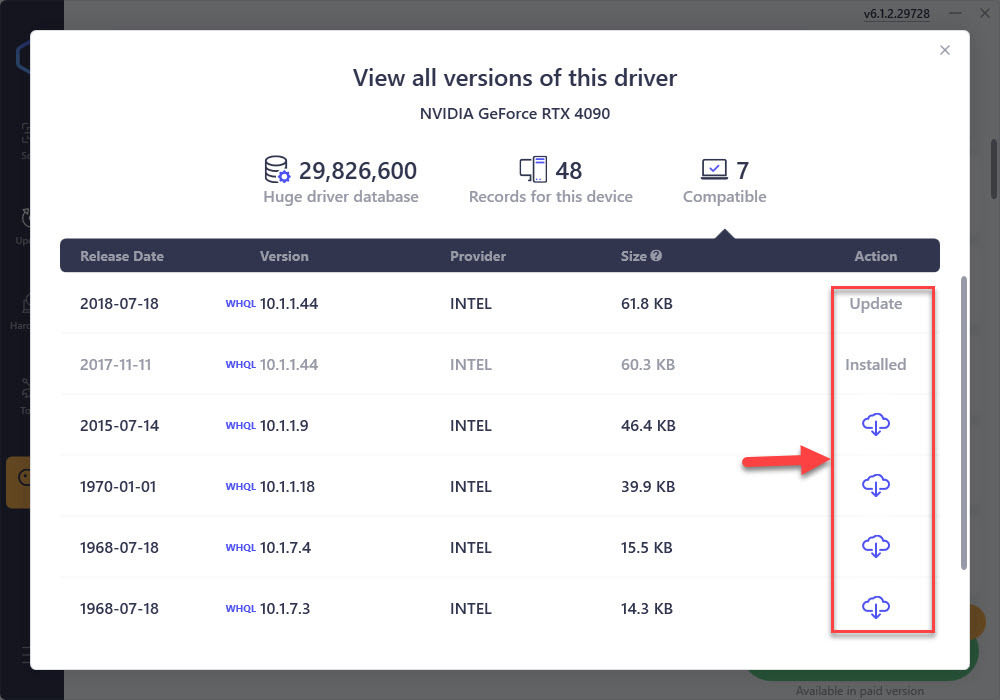
Driver Easy’s View all driver versions feature allows you to view the entire driver history for your RTX 4090. This gives you the flexibility to choose the most stable version. If the current driver isn’t performing as expected, you can easily roll back and manually install an older version from the list.
To do so:
- Click the three-dot icon next to a specific driver (RTX 4090 in this case), select View All Driver Versions.
- Test different versions to find the one that works best for your setup.
Method 2: Update your RTX 4090 driver manually
If you prefer more control over your driver updates or just want to do it yourself, manually updating your RTX 4090 driver is a good option. There are two main ways to go about it: one through the NVIDIA website and the other using Device Manager in Windows.
Option 1: Update RTX 4090 driver through the NVIDIA website
For full control over your driver, updating through the NVIDIA website is the best option. This method lets you manually select the version you want, download it, and install it on your system. It’s ideal if you want to choose specific driver versions or need to troubleshoot by rolling back to a previous version.
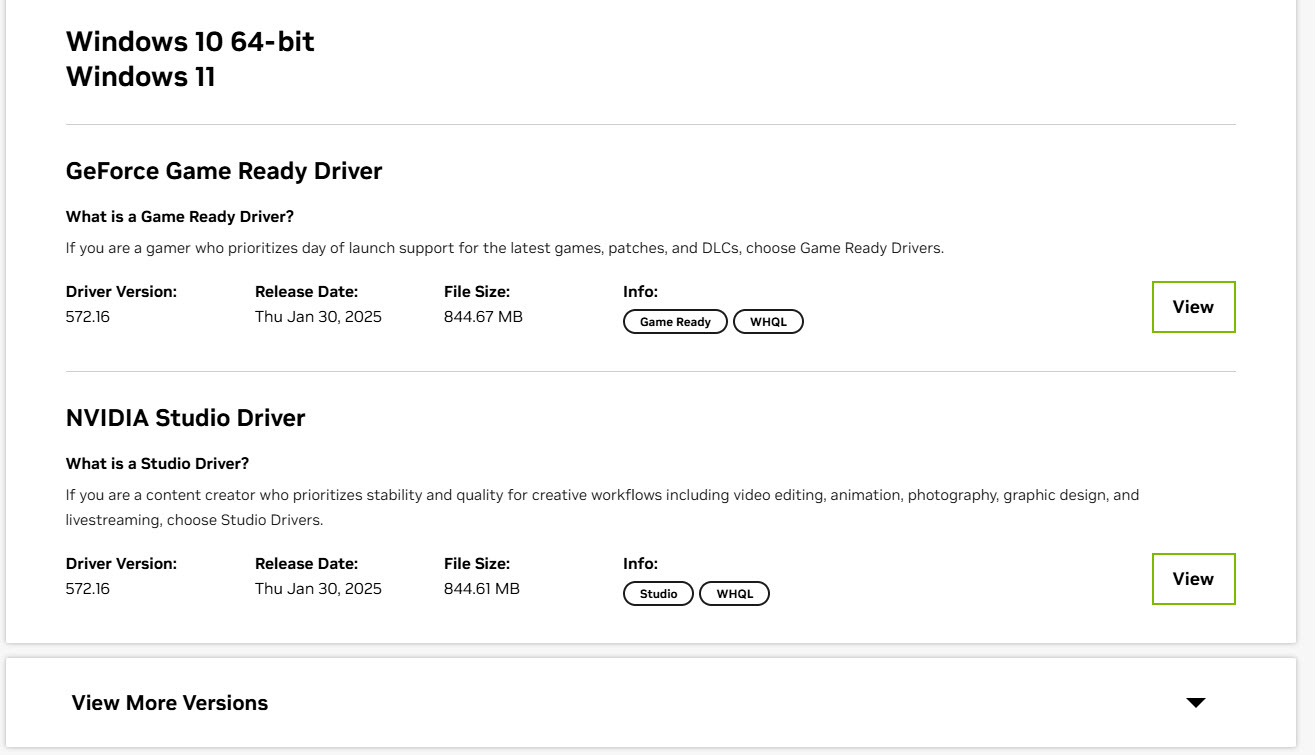
- Go to the NVIDIA drivers page.
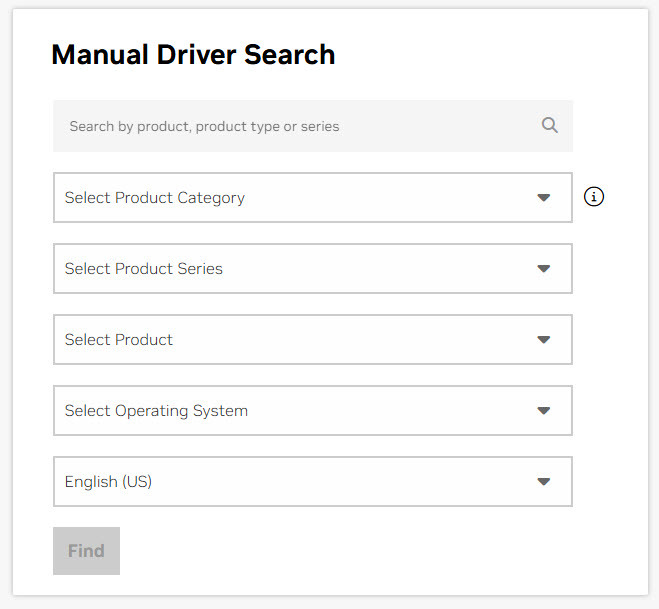
- In Manual Driver Search, choose the right category for your RTX 4090 graphics card and click Find.
- Choose the right driver for your graphics card and download the file.
- Open the installer file and follow the on-screen instructions to install the driver. During the installation, you can choose the Custom (Advanced) option if you want to perform a clean installation, which ensures that previous versions of the driver are fully removed before the new one is installed.
- Restart your computer to apply the changes.
Option 2: Update RTX 4090 driver through Device Manager
If you’re looking for a quick, no-fuss method and don’t mind if you don’t get the absolute latest version, updating via Device Manager is a simple way to check for available updates. While it isn’t guaranteed to find the latest drivers, it’s easy to do and doesn’t require downloading anything manually.
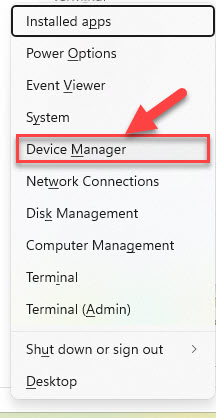
- On your keyboard, press Windows + X and select Device Manager from the menu.
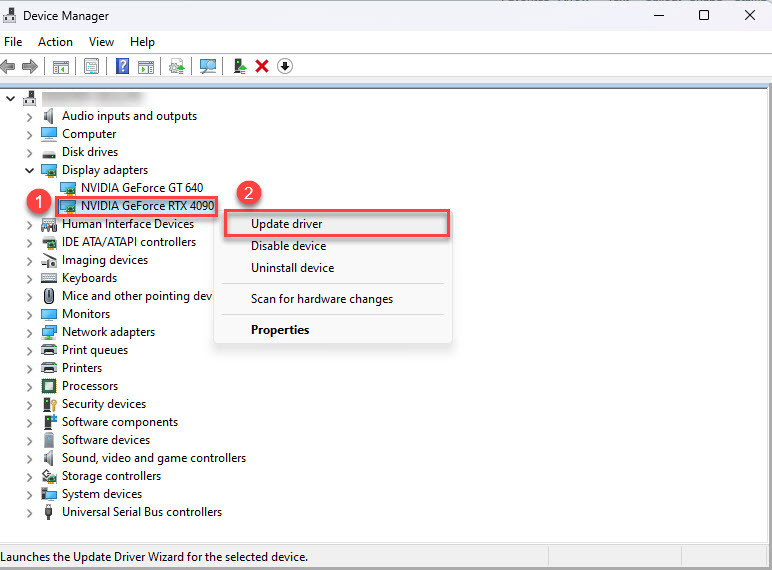
- In Device Manager, double-click on the Display adapters category. Then, right-click on NVIDIA GeForce RTX 4090 and choose Update driver.
- You’ll be prompted with two options. Click on Search automatically for updated driver software. Windows will search online for the latest driver version and install it for you if an update is found.
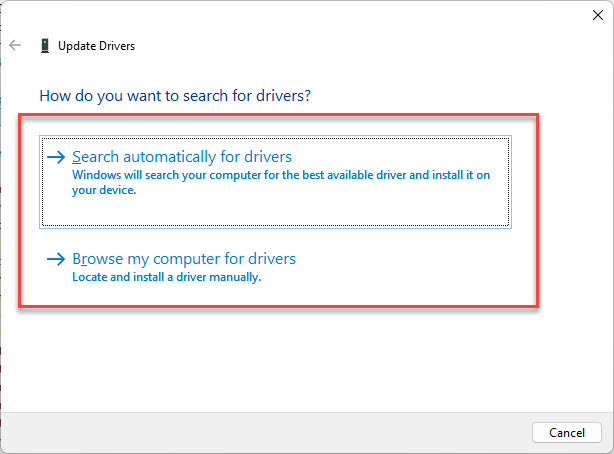
- If an update is available, follow the prompts to complete the installation. If not, Windows will notify you that the best driver is already installed.
- Restart your computer to finalize the changes.
That’s it! Whether you choose to update your RTX 4090 driver automatically using Driver Easy or go the manual route through the NVIDIA website or Device Manager, keeping your drivers up-to-date is key to getting the most out of your GPU. Hope this guide has helped you find the best option for your needs and made the process a little easier. Happy gaming!