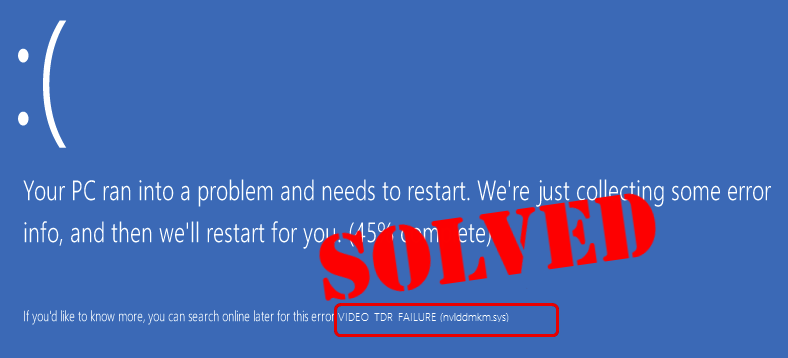
If you’re seeing VIDEO_TDR_FAILURE (nvlddmkm.sys) blue screen of death error, you’re not alone. Many Windows 10 users with NVIDIA graphics card are reporting this problem as well. But don’t worry, it’s possible to fix.
Here are 4 solutions for you to try. You may not need to try them all; just work your way down and find the one works for you.
4 fixes for VIDEO_TDR_FAILURE (nvlddmkm.sys)
- Clean re-install Nvidia graphics driver
- Update Nvidia graphics driver
- Drivers or programs conflict check
- Run chkdsk and memtest tests
What is VIDEO_TDR_FAILURE?
TDR stands for Timeout, Detection, and Recovery components in Windows. It’s supposed to be there to help stop BSODs by resetting the GPU and/or driver when there is an issue of long delay. If problems happen too many times in a row, a blue screen of death occurs.
1: Clean re-install NVIDIA graphics driver
Corrupted graphics card driver could be the cause of a Video_TDR_Failure blue screen problem. You can try reinstalling your NVIDIA graphics driver to fix it:
1) Download and install Display Driver Uninstaller. Run it when the install finishes.
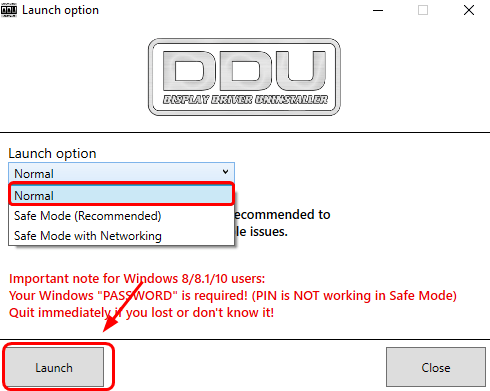
2) You can select Safe Mode (Recommended) or Safe Mode with Networking if you prefer, and we’ll go with Normal mode here. When you’re done with the selecting, click Launch.
3) Click Clean and Restart (Highly recommended).
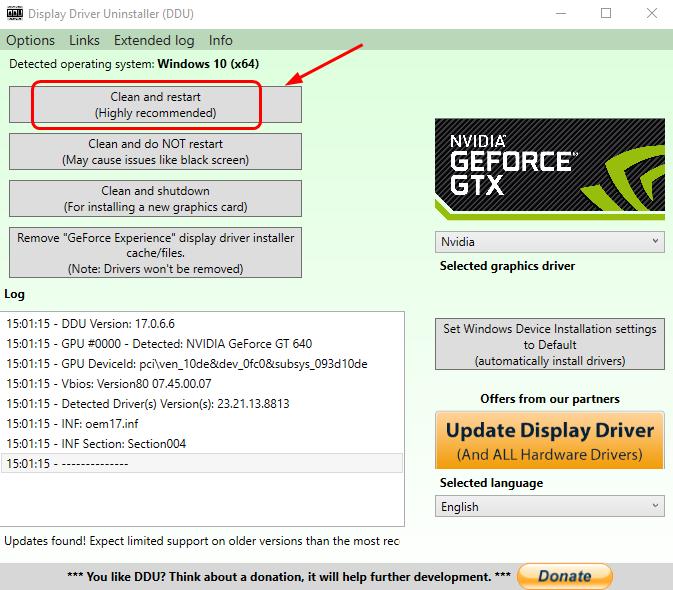
4) Your computer will restart automatically once your display card driver is uninstalled.
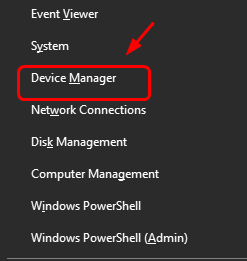
5) On your keyboard, press the Windows logo key and X at the same time. Click Device Manager.
6) Click Action and Scan for hardware changes.
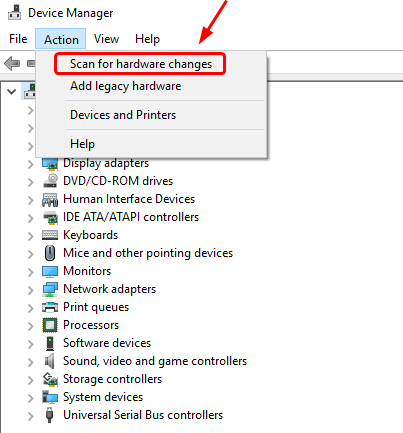
7) Your computer will check for available display driver update for you automatically. Just wait with patience for it to finish.
2: Update NVIDIA Graphics Driver
If reinstalling your Nvidia graphics card driver doesn’t fix the nvlddmkm.sys blue screen of death error, it’s likely that you’re using the wrong driver altogether.
There are two ways you can get the right drivers for your graphics card: manually or automatically.
Manual driver update – You can update your video driver manually by going to the manufacturer’s website, which is Nvidia, for your video card, and searching for the most recent correct driver for it. Be sure to choose only driver that is compatible with your variant of Windows 10.
Automatic driver update – If you don’t have the time, patience or computer skills to update your video driver manually, you can, instead, do it automatically with Driver Easy. Driver Easy will automatically recognize your system and find the correct drivers for your exact video card and monitor, and your variant of Windows 10, and it will download and install them correctly:
- Download and install Driver Easy.
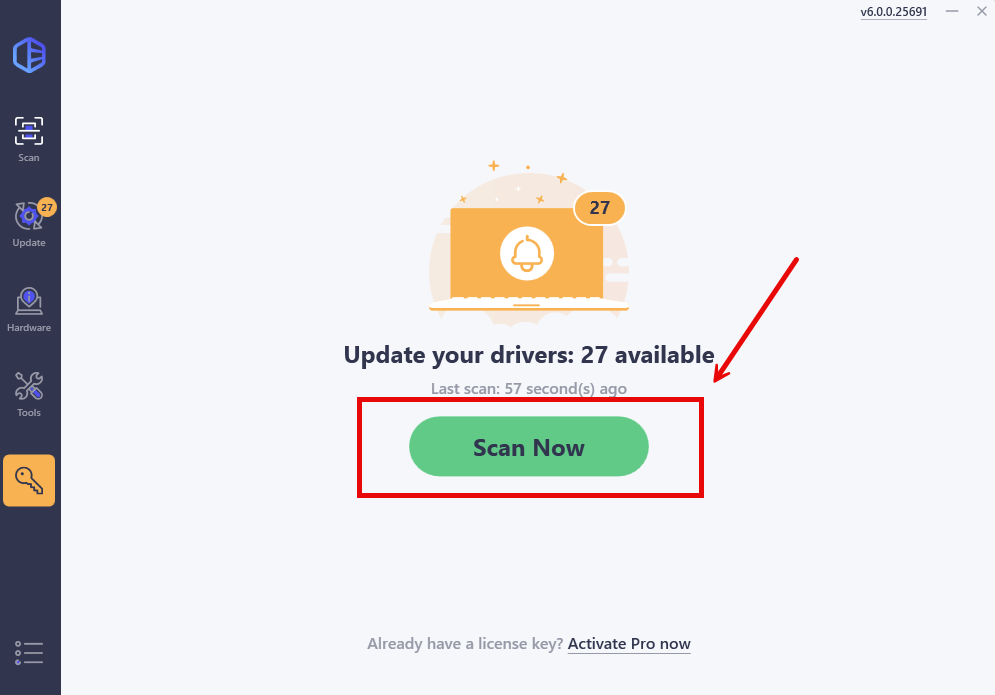
- Run Driver Easy and click the Scan Now button. Driver Easy will then scan your computer and detect any problem drivers.
- Click Update All to automatically download and install the correct version of all the drivers that are missing or out of date on your system.
(This requires the Pro version which comes with full support and a 30-day money-back guarantee. You’ll be prompted to upgrade when you click Update All. If you’re not ready to buy the Pro version, Driver Easy offers a 7-day free trial which includes access to all the Pro features such as high-speed download and one-click install. You won’t be charged anything until your 7-day trial has ended.)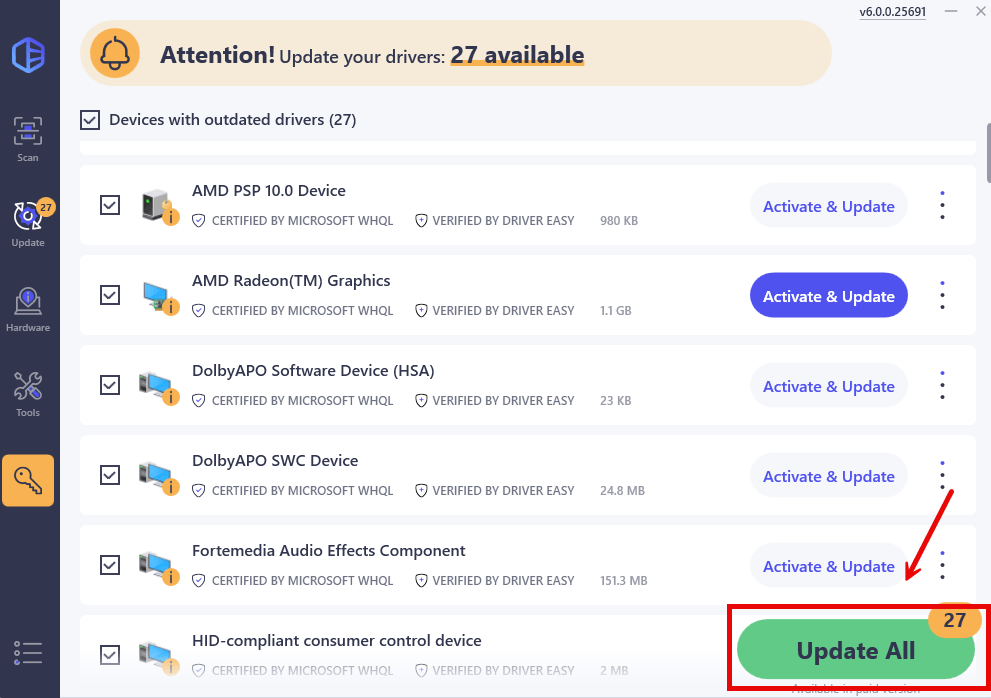
- Restart your computer for the changes to take effect.
3: Drivers or programs conflict check
1) If you’ve recently installed new drivers or programs on your PC, remove them or upgrade them to the latest versions.
2) It’s reported that driver conflict with Logitech webcam and integrated webcam would cause this problem. So you might want to remove your external webcam and uninstall its drivers to see if this problem is gone.
4: Run chkdsk and memtest Tests
Blue screen of death errors are usually related to corrupted or faulty hard drive or RAM. You can run some tests to check if your disk or RAM is at fault:
- Run Disk Check
This check is to help you verify whether the problem is caused by your hard drive.
1) On your keyboard, press the Windows logo key, then type cmd. Right-click Command Prompt and select Run as administrator.
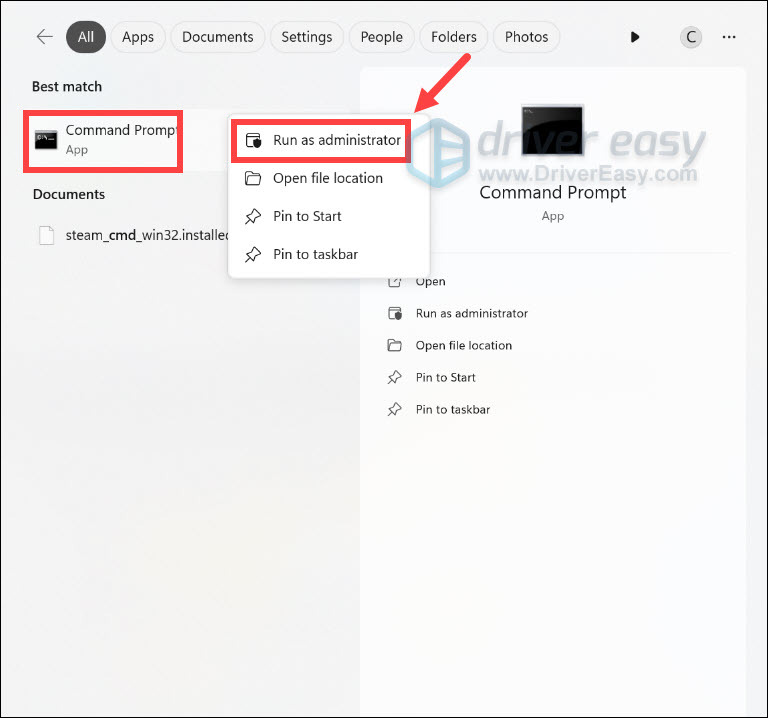
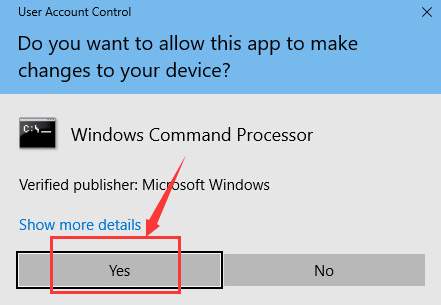
When prompted with the administrator permission, click Yes.
2) In the command prompt window, type in the following command and press Enter.
chkdsk /f c:
Note: If the setup file of your Windows is not stored in disk C, you need to replace the c: with the appropriate disk letter.
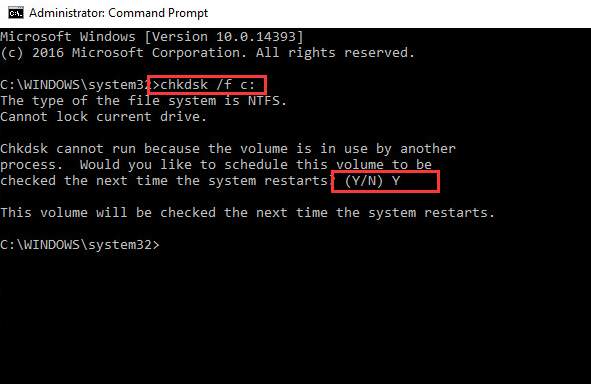
Type Y and restart your computer for the disk check to start.
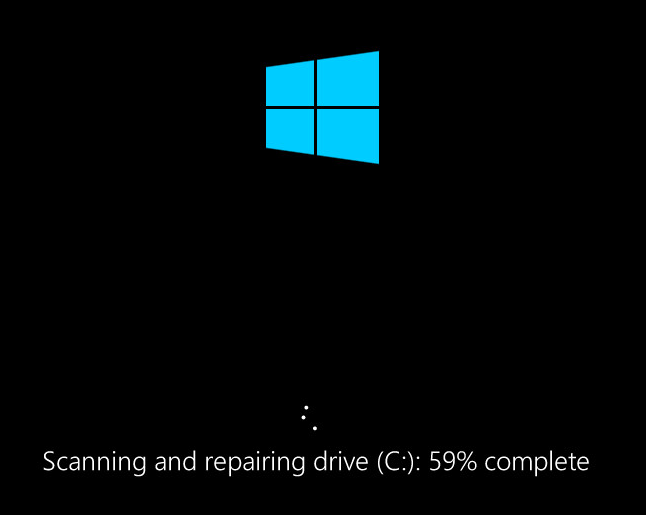
You’ll see the checking process happening when you restart your computer. Wait for it to finish.
- Run Memory Test
This test helps you verify that the RAM is not producing errors.
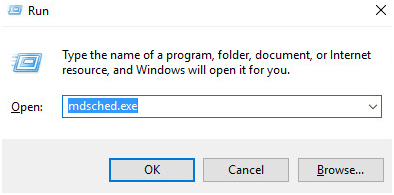
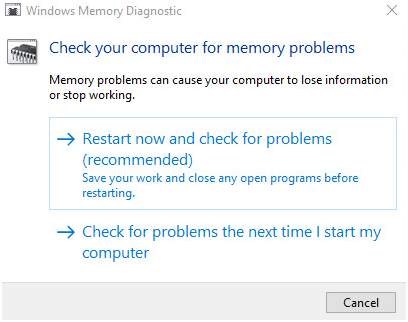
1) On your keyboard, press the Windows key and R at the same time to invoke a Run command. Type mdsched.exe in and press Enter.
2) You could click Restart now and check for problems (recommended) to check the status of your memory card right now or click Check for problems the next time I start my computer if you are too occupied now.
3) You’ll be seeing this page showing the progress of the check and the number of passes it will run on memory.
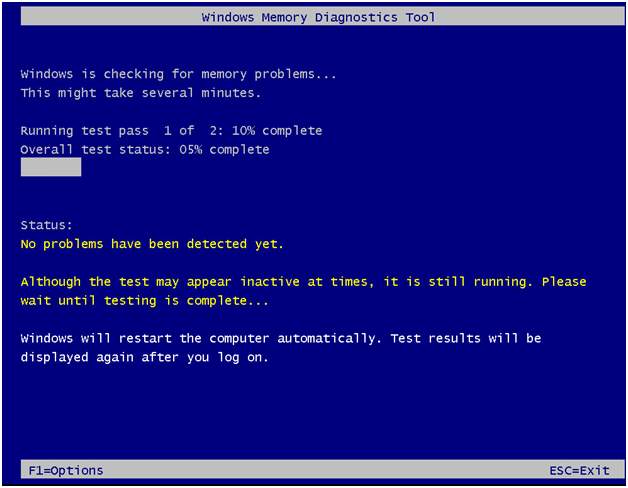
If you don’t see any error here, likely, that your memory card is not causing any issues.


