


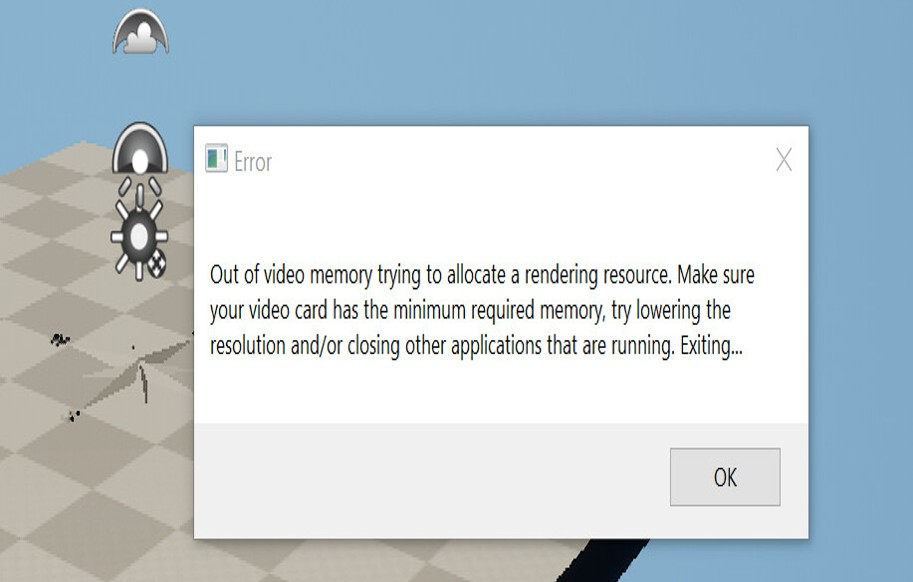
Encountering the error message “Out of video memory trying to allocate a rendering resource. Make sure your video card has the minimum required memory, try lowering the resolution and/or closing other applications that are running. Exiting… “ typically indicates that your Graphics Processing Unit (GPU) lacks sufficient Video RAM (VRAM), which is a type of memory used specifically by the GPU to store image data and textures that are displayed on the screen, to handle the current workload.
This issue is prevalent in games and applications built on Unreal Engine; for example, Fortnite, Valorants, and Twinmotion). However, it’s essential to note that this error can also arise due to other factors, including CPU compatibility issues, or outdated graphics drivers. If you’re in the same boat, don’t worry. This guide will walk you through the steps to fix it, step by step.
Before Troubleshooting
Before applying any fixes, it’s essential to verify how much VRAM your GPU actually has and how much is being used. This step is crucial because it helps determine if you’re genuinely running out of video memory or if the error is caused by another issue.
How to Check Your VRAM
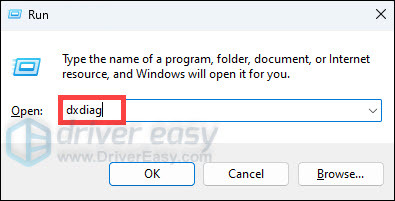
1. Press the Windows logo key + R to open the Run box. Type dxdiag and hit Enter.
2. In the DirectX Diagnostic Tool, navigate to the Display tab, where it lists the information of your dedicated graphics card.
3. Look for the following entries:
- Display Memory (VRAM): This shows the dedicated video memory of your GPU.
- Shared Memory: This indicates the portion of system RAM can be used by the GPU if needed.
Below we’ll help you understand the numbers referring to the screenshot below.
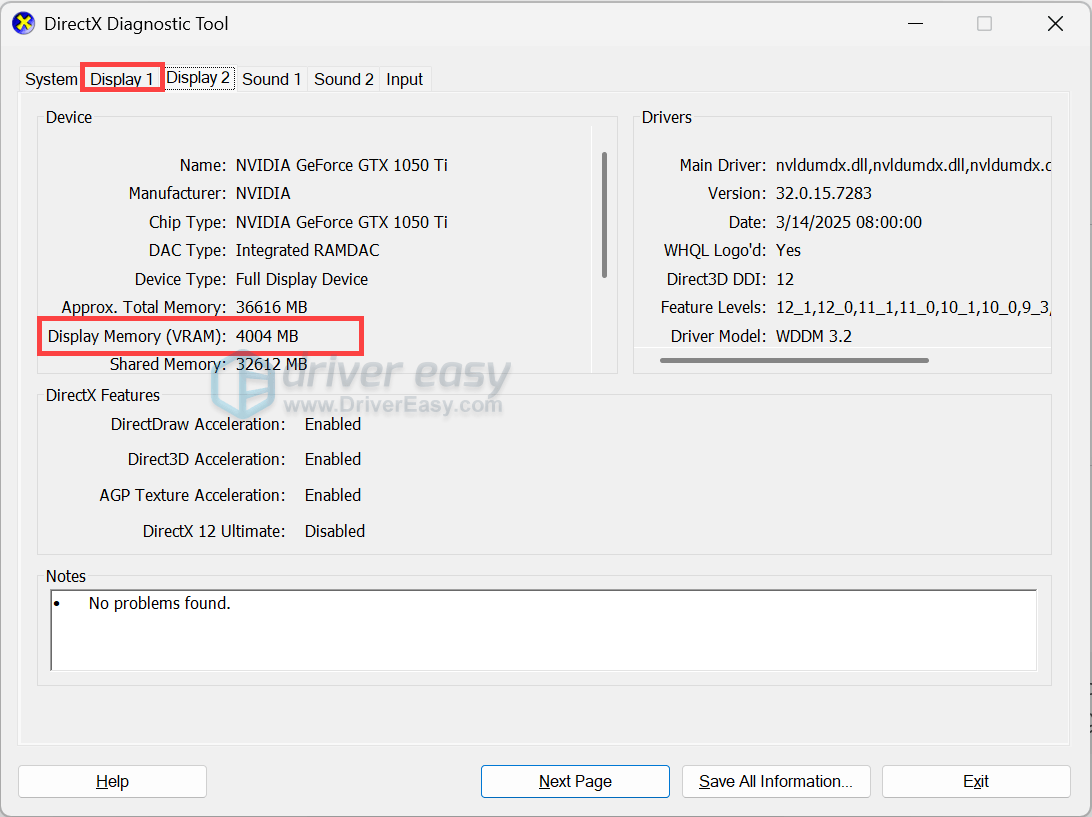
So the graphics card model is NVIDIA GeForce GTX 1050 Ti. And here, you can see:
- Display Memory (VRAM): 4,004 MB
- Shared Memory: 32,612 MB
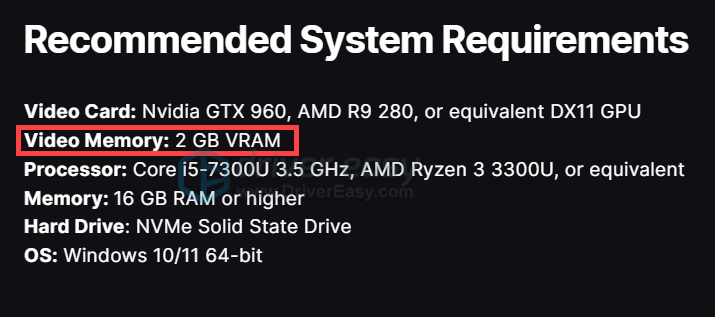
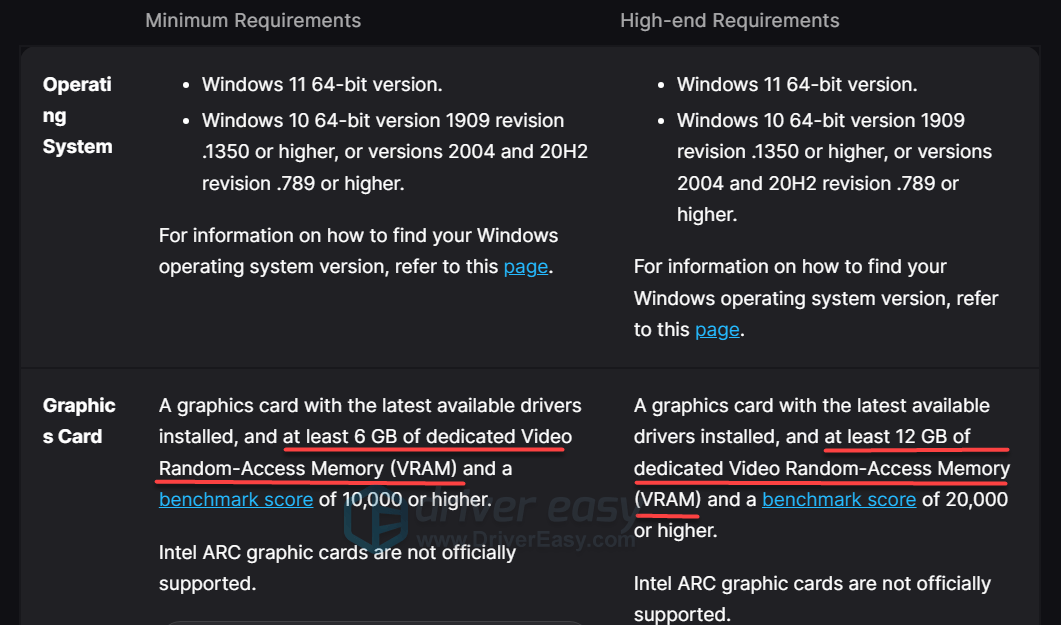
This indicates that your GPU is equipped with approximately 4 GB of dedicated VRAM and has access to an additional 32 GB of system RAM for graphics-related tasks. To determine if this configuration meets the requirements of specific applications or games, refer to their official system specifications. For instance, as of the latest information:
After verifying your GPU’s VRAM, you’ll encounter one of two scenarios:
Scenario 1: VRAM Meets or Exceeds Applications Requirements
Scenario 2: VRAM Is Below Application Requirements
If Your VRAM is Sufficient
If your GPU’s VRAM meets or surpasses the application’s requirements, yet you’re still encountering memory errors, consider the following methods. You may not need to try them all; simply work through the list until you find a solution that resolves the issue.
- Monitor VRAM Usage
- Optimize In-Game Graphics Settings
- Update Your Graphics Drivers
- Verify Game Files/Force Your Game to Use DirectX 11
- Close Background Applications
- Check for CPU Compatibility Issues
- Adjust Virtual Memory
- Reinstall Your Game or Application
1. Monitor VRAM Usage
To begin with, utilizing tools like Task Manager can help you track VRAM usage:
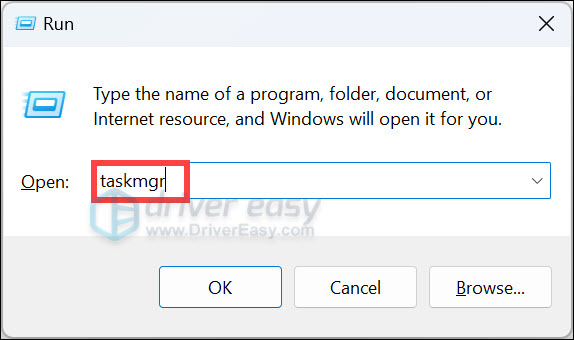
1. Press the Windows logo key + R to open the Run box. Type taskmgr and hit Enter. This will open the Task Manager.
2. Navigate to the Performance tab. Select your GPU to view dedicated and shared GPU memory usage.

Monitoring VRAM usage is crucial even when your system’s VRAM seems sufficient. It provides insights into how different applications utilize VRAM, allowing you to decide whether it’s necessary to fine-tune performance and allocate resources.
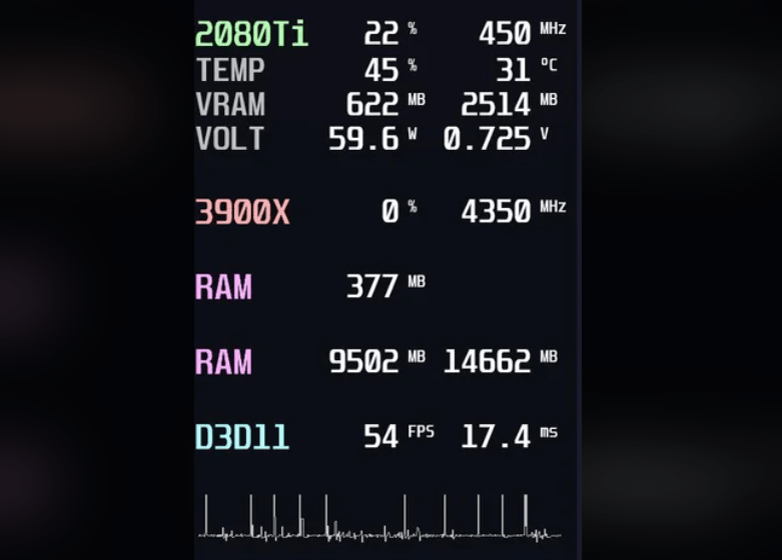
For more detailed monitoring, consider third-party tools like MSI Afterburner, which can display real-time VRAM usage overlays. This setup allows you to monitor VRAM usage per process.
2. Optimize In-Game Graphics Settings
Running games at ultra-high settings can easily exceed your GPU’s VRAM capacity without you even knowing. So it’s suggested that you reduce resolution, texture quality, shadows, and other graphics-intensive settings.
If doing this doesn’t enable your program to launch successfully, proceed to the next fix.
3. Update Your Graphics Drivers
Moreover, outdated or corrupt graphics drivers may also trigger this error. So it’s essential to download the latest drivers for your system. Driver updates usually come with performance boosts and bug fixes.
Depending on the graphics card model you’re using, you can update your graphics drivers by clicking on the link below. Then find the correct driver compatible with your system, download and install it by following the on-screen instructions.
Note: To update drivers manually, you’ll need to identify your graphics card model, along with your system information, which can be found from the DirectX Diagnostic Tool. Simply open the Run box, type dxdiag, and hit Enter. Then look for the information from the System and Display tabs.
In addition, most of the manufacturers provide a utility or software to update drivers without hassle. For example, you can do that on the NVIDIA App. But sometimes they may fail to recognize your device, and you may not be able to download a specific or older version within it. In this situation, you’ll still need to do that manually, which will require some computer knowledge.
If manually searching for driver updates is time-consuming and troublesome for you, try Driver Easy, a handy tool designed to simplify the process of updating drivers. It will automatically detect any outdated or corrupt drivers, then download and install the latest correct drivers for you, direct from the manufacturers.
Here’s how Driver Easy works:
1. Download and install Driver Easy.
2. Run it and click Scan Now, and Driver Easy will scan your computer and detect any devices with missing or outdated drivers.

3. Click Activate & Update next to your device name. Or click Update All to update all drivers at once. You’ll be prompted to upgrade by clicking on these buttons. If you’re not ready for your purchase, sign up for the free trial to update drivers with no upfront cost.

It still prompts an alert? Try the next fix below!
4. Verify Game Files/Force Your Game to Use DirectX 11
If you encounter an “Out of Video Memory” error when launching your game, it’s advisable to first verify and repair any corrupted game files through your game launcher. Corrupted or missing files can lead to such errors.
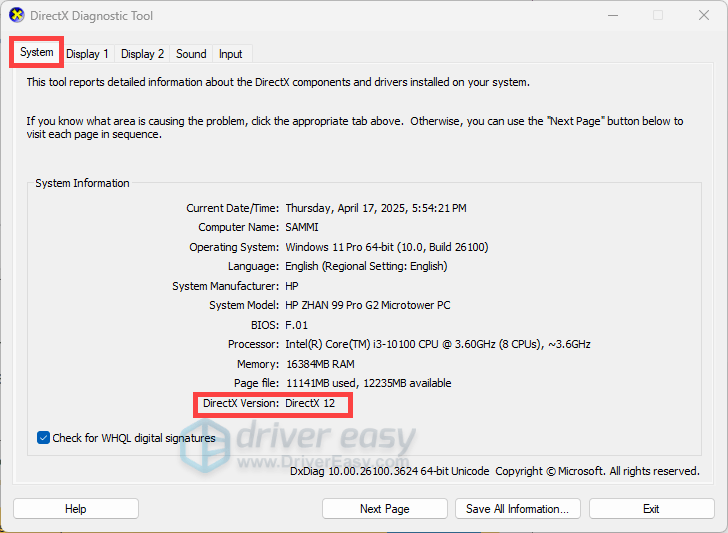
Additionally, if you’re using DirectX 12, consider switching to DirectX 11. Some users have reported that running games with DirectX 11 resolves these memory errors, as DirectX 12 may have compatibility issues with certain hardware configurations.
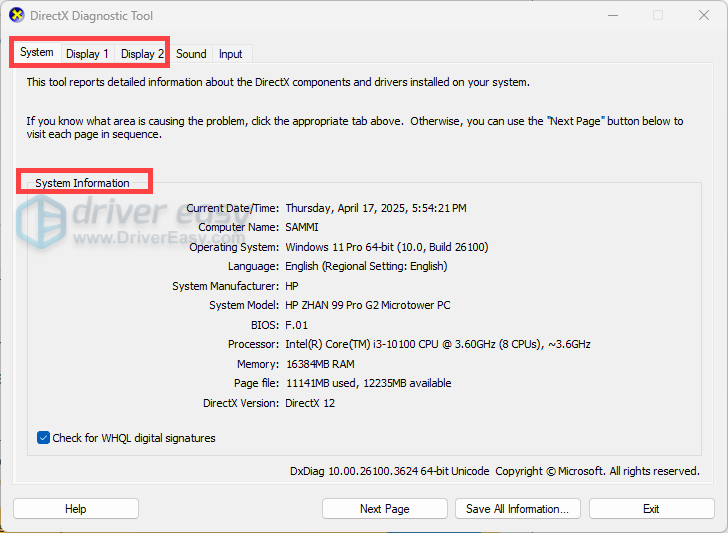
(The information on your DirectX version can be accessed through the DirectX Diagnostic Tool, which you can open by typing dxdiag in the Run box. Then in the System tab, there’s a section called System Information, where you should be able to identify your DirectX version. )
Below is how you can verify game files and start the game in DirectX 11 on Epic Games Launcher and Steam:
on Epic Games Launcher
To verify your game:
1. Open the Epic Games Launcher.
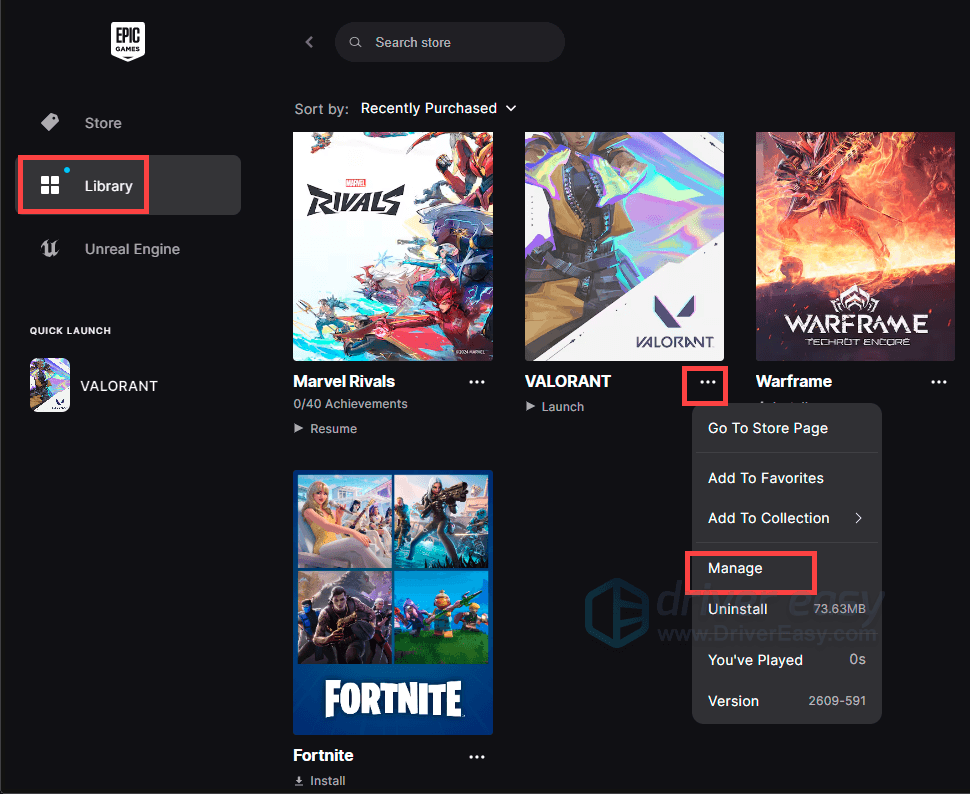
2. Find the game in your Epic Games Library.
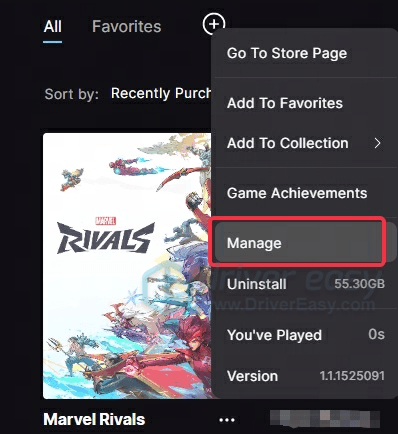
3. Click the three dots on the right side of the game line, and select Manage.
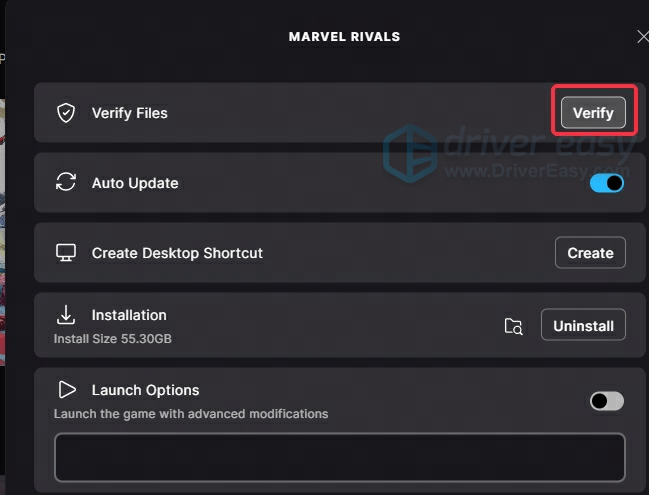
4. Click the Verify button. Then wait for the validation to complete. It may take a while to verify your files.
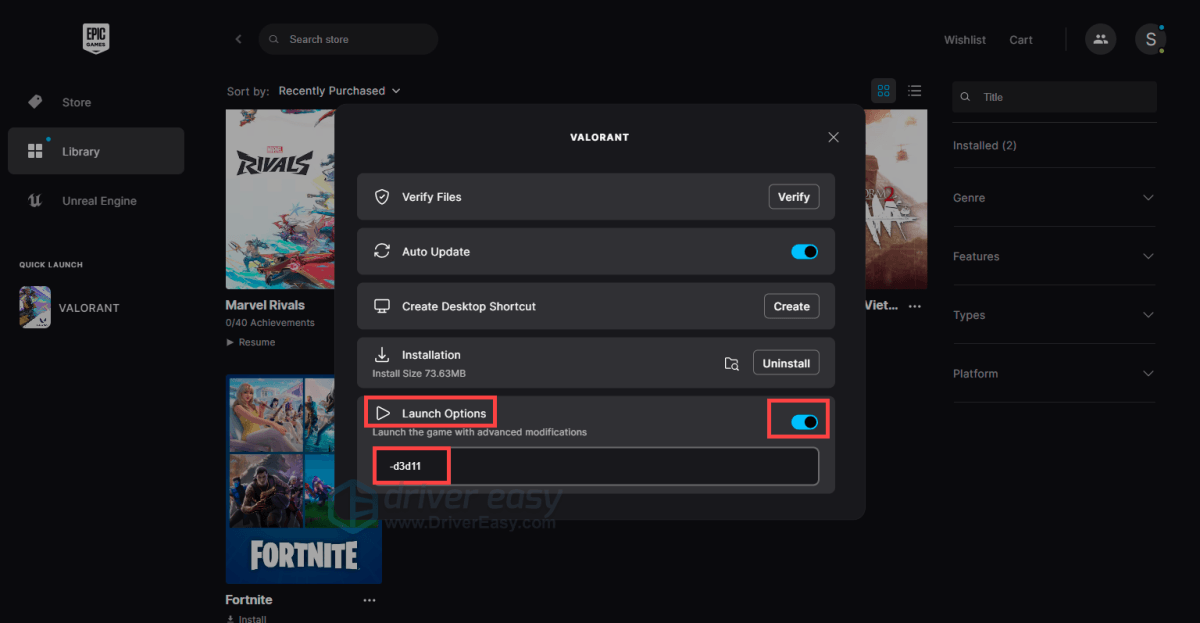
To force your game to use DirectX 11:
1. Open the Epic Games Launcher.
2. Find the game in your Epic Games Library.
3. Click the three dots on the right side of the game line, and select Manage.
4. Scroll down to Launch Options, click on the toggle to turn it on, then type -d3d11.
on Steam
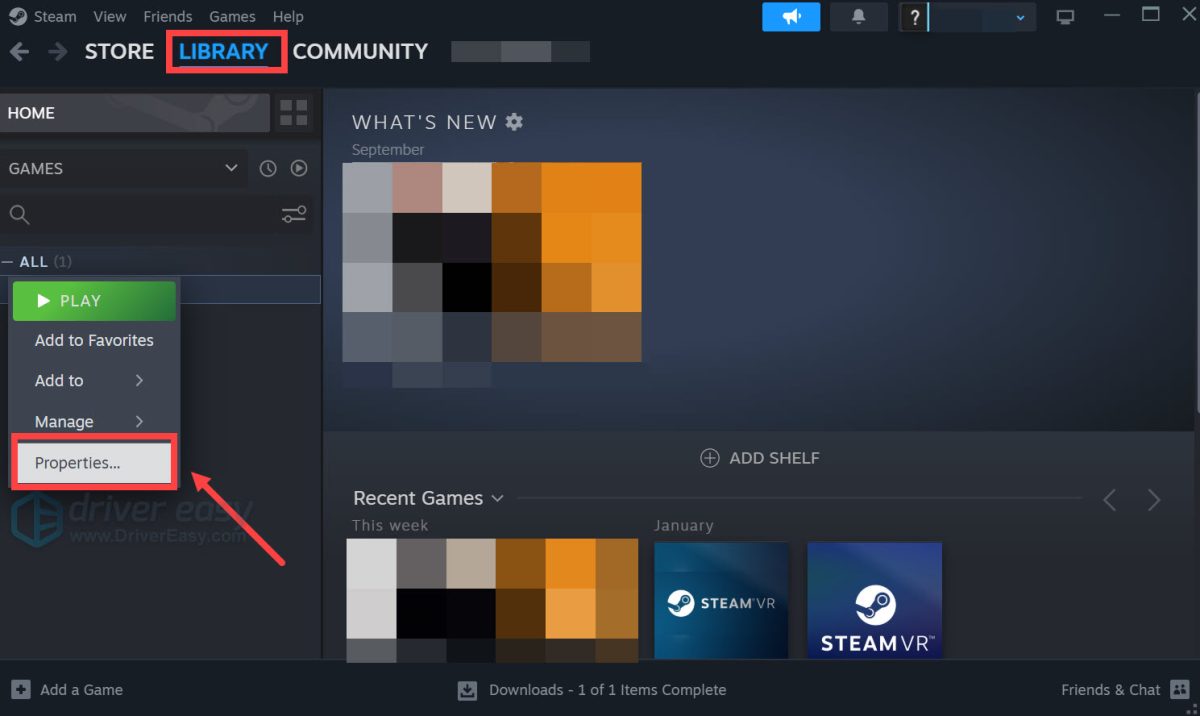
To verify your game:
1. Restart your computer and launch Steam.
2. Under LIBRARY, find your game, right-click it and select Properties….
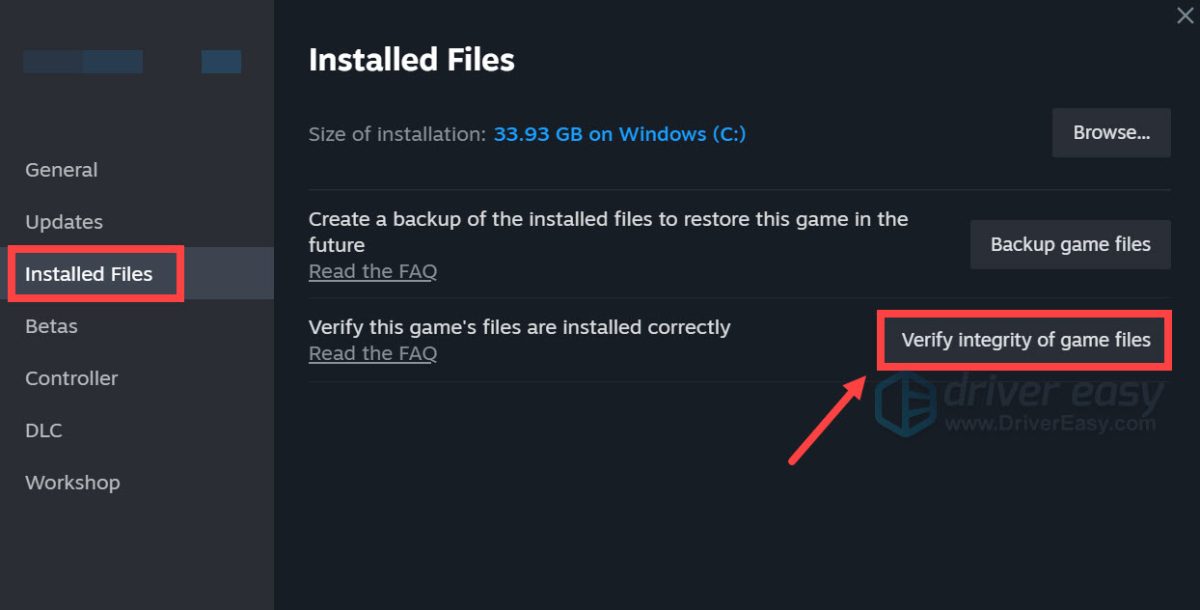
3. Select the Installed Files tab and click the Verify integrity of game files button. Steam will verify the game’s files – this process may take several minutes.
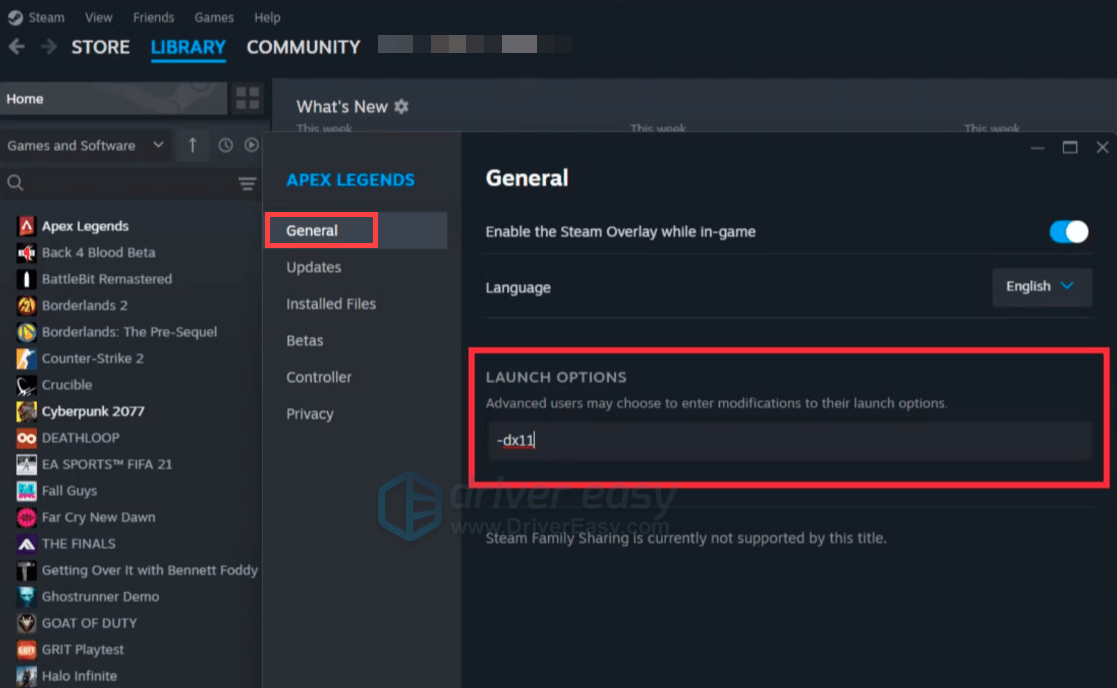
To force your game to use DirectX 11:
1. Open your Steam LIBRARY.
2. Right click the game’s title and select Properties.
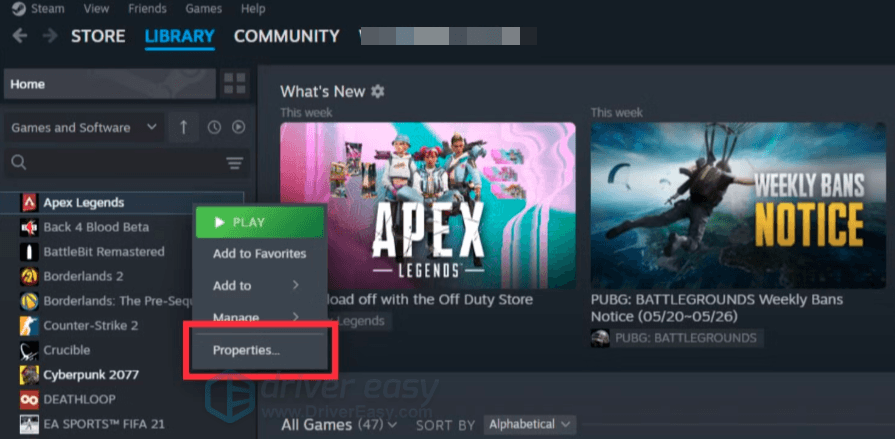
3. On the General tab, you’ll find the Launch Options section. Enter -dx11. Then relaunch your game.
If that doesn’t work, proceed to the next fix.
5. Close Background Applications
Even with adequate VRAM, managing background applications is a proactive step to ensure optimal system performance and resource allocation. For instance, applications like web browsers or communication tools can utilize a significant portion of VRAM. Some users have reported that browsers like Mozilla Firefox can consume insane amounts of VRAM.
Therefore, it’s suggested that you close them to prevent reduced performance in graphics-intensive applications or games:
1. Press the Windows logo key + R to open the Run box. Type taskmgr and hit Enter. The Task Manager window will open.
2. Go to the Processes tab. Look for any non-essential or resource-intensive programs (You can identify them by clicking on the column headers such as CPU or Memory. ).
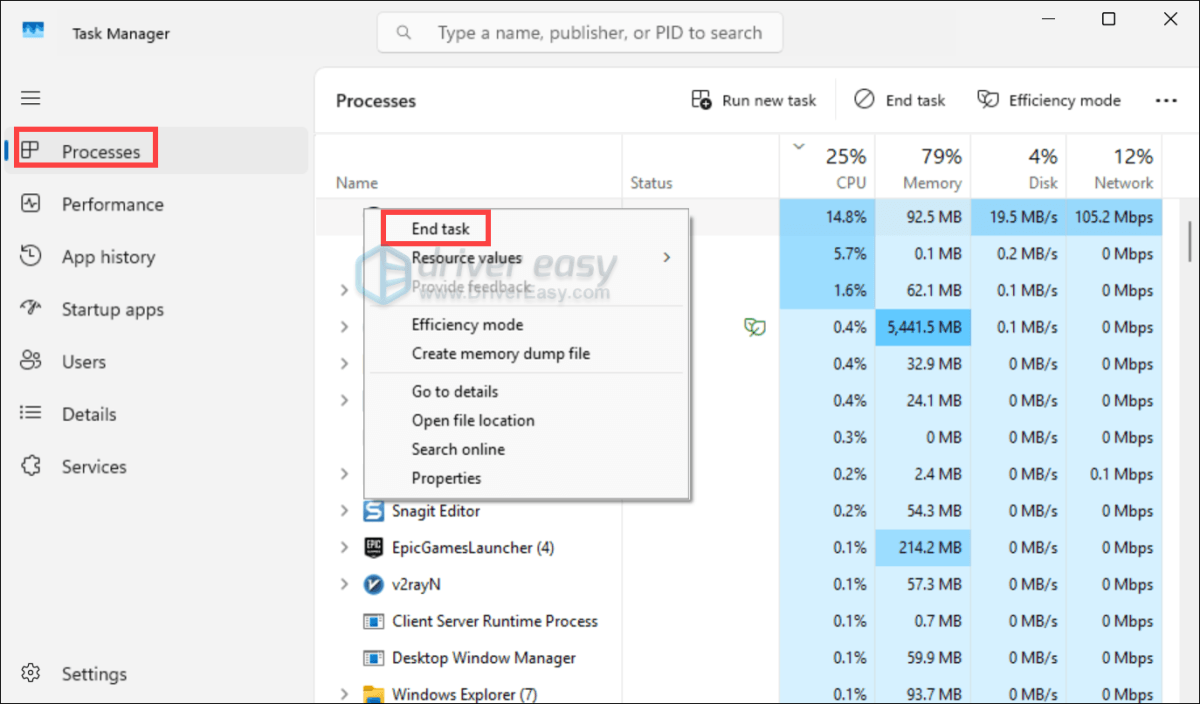
After performing these steps, relaunch your game or application to see if the error message still pops up.
6. Check for CPU Compatibility Issues
Intel 13th/14th Gen CPU owners, particularly i9-133900K/14900K, are most affected (weird but true!).
To prevent VRAM-related errors and resolve compatibility issues between certain Intel CPUs and Unreal Engine, one workaround is to lower the performance core ratio from Intel Extreme Tuning Utility (XTU). Below are the steps you take:
1. Download and install Intel Extreme Tuning Utility (XTU) from Intel’s official website.
2. Open XTU and locate the Performance Core Ratio setting.
3. Reduce the ratio by 1 or 2 steps (e.g., from 55x to 54x or 53x). Then click Apply to save changes.
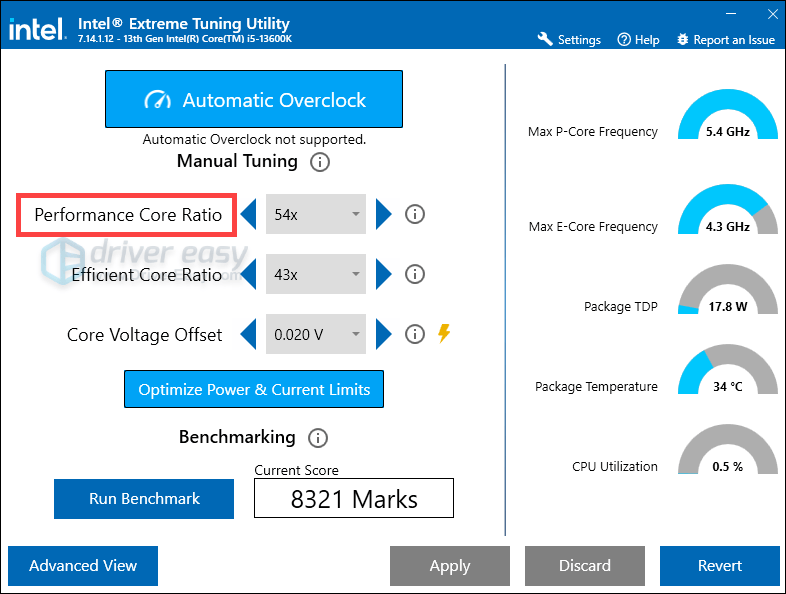
Then check if the error still shows up.
Additional information: How to check what processor you have in your computer
If you have no idea of the exact model of CPU you have, try to open the Task Manager by entering taskmgr into the Run box. Then from Performance > CPU, you should be able to see this information.
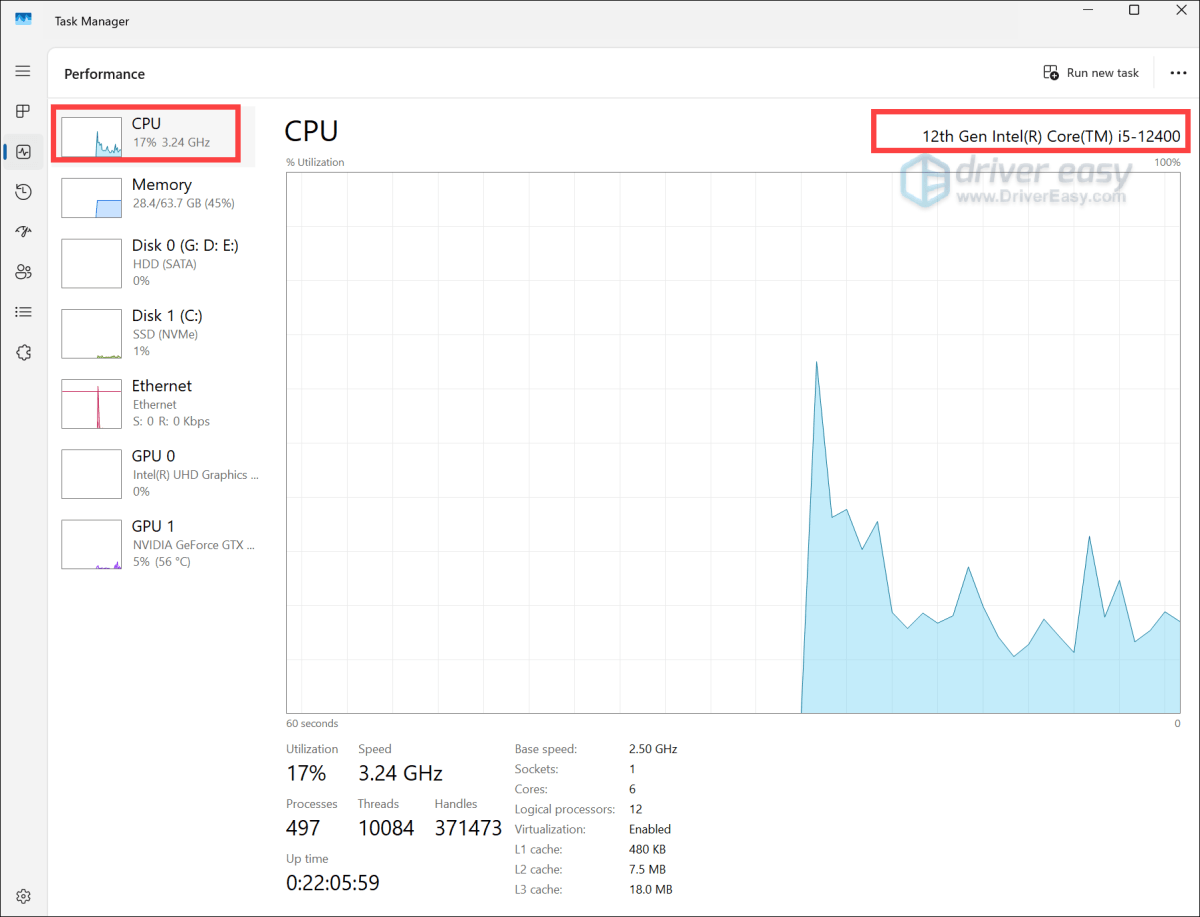
In the screenshot above, it shows 12th Gen Intel(R) Core(TM) i5-12400, which means that it’s a 12th generation, mid-range desktop processor featuring 6 performance cores.
However, this isn’t always straightforward, especially with earlier generations or certain models. For instance, the Intel(R) Core(TM) i3-10100 is a 10th-generation processor, but the generation isn’t explicitly stated in the name.
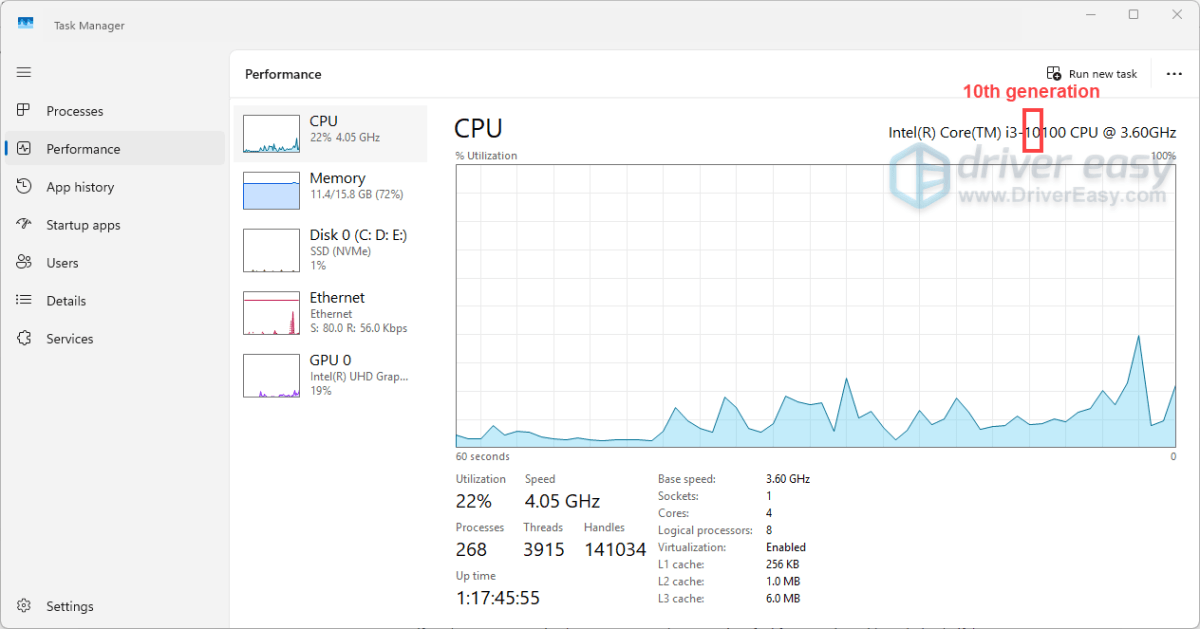
Typically, Intel’s processor model numbers typically follow this format: iX-YYYY, where:
- iX: Indicates the processor’s series (e.g., i3, i5, i7, i9).
- YYYY: The first digit(s) often represent the generation. So, for Intel(R) Core(TM) i3-10100, it’s the 10th generation.
7. Adjust Virtual Memory
In some cases, the default or manually set virtual memory size may be too small to handle the memory demands of certain applications or games. This can lead to errors when the system cannot allocate additional memory resources as needed. Adjusting the virtual memory settings ensures that your system has a larger buffer to accommodate these demands, potentially resolving the error.
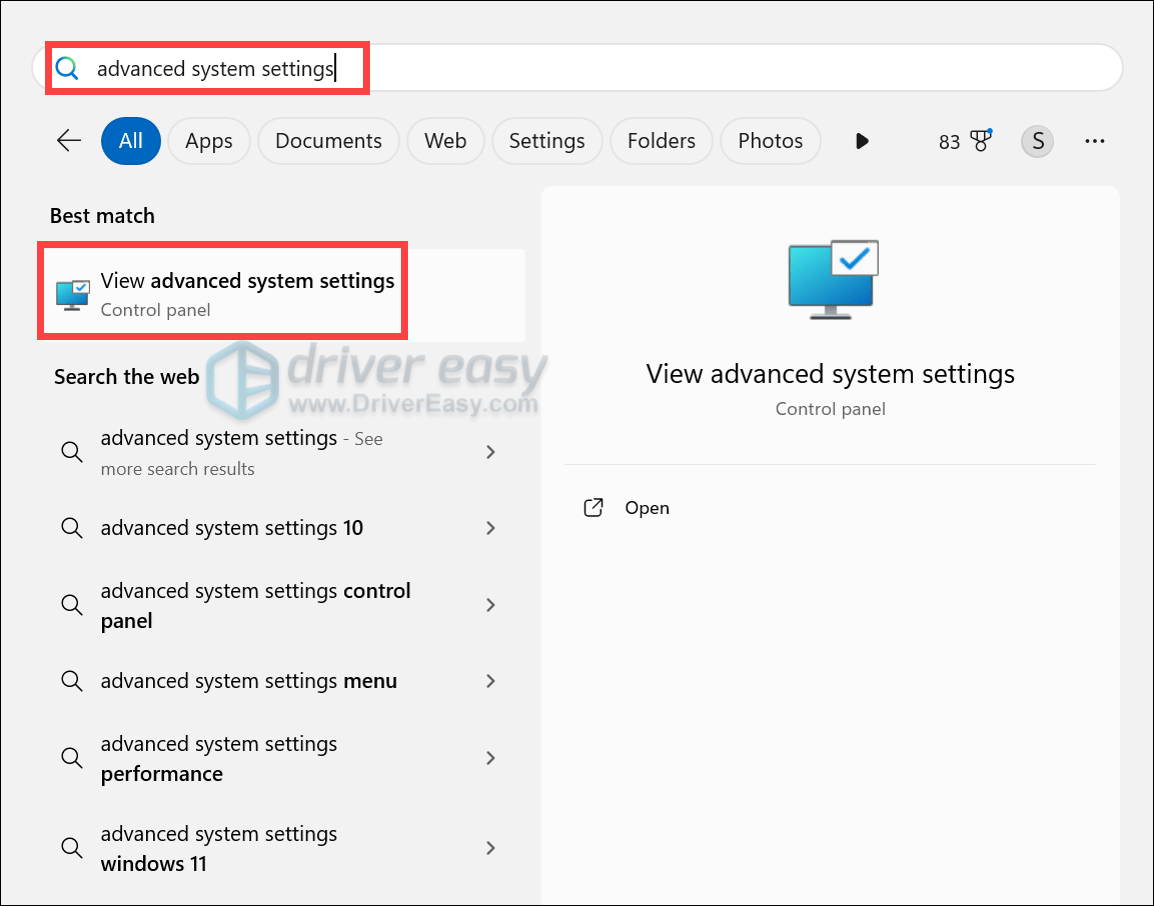
1. In the Search bar, type advanced system settings. Click View advanced system settings from the list of results.
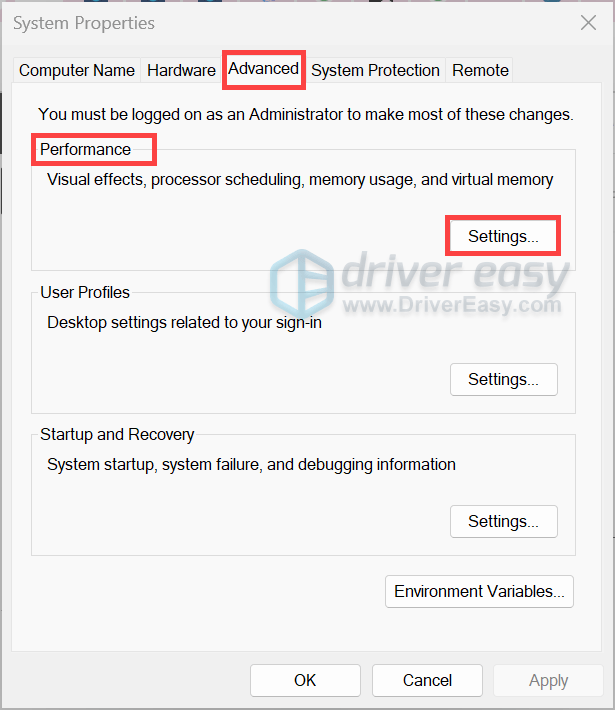
2. Select the Advanced tab. Under the Performance section, click on Settings….
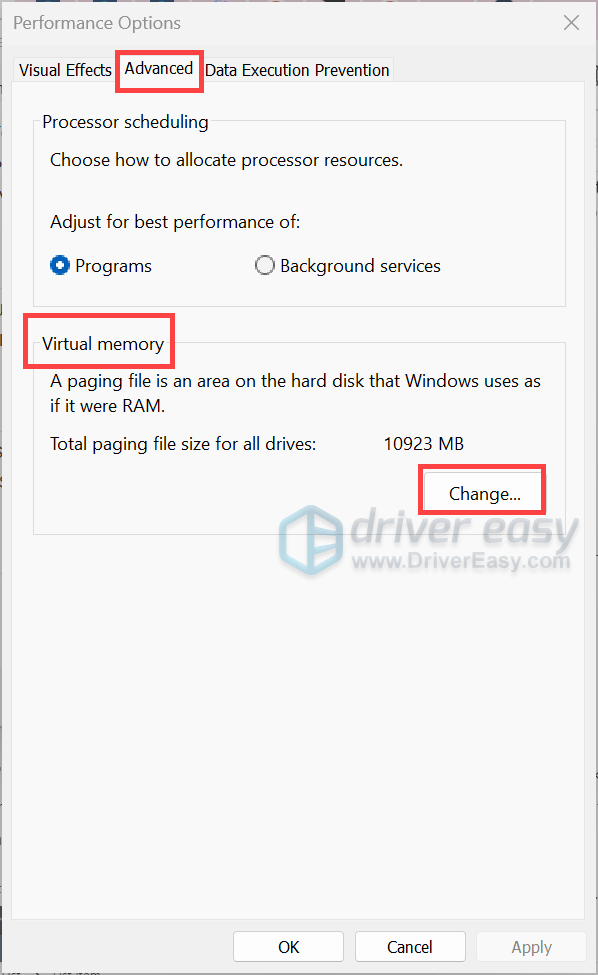
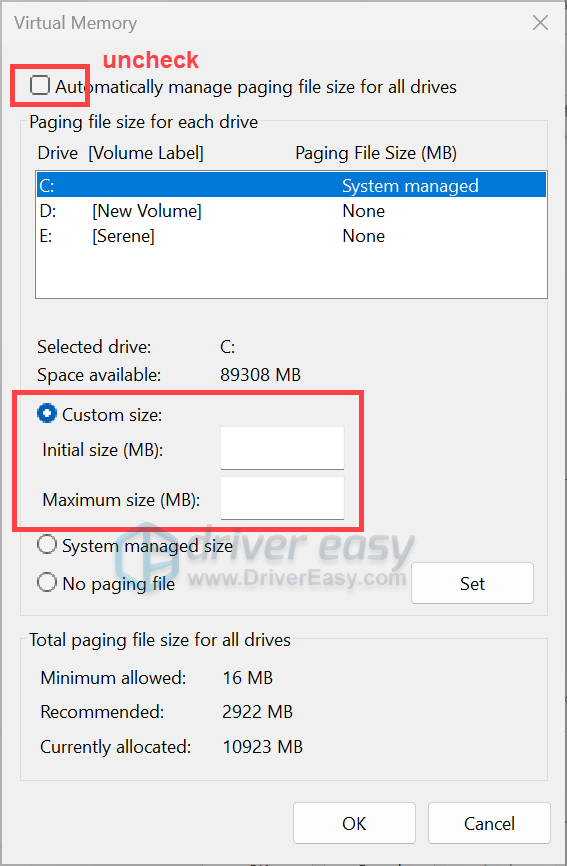
3. Under the Advanced tab, find the Virtual memory section and click on Change….
4. Uncheck the box labeled Automatically manage paging file size for all drives. Select the drive where your operating system is installed (usually C:). Tick the option Custom size, then enter an Initial size (MB) and a Maximum size (MB). The paging file should be a minimum of 1.5 times the size of your installed RAM, and a maximum of 3 times your RAM size.
By doing this, you should be able to run your game or application smoothly. If you’re still bothered by the “Out of Video Memory” error, try the next fix below.
8. Reinstall Your Game or Application
If you’ve tried the previous solutions and continue to encounter “Out of Video Memory” errors, reinstalling the game or application may help resolve the issue. Corrupted or missing files can lead to memory allocation problems, and a fresh installation ensures that all components are correctly installed.
Use the official uninstaller or your system’s settings to remove the application completely. After uninstallation, check for and delete any remaining files in the installation directory to prevent conflicts. Then restart your PC and obtain the most recent version from the official website or game launcher to ensure all updates are included.
If Your VRAM is Insufficient
If your system’s VRAM falls short of your applications’ requirements, don’t worry—there are several effective strategies to optimize performance and mitigate “Out of Video Memory” errors. Below, we’ll walk you through these methods step by step.
1. Lower Graphics Settings
Reducing graphics settings is one of the most straightforward ways to decrease VRAM usage. High-resolution textures, shadows, and effects can quickly consume available VRAM. By adjusting these settings, you can significantly reduce the memory load on your GPU.
Key settings to adjust:
- Texture Quality: Lowering texture resolution can have a substantial impact on VRAM usage. (Check discussions: Microsoft Flight Simulator Forums → )
- Resolution: Playing at a lower screen resolution reduces the amount of data the GPU needs to process.
- Shadow Quality: Shadows can be resource-intensive; reducing their quality or disabling them can free up VRAM.
- Anti-Aliasing: Disabling or lowering anti-aliasing settings can decrease VRAM consumption.
2. Allocate More Shared Memory (Integrated GPUs)
For systems with integrated graphics (like Intel UHD or AMD Radeon Vega), you can allocate more system RAM to act as VRAM. However, this process varies by manufacturer and motherboard model, and the setting may not be available for all systems.
Note: “For computers with specifications of 16GB or less, it’s not recommended to allocate more than 4GB of memory to VRAM, as it may cause system lag. ” – Asus Support
Additionally, adjusting VRAM allocation can be complex and might lead to other issues. Therefore, it’s advisable to proceed with caution and only make such changes if you’re confident in your understanding of the process and its implications.
Firstly,
You’ll need to determine how much RAM your system has:
1. Press the Windows logo key + R to open the Run box. Type taskmgr and hit Enter. This will open the Task Manager.
2. Select Performance > Memory. Here you’ll know how much memory you have.

Secondly,
You need to find out how to enter the BIOS setup in your Windows PC. Instead of using the traditional hotkeys—which can vary by manufacturer—you can do so directly through Windows.
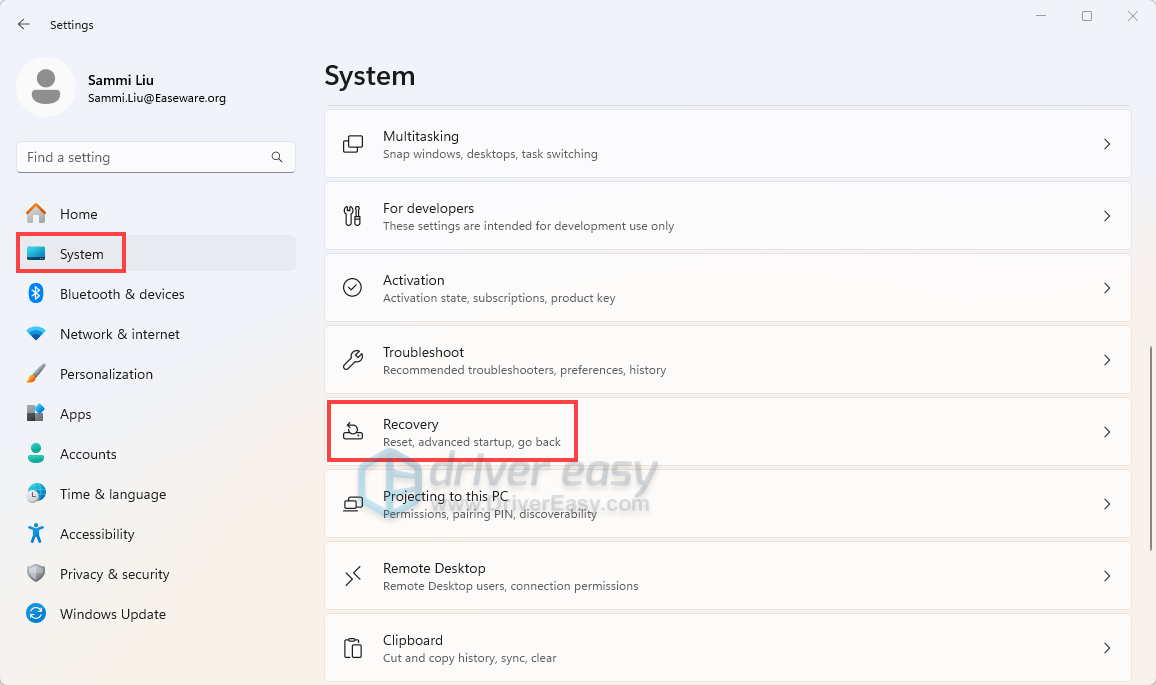
What you need to do is press the Windows logo key + I to open Settings. Then go to System > Recovery.
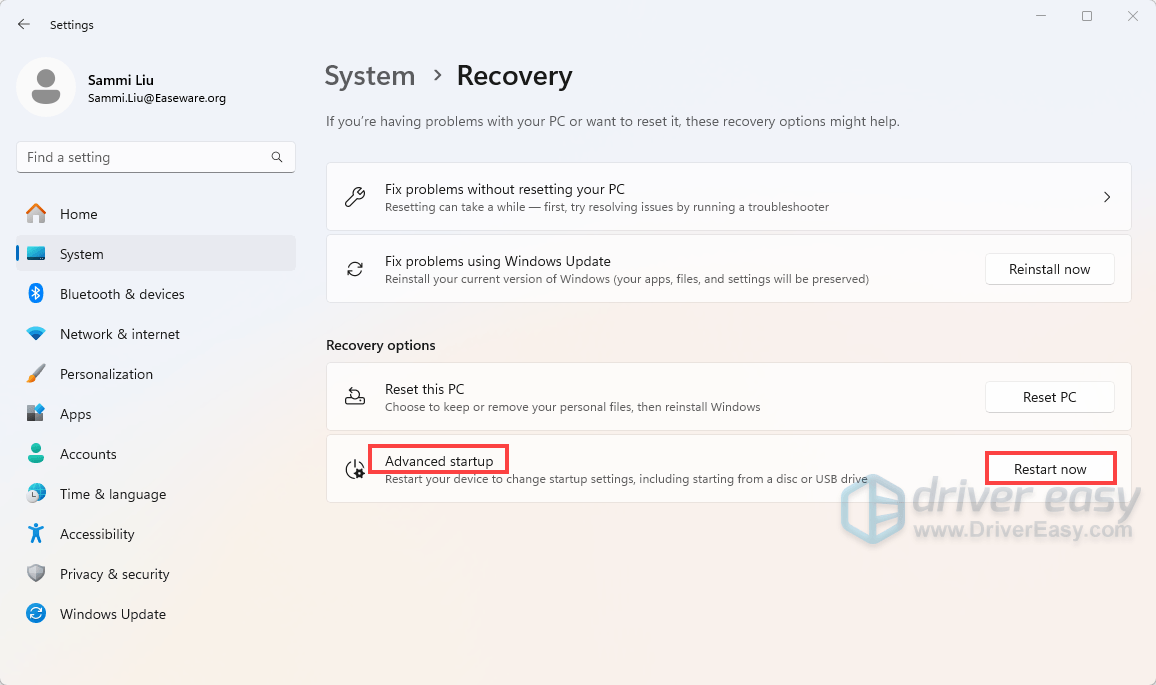
Find Advanced startup, then click on the Restart now button.
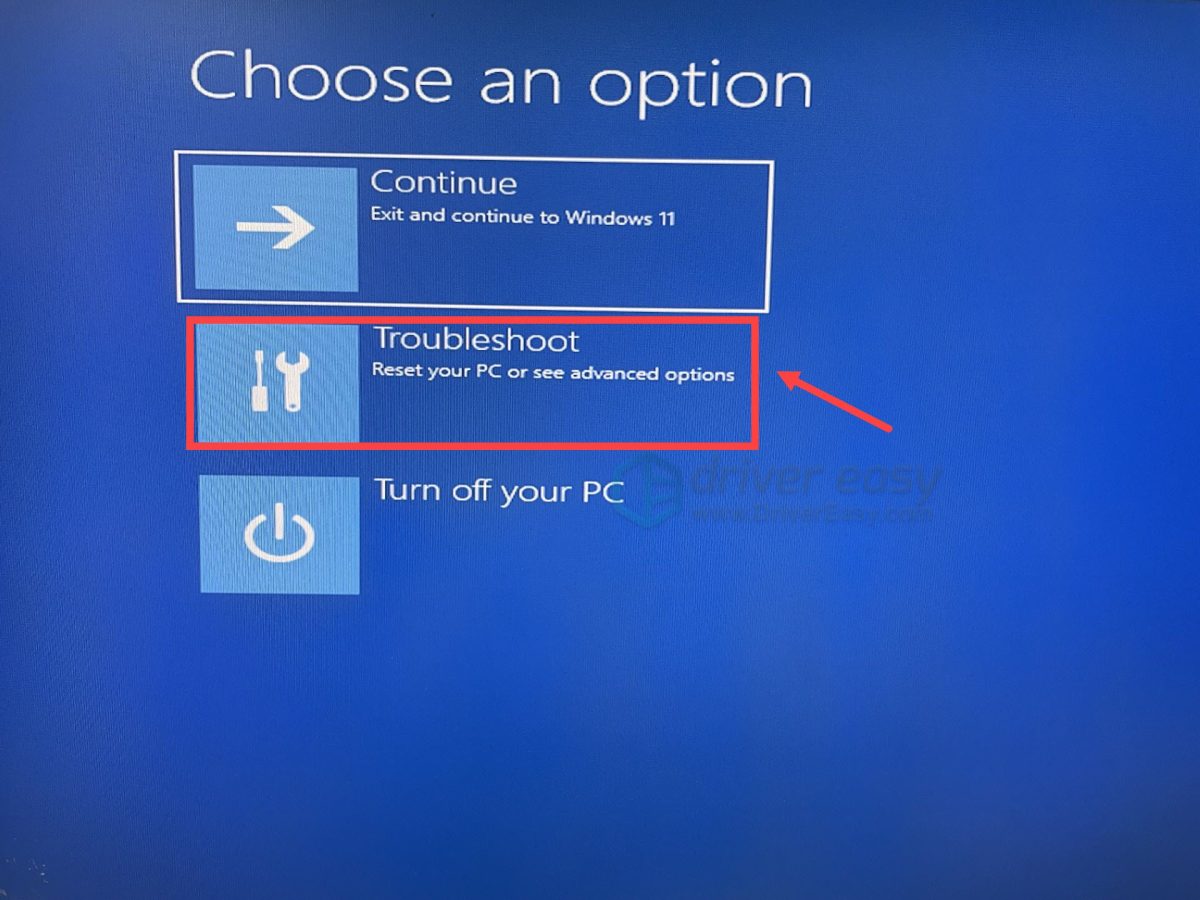
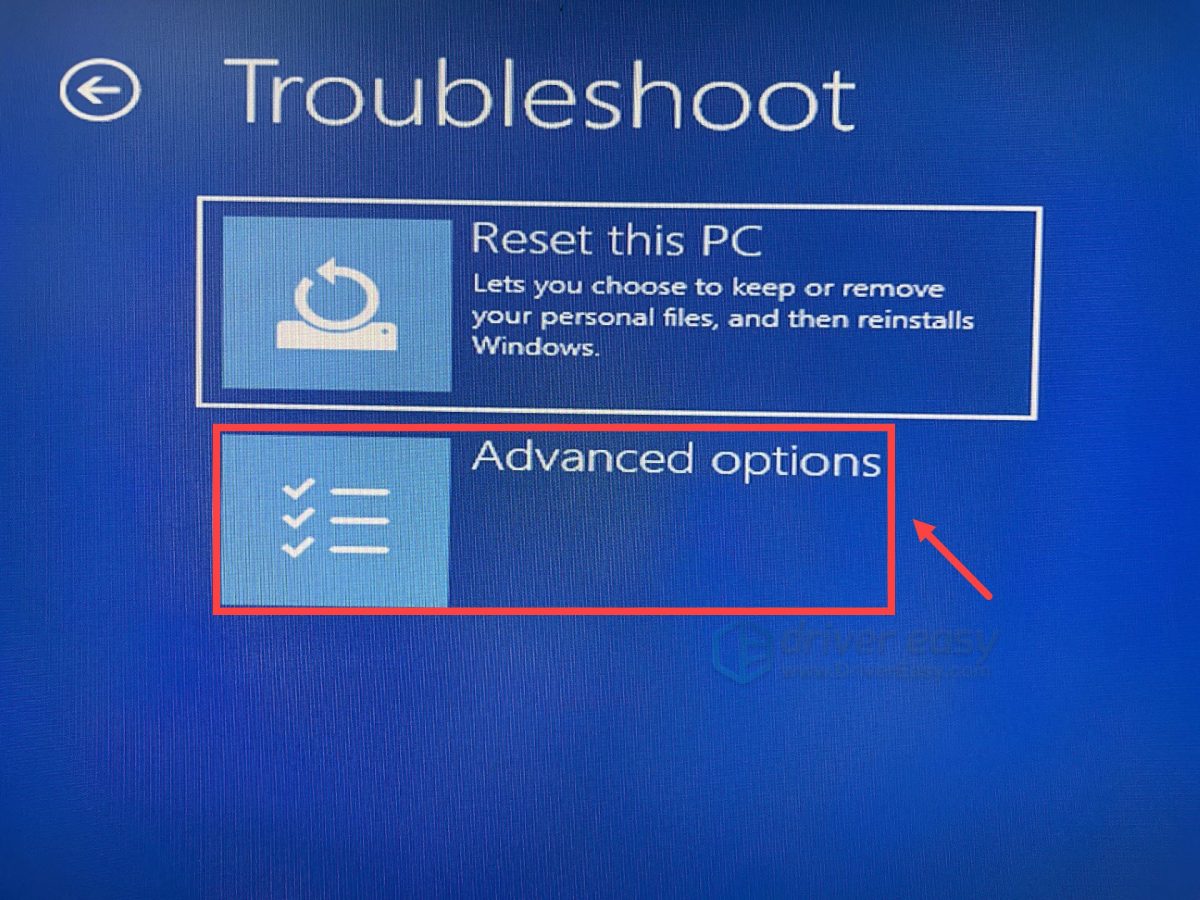
After your PC restarts, you’ll see a blue screen with several options. Choose Troubleshoot.
Then select Advanced options.
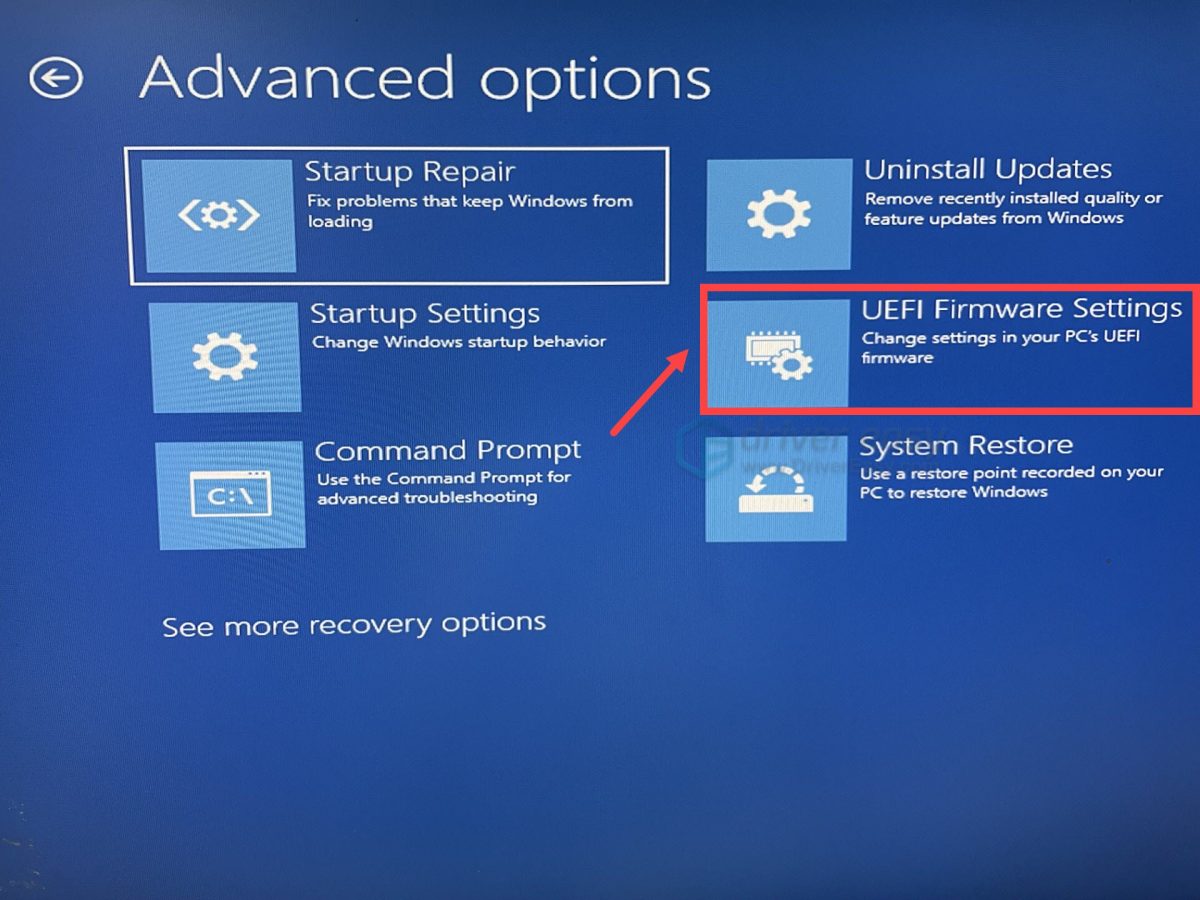
Click on UEFI Firmware Settings.
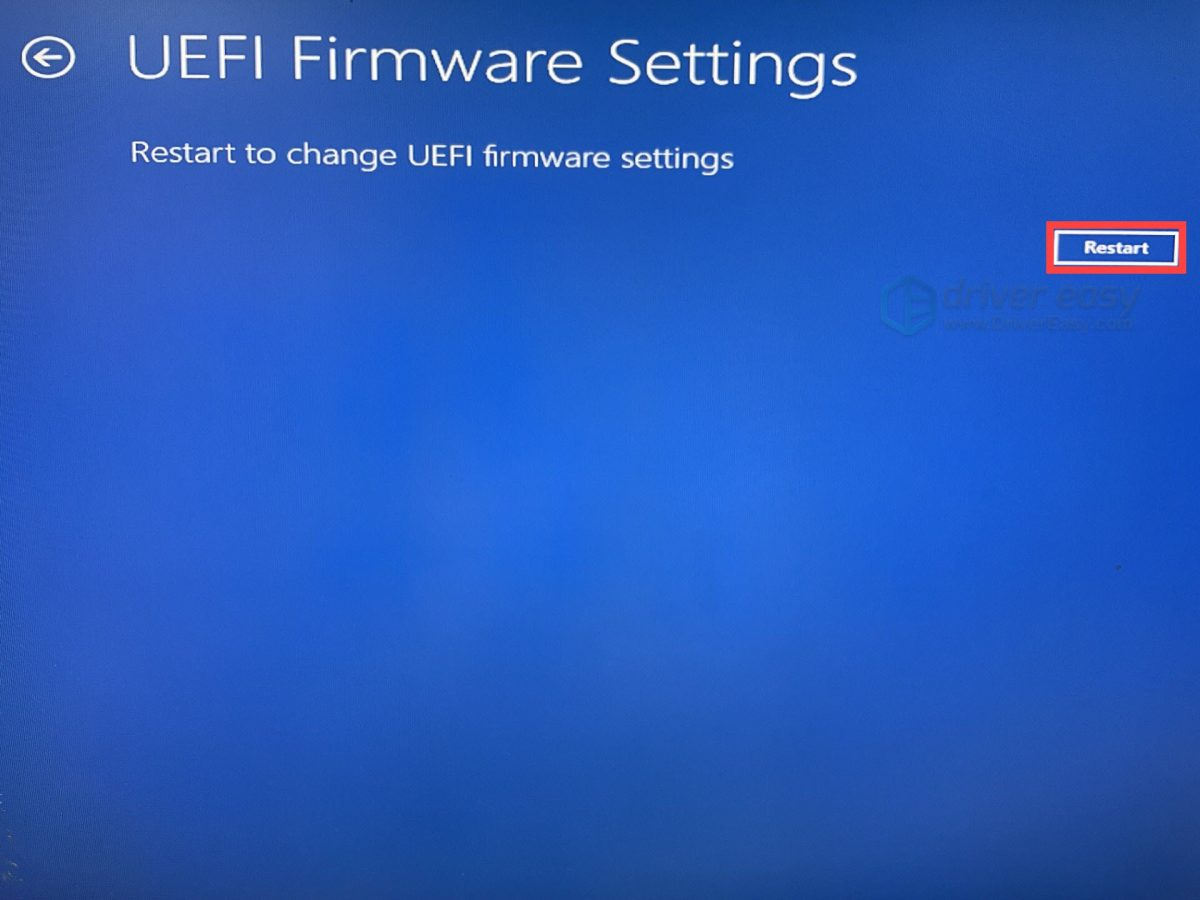
Finally, click Restart and your computer will boot into the BIOS setup screen.
Thirdly,
When you boot into the BIOS setup screen, look for settings like:
- Intel: DVMT Pre-Allocated, Graphics Settings, iGPU Memory
- AMD: UMA Frame Buffer Size
Advanced > AMD CBS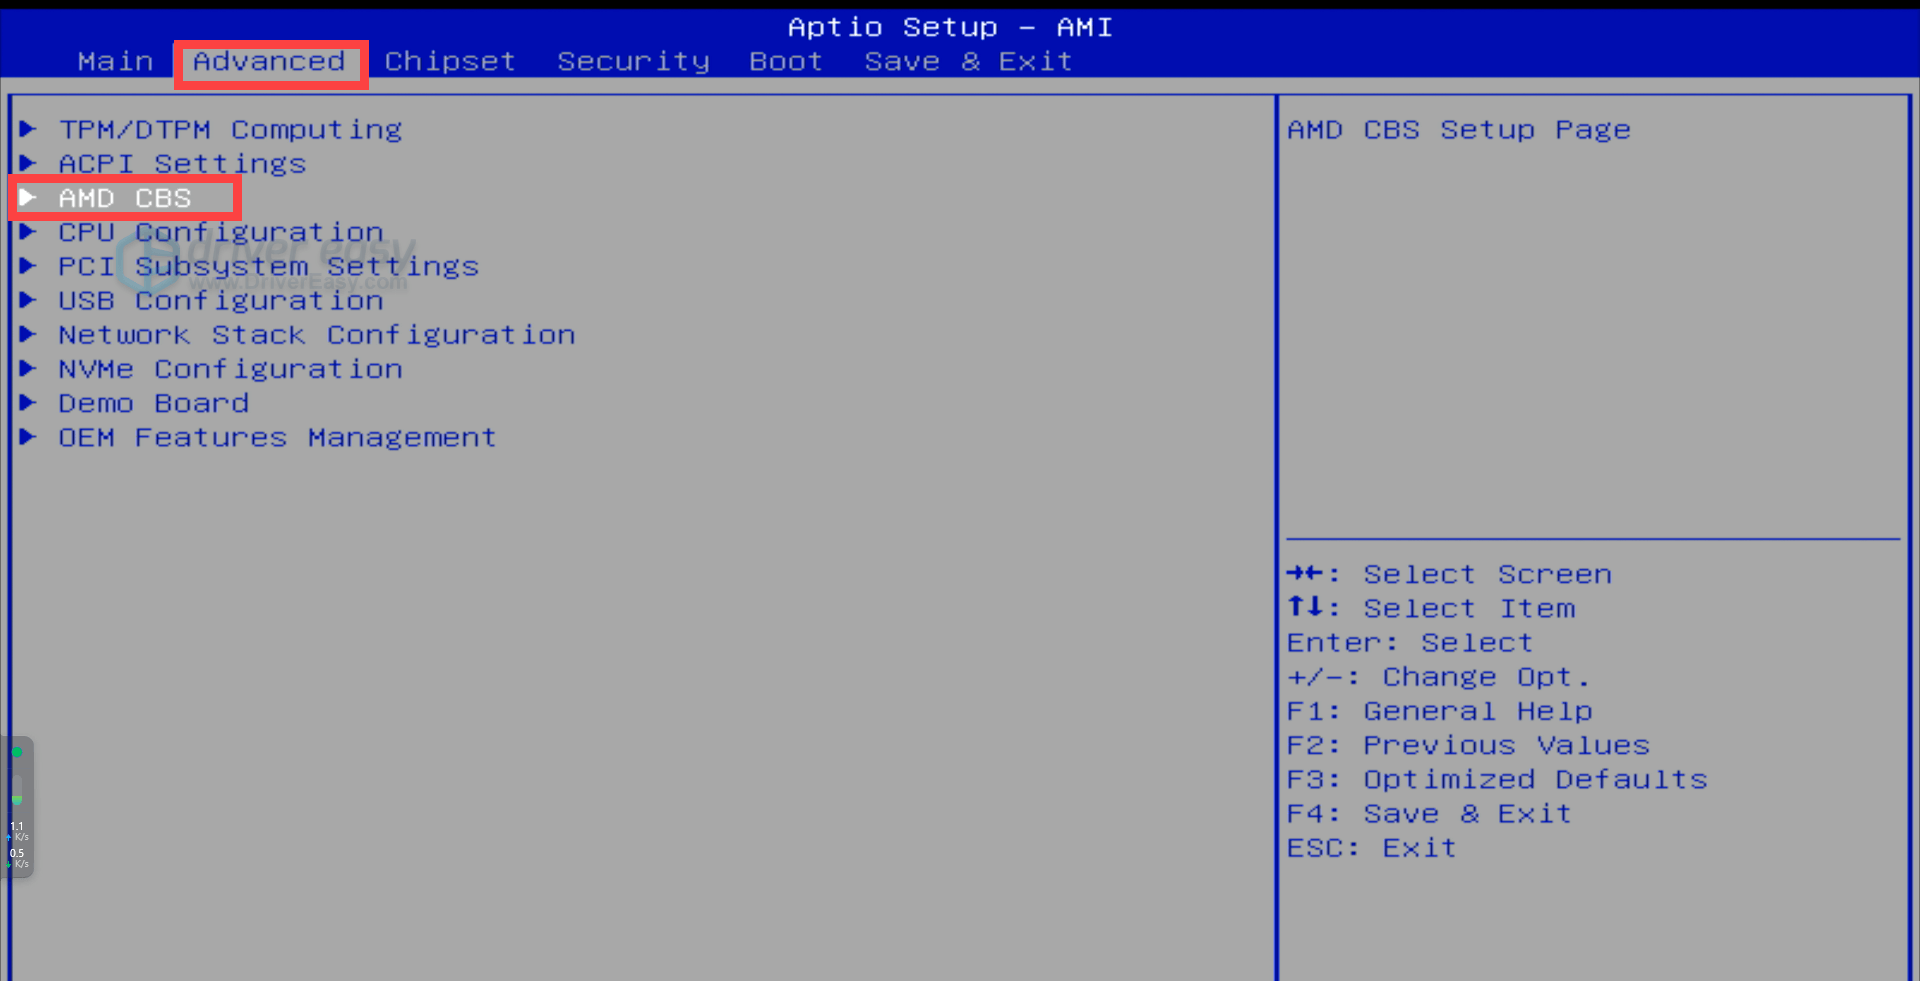
NBIO Common Options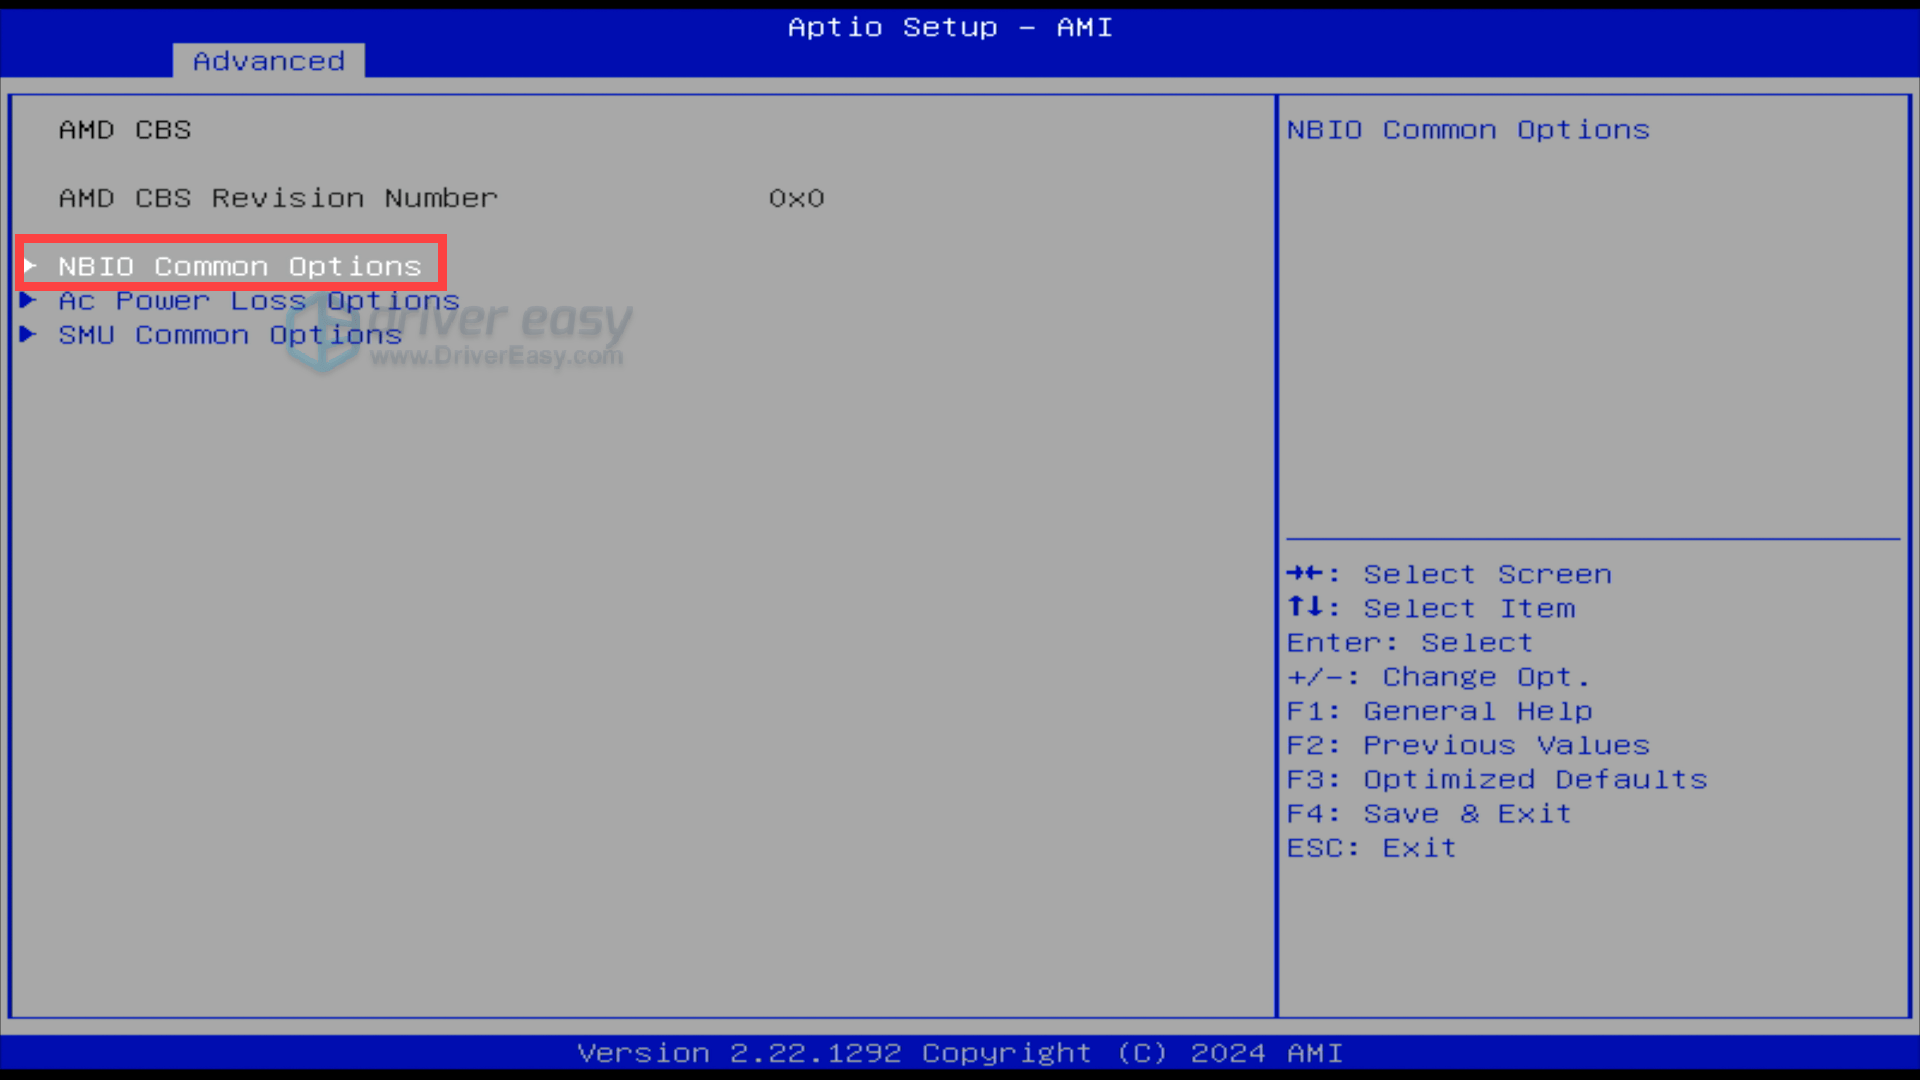
GFX Configuration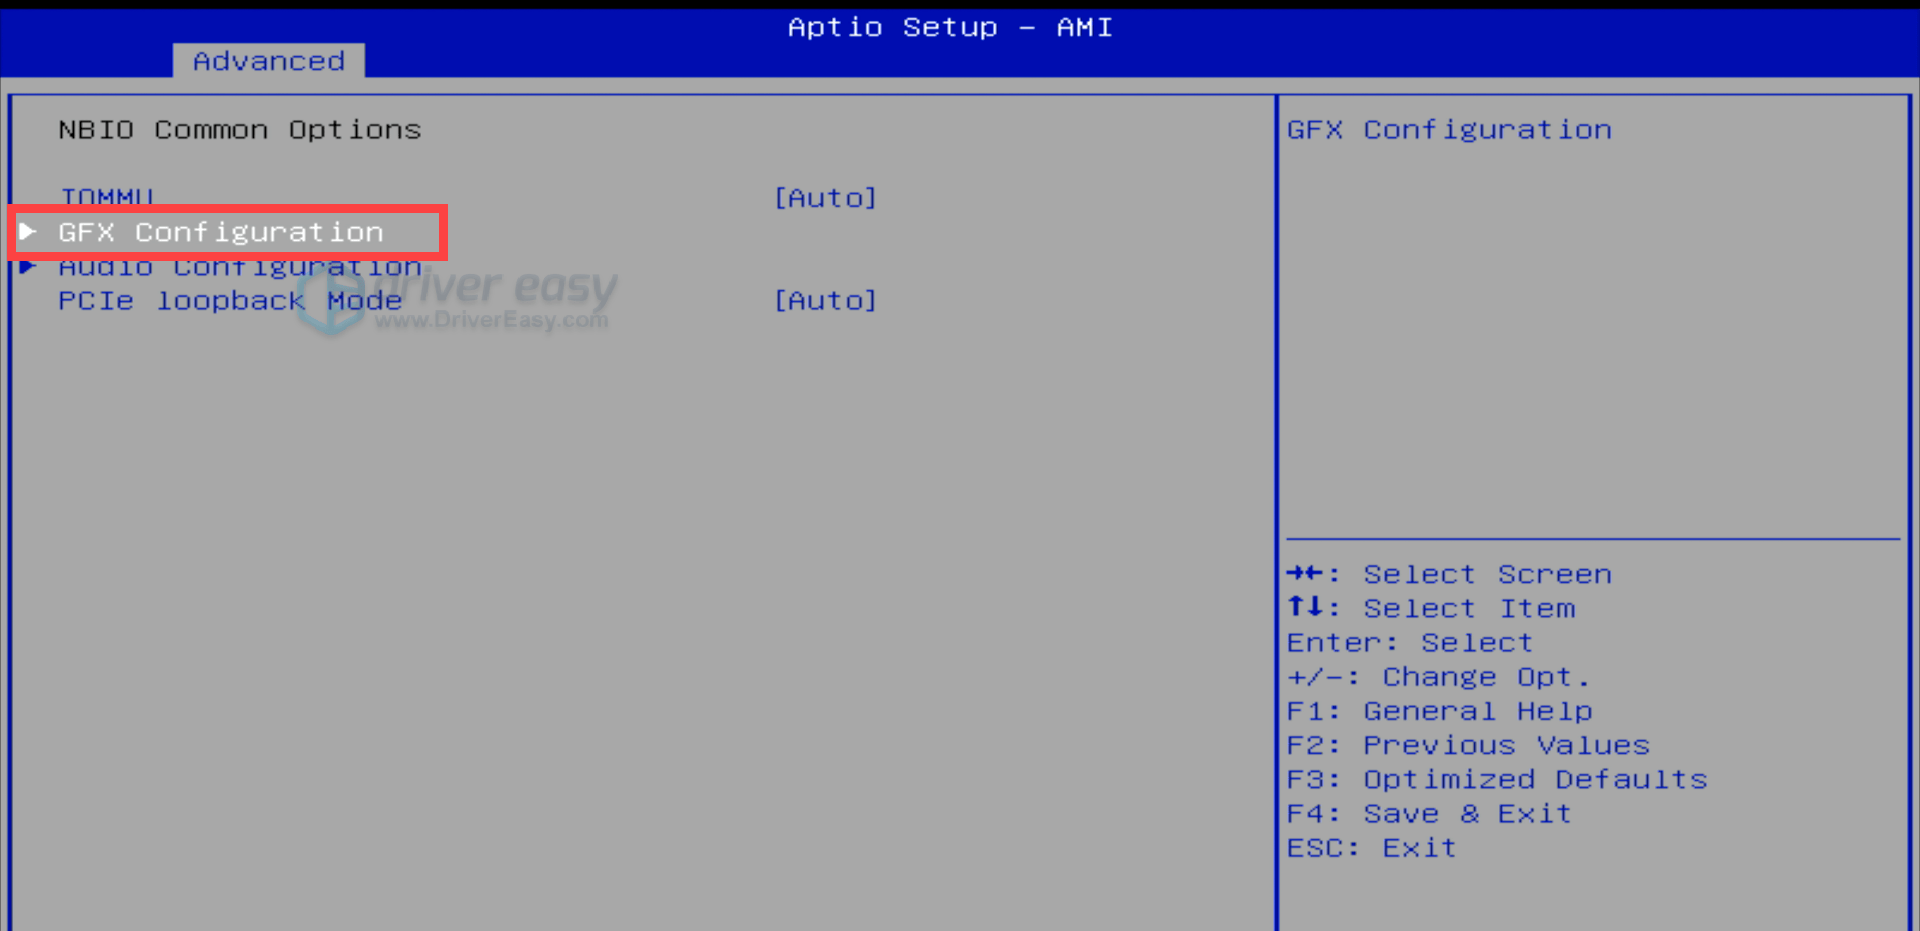
UMA Frame buffer Size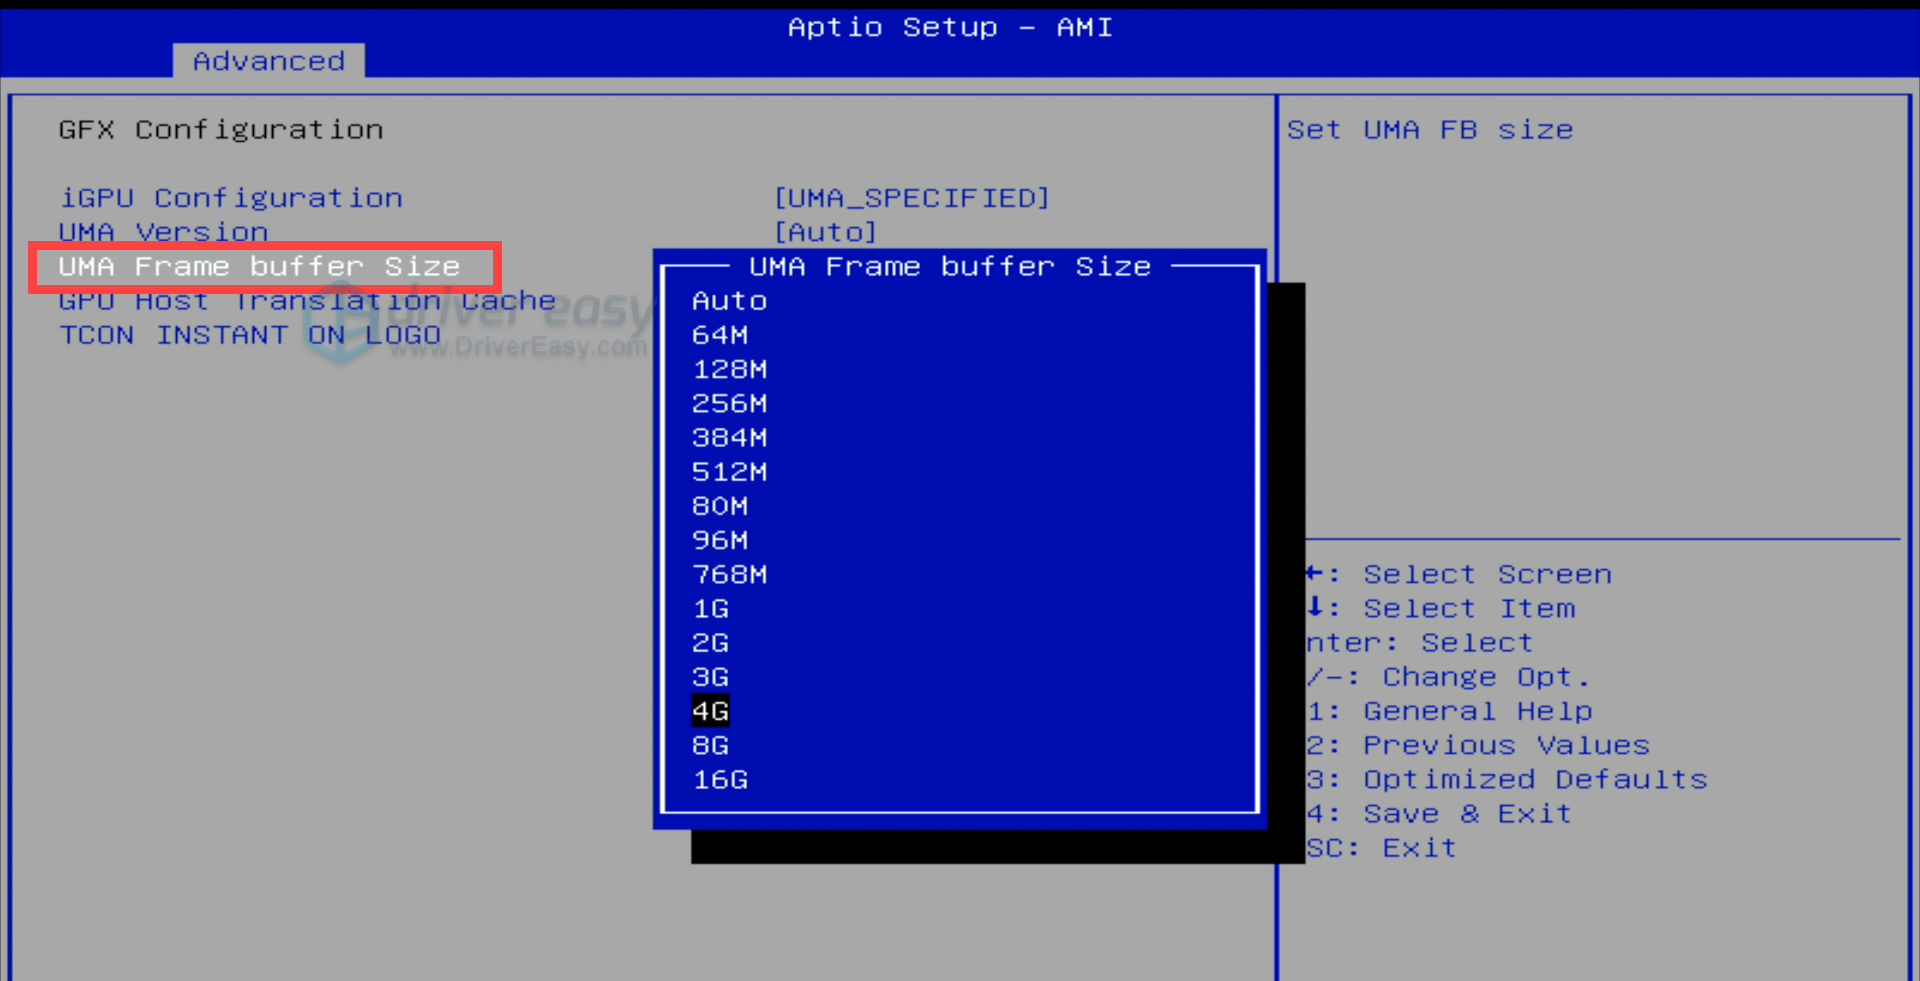
- Other: VGA Share Memory Size, iGPU Configuration
Increase the value (e.g., from 128MB to 512MB, 1GB, or 2GB). Do not allocate more than 4GB if you have ≤16GB RAM (may cause system slowdowns). Once done, save changes and exit the BIOS.
3. Upgrade Hardware
If your applications require more VRAM than your integrated graphics can provide, upgrading to a dedicated graphics card is the most effective solution.
Considerations when upgrading:
- VRAM Requirements: Determine the VRAM needed for your typical applications. For example, 8GB is often sufficient for 1080p gaming, while 12GB or more may be necessary for 1440p or 4K resolutions. – TechRadar
- Compatibility: Ensure your system’s power supply, motherboard, and case can accommodate the new GPU.
- Budget: Balance performance needs with your budget. Research and compare different GPU models to find the best fit.
This wraps up our comprehensive guide on resolving the “Out of Memory” issue. We hope you found it helpful. If you need further assistance or have additional questions, feel free to leave a comment below.
To help us assist you more effectively, please include the following information in your comment:
- System Specifications: Such as your CPU model, GPU model, RAM size, and operating system version.
- Troubleshooting Steps Already Taken: Any solutions you’ve attempted so far.
- Specific Scenarios: When and where the issue occurs (e.g., during gaming, or using specific applications).
Providing these details will enable us and the community to offer more accurate and tailored support.