
You may come across an error message that tells you “Printer not responding” when you are attempting to print something. There are various possible causes for this error, including bad hardware status and configuration, faulty drivers, etc.
If the error is troubling you, you can try the methods below and see if they can help you solve the problem.
3) Restart Print Spooler service
1) Basic troubleshooting
If you bump into a Printer not responding error, the first thing you should do is to check the connection status. Make sure your printer is properly connected to your computer, and the cables or wireless network you use is normal.
Additionally, you can also try restarting all devices related to printing jobs. They include your printer, computer, and WiFi router (if your printer use wireless connection). You should shut them down completely, leave them for a while, and then power them on again. After that you can print something to see if this fixes the problem.
2) Run printer troubleshooter
Windows system has a built-in printer troubleshooter that can diagnose your printer issues. You can run this tool as a way to help you fix the printer not responding error.
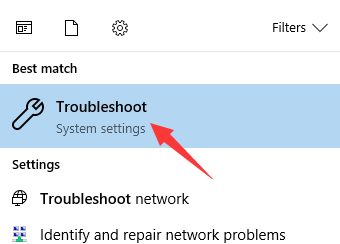
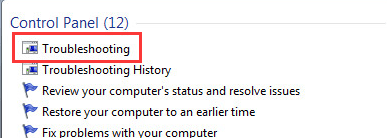
a) Press Win key, and then type “troubleshoot“. Select Troubleshoot (on Windows 10) or Troubleshooting (on Windows 7) in the result.
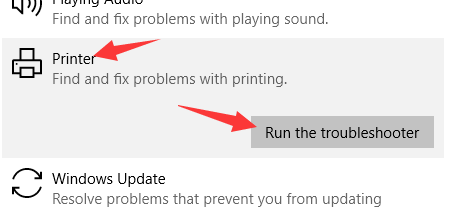
b) If you are using Windows 10, click on Printer and then on Run the troubleshooter.
c) For Windows 7, click on Use a printer under Hardware and Sound.

d) Follow the on-screen instruction to complete the troubleshooting. If the troubleshooter is able to find some issues, you may need to fix them with this tool or seek for solutions from other sources.
3) Restart Print Spooler service
Print Spooler service manages all the print jobs of your computer. Sometimes it can go wrong and cause various printer issues. You can solve problems of this kind by simply restarting this service. To restart Print Spooler service, follow the steps below.
(Note that you should log in your system as Administrator before you proceed).
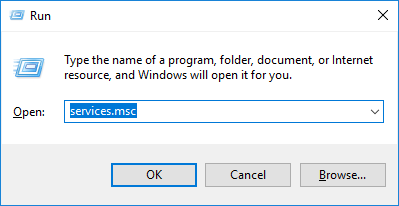
a) Press Win + R keys, and then type “services.msc” and hit Enter.
b) Scroll down to find Print Spooler. Double click on it to open this service.

c) Click on Stop button under Service status and then on Start. (If the Service status is Stopped, then directly hit the Start button.) After that, hit OK.
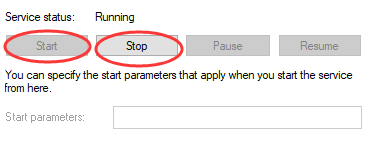
d) You have just restarted Print Spooler service. Now try your printer and see if the not responding error is gone.
4) Configure to correct port
In order for your printer to run normally, you need to configure your printer to correct printer port. You can follow the steps below to check and change the port of your printer.
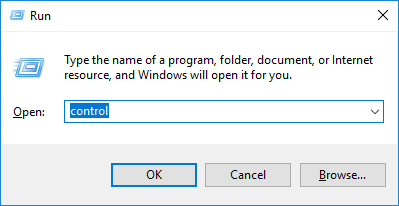
a) Press Win + R keys, and enter “control“.
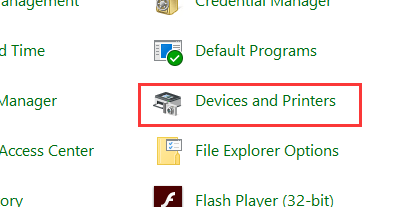
b) Click on Devices and Printers.
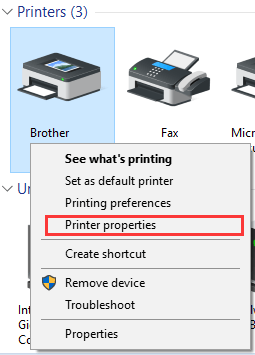
c) In Printers section, right click on your printer and then select Printer properties.
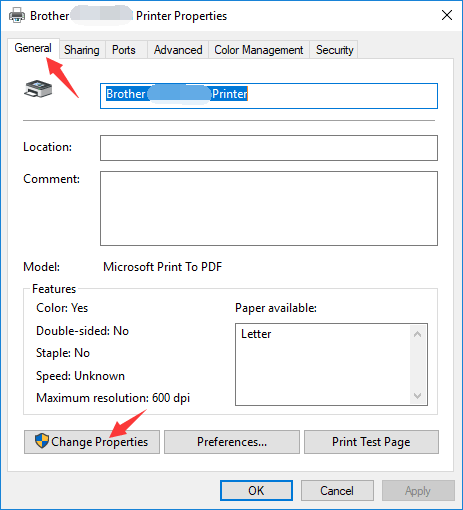
d) Select Change properties on General tab.
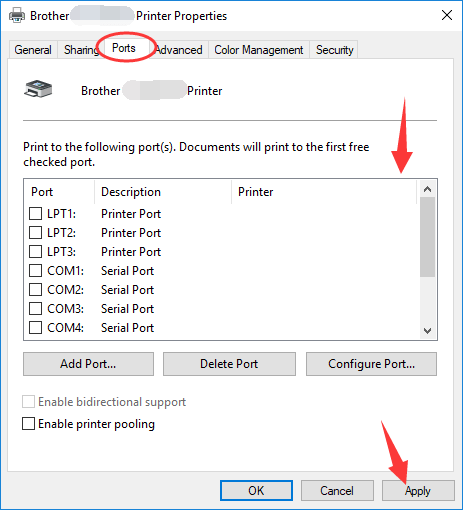
e) Go to Ports tab. Under Print to the following port(s), tick the port that contains the name of your printer. You should note that the Description of the port should include USB or DOT4 if you are using USB connection, or WSD, network or IP if network connection is used. After choosing the port, hit Apply.
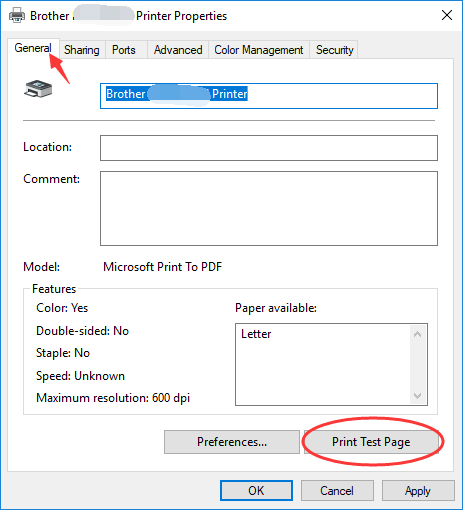
f) Go back to General tab. Click on Print Test Page to perform a printing test in order to check if you choose the right port.
g) You may need to repeat step e and f until you can confirm you have applied the right change.
5) Check printer driver
Sometimes Printer not responding error can be caused by driver issues. To fix the problem, you need to update your driver if it is outdated, or reinstall the driver if it is problematic.
You can go to official website of your printer manufacturer to download the driver and support software for your device and install them on your own. Or you can go to Device Manager of the system and update or reinstall the driver (after you find your printer from a long list of device). Either way is a good way, yet a bit tricky, and sometimes time- and energy-consuming.
Therefore we recommend you using Driver Easy. It is a powerful and easy-to-use driver management tool that can save you a lot of time and energy.
To use Driver Easy to update your driver:
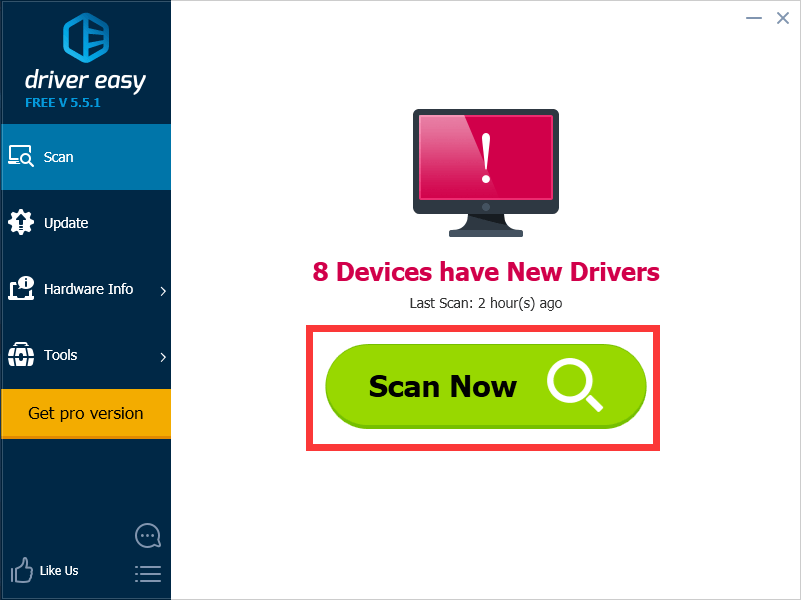
a) Open the program and hit Scan Now. Wait for a few seconds.
b) Click on Update button next to your printing device. Driver Easy will download the latest credible driver for you. Then you can install the driver on your own.
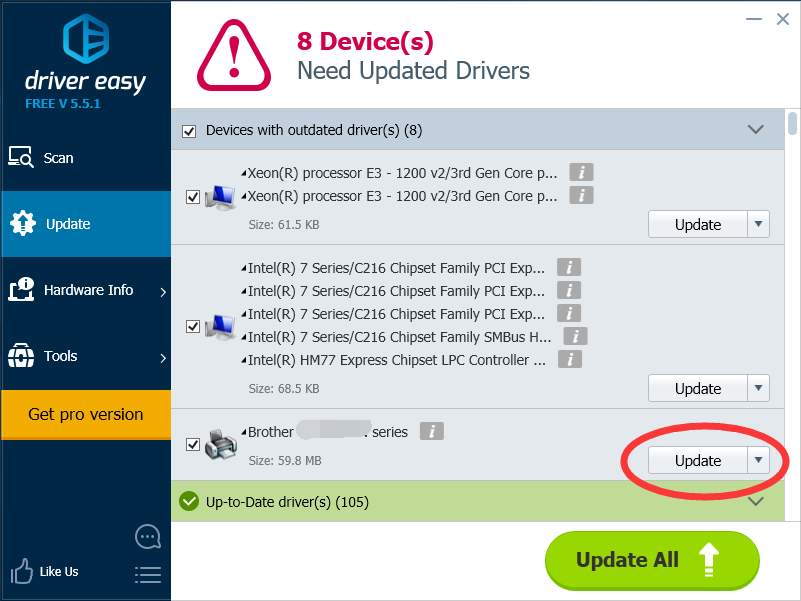
c) If you want Driver Easy to complete the installation for you, you can use its Pro version. It will do the whole update process automatically. Also, you can update all drivers by hitting Update All button.

In fact, Driver Easy Pro also contains powerful features, such as driver backup and restore. They can help you deal with various driver issues. And they are all very easy to use. Plus, you can enjoy experienced technical support if you go Pro. It is a convenient tool that can keep your computer healthy.
If all the methods above do not help you fix the issue, it is possible that it is a hardware problem, either from your printer or from your computer. In this case, it is suggested that you contact your device manufacturer for further assistance.


