
Want to get a higher FPS when playing PUBG with your NVIDIA graphics card? You’ve come to the right place! It’s pretty easy! After reading this article, you should be able to enjoy a smoother gaming experience when playing PUBG!
Try these tips
Tip 1: Modify your NVIDIA graphics settings for the best performance
You can follow the instructions below to modify your NVIDIA graphics settings to gain a higher FPS. Here’s how to do it:
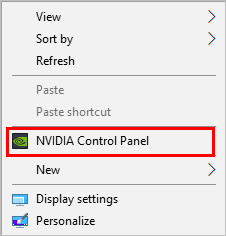
- Right-click an empty area of the desktop, then select NVIDIA Control Panel to open it.
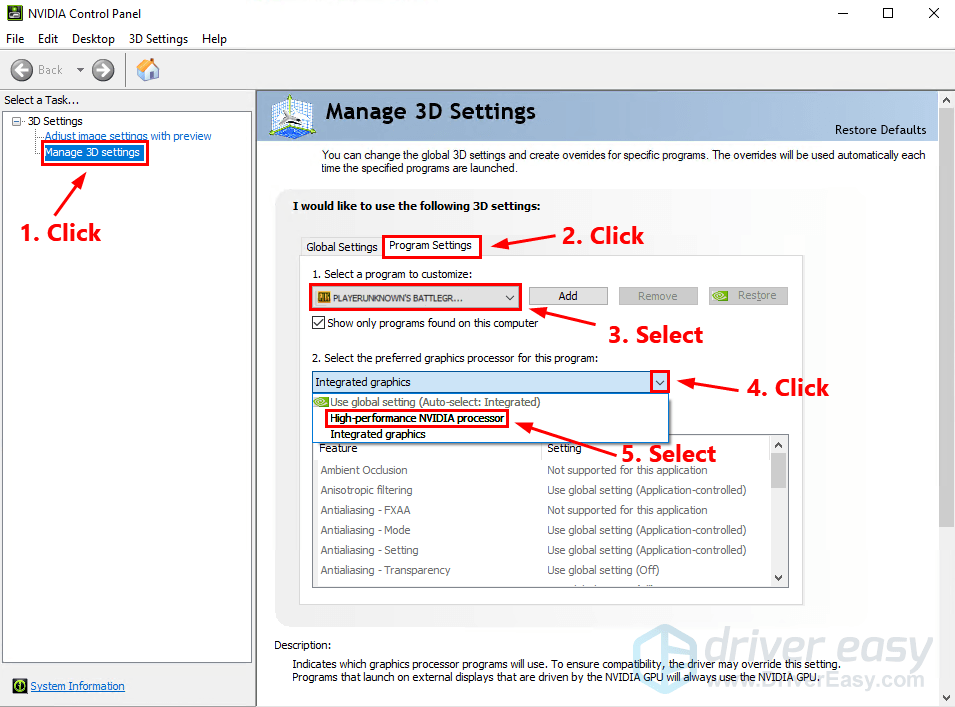
- Click Manage 3D settings on the left panel. On the right, navigate to the Program Settings. Then select PUBG from the list. For PUBG, select High-performance NVIDIA processor.
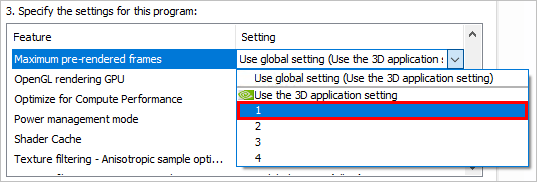
- Set Maximum pre-rendered frames to 1.
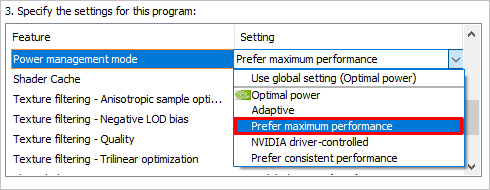
- Set Power Management Mode to Prefer maximum performance.
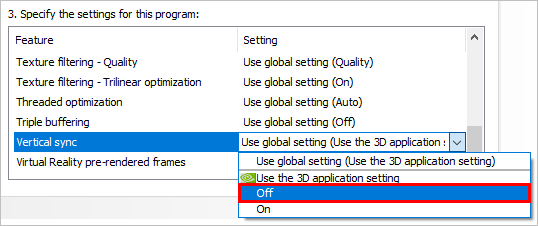
- Turn off Vertical Sync.
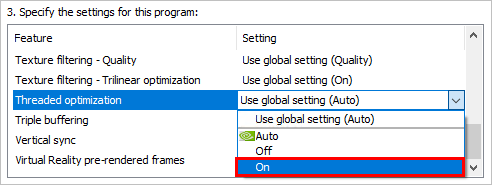
- Turn on Threaded Optimization.
- Set Preferred Refresh Rate to Highest available.
- Set Monitor Technology to G-SYNC (if it’s there).
- Set Multi-Display/Mixed-GPU Acceleration to Single display performance mode.
- Click Apply to save the settings.
Run PUBG to see if the FPS improves in the game. If not, try the next tip below to update your graphics driver to the latest version.
Tip 2: Update your graphics driver
An outdated or corrupted graphics driver may be the root of your low FPS. Try updating your graphics driver to see if you can get a higher FPS.
There are two ways to update your graphics card driver: manually and automatically.
Manually update your graphics driver – You can update your graphics driver manually by going to the manufacturer’s website, and searching for the latest driver for your graphics card.
OR
Update your graphics driver automatically – If you don’t have the time, patience or computer skills to update your graphics driver manually, you can, instead, do it automatically with Driver Easy. You don’t need to know exactly what system your computer is running, you don’t need to risk downloading and installing the wrong driver, and you don’t need to worry about making a mistake when installing. Driver Easy handles it all.
- Download and install Driver Easy.
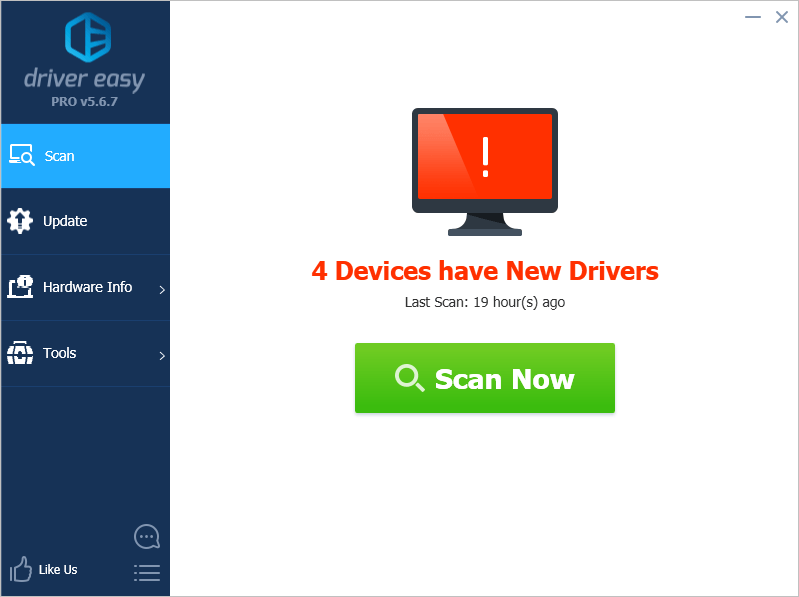
- Run Driver Easy and click the Scan Now button. Driver Easy will then scan your computer and detect any problem drivers.
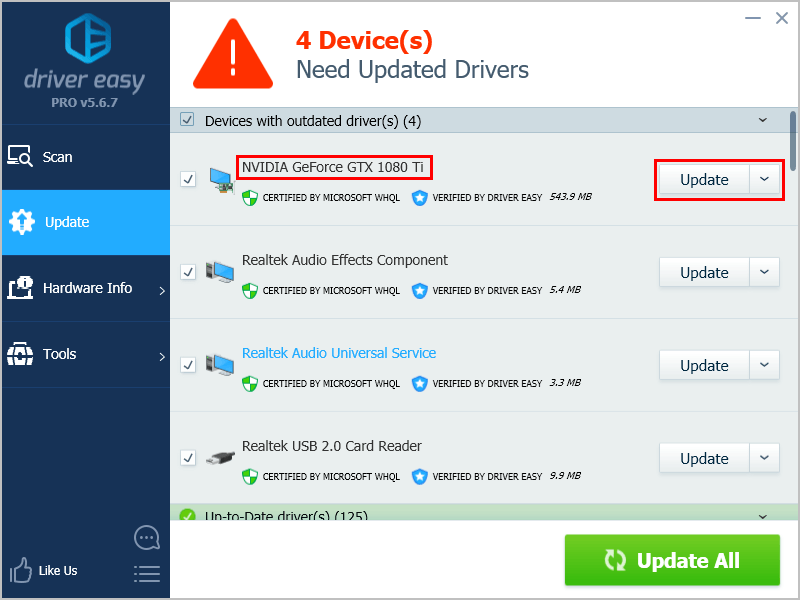
- Click Update next to your graphics card to automatically download the correct version of its driver, then you can install it manually. Or click Update All to automatically download and install the correct version of all the drivers that are missing or out of date on your system (This requires the Pro version – you’ll be prompted to upgrade when you click Update All. You get full support and a 30-day money back guarantee).
You can do it for free if you like, but it’s partly manual. If you need assistance, please contact Driver Easy’s support team at support@drivereasy.com.


