Want to set up a gaming steering wheel on your PC for a better gaming experience? You’ve come to the right place! After reading this article, you’ll know exactly what to do.
3 simple steps:
- Install your gaming steering wheel
- Install the correct driver for your gaming steering wheel
- Configure your Racing Wheel
Step 1: Install your gaming steering wheel
- Attach the pedals (and shifter) to the Racing Wheel.
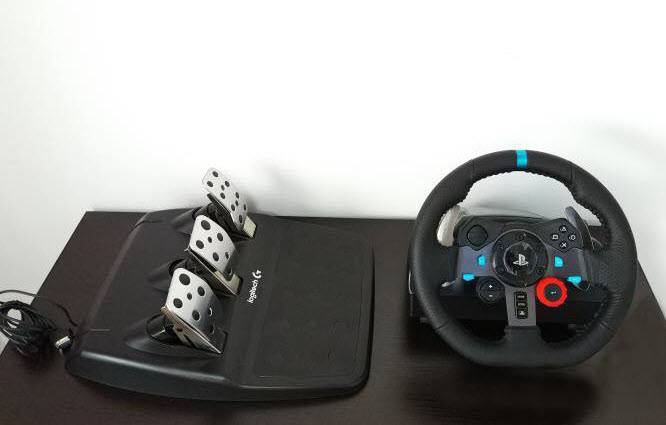
- Attach the power adapter to the Racing Wheel.
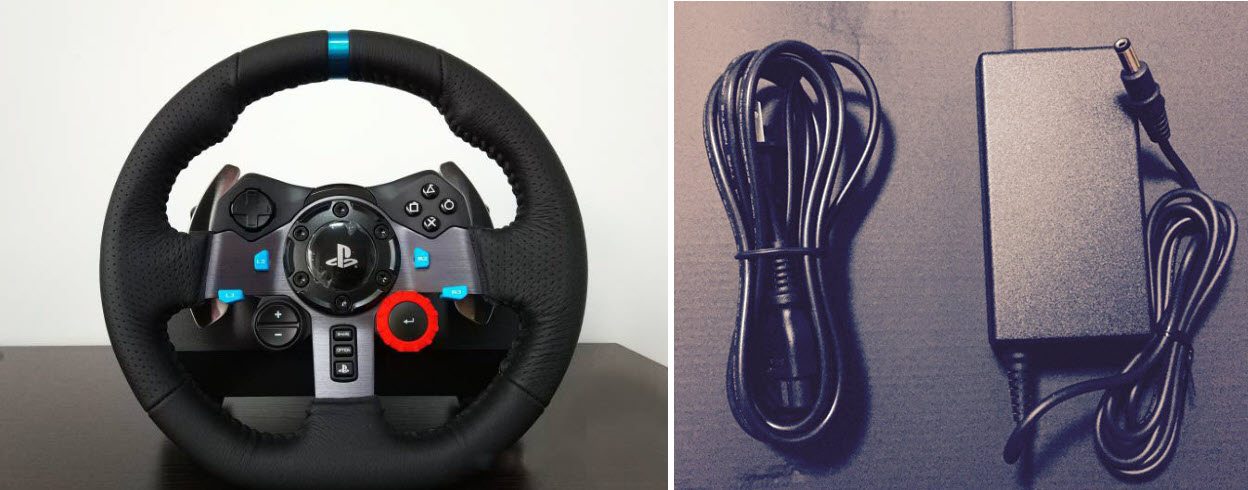
- Connect your Racing Wheel to a free USB port on your PC.
- Set the pedals, shifter and wheel up on the seat in their designed position.
- Set your wheel to the correct mode.
- Turn on your computer, and plug your Racing Wheel into an electrical outlet.
Step 2: Install the correct driver for your gaming steering wheel
If your PC doesn’t identify your gaming steering wheel, you’ll need to install the correct driver for it. There are 2 ways you can get the driver for your device:
- Option 1 – Download and install the driver manually
- Option 2 – Automatically install the driver (Recommended)
Option 1 – Download and install the driver manually
The manufacturer of your Racing Wheel keeps updating drivers. To get the correct driver for your device, you need to go to the manufacturer website, find the driver corresponding with your specific flavor of Windows version (for example, Windows 32 bit) and download the driver manually.
The following shows an example of how to download the driver for a Logitech gaming steering wheel:
- Go to the Logitech official website, then click SUPPORT > Downloads.
- Type model numbers of your device on the search box, then select your product from the list.

- Click Downloads.
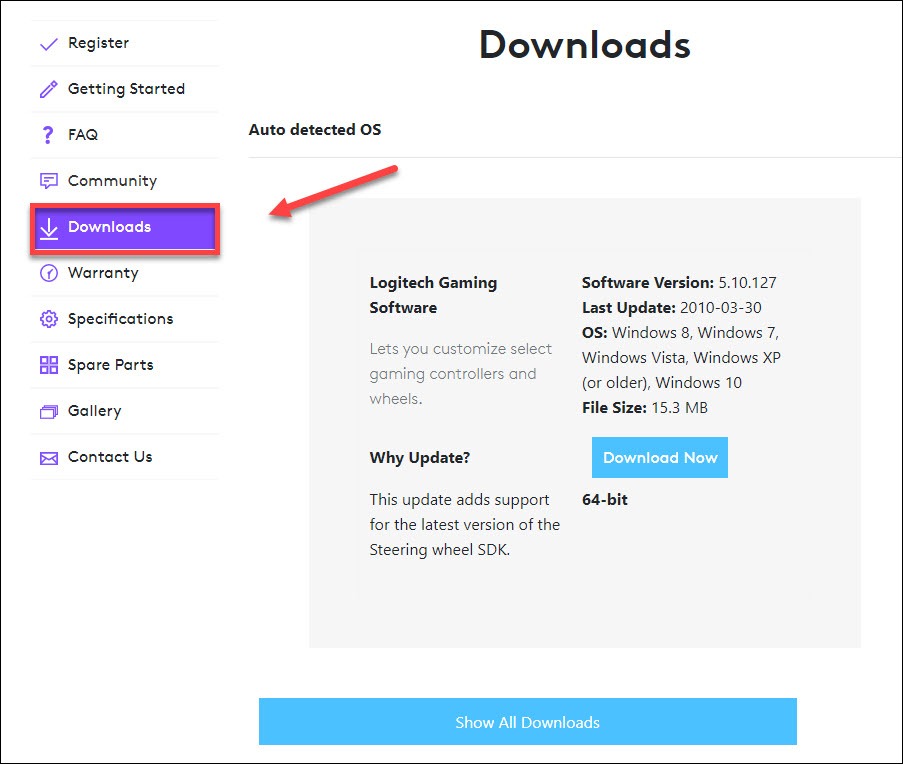
- Find the driver you need, then click Download Now.
- Once you’ve downloaded the correct driver for your system, double-click on the downloaded file and follow the on-screen instructions to install the driver.
Option 2 – Automatically install the driver
If you don’t have the time, patience or computer skills to update your driver manually, you can do it automatically with Driver Easy.
Driver Easy will automatically recognize your system and find the correct drivers for it. You don’t need to know exactly what system your computer is running, you don’t need to risk downloading and installing the wrong driver, and you don’t need to worry about making a mistake when installing.
You can update your drivers automatically with either the 7 days free trial or the Pro version of Driver Easy. It takes just 2 clicks, and you get full support and a 30-day money-back guarantee with the Pro version:
- Download and install Driver Easy.
- Run Driver Easy and click the Scan Now button. Driver Easy will then scan your computer and detect any problem drivers.
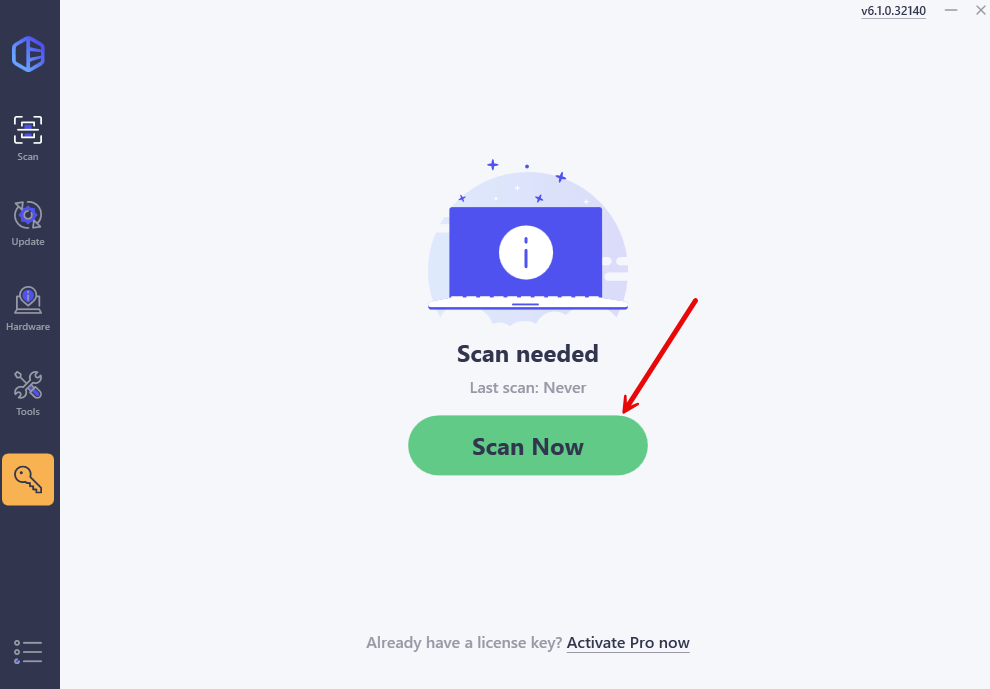
- Click the Activate & Update button next to the flagged device to automatically download and install the correct version of this driver.
Or click Update All to automatically download and install the correct version of all the drivers that are missing or out of date on your system (You’ll need the Pro version for this – when you select Update All, you’ll get a prompt to upgrade. If you’re not prepared to purchase the Pro version yet, Driver Easy provides a 7-day trial at no cost, granting access to all Pro features like fast downloads and easy installation. No charges will occur until after your 7-day trial period ends.)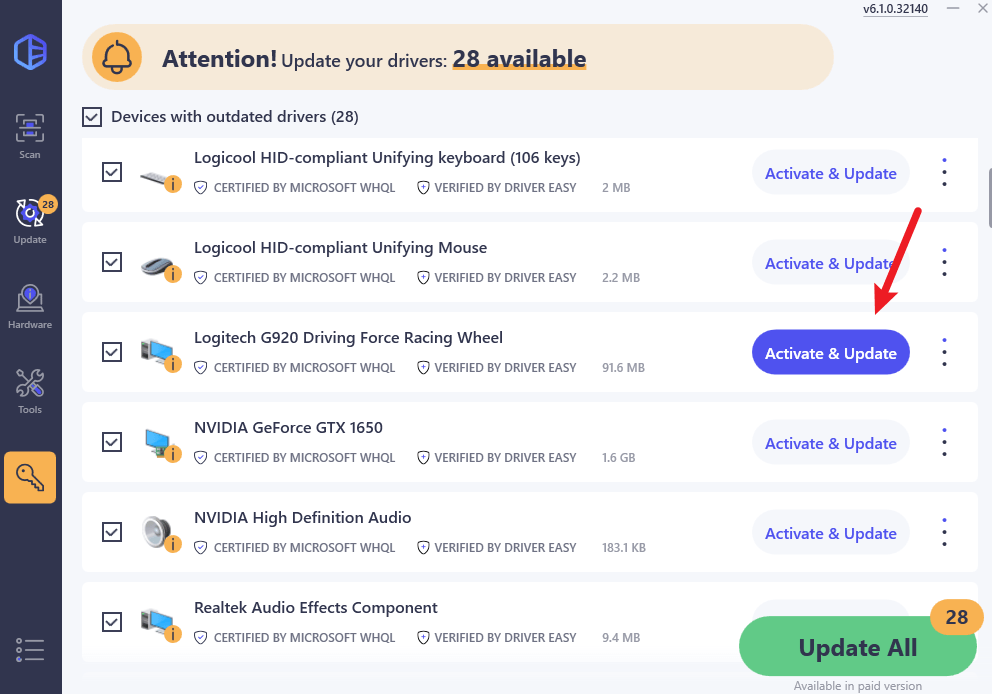
- After updating, restart your computer to take effect.
Step 3: Configure your Racing Wheel
Now let’s configure the racing wheel and ensure it is working correctly.
The following shows as an example of setting up Logitech G27 racing wheel on PC:
- Run the driver program.
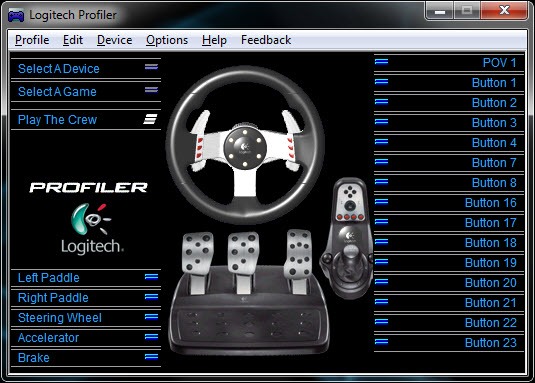
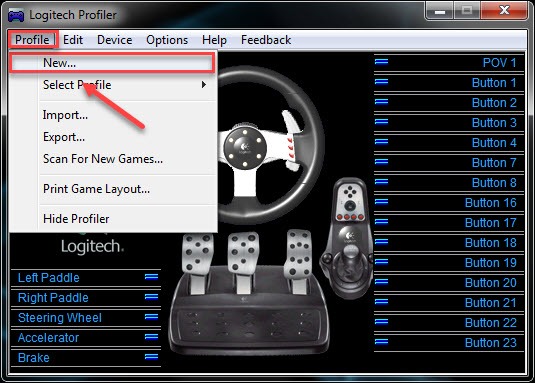
- Click Profile >New.
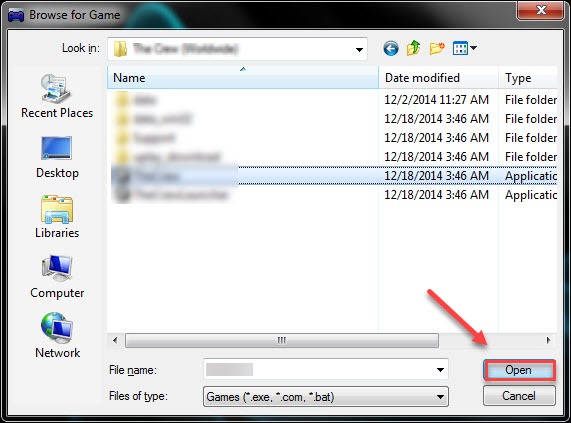
- Add the game you want to play to the program.
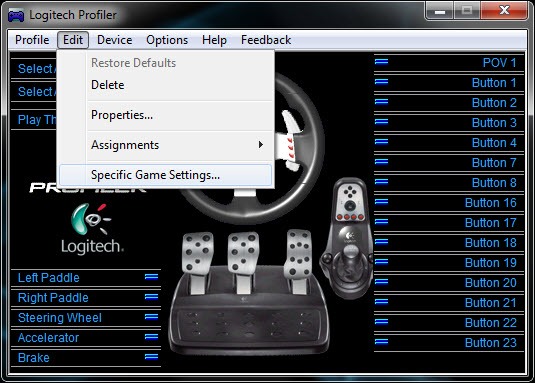
- Click Edit > Specific Game Settings.
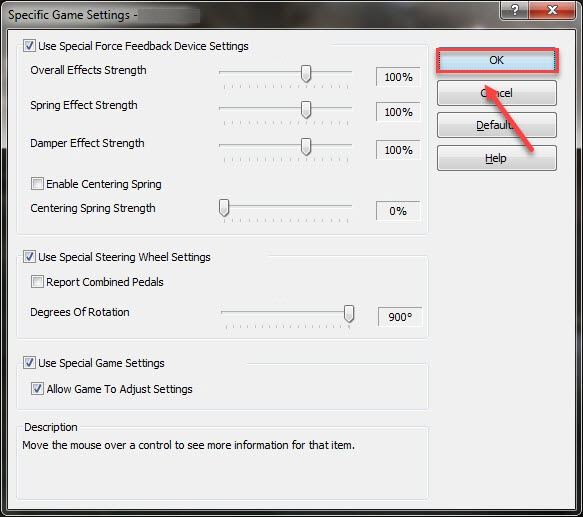
- Configure your racing wheel according to the screenshot below, then click OK.
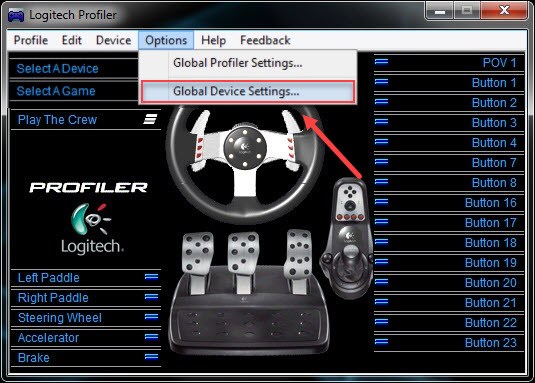
- Click Options> Global Device Settings.
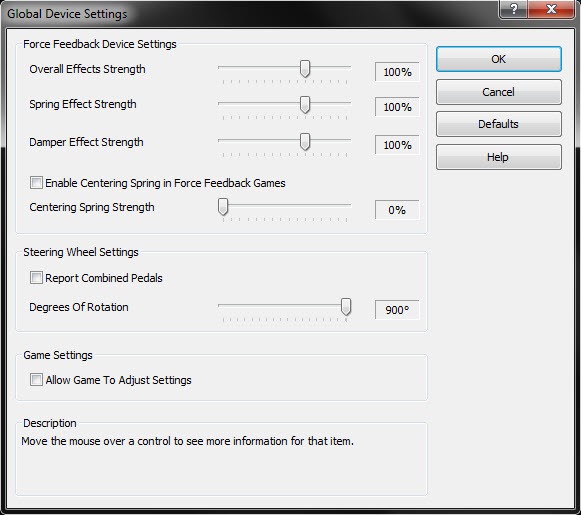
- Apply the following settings:
Hopefully, this article helped. If you have any questions or suggestions, please leave a comment below.
Bonus Tip: How to Buy Video Games for Cheap
If you want to update your game library but your budget is tight, give Coupert a try! Coupert is a browser extension available for Chrome, Firefox, and Edge. It automatically finds the coupons for the site you’re on.
Once you’ve signed up and installed the extension, you just go to the site and shop as you normally do. Go to checkout – if there are any coupons available, the extension will pop up an alert.
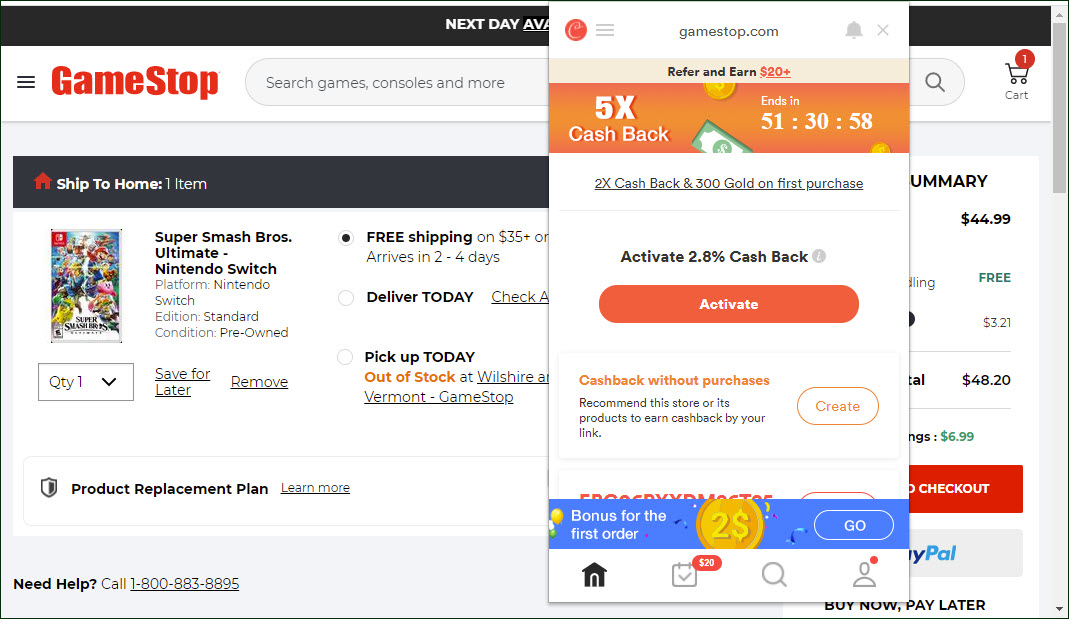
You just click ‘Apply Coupons’, and it will try them all to find the one that gives you the best discount, then apply it for you automatically. So you get the best available discount without even lifting a finger!


