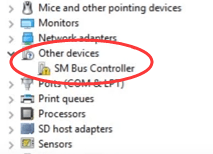
Getting an “SM Bus Controller doesn’t have a driver” error on your computer? That yellow exclamation mark in Device Manager means the System Management Bus (SM Bus) driver is missing. And yes, it’s part of your motherboard’s chipset.
The fix is simple: just install the right chipset drivers. In this article, we’ll show you how to update chipset drivers, so you can get your system back in shape.
Method 1: Download Intel Chipset Drivers Automatically
While Intel and AMD provide a “one-size-fits-all” chipset driver, updating manually still requires some effort. You’ll need to identify your chipset, visit the correct support page, and install the driver yourself. While the process is straightforward, it can be time-consuming, especially if you’re not familiar with it. If you’re looking for a simpler and faster way to update your drivers manually, you can do it automatically with Driver Easy.
Driver Easy will automatically recognize your system and find the correct chipset driver for it. You don’t need to know exactly what system your computer is running, you don’t need to be troubled by the wrong driver you would be downloading, and you don’t need to worry about making a mistake when installing. Driver Easy handles it all.
Driver Easy offers a 7-day free trial, so you can try it out without commitment and automatically update your drivers. If you’re happy with the results, you can continue with the Pro version.
1) Download and install Driver Easy.
2) Run Driver Easy and click the Scan Now button. Driver Easy will then scan your computer and detect any problem drivers.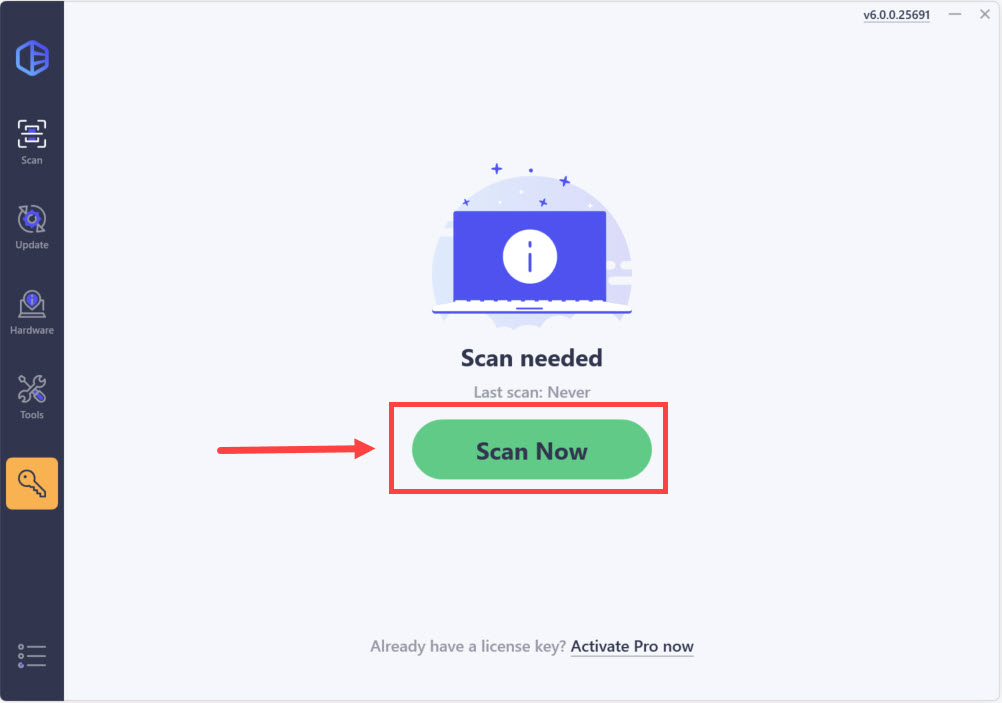
3) Click Update All to automatically download and install the correct version of all missing or outdated drivers on your system. This will prompt the option to start the 7-day free trial or upgrade to the Pro version. Either option will download and install the latest drivers automatically for you.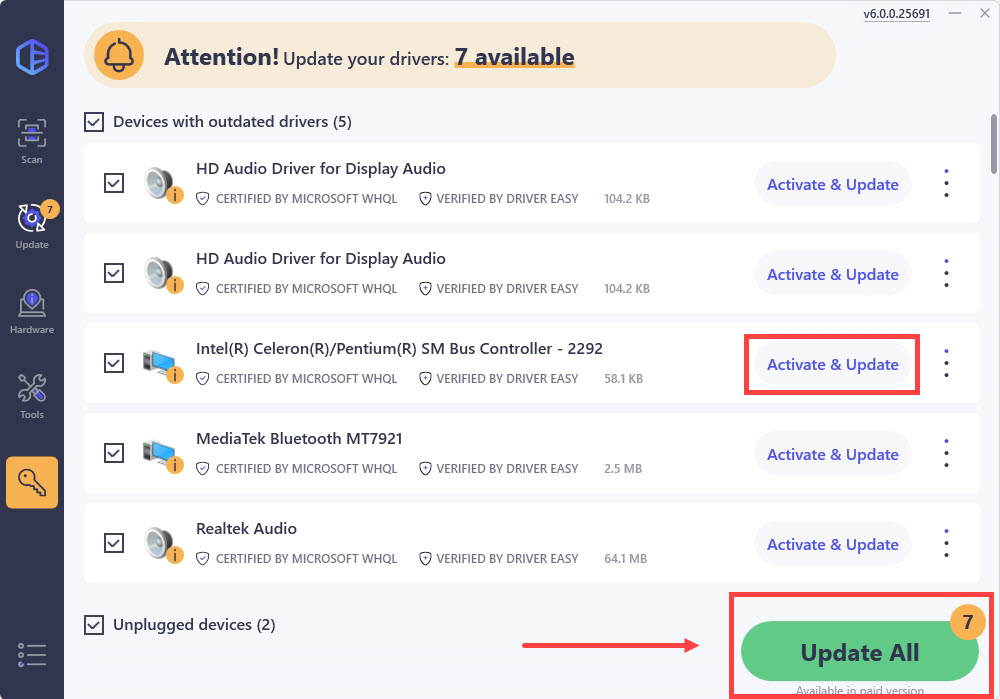
If you need assistance, please contact Driver Easy’s support team at support@drivereasy.com.
Method 2: Download Intel Chipset Drivers Manually
If you’re up for a little manual work, downloading the chipset drivers directly from Intel or AMD is a solid way to go. It gives you full control over what’s being installed, and makes sure you’re getting the latest version straight from the source.
Here’s how to grab the right chipset driver directly from the official sites of Intel and AMD.
If you’re on Intel:
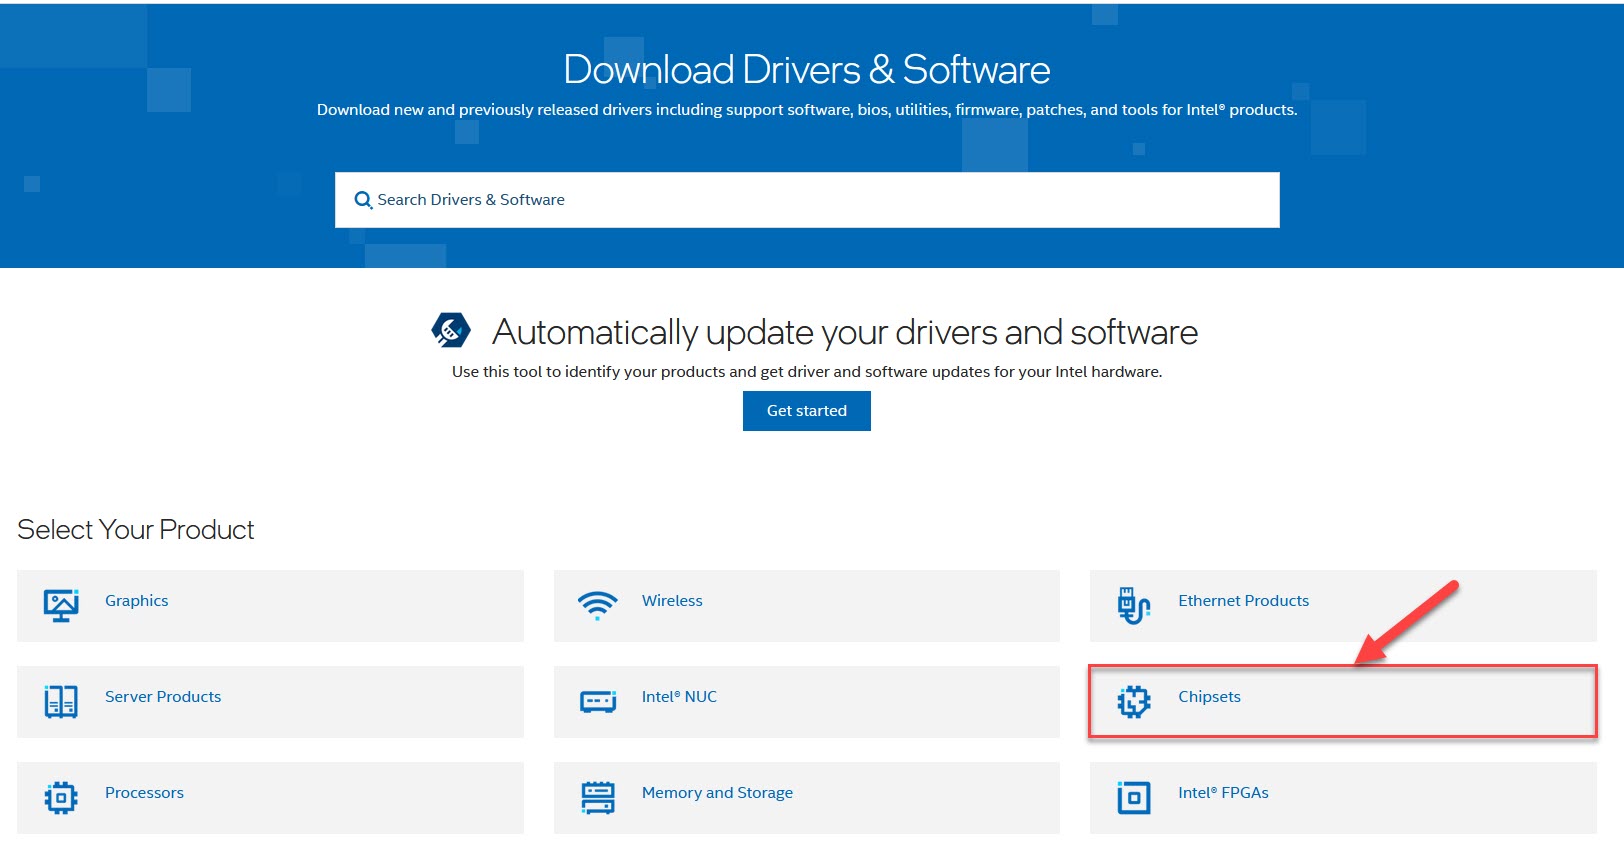
- Go to the Intel Downloads Center.
- In Intel’s download center, click Chipset from the Select Your Product section.
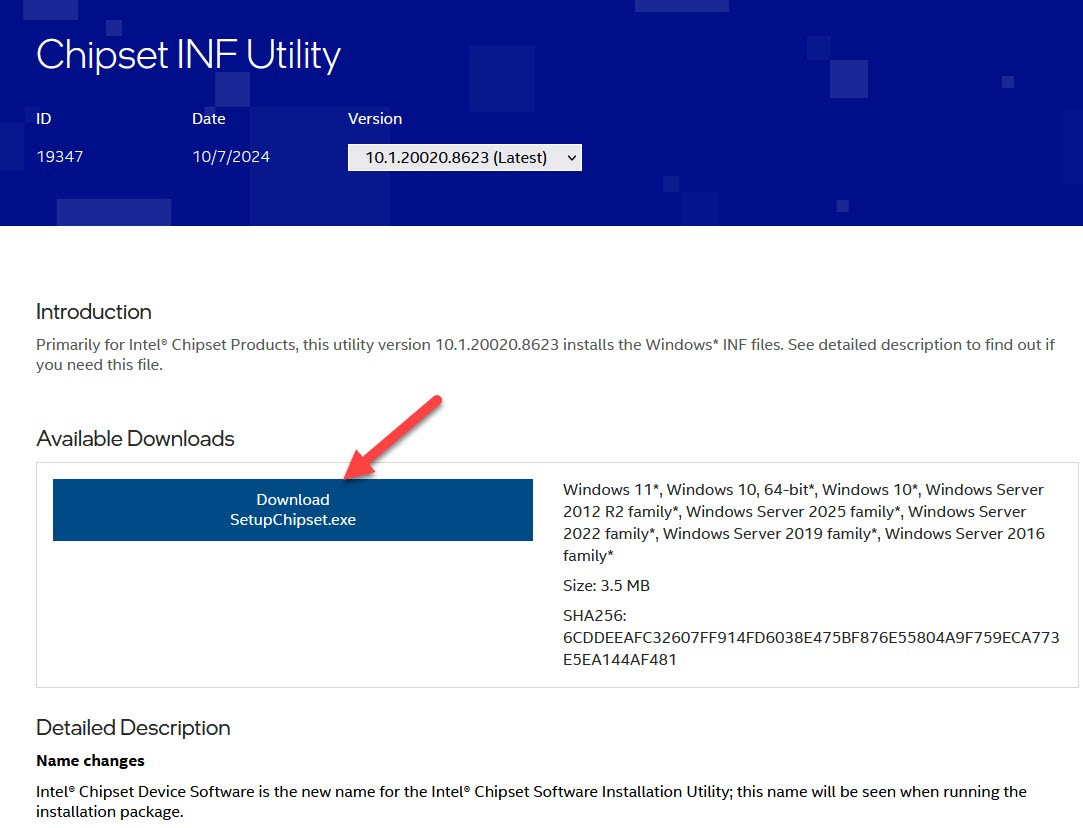
- Locate Chipset INF Utility and click View Details.
- Click Download, then install the utility by following the on-screen instructions.
Note: You may also see other chipset-related drivers like Intel® QuickAssist Technology Driver and Intel® Server Chipset Driver, but these are designed for specific hardware (e.g., data center acceleration or server boards) and not needed for regular consumer PCs. - Restart your computer for the changes to take effect.
If you’re on AMD:
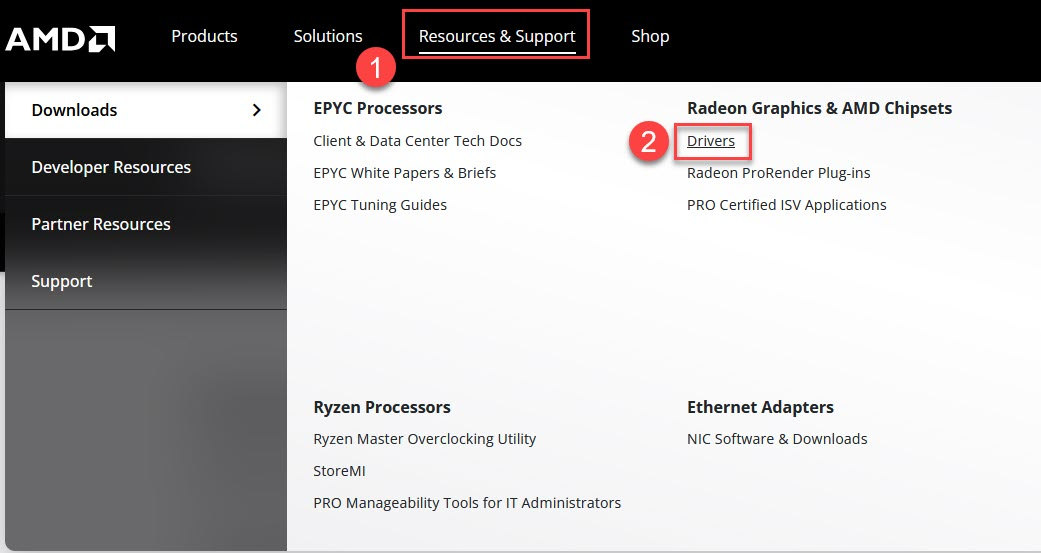
- Go to AMD’s driver download page.
- Click Resources & Support > Drivers.
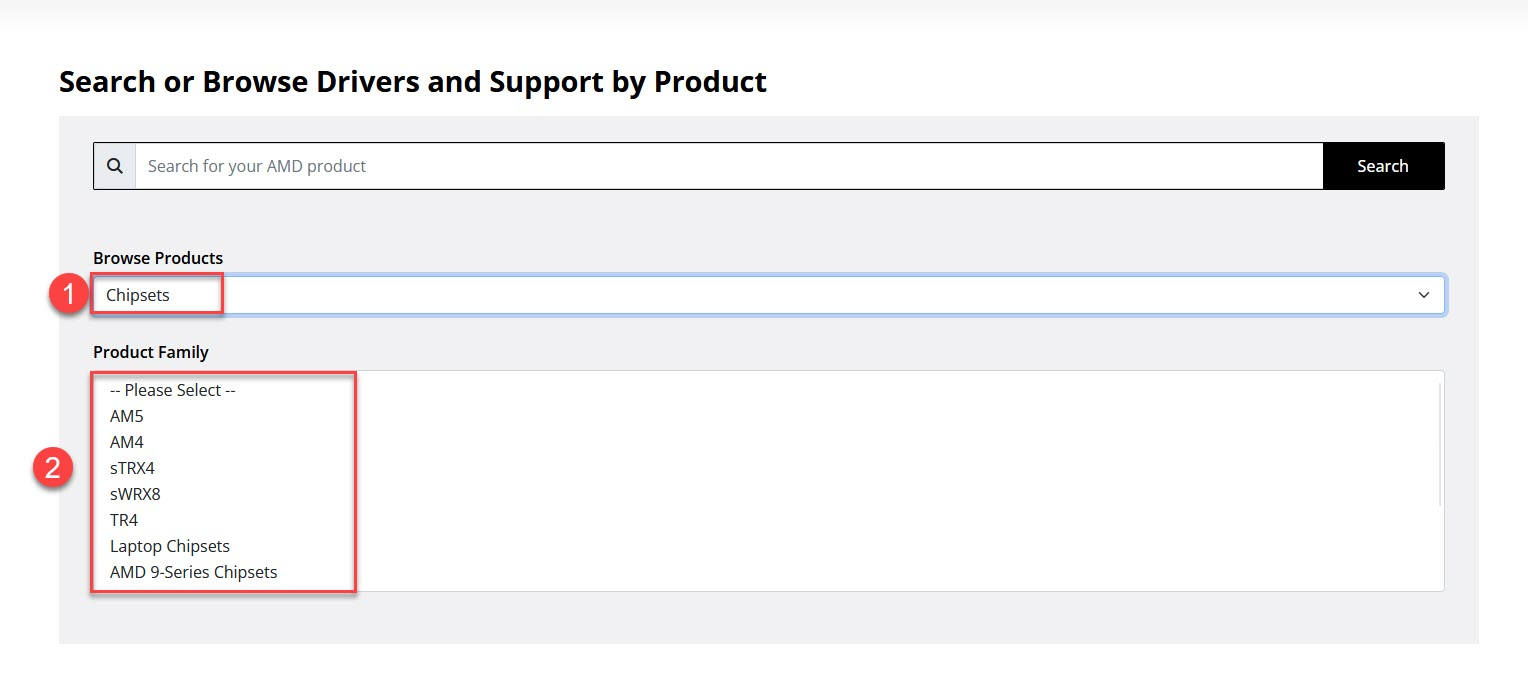
- Under the Browse for your product section, select Chipsets as the product category. Then choose any option from the Product Family list (e.g., AM4, AM5, etc.) and press Enter—they all lead to the same driver package.
- Download the latest Chipset Drivers and run the installer.
- Restart your computer for the changes to take effect.
Not sure whether you’re using an Intel or AMD chipset?
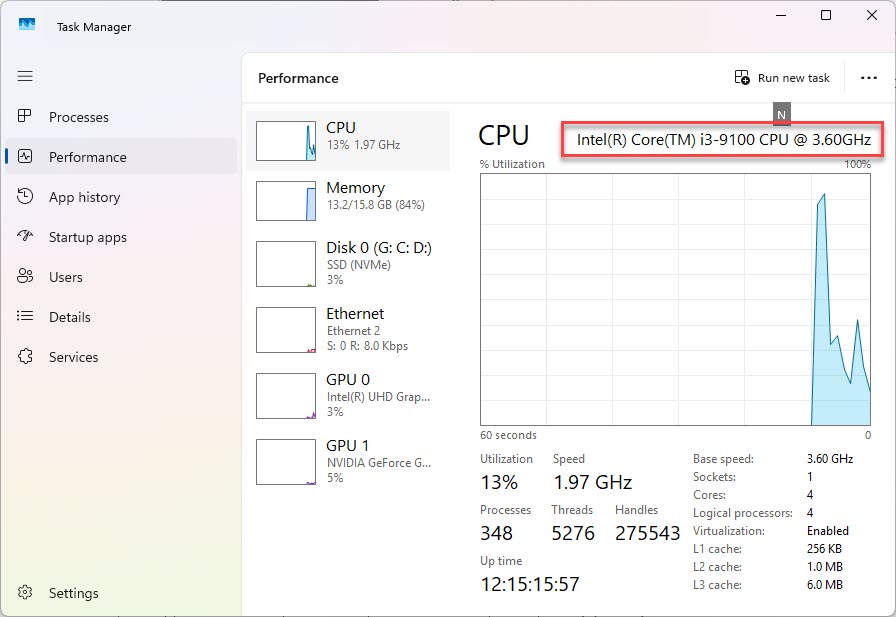
You could easily check it out via Task Manager. Here’s a quick rundown:
- On your keyboard, press Ctrl, Shift, and Esc at the same time to bring up Task Manager.
- Go to the Performance tab, then under the CPU section, you’ll see the processor’s name — either “Intel” or “AMD.”