
Alienware Command Center allows you to get the most of your gaming rig, but first you need to get it working. Many gamers are having issues with Alienware Command Center, and the common ones include app not loading, settings not working and software not opening.
But don’t worry if you’re on the same boat. Here’re some proven fixes that can get your Command Center working in a jiff.
Try these fixes
You might not need to try all of them; simply work your way down until you find the one that does the trick.
- Check for Windows updates
- Update your drivers
- Try the Microsoft .NET Framework Repair Tool
- Reinstall ACC completely
- Scan and repair Windows
- Perform a clean boot
Fix 1: Check for Windows updates
First you need to make sure your PC has all the latest system patches. The two types of patches, security updates and feature updates, could fix compatibility issues and improve overall stability. If you don’t remember when was the last time you checked for updates, definitely do it now.
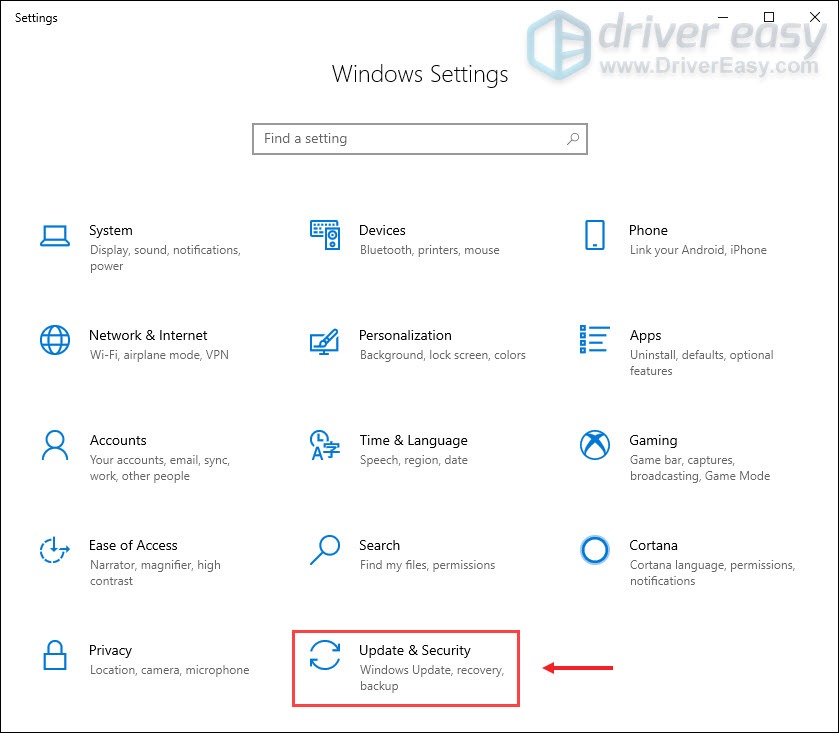
- On your keyboard, press Win+I (the Windows logo key and the i key) to open the Windows Settings app. Click Update & Security.
- Click Check for updates. Windows will then download and install the available patches. It might take some time (up to 30 mins).
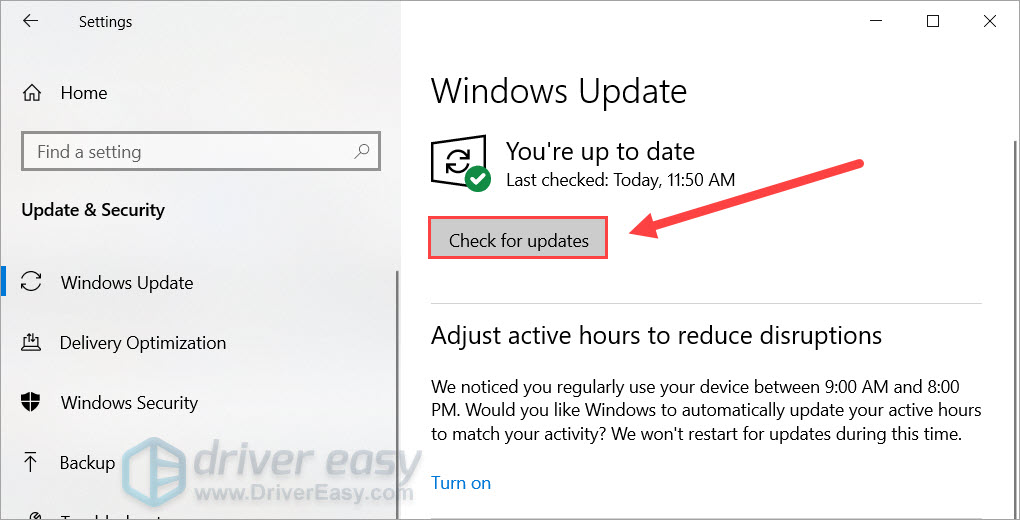
Once you’ve installed all the system updates, restart and check if ACC is working now.
If this doesn’t work for you, take a look at the next fix.
Fix 2: Update your drivers
In some cases, you’re actually dealing with a driver issue, especially when you notice some settings aren’t working as expected. To get the most of your hardware, you should always make sure to have the latest correct drivers.
You can update your drivers manually, by visiting the hardware manufacturers’ websites (use dell.com if it’s a Alienware gaming PC), downloading the correct installers and installing step by step. But if you’re not comfortable playing with device drivers, you can use Driver Easy to scan, repair and update all the drivers automatically.
You can update your drivers automatically with either the 7 days free trial or the Pro version of Driver Easy. It takes just 2 clicks, and you get full support and a 30-day money-back guarantee with the Pro version:
- Download and install Driver Easy.
- Run Driver Easy and click the Scan Now button. Driver Easy will then scan your computer and detect any problem drivers.

- Click the Activate & Update button next to the flagged device to automatically download and install the correct version of this driver.
Or click Update All to automatically download and install the correct version of all the drivers that are missing or out of date on your system (You’ll need the Pro version for this – when you select Update All, you’ll get a prompt to upgrade. If you’re not prepared to purchase the Pro version yet, Driver Easy provides a 7-day trial at no cost, granting access to all Pro features like fast downloads and easy installation. No charges will occur until after your 7-day trial period ends.)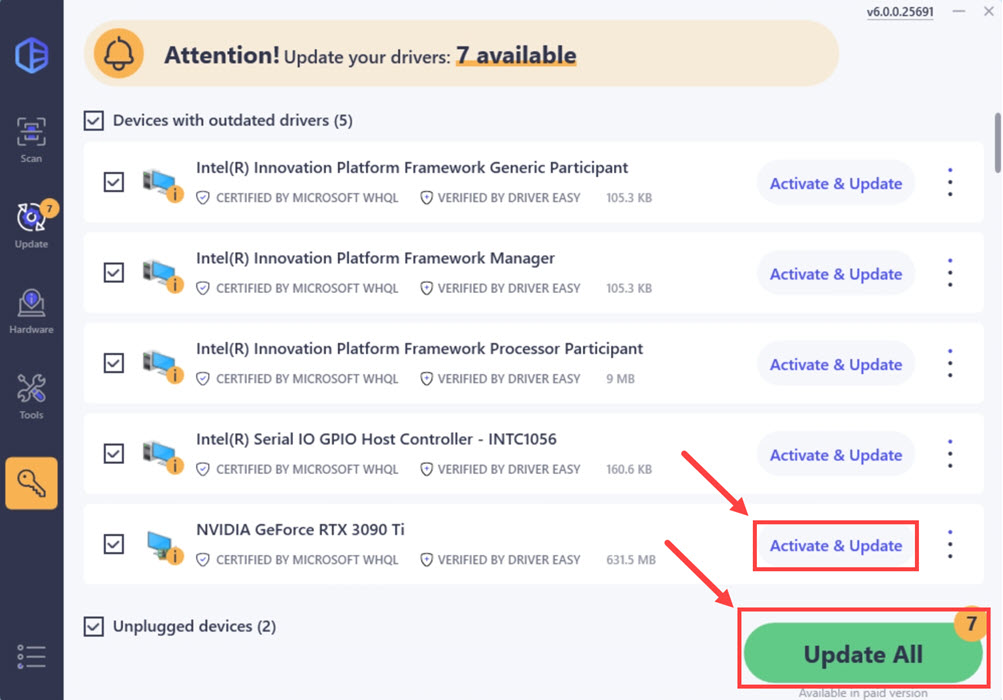
- After updating, restart your computer to take effect.
After updating all the drivers, do a reboot and check if ACC works now.
If the latest drivers can’t help you, take a look at the next fix.
Fix 3: Try the Microsoft .NET Framework Repair Tool
Incorrectly configured or corrupted .NET Framework could also be the culprit to the ACC not working problem. To fix it, you can try to download the Microsoft .NET Framework Repair Tool from here: https://www.microsoft.com/en-us/download/details.aspx?id=30135
After the download, double-click the setup file to run the installation, then run the repair tool as per on-screen instructions.
If the repair tool can’t fix the ACC not working problem for you, please move on.
Fix 4: Reinstall ACC completely
According to many users on Reddit, reinstalling ACC completely is a potential fix to most of the common issues. You can use the guide below to do a clean reinstall of ACC and see how it goes.
Uninstall ACC completely
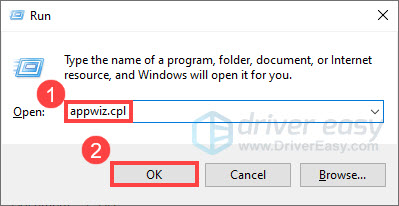
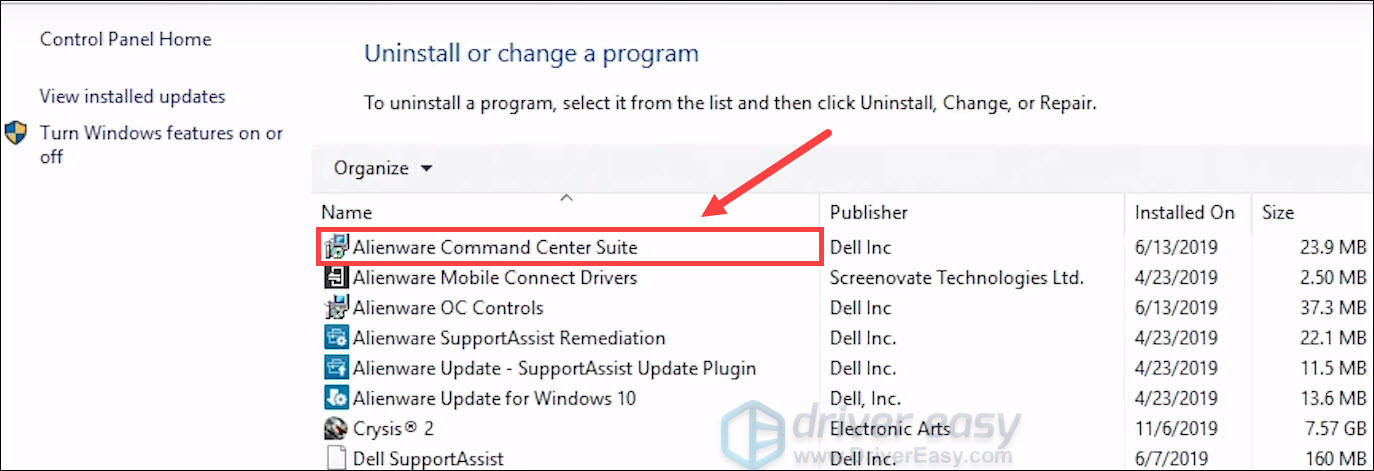
- First you need to remove ACC completely. On your keyboard, press Win+R (the Windows logo key and the R key) and type or paste appwiz.cpl. Then Click OK.
- Double click Alienware Command Center Suite to uninstall the program. Follow the on-screen instructions to complete the uninstallation.
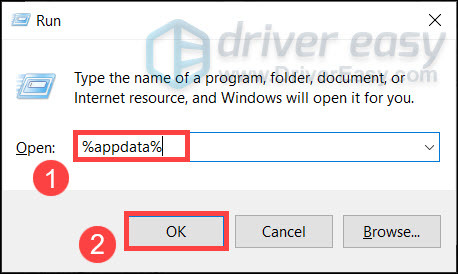
- Next you need to purge the remaining files. On your keyboard, press Win+R and type or paste %appdata%. Click OK. Then delete any Alienware folders.
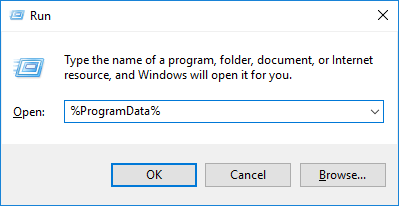
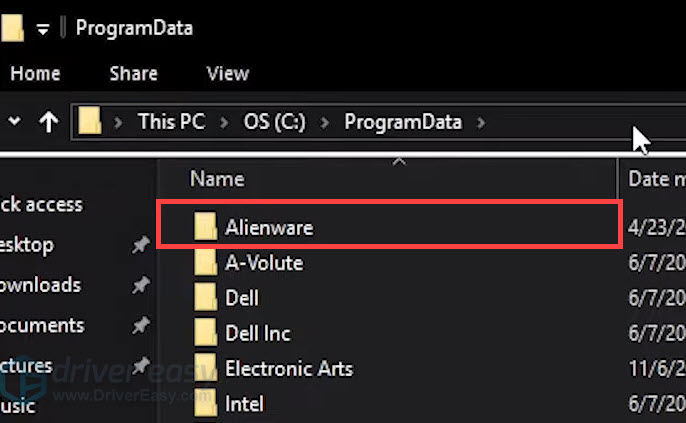
- Next, press Win+R again and type or paste %programdata%. Then press Enter.
- Delete any Alienware folders.
- Next, press Win+R again and type or paste %programfiles%. Then click OK.
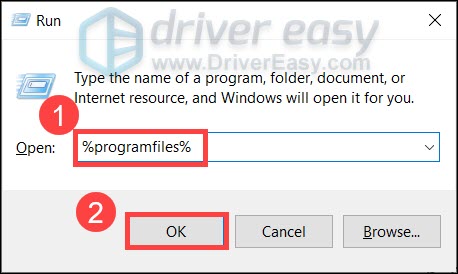
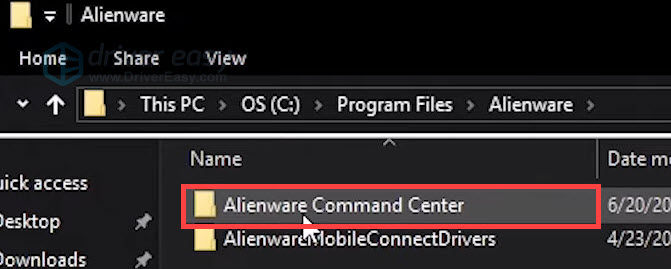
- Enter the Alienware folder. Delete the Alienware Command Center folder.
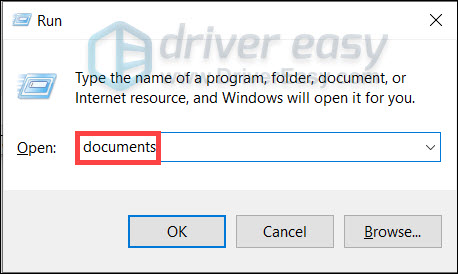
- Use Win+R to invoke the Run dialog. Type or paste documents and press Enter.
- Delete the AlienFX and Alienware TactX folders.
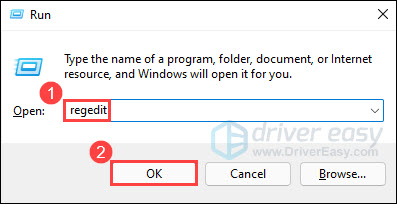
- Press Win+R, type or paste regedit and click OK.
- In the address bar, type or paste HKEY_LOCAL_MACHINE\SOFTWARE\Alienware and press Enter.
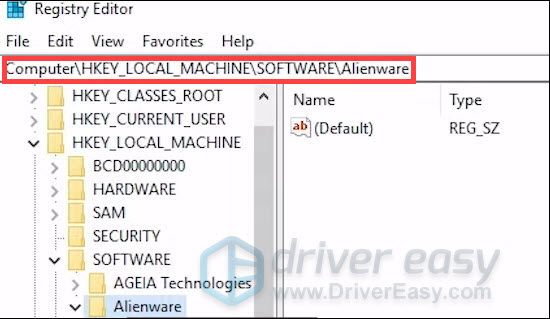
- Delete the following folders:
1. AlienFXMediaPlugin
2. Alienware AlienFX
3. CCPlugins
4. Command Center - In the address bar, type or paste HKEY_LOCAL_MACHINE\SOFTWARE\WOW6432Node\Alienware and press Enter.
- Delete the following folders:
1. AlienFXMediaPlugin
2. Alienware AlienFX
3. Command Center - Restart your PC.
Install ACC from scratch
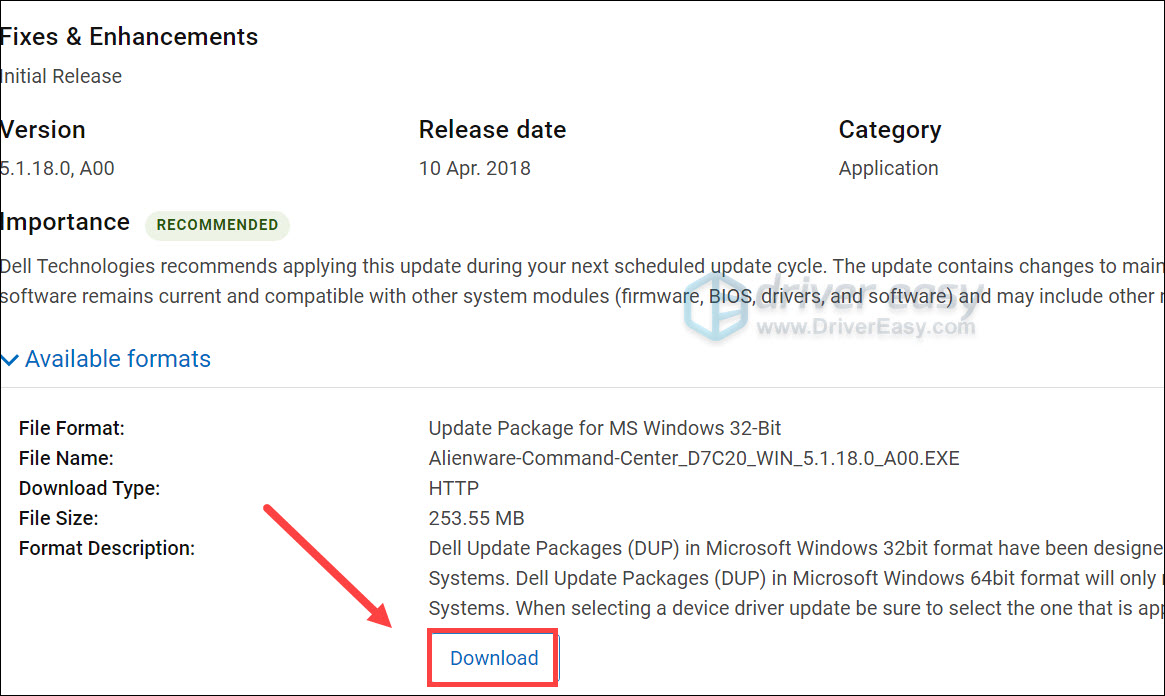
- Download the latest Alienware Command Center. (Screenshot for reference only)
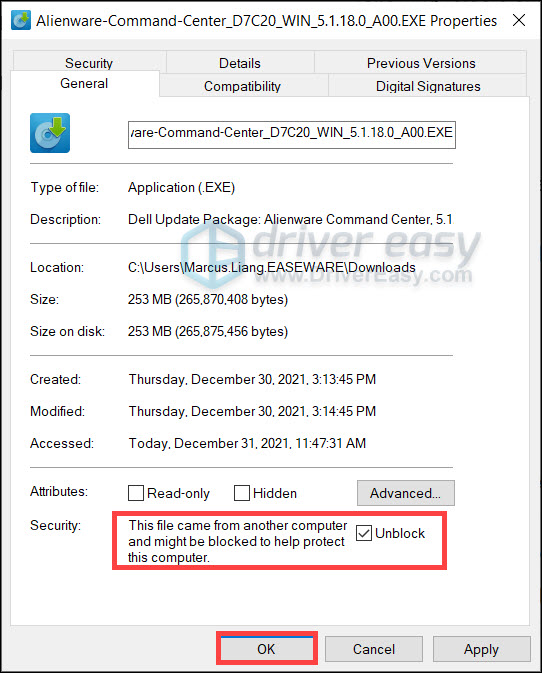
- Right click the downloaded ACC installer and select Properties. Next to Security, check the box before Unblock and click OK.
- Double click the installer and follow the on-screen instructions to install.
- Once done, check if ACC is working now.
If a fresh reinstall doesn’t help you, take a look at the next fix.
Fix 5: Scan and repair Windows
In some cases, it indicates a critical computer problem. While you can use the nuclear method and reinstall the entire system, it’s better you first try scanning and repairing Windows.
Step 1. Scan corrupt files with System File Checker
1) On your keyboard, press the Windows logo key and R at the same time to open the Run box. Type cmd and press Ctrl+Shift+Enter to run Command Prompt as administrator.

Click Yes when prompted for permission to make changes to your device.
2) In the Command Prompt, type the following command and hit Enter.
sfc /scannow
3) System File Check will begin to scan all system files and repair any corrupted or missing ones it detected. This may take 3-5 minutes.
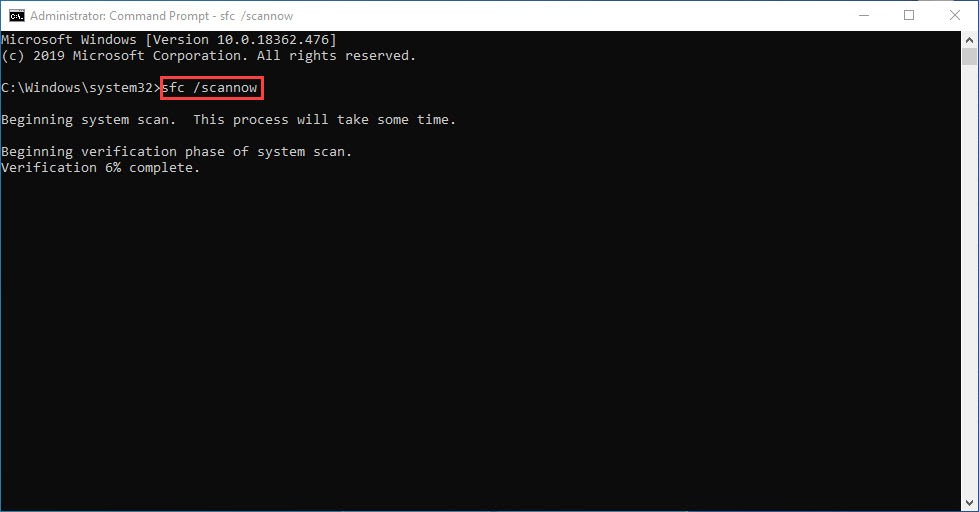
4) You may receive something like the following messages after the verification.
- no errors
- it fixed some errors
- could not fix all errors
- could not fix errors at all
- ……
No matter what message you receive, you can try running dism.exe (Deployment Image Servicing and Management) to further scan the health of your PC.
Step 2. Run dism.exe
1) Run Command Prompt as admin and enter the following commands.
- This command line will scan the health of your PC:
dism.exe /online /cleanup-image /scanhealth
- This command line will restore the health of your PC:
dism.exe /online /cleanup-image /restorehealth
2) After the restore health process finishes, you may get some error messages.
- If restore heath gave you errors, you can always try this command line. This will take up to 2 hours.
dism /online /cleanup-image /startcomponentcleanup
- If you get Error: 0x800F081F with the restore health scan, reboot your PC and run this command line.
Dism.exe /Online /Cleanup-Image /AnalyzeComponentStore
If the System File Check finds any files corrupted, follow the on-screen instructions to repair them, and then restart your computer for the changes to take full effect.
Fix 6: Perform a clean boot
If you have multiple monitoring tools, you might run into a conflict issue since they could all have background tasks or services fighting for resources. To see if that’s the problem, you can do a clean boot.
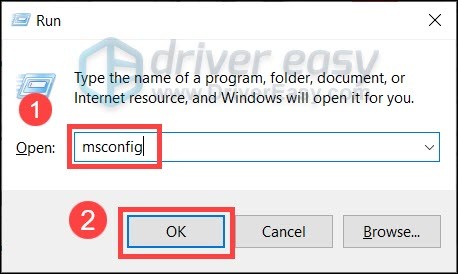
- On your keyboard, press Win+R (the Windows logo key and the r key) at the same time to invoke the Run box. Type or paste msconfig and click OK.
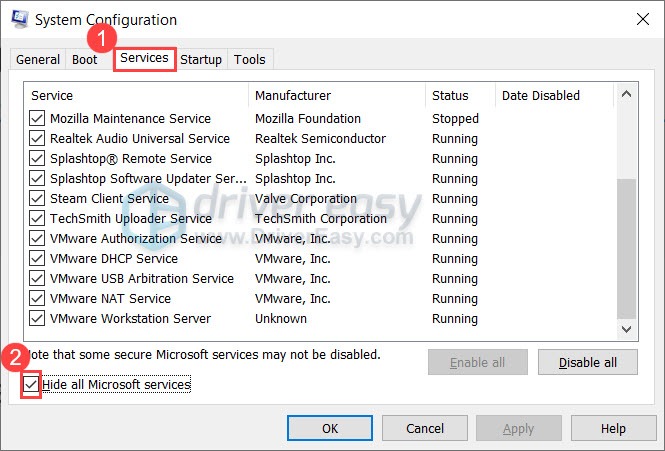
- In the pop-up window, navigate to the Services tab and check the box next to Hide all Microsoft services.
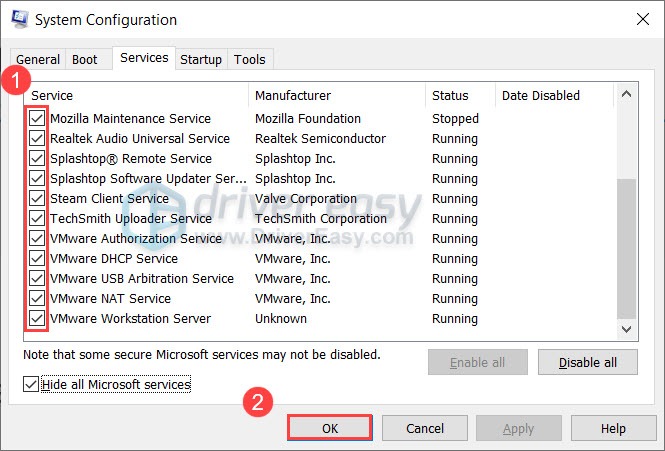
- Uncheck all the services EXCEPT those belong to your hardware manufacturers, such as Realtek, AMD, NVIDIA, Logitech and Intel. Then click OK to apply the changes.
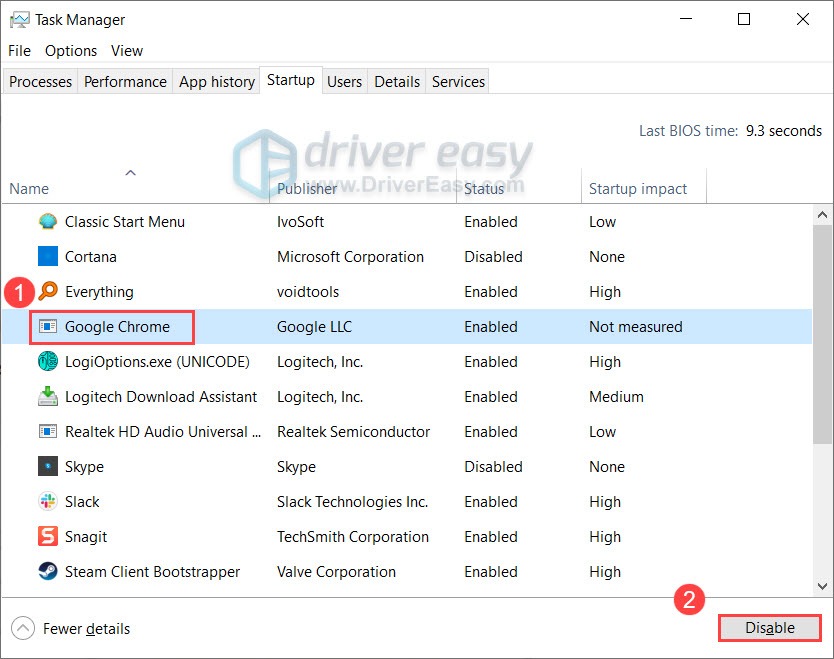
- On your keyboard, press Ctrl, Shift and Esc at the same time to open Task Manager, then navigate to the Startup tab.
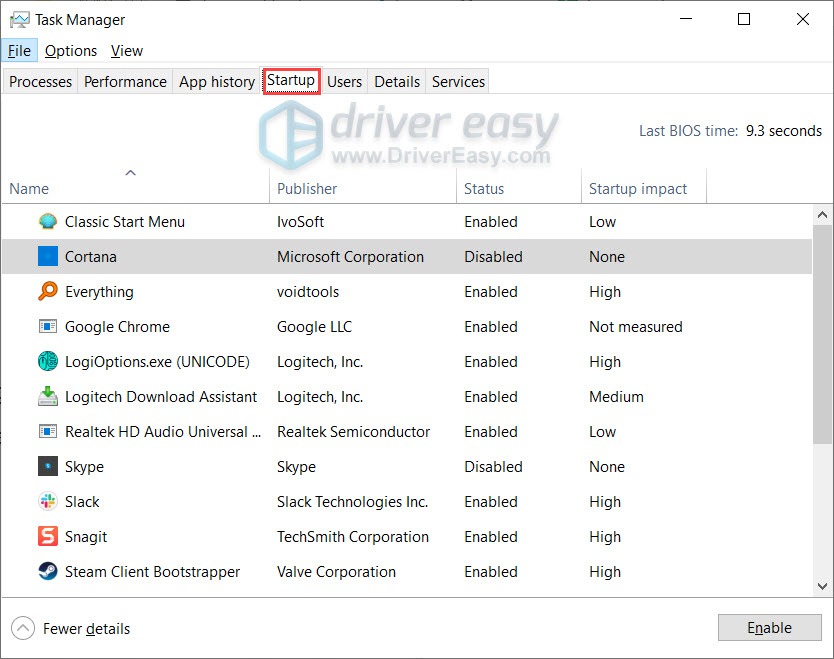
- One at a time, select any programs you suspect might be interfering, and click Disable.
- Restart your PC.
If the issue disappears after the reboot, repeat these steps and disable half of the services/programs to find out what is causing the problem.
Hopefully this tutorial helps you fix the ACC not working issue. If you have any questions or ideas, feel free to give us a shout in the comments below.


