It’s annoying when you can’t connect to the EA server or receive the error message saying Connection to server timed out. Is Apex Legends down again? Or it’s something wrong with your PC? Don’t worry, you’re not the only one, the methods below would help you fix the connection issue.
Try these fixes:
You don’t have to try them all; just work your way down the list until you find the one that works for you.
Method 1: Check the server status
The best way to check the server status is through the official channels. The Apex Legends Twitter account and the EA Help account offer support for Apex Legends. Also, there’re third-party sites that keeping updating server status.
If the servers are showing as down, it could be for maintenance or other issues on their end.
Tips: Steam server maintenance happens every Tuesday around 7:30 EST.
When it’s a server issue, the solution is apparently just to wait. There’s nothing you can do, avoid server maintenance time and play the game another time would be the solution.
For Steam users, if you still have this problem outside Steam’s maintenance period, try to eject all USB devices in the system and restart the game.
If you don’t have USB devices on but still have this issue, try to insert one such as a flash driver, then eject it and restart the game.
If you’re a Origin user, use the Origin Launcher, it would help.
If it’s not the server, please move to the next method.
Method 2: Change DNS to Google
Google is one of the free and public DNS servers. Some players find the connection issue could be solved by swapping their DNS to Google.
If you don’t know how to do it, this step-by-step guide will show you how to change it.
| Provider | Primary DNS (IPv4) | Secondary DNS |
|---|---|---|
| 8.8.8.8 | 8.8.4.4 |
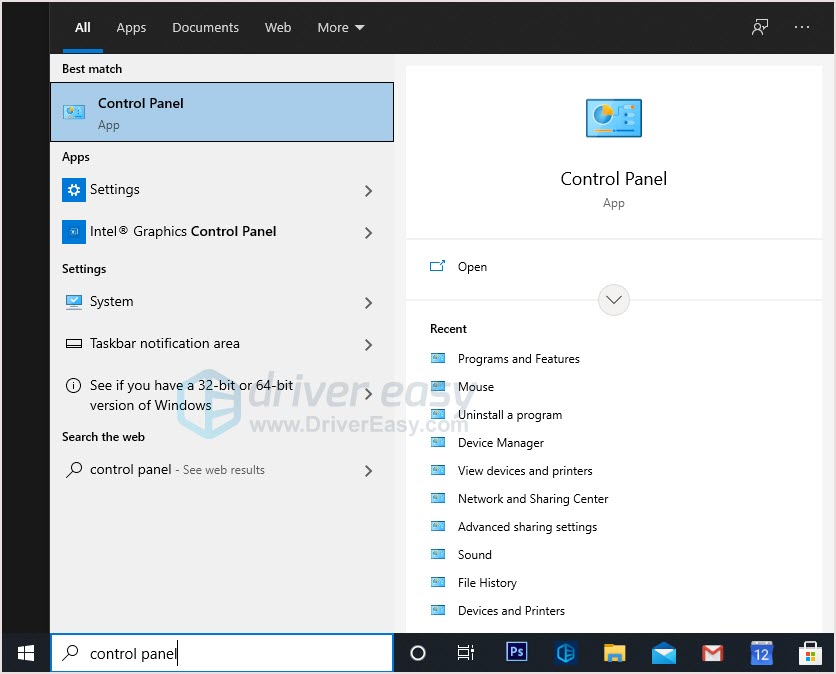
- Type Control Panel on the search bar and click to open.
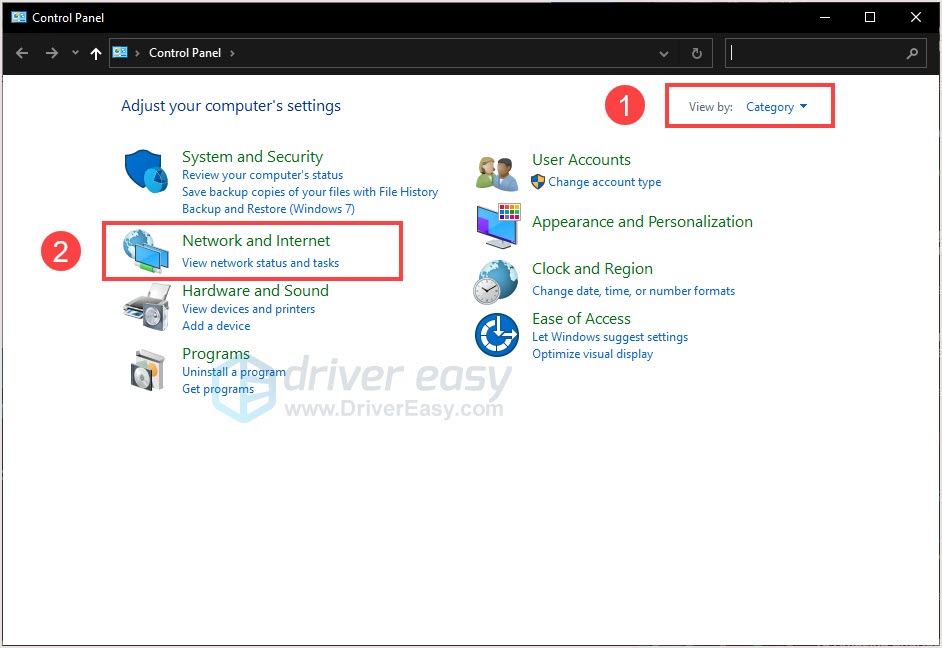
- Set Control Panel View by Category, then click Network and Internet.
- Click Network and Sharing Center > Change adapter settings.
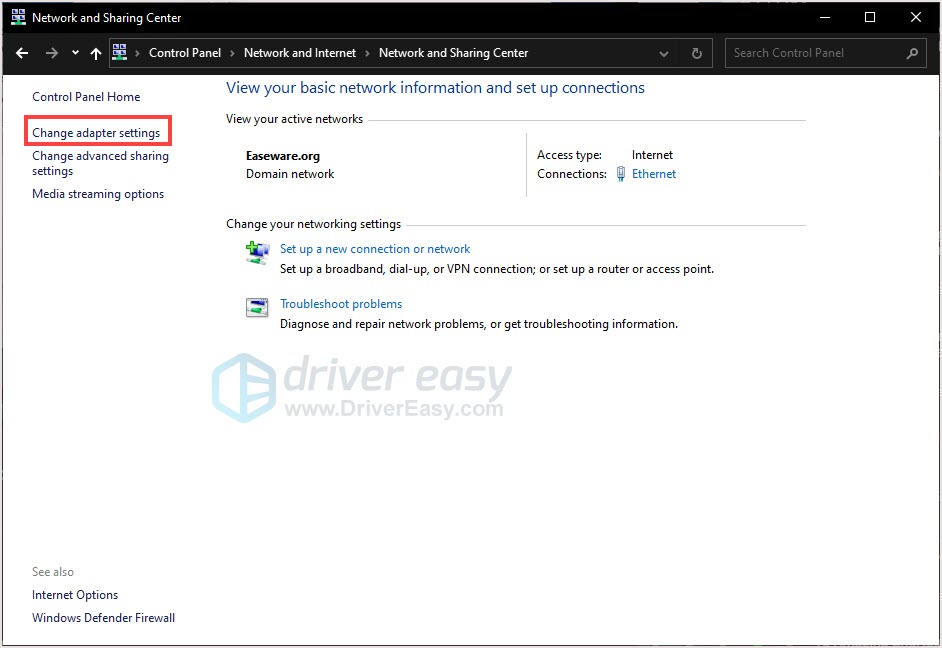
- Select the connection you want to configure Google Public DNS, right-click it, and select Properties.
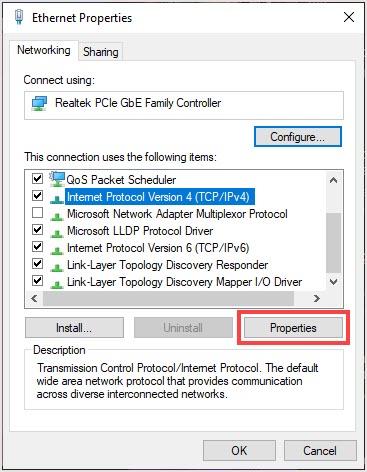
- Select the Networking tab, select Internet Protocol Version 4 (TCP/IPv4) under This connection uses the following items. Click Properties.
- Click Use the following DNS server addresses and enter the Google DNS server address.
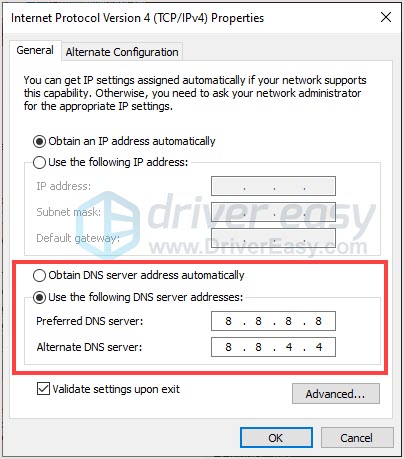
- Click OK to save the change.
- Reboot the game and check.
Method 3: Run as administrator
Some players suggest Run as administrator could fix this issue.
- Right-click the Apex Legends shortcut icon and click Properties.
- Click the Compatibility tab and check Run this program as administrator.
- Click Apply > OK to save changes.
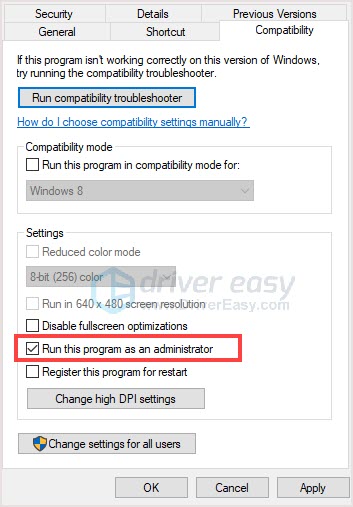
- Reboot the game and check.
If this method doesn’t help, please move to the next one.
Method 4: Update your drivers
Check your PC network adapter driver is also important. This driver would affect your internet connection when it’s outdated or broken. Updating the driver would simply fix this issue and improve your PC performance.
You can manually update these drivers by going to the manufacturer’s official websites, but there’s an easier way — use Driver Easy to automatically update your drivers.
Driver Easy will automatically recognize your system and find the correct drivers for your exact network adapter/ graphic card, and your Windows version, and it will download and install them correctly:
- Download and install Driver Easy.
- Run Driver Easy, then click Scan Now. Driver Easy will then scan your computer and detect any problem drivers.
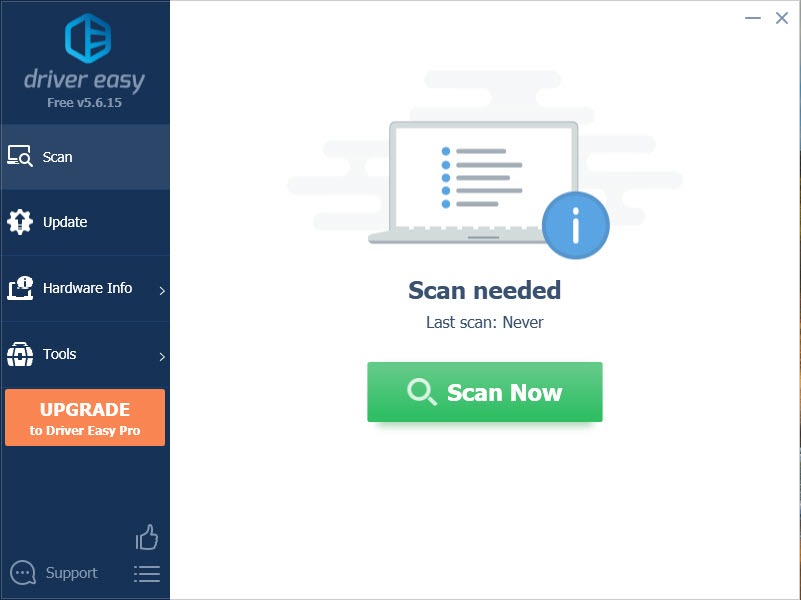
- Click Update All to automatically download and install the correct version of all the drivers that are missing or out of date on your system.
(This requires the Pro version – you’ll be prompted to upgrade when you click Update All. If you don’t want to pay for the Pro version, you can still download and install all the drivers you need with the free version; you just have to download them one at a time, and manually install them, the normal Windows way.)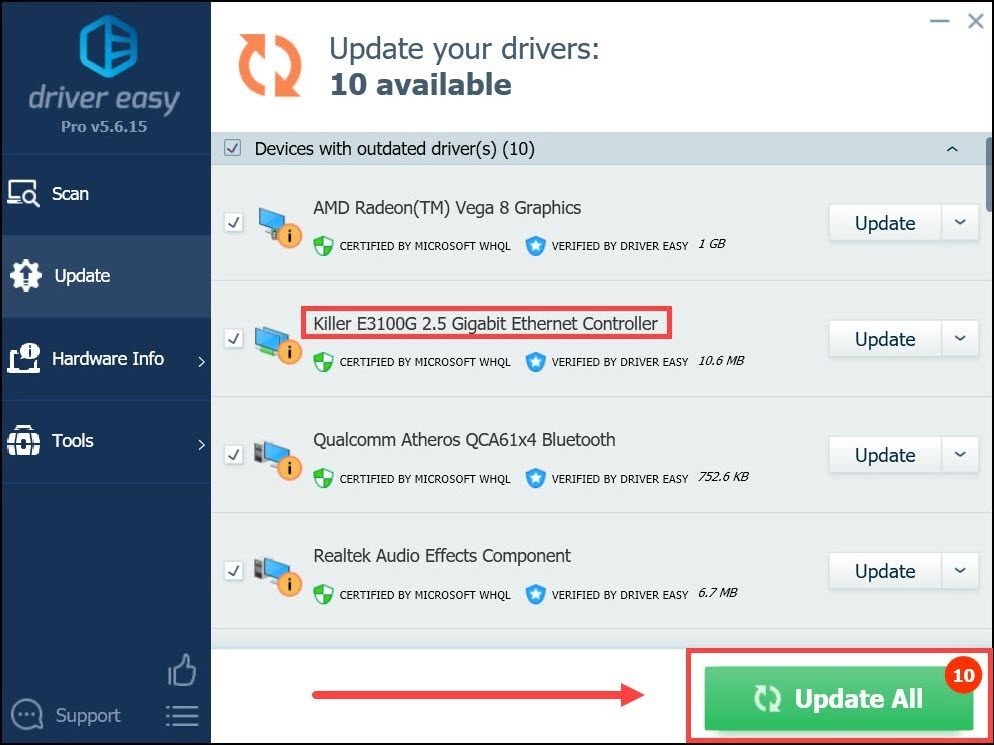
Method 5: Clear game cache
Many players have reported their issues were solved after clearing the game cache. If you’re playing Apex Legends on PC with Origin or EA Desktop, follow the steps below to clear the cache.
For Origin:
- Exit Origin completely.
- Press the Windows key + R together to open the Run box.
- Type %ProgramData%/Origin and click OK.
- Delete all the files and folders inside it except for LocalContent. Do not delete this folder.
- Hold the Windows key + R again.
- Type %AppData% then click OK.
- In the Roaming folder that opens, delete the Origin folder.
- Click on AppData in the address bar.
- Open the Local folder and delete the Origin folder in there.
- Restart your PC and launch Origin again.
For EA Desktop
- Exit EA Desktop completely.
- Press the Windows key + R together to open the Run box.
- Type %ProgramData%/Electronic Arts/EA Desktop and click OK.
- Delete all the files and folders inside it.
- Open the Run box again.
- Type %AppData% then click OK.
- Click on AppData in the address bar.
- Open the Local folder.
- Delete the EADesktop and EALauncher folder in there.
- Restart your PC and launch EA Desktop again.
That’s it, hope it helps. If you have any questions or comments, you’re welcome to drop them below.


