It’s never pleasant when you’re playing a video game, and your computer turns into a blue screen all of a sudden. Then you find yourself stuck with the blue screen and an error that reads CLOCK_WATCHDOG_TIMEOUT. Irritating as it may seem, this blue screen of death error can be solved. And here we are, giving you 6 of the most useful fixes for your blue screen of death issue. You don’t have to try them all; just work your way down until you find the one that works for you.
6 fixes for Clock Watchdog Timeout
- Install available Windows Update
- Update device drivers
- Remove any third party antivirus program
- Set the BIOS settings to the default stage
- Run a memtest
- Run SFC
1: Install available Windows Update
If this is the very first time that you ran into this problem, you should go and check to see if you have all the Windows Update patches installed correctly. Here’s how you can do it:
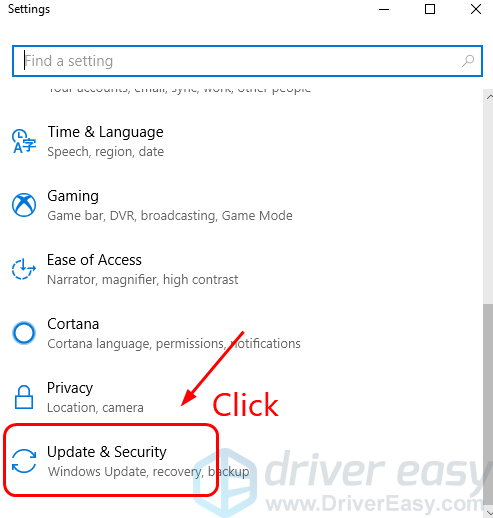
1) On your keyboard, press the Windows logo key and I at the same time. Click Update & Security.
2) Click Check for updates.
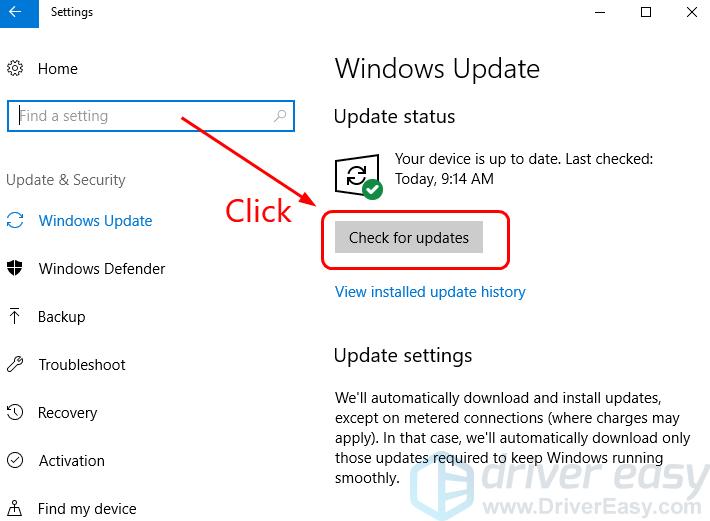
3) Windows will start checking for available updates for your computer. If found any, it’ll automatically install them. Just wait for it to finish its job.
4) Restart your computer when the update installed is done. Check to see if the blue screen of death error is gone. If not, please go to the methods below.
2: Update device drivers
In many cases, this blue screen of death error could be caused by faulty, outdated, incorrect or corrupt system driver. You should verify that all your devices have the right driver, and update those that don’t.
There are two ways you can get the right drivers: manually or automatically.
Manual driver update – You can update your device drivers manually by going to the manufacturer’s website for your hardware devices, and searching for the most recent correct driver for each. Be sure to choose only drivers that are compatible with your variant of Windows 10.
Automatic driver update – If you don’t have the time, patience or computer skills to update your device drivers manually, you can, instead, do it automatically with Driver Easy. Driver Easy will automatically recognize your system and find the correct drivers for your hardware devices, and your variant of Windows 10, and it will download and install them correctly.
You can update your drivers automatically with either the 7 days free trial or the Pro version of Driver Easy. It takes just 2 clicks, and you get full support and a 30-day money-back guarantee with the Pro version:
- Download and install Driver Easy.
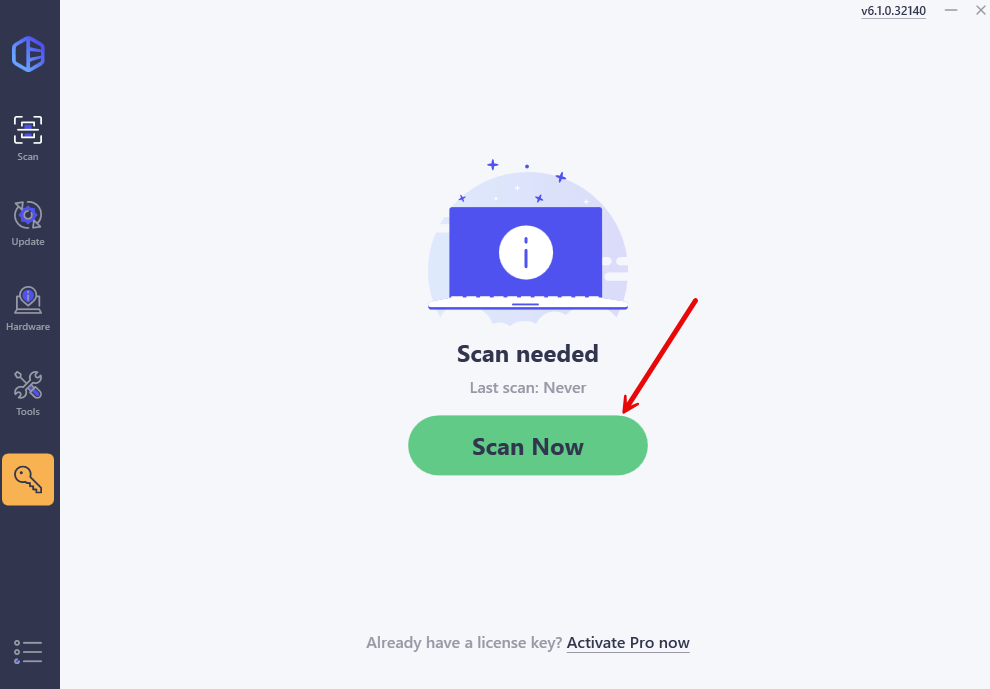
- Run Driver Easy and click the Scan Now button. Driver Easy will then scan your computer and detect any problem drivers.
- Click the Activate & Update button next to the flagged device to automatically download and install the correct version of this driver.
Or click Update All to automatically download and install the correct version of all the drivers that are missing or out of date on your system (You’ll need the Pro version for this – when you select Update All, you’ll get a prompt to upgrade. If you’re not prepared to purchase the Pro version yet, Driver Easy provides a 7-day trial at no cost, granting access to all Pro features like fast downloads and easy installation. No charges will occur until after your 7-day trial period ends.)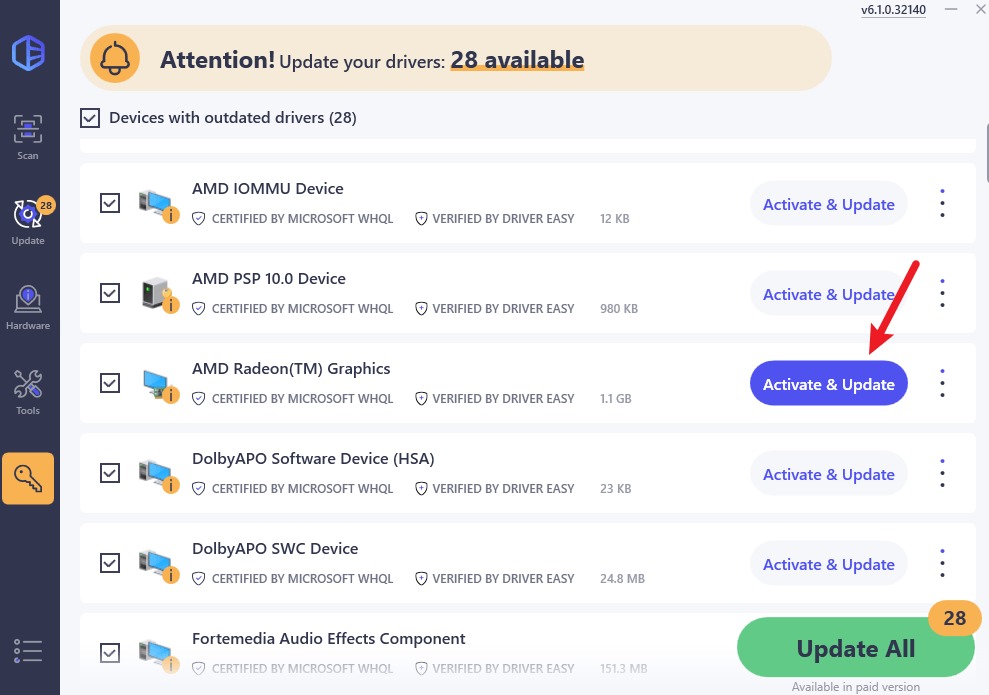
- Restart your computer for the change to take effect.
3: Remove any third party antivirus program
This error is sometimes caused by interference from a third-party antivirus software. To see if that’s the problem for you, temporarily disable your antivirus and check if the problem persists. (Consult your antivirus documentation for instructions on disabling it.)
If this resolves the problem, contact the vendor of your antivirus software and ask them for advice, or install a different antivirus solution.
4: Set the BIOS settings to the default stage
There are different ways to go to the BIOS settings on different PCs. If you’re not confident with your knowledge about the BIOS, go to the manufacturer of your computer for more detailed instructions. Please DO NOT do anything that’s beyond your understanding with the BIOS.
This is what you might see when you’re in the BIOS setting panel (what you see might be different from the screenshot here):
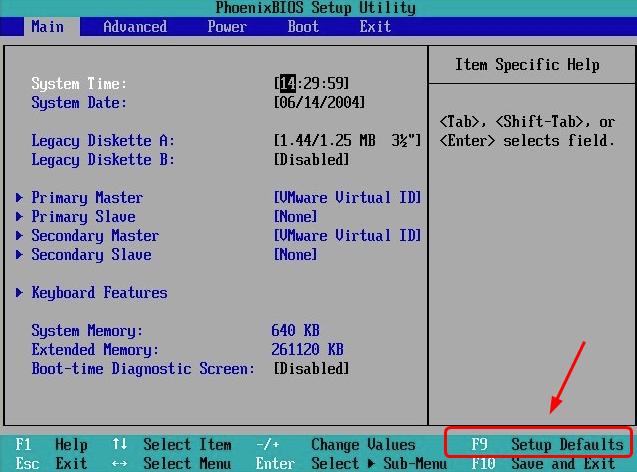
Follow the on-screen instructions to set your BIOS setting to default.
Restart your PC into normal mode and see if the problem persists.
If the problem persists, try to update the BIOS. If you’re using a brand computer, head to your PC manufacturer’s website to check for and download the last BIOS update by your PC model. If you’re using a built computer, go to the manufacturer website for your PC motherboard. You can usually download the BIOS update from the Support or Download section on the website.
5: Run a memtest
There is a big possibility that this blue screen error is related to errors in your hardware memory. You can run a RAM check to see if problem is resolved:
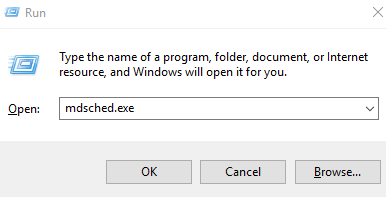
1) On your keyboard, press the Windows logo key and R at the same time, then type mdsched.exe.
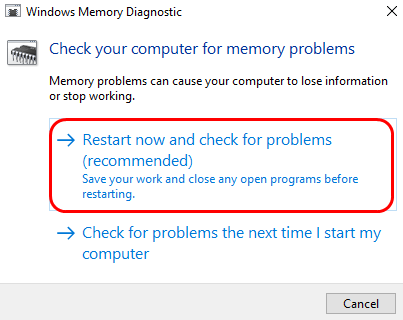
2) Click Restart now and check for problems (recommended). Your PC will restart immediately.
3) Wait for the scans to finish (it can take up to 15-20 minutes).
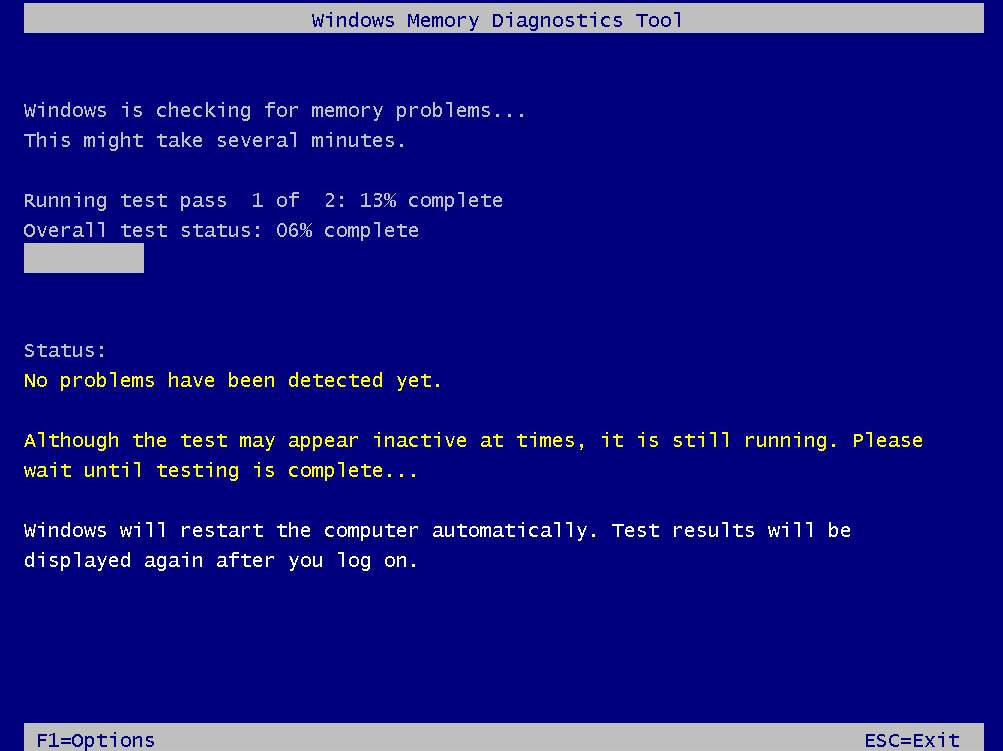
4) When the check finishes, restart your computer and see if the same blue screen of death error happens again.
6: Run SFC
This blue screen of death error could also happen if some of your system files are corrupted, or lost. You can try to get this problem fixed by running the built-in System File Checker:
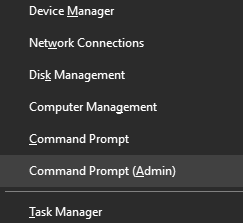
1) On your keyboard, press the Windows logo key and X at the same time. Click Command Prompt (Admin).
2) Type sfc /scannow and press the Enter key on your keyboard.
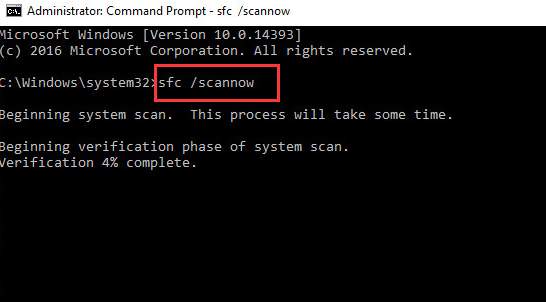
3) When the check is done, restart your computer. Check to see if the blue screen of death error happens again.


