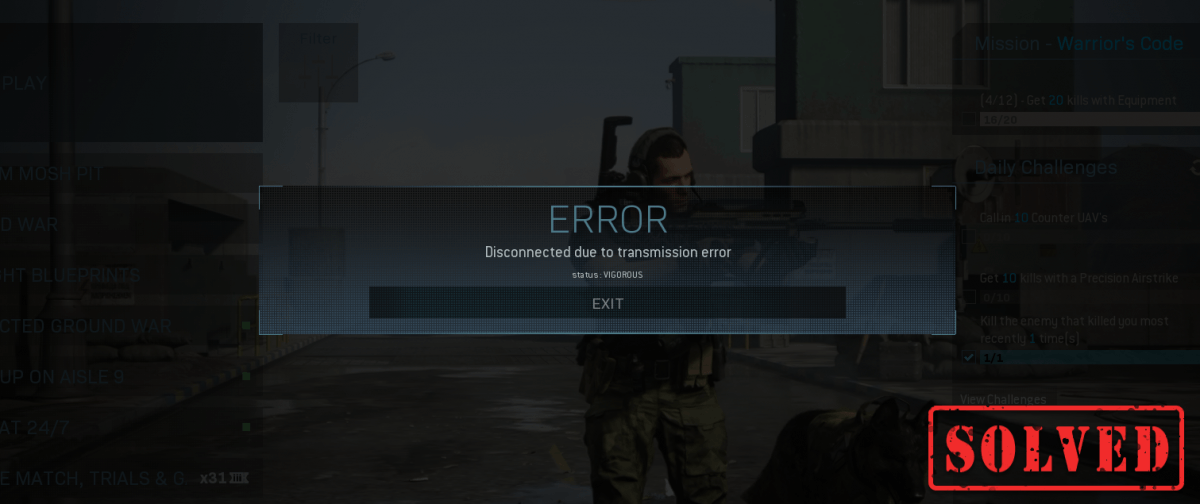
Having the error “Disconnected due to traminission error; status: VIGOROUS” popping up when playing Modern Warfare, Warzone or Vanguard? You’re definitely not alone! This occurs due to a connection problem. But your corrupted game files may also be the culprit.
Before following the troubleshooting guide, we would like to mention that if you have Modern Warfare installed on an external drive, move it to your system’s main drive. Although it seems to be irrelevant, give it a shot as some gamers found that it helped.
And to isolate the issue, you should check the server status in case they temporarily shut down the servers or the servers are under maintainence. If there are no reports on the server side, try these fixes:
- Repair your game files
- Update your network driver
- Change your DNS settings
- Reinstall shaders
- Disable antivirus software
- If your problem persists…
1. Repair your game files
Corrupt or missing game files can cause a lot of issues. To make sure your game file are intact, use the “scan and repair” tool on Blizzard launcher or “verify integrity of game files” on Steam:
Repair game files on Blizzard launcher
1) Open the Battle.net desktop app.
2) Click your game title. Then click on the cogwheel icon and select Scan and Repair from the list.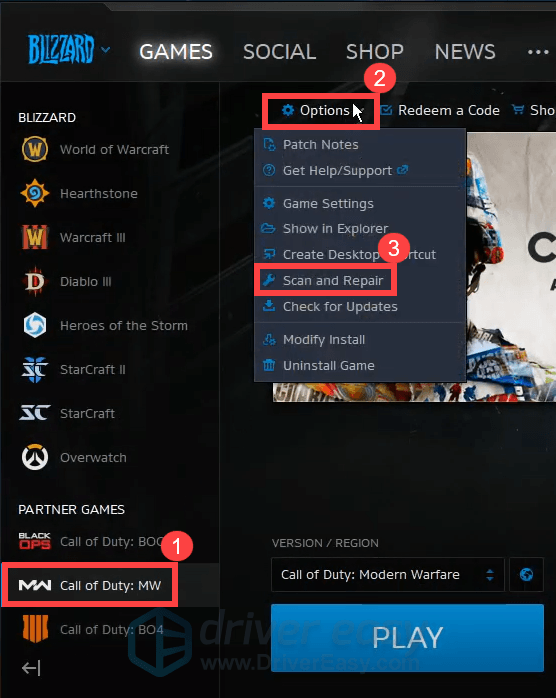
3) Click Begin Scan. Then you need to wait for the repair to finish.
Verify integrity of game files on Steam
1) Open your Steam client.
2) Under LIBRARY, right-click your game title and select Properties.
3) Select the LOCAL FILES tab and click on the VERIFY INTEGRITY OF GAME FILES… tab.
If repairing game files didn’t help you fix the issue, the problem might be from your side. Before tweaking any settings, we suggest you restart your router or modem if you haven’t done this in a while. This can work like magic. However, if you’re not able to see any differences, try the next fix below.
2. Update your network adapter driver
When you keep disconnected from Modern Warfare, it’s high time you troubleshoot your network. If you’re using a wireless connection, switch to the wired connection. However, if you have to use a wireless network, there are other ways to make sure that you have a better internet connection. One of the steps you can take is to check if your network driver is outdated or misconfigured, which can cause connection problems. To fix it, you need to update your network driver.
To update your network driver, you can either do it manually via the Device Manager or head to the manufacturer’s driver download page to download and install the exact drivers for your system. This requires a certain level of computer knowledge and can be a headache if you aren’t tech-savvy. Therefore, we would like to recommend you use an automatic driver updater such as Driver Easy. With Driver Easy, you don’t need to waste your time hunting for driver updates as it will take care of the busy work for you.
Here’s how to update drivers with Driver Easy:
1) Download and install Driver Easy.
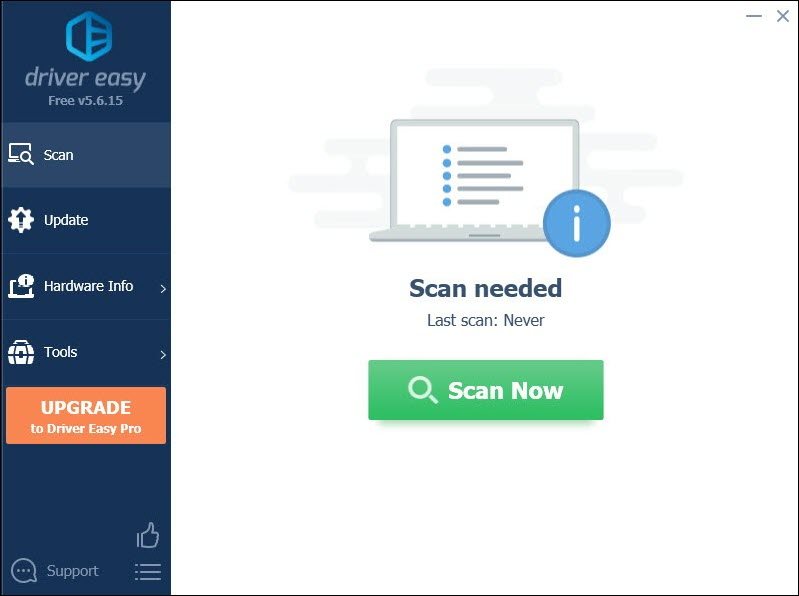
2) Run Driver Easy and click the Scan Now button. Driver Easy will then scan your computer and detect any devices with missing or outdated drivers.
3) Click Update All to automatically download and install the correct version of all the drivers that are missing or out of date on your system.
(This requires the Pro version which comes with full support and a 30-day money-back guarantee. You’ll be prompted to upgrade when you click Update All. If you don’t want to upgrade to the Pro version, you can also update your drivers with the FREE version. All you need to do is to download them one at a time and manually install them.)
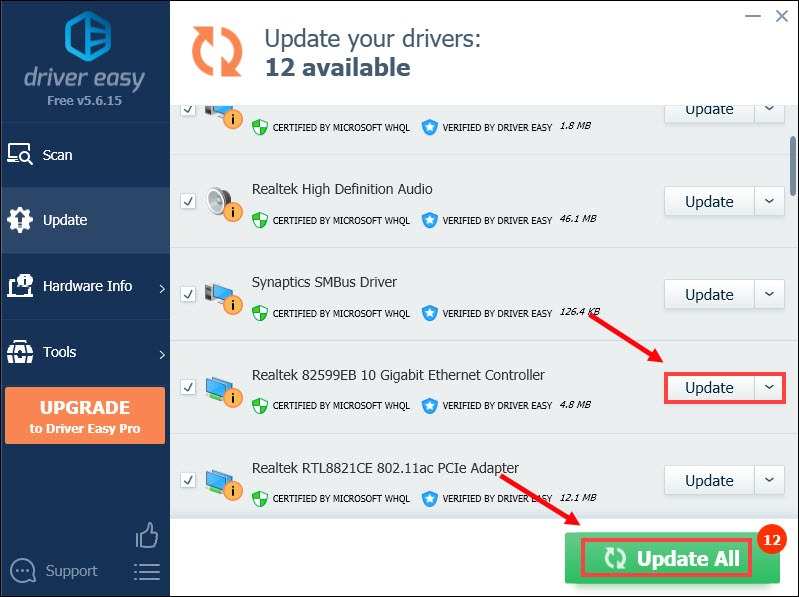
After updating your drivers, restart your PC and check if your problem persists.
3. Change your DNS settings
The quality of the DNS server supplied by your ISP is, actually, unknown. But switching to a third-party DNS service such as Google Public DNS may speed your internet activity. Here’s how:
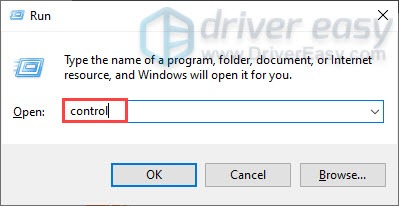
1) On your keyboard, press the Windows + keys simultaneously to open the Run dialog box.
2) Type control and then press Enter on your keyboard to open the Control Panel.
3) Click Network and Internet. (Note: make sure you view the Control Panel by Category.)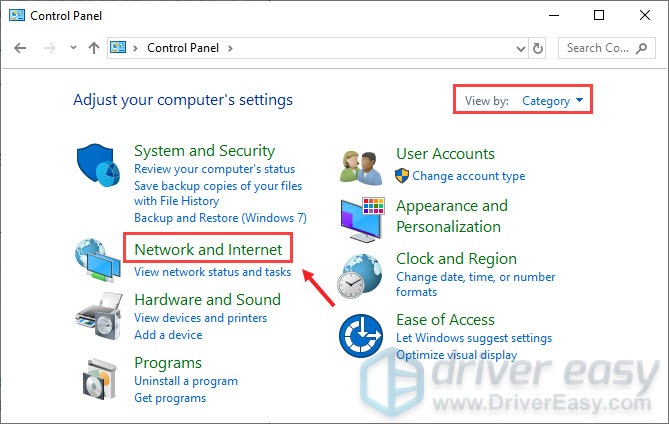
4) Click Network and Sharing Center.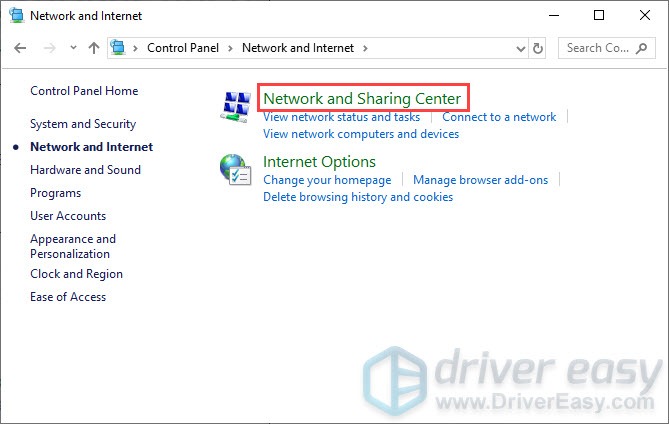
5) Click on your Connections, whether it’s Ethernet, Wifi, or others.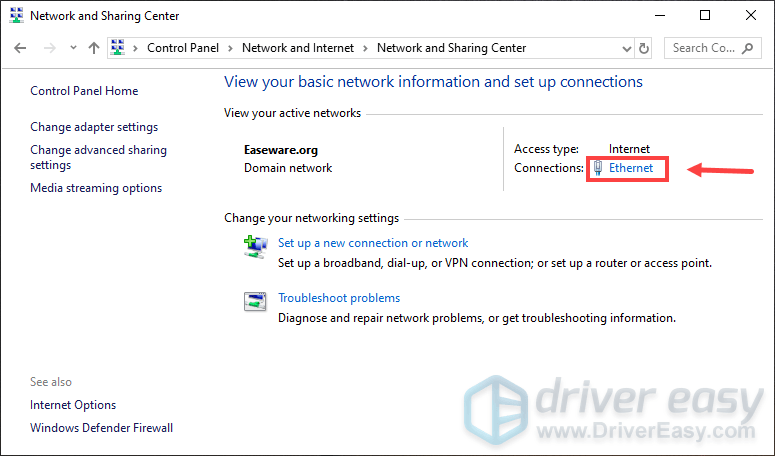
6) Click Properties.
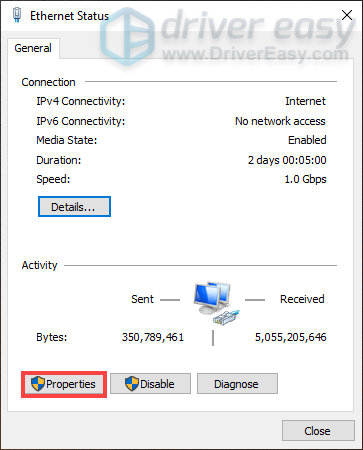
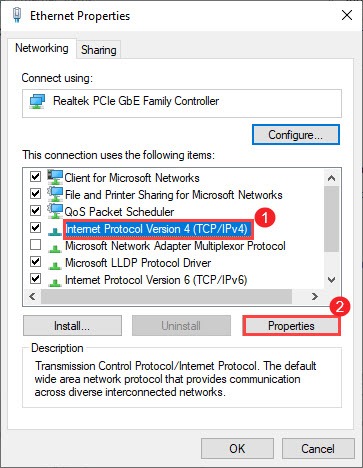
7) When the Properties window opens, click Internet Protocol Version 4 (TCP /IPv4) > Properties.
8) Click Use the following DNS server addresses:
For Preferred DNS server, type 8.8.8.8
For Alternate DNS server, type 8.8.4.4
Check the box next to Validate settings upon exit and then click OK to confirm the changes.
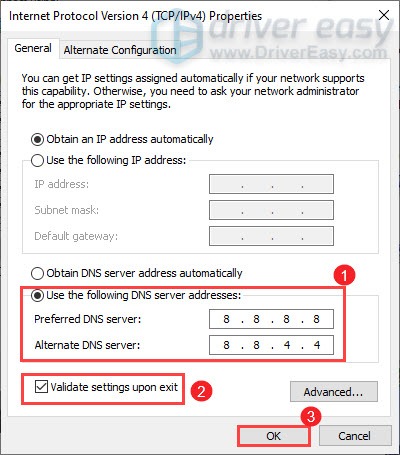
After applying the changes, launch Modern Warfare to check if this action did the trick.
4. Reinstall shaders
Shaders in Modern Warfare are installed for optimization. But there are circumstances that something’s going wrong with the installation. In this situation, reinstalling shaders can solve the problems you’re having with the game. Follow the instructions below to do this:
1) Boot up your game and click Options at the bottom left corner. 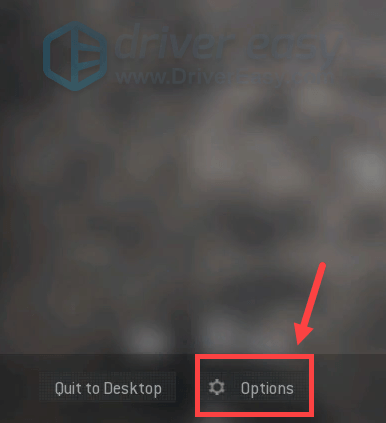
2) Select the GRAPHICS tab. Scroll down and find Restart Shaders Installation. 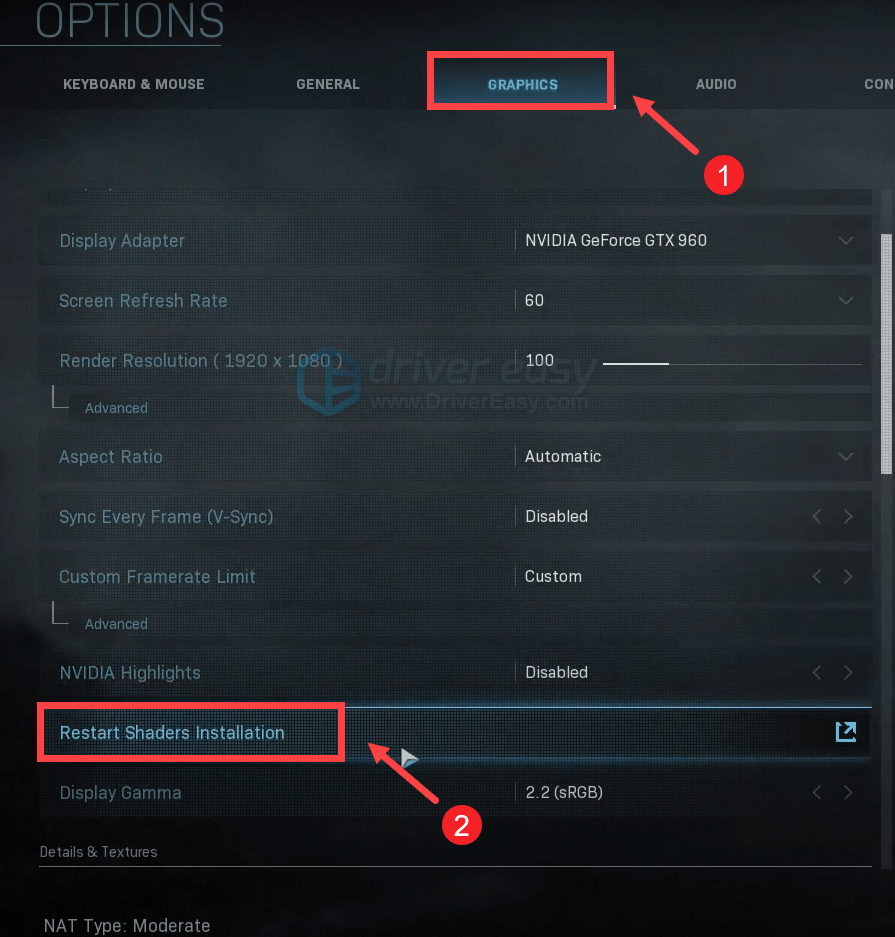
3) Click RESTART.
This will clear the cache and it will automatically reinstall the shaders. Once it’s finished, play Modern Warfare and you should be able to enjoy the gameplay without getting the transmission error.
5. Disable antivirus software
For players who got the message saying Match Started. Loading level… before receiving the transmission error, you need to disable any antivirus software you’ve installed in case they’re in conflict with your Modern Warfare. This worked for some players, so you might want to give it a shot.
To disable antivirus software, simply click on the up arrow icon near the system tray, right-click on the program, and choose the option to disable or exit the program. Once you’ve done this, play Modern Warfare and test if the message is still popping up.
For further troubleshooting, you can manually add Modern Warfare to the list of bypassing Windows firewall:
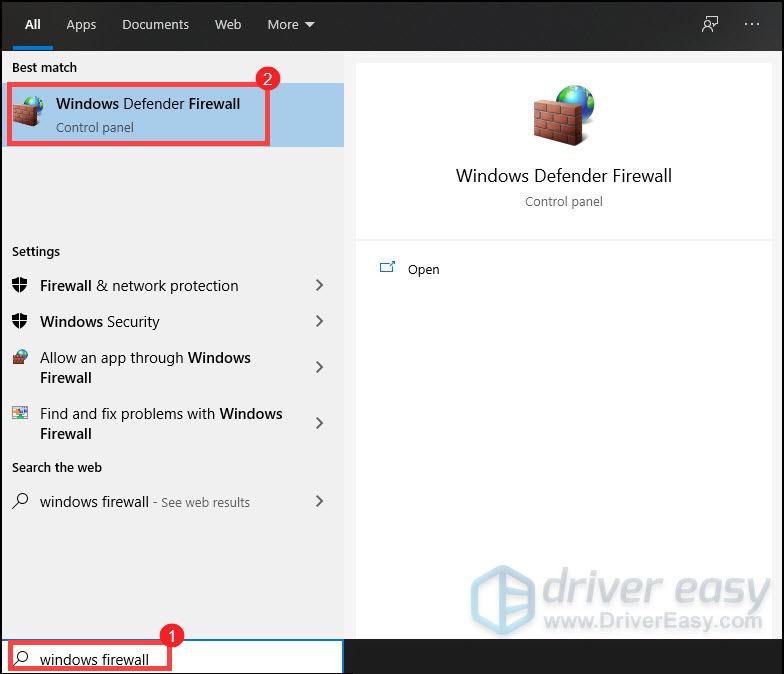
1) In the Search box, type windows firewall and click Windows Defender Firewall from the results.
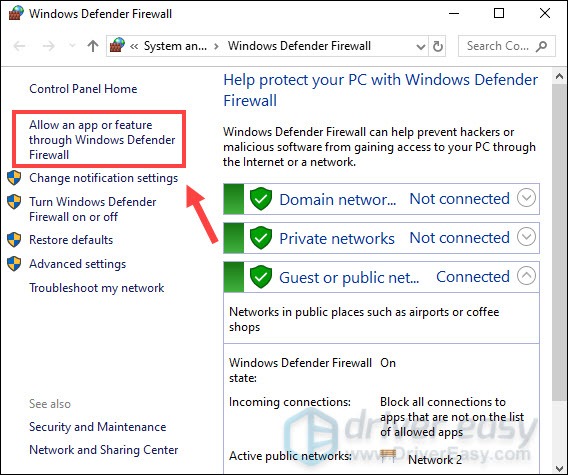
2) From the left panel, click Allow an app or feature through Windows Defender Firewall.
3) Now you need to scroll down until you can find Call of Duty: Modern Warfare.
If your game isn’t on the list, take these steps:
1) Click on Change settings > Allow another app….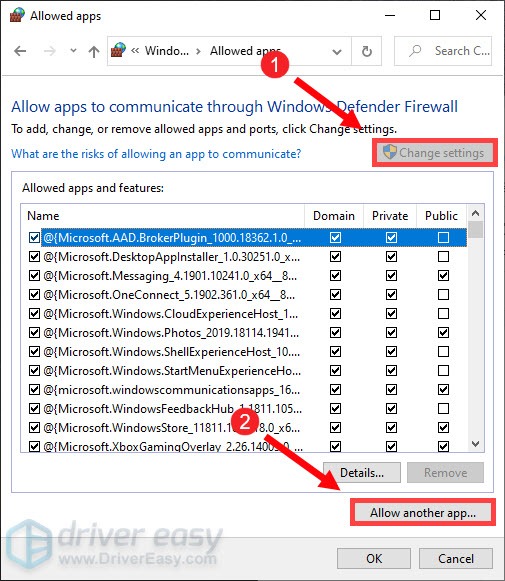
2) Your File Explorer is now opening. Then you can navigate to the drive on which you save your game.
3) Click Program Files > Call of Duty Modern Warfare.
4) Click ModernWarfare.exe and then click Open.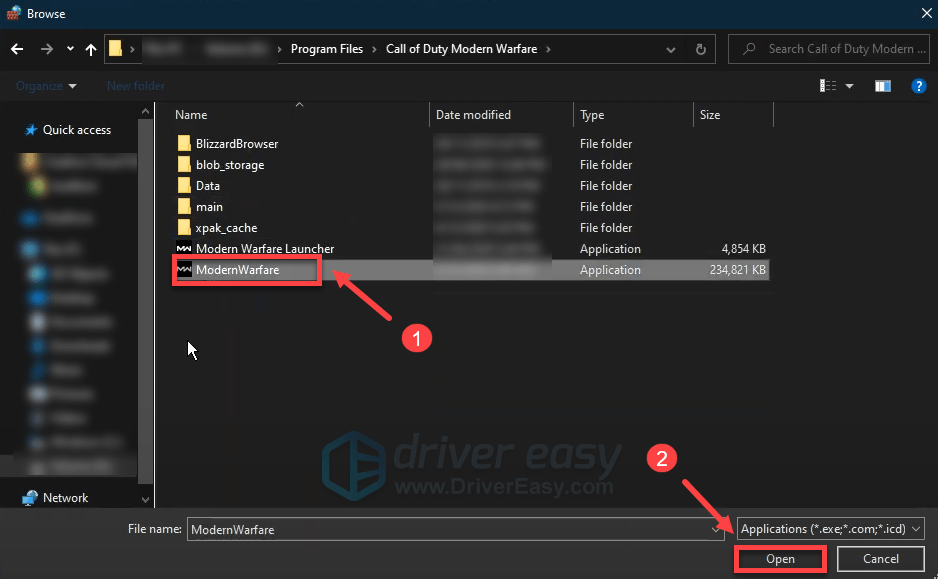
5) Click Call of Duty: Modern Warfare > Add.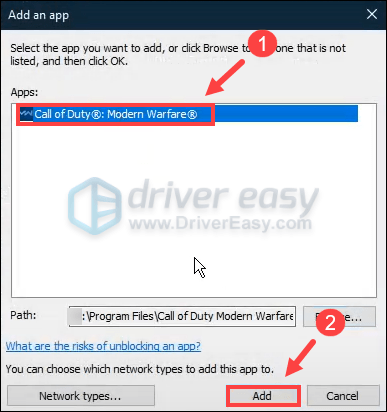
Now play Modern Warfare and you should be able to enjoy the gameplay without getting the infuriating transmission error.
If nothing else has worked, here’s a workaround for you if you play Modern Warfare on Xbox:
- Go to My Games and Apps, and hit Menu on the game. Then select Manage game and add-ons.

- Uninstall all the older multiplayer data packs, except the first one (6.0 GB Multiplayer pack).
- Then install Multiplayer/Special Ops Compatibility Pack and the last one listed as Multiplayer Pack (22 GB).
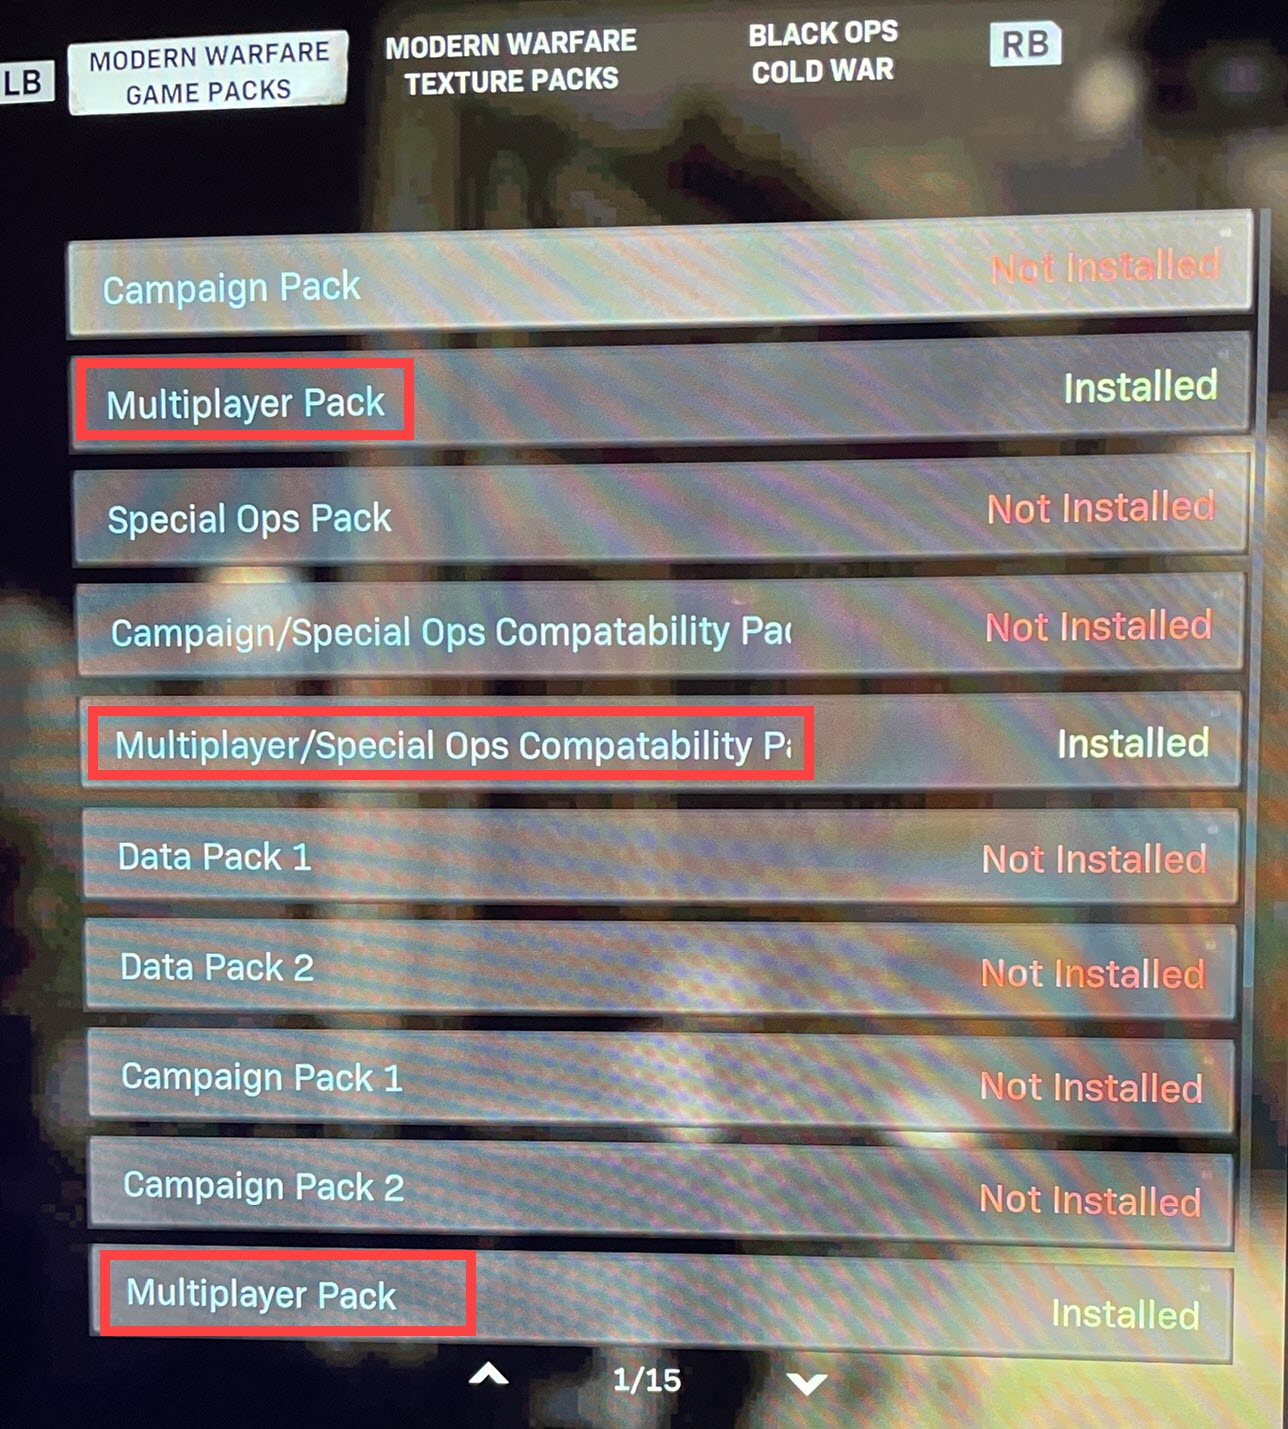
(Final installs should look like this)
6. If your problem persists…
If everything else had failed, give VPN a try. By connecting to a different server, you’re able to avoid bandwidth throttling. But be advised: lots of problems may arise if you use a free VPN. Therefore, to secure your network, we suggest you use a paid VPN.
Here are the VPN apps we would like to recommend:
- NordVPN (30-day money-back guarantee)
- Surfshark (7-day free trial)
- Cyberghost (free trial available)
After connecting to VPN, launch your game and you should be able to enjoy your gameplay without receiving the error.
That’s it. Feel free to drop a comment below to let us know any fixes listed above worked for you. We also welcome alternate workarounds in case you’ve found one that worked for you.


